Loading...
Loading...
Loading...
Loading...
Loading...
Loading...
Loading...
Loading...
Loading...
Loading...
Loading...
Loading...
Loading...
Loading...
Loading...
Loading...
Loading...
Loading...
Loading...
Loading...
Loading...
Loading...
Loading...
Loading...
Loading...
Loading...
Loading...
Loading...
Loading...
Loading...
Loading...
Loading...
Loading...
Loading...
Loading...
Loading...
Loading...
Loading...
Loading...
Loading...
Loading...
Loading...
Loading...
Loading...
Loading...
Loading...
Loading...
Loading...
Loading...
Loading...
Loading...
Loading...
Loading...
Loading...
Loading...
Loading...
Loading...
Loading...
Loading...
Loading...
Loading...
Loading...
Loading...
Loading...
Loading...
Loading...
Loading...
Loading...
Loading...
Loading...
Loading...
Loading...
Loading...
Loading...
Loading...
Loading...
Loading...
Loading...
Loading...
Loading...
Loading...
Loading...
Loading...
Loading...
Loading...
Loading...
Loading...
Loading...
Loading...
Loading...
Loading...
Loading...
Loading...
Loading...
Loading...
Loading...
Loading...
Loading...
JAVA_TOOL_OPTIONS="-Dhttp.proxyHost=your.proxy.net -Dhttp.proxyPort=8080 -Dhttp.nonProxyHosts=XXXXX -Dhttps.proxyHost=your.proxy.net -Dhttps.proxyPort=8080 -Dhttps.nonProxyHosts=XXXXX"api:
env:
- name: JAVA_TOOL_OPTIONS
value: "-Dhttp.proxyHost=your.proxy.net -Dhttp.proxyPort=8080 -Dhttp.nonProxyHosts=XXXXX -Dhttps.proxyHost=your.proxy.net -Dhttps.proxyPort=8080 -Dhttps.nonProxyHosts=XXXXX"
registry:
env:
- name: JAVA_TOOL_OPTIONS
value: "-Dhttp.proxyHost=your.proxy.net -Dhttp.proxyPort=8080 -Dhttp.nonProxyHosts=XXXXX -Dhttps.proxyHost=your.proxy.net -Dhttps.proxyPort=8080 -Dhttps.nonProxyHosts=XXXXX"
executor:
env:
- name: JAVA_TOOL_OPTIONS
value: "-Dhttp.proxyHost=your.proxy.net -Dhttp.proxyPort=8080 -Dhttp.nonProxyHosts=XXXXX -Dhttps.proxyHost=your.proxy.net -Dhttps.proxyPort=8080 -Dhttps.nonProxyHosts=XXXXX"security:
patSecret: "AAAAAAAAAAAAAAAAAAAA"
internalSecret: "BBBBBBBBBBBBBBBBB"## Terrakube API properties
api:
defaultDatabase: false
loadSampleData: true
properties:
databaseType: "H2"
databaseHostname: ""
databaseName: ""
databaseUser: ""
databasePassword: ""
helm install --values terrakube.yaml terrakube terrakube-repo/terrakube -n terrakubeImages for Terrakube components can be found in the following links:
## Terrakube API properties
api:
defaultDatabase: false
loadSampleData: false
properties:
databaseType: "POSTGRESQL"
databaseHostname: "server_name.postgres.database.com"
databaseName: "database_name"
databaseUser: "database_user"
databasePassword: "database_password"
databaseSslMode: "disable"
databasePort: "5432"
## Terrakube API properties
api:
defaultDatabase: false
loadSampleData: false
properties:
databaseType: "MYSQL"
databaseHostname: "server_name.database.mysql.com"
databaseName: "database_name"
databaseUser: "database_user"
databasePassword: "database_password"
helm install --values terrakube.yaml terrakube terrakube-repo/terrakube -n terrakube## Terrakube API properties
api:
defaultDatabase: false
loadSampleData: false
properties:
databaseType: "SQL_AZURE"
databaseHostname: "server_name.database.windows.net"
databaseName: "database_name"
databaseUser: "database_user"
databasePassword: "database_password"
databaseSchema: "dbo"
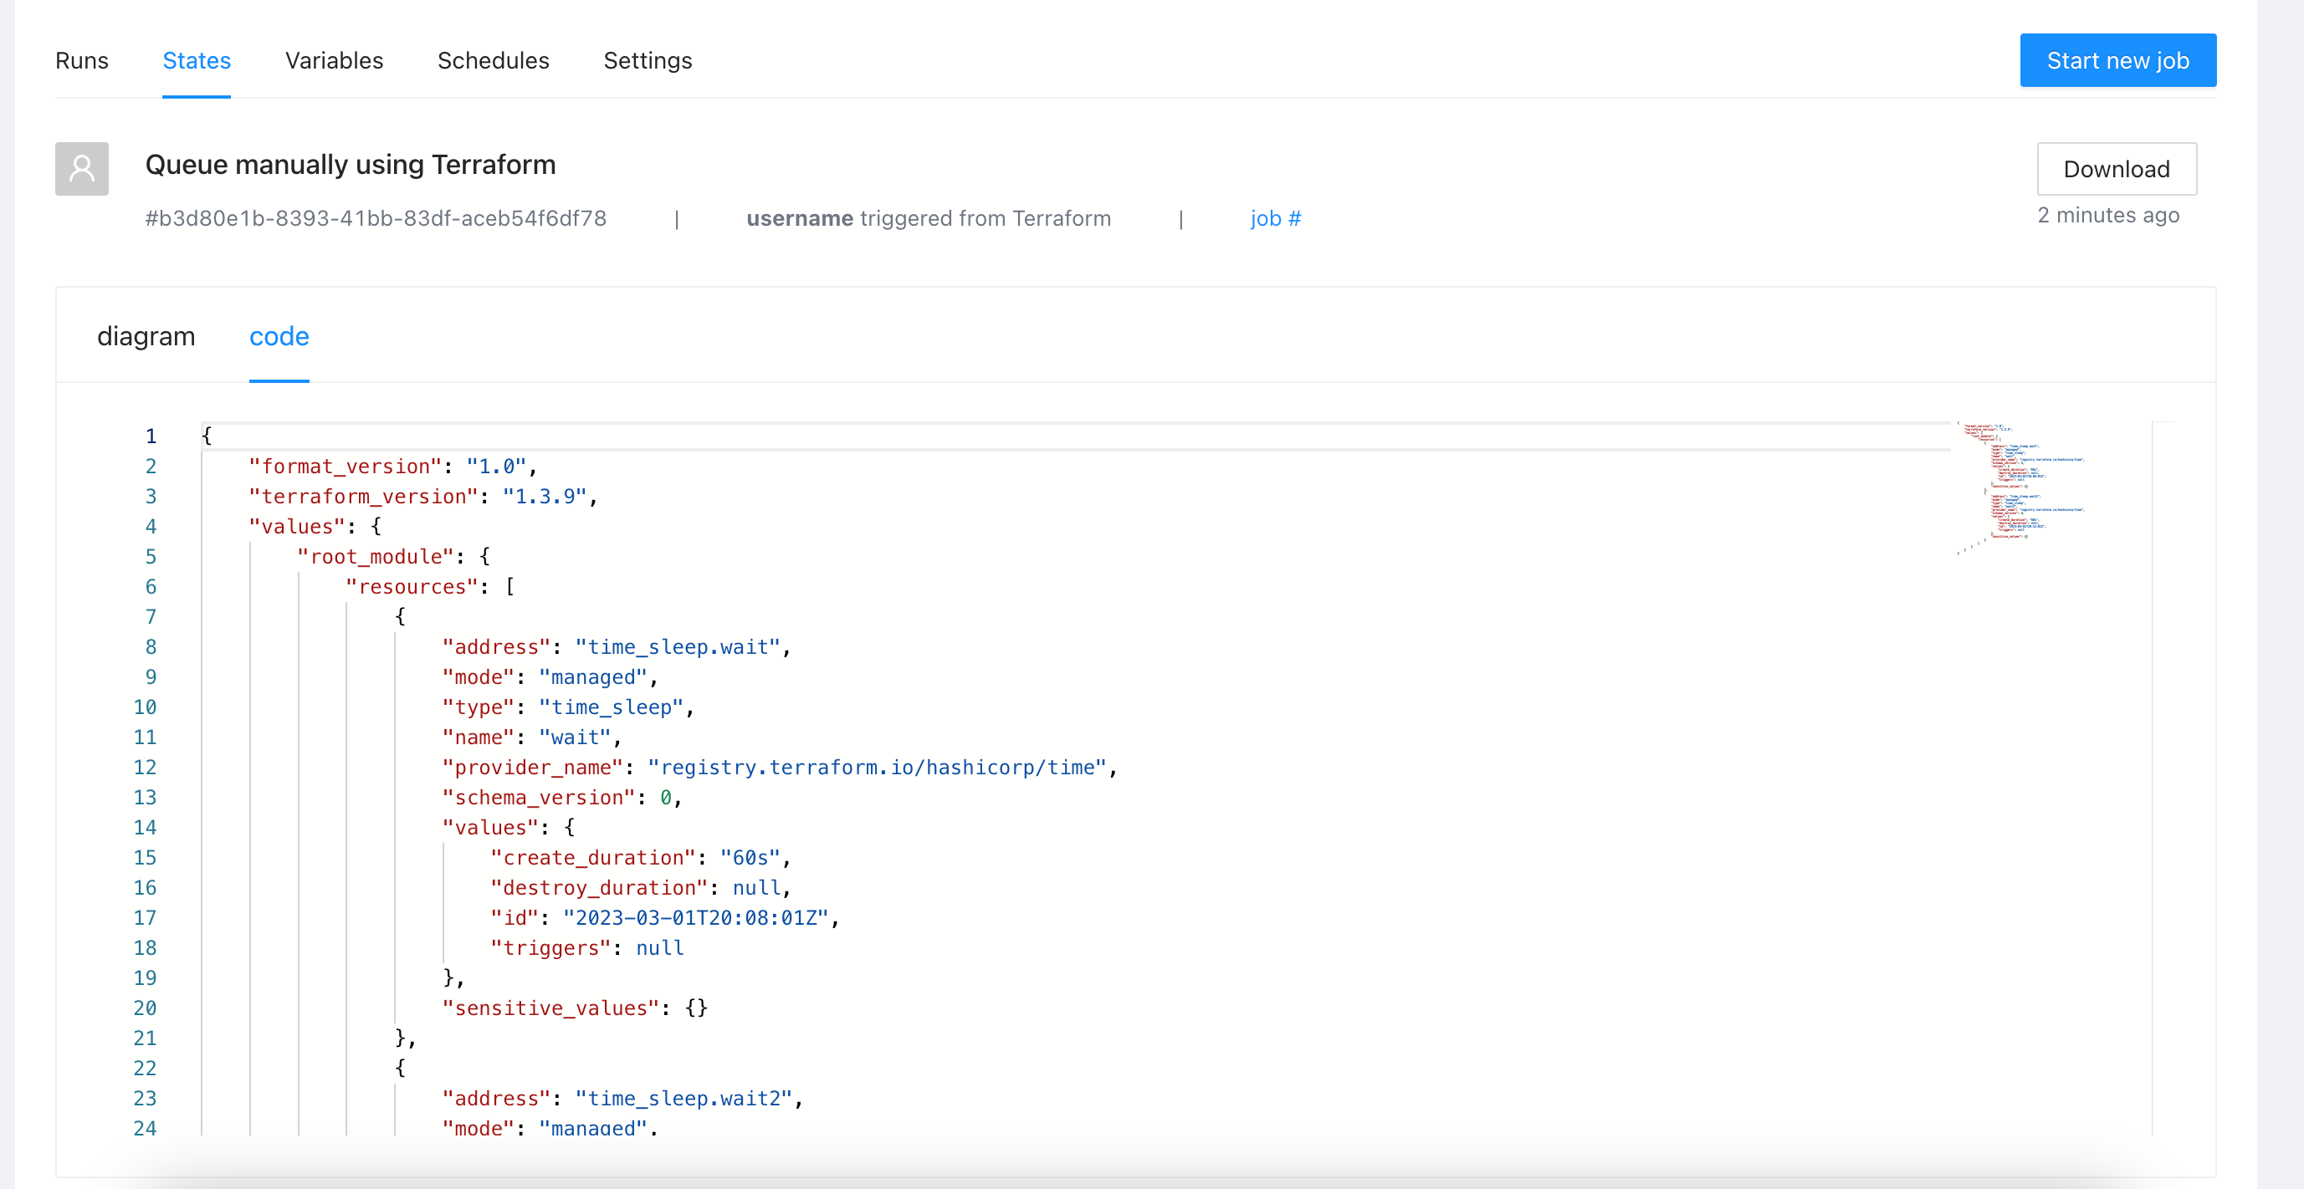
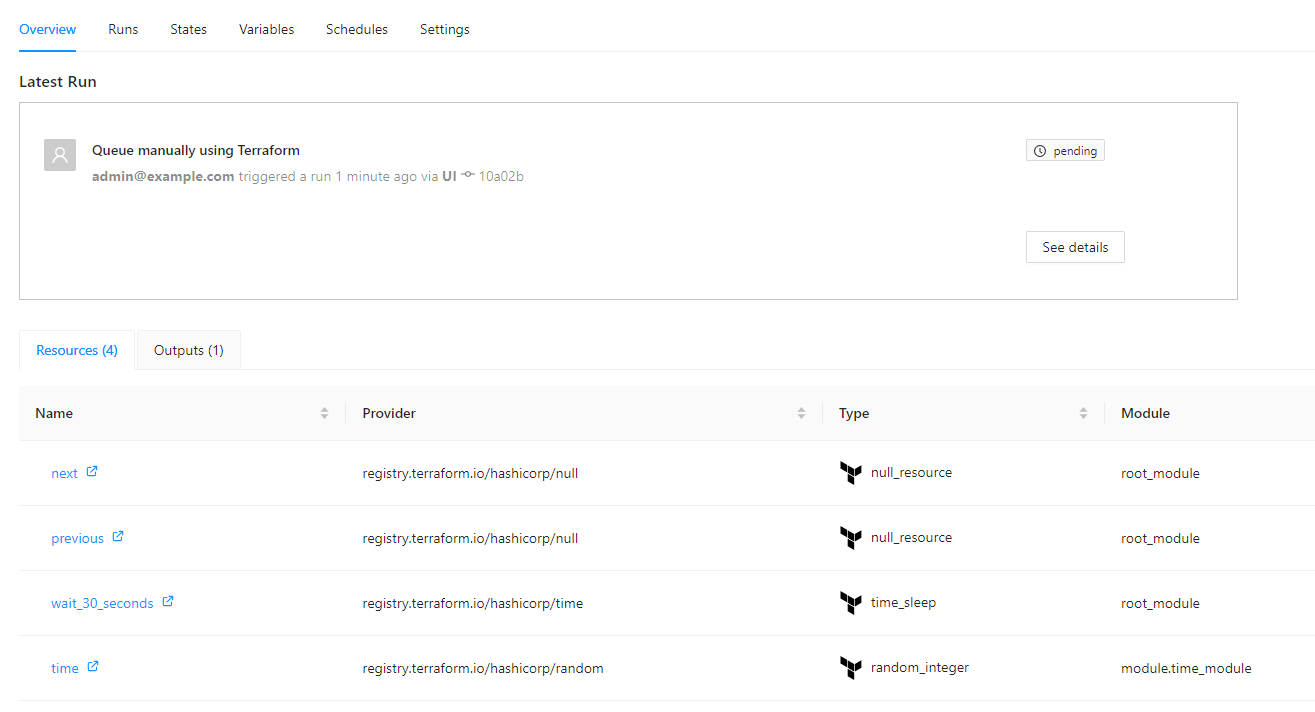
helm install --values terrakube.yaml terrakube terrakube-repo/terrakube -n terrakubedata "terraform_remote_state" "remote_creation_time" {
backend = "remote"
config = {
organization = "simple"
hostname = "8080-azbuilder-terrakube-vg8s9w8fhaj.ws-us102.gitpod.io"
workspaces = {
name = "simple_tag1"
}
}
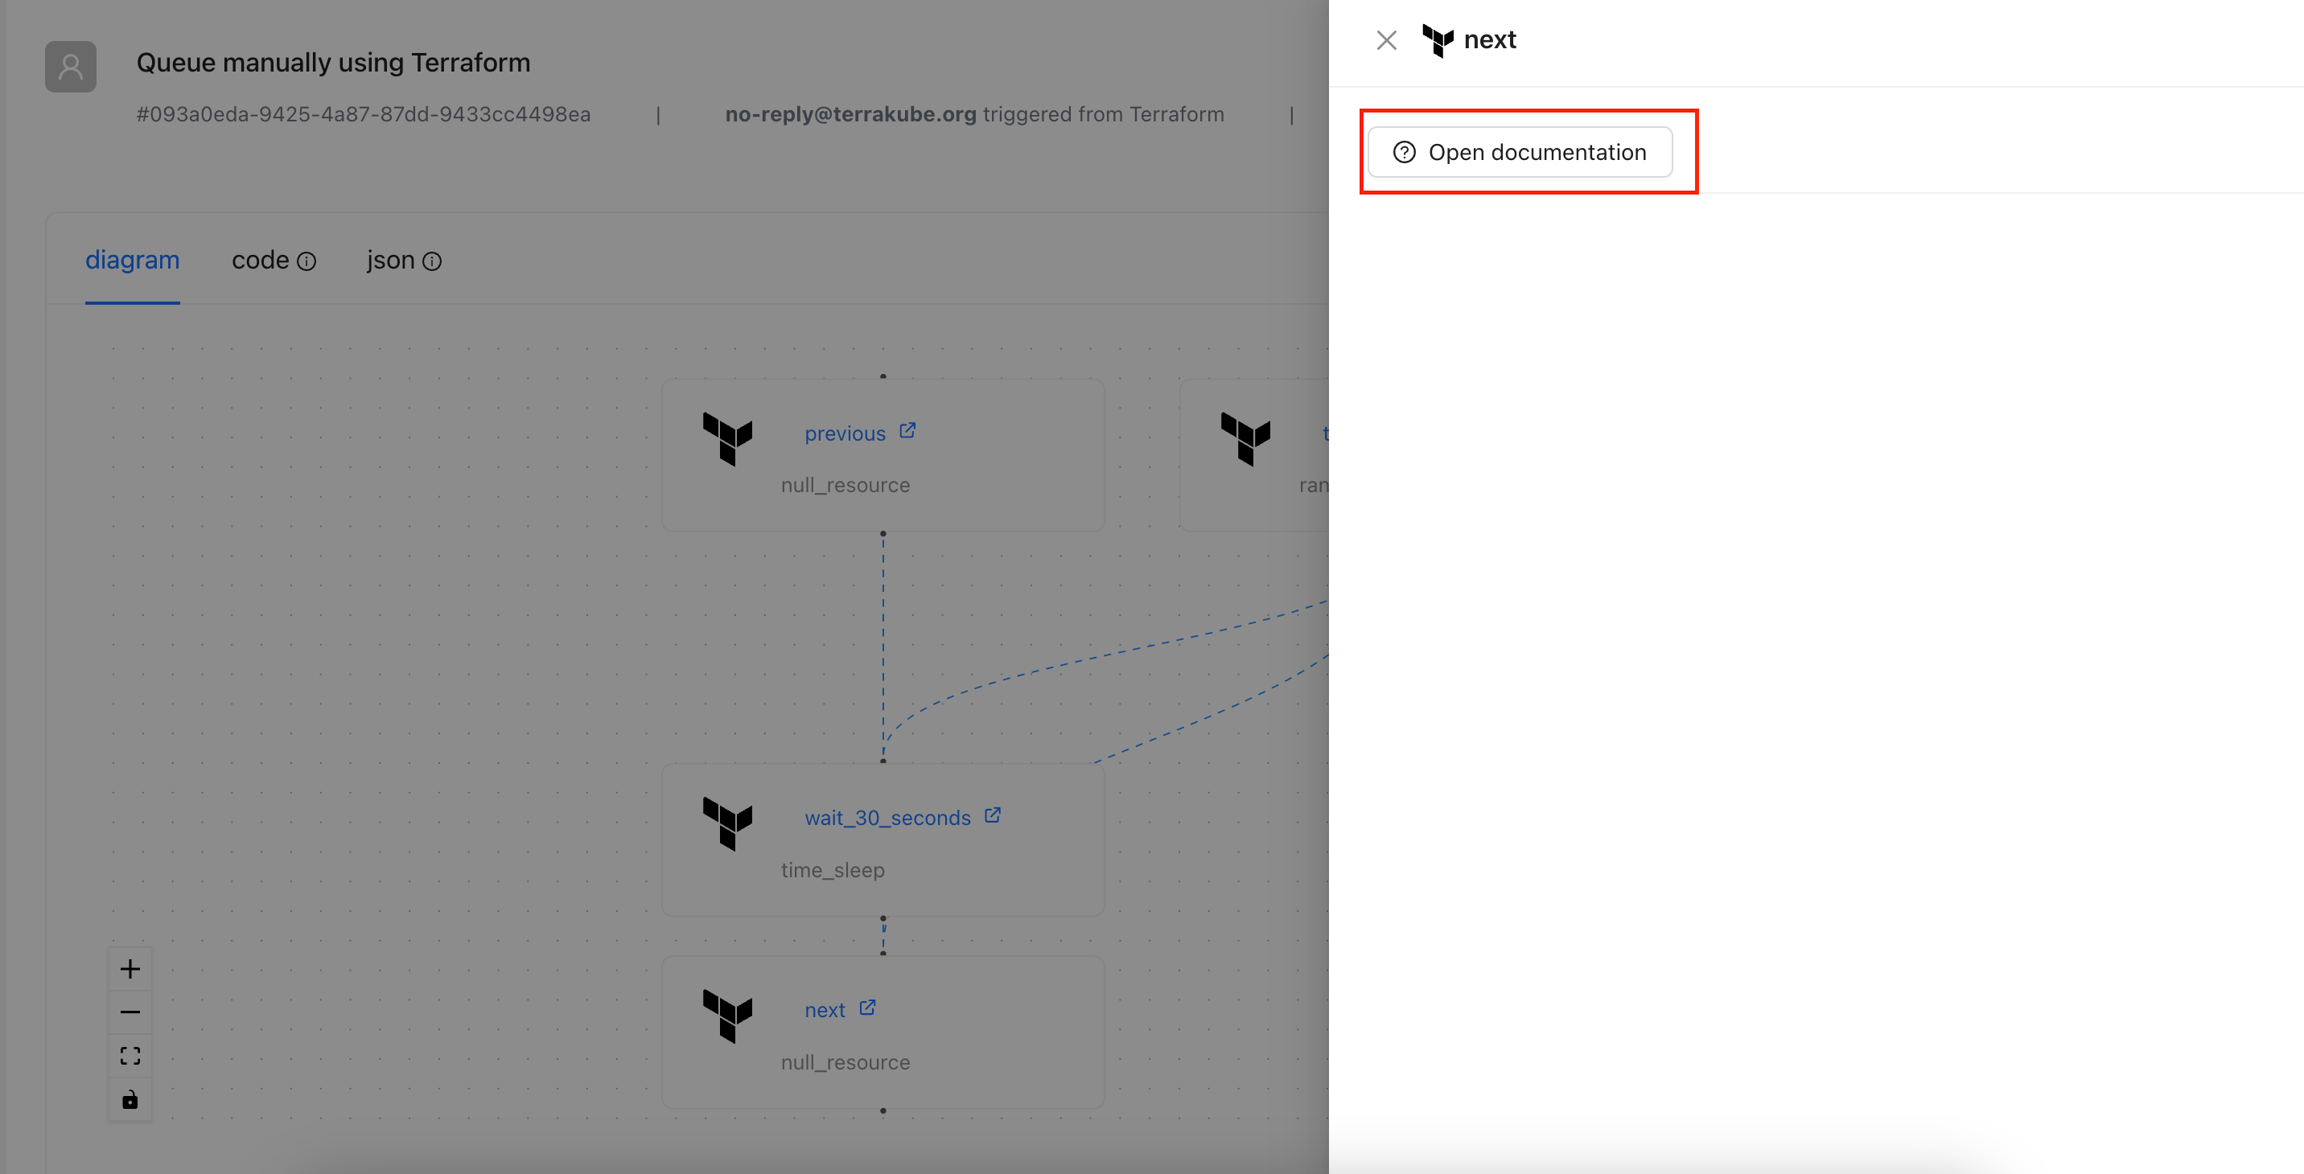
}data "terraform_remote_state" "remote_creation_time" {
backend = "remote"
config = {
organization = "simple"
hostname = "8080-azbuilder-terrakube-vg8s9w8fhaj.ws-us102.gitpod.io"
workspaces = {
name = "simple_tag1"
}
}
}
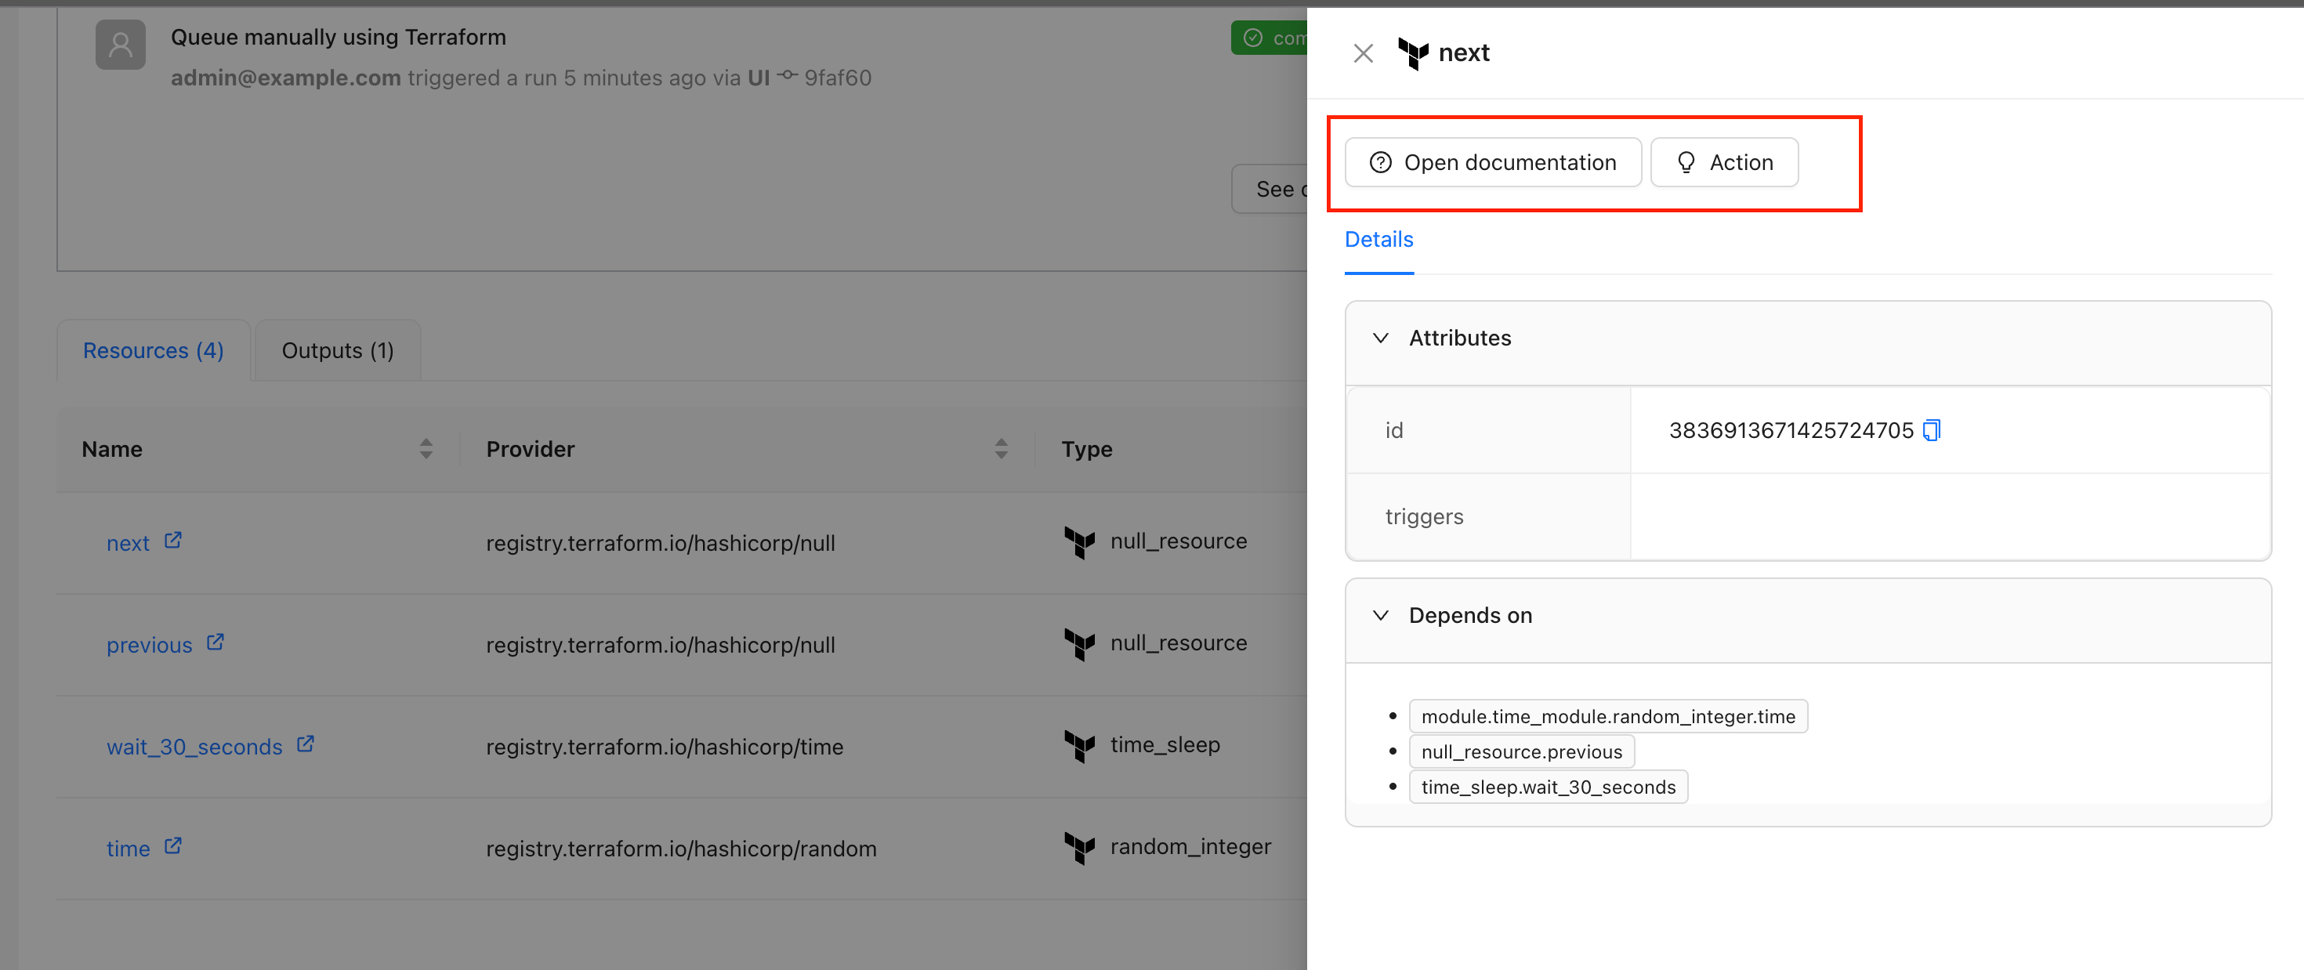
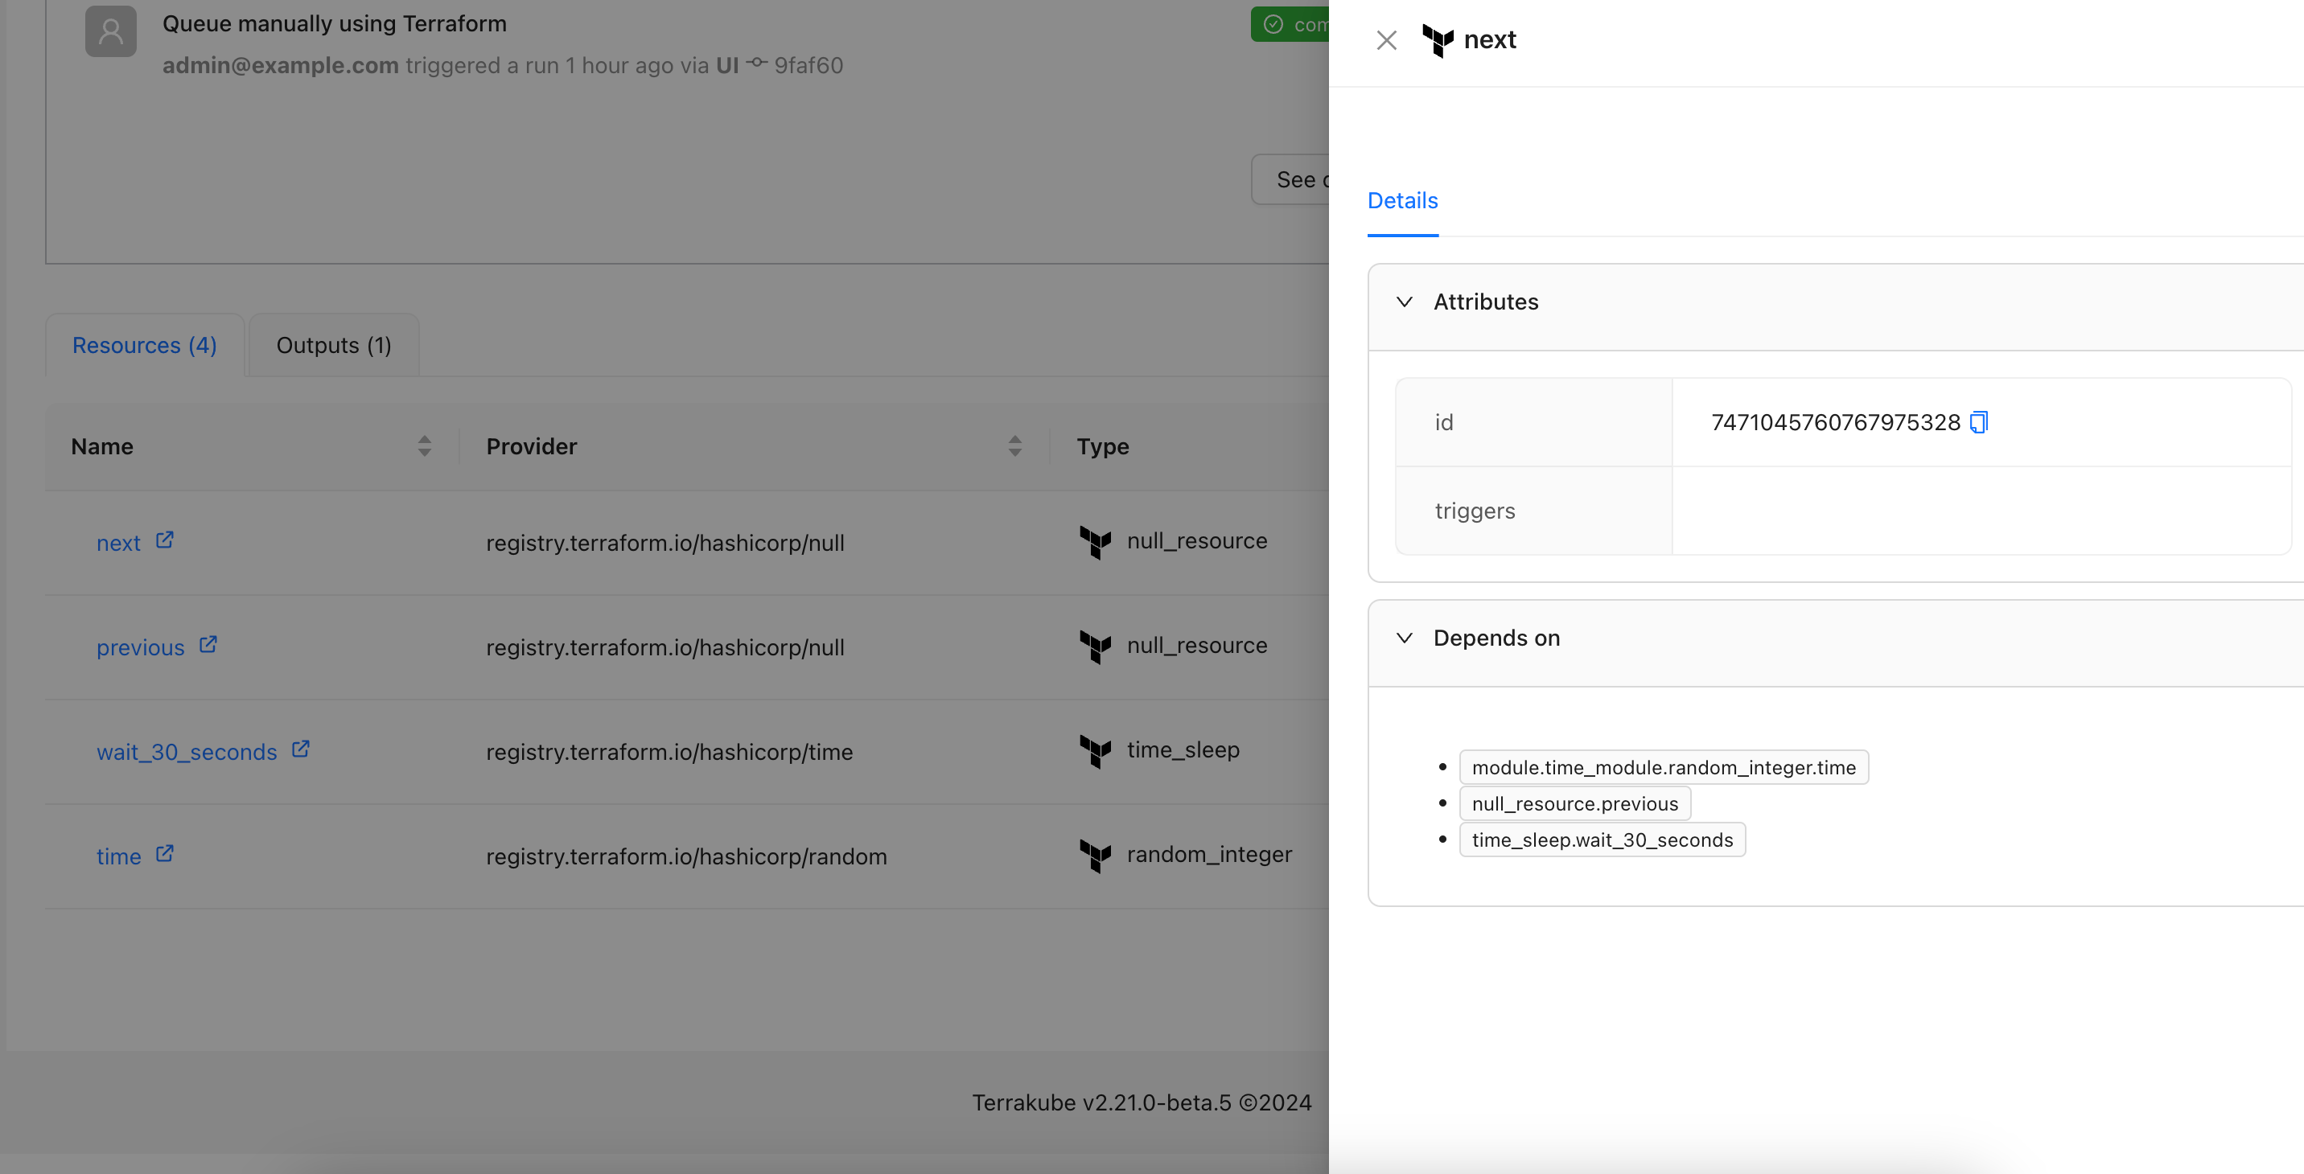
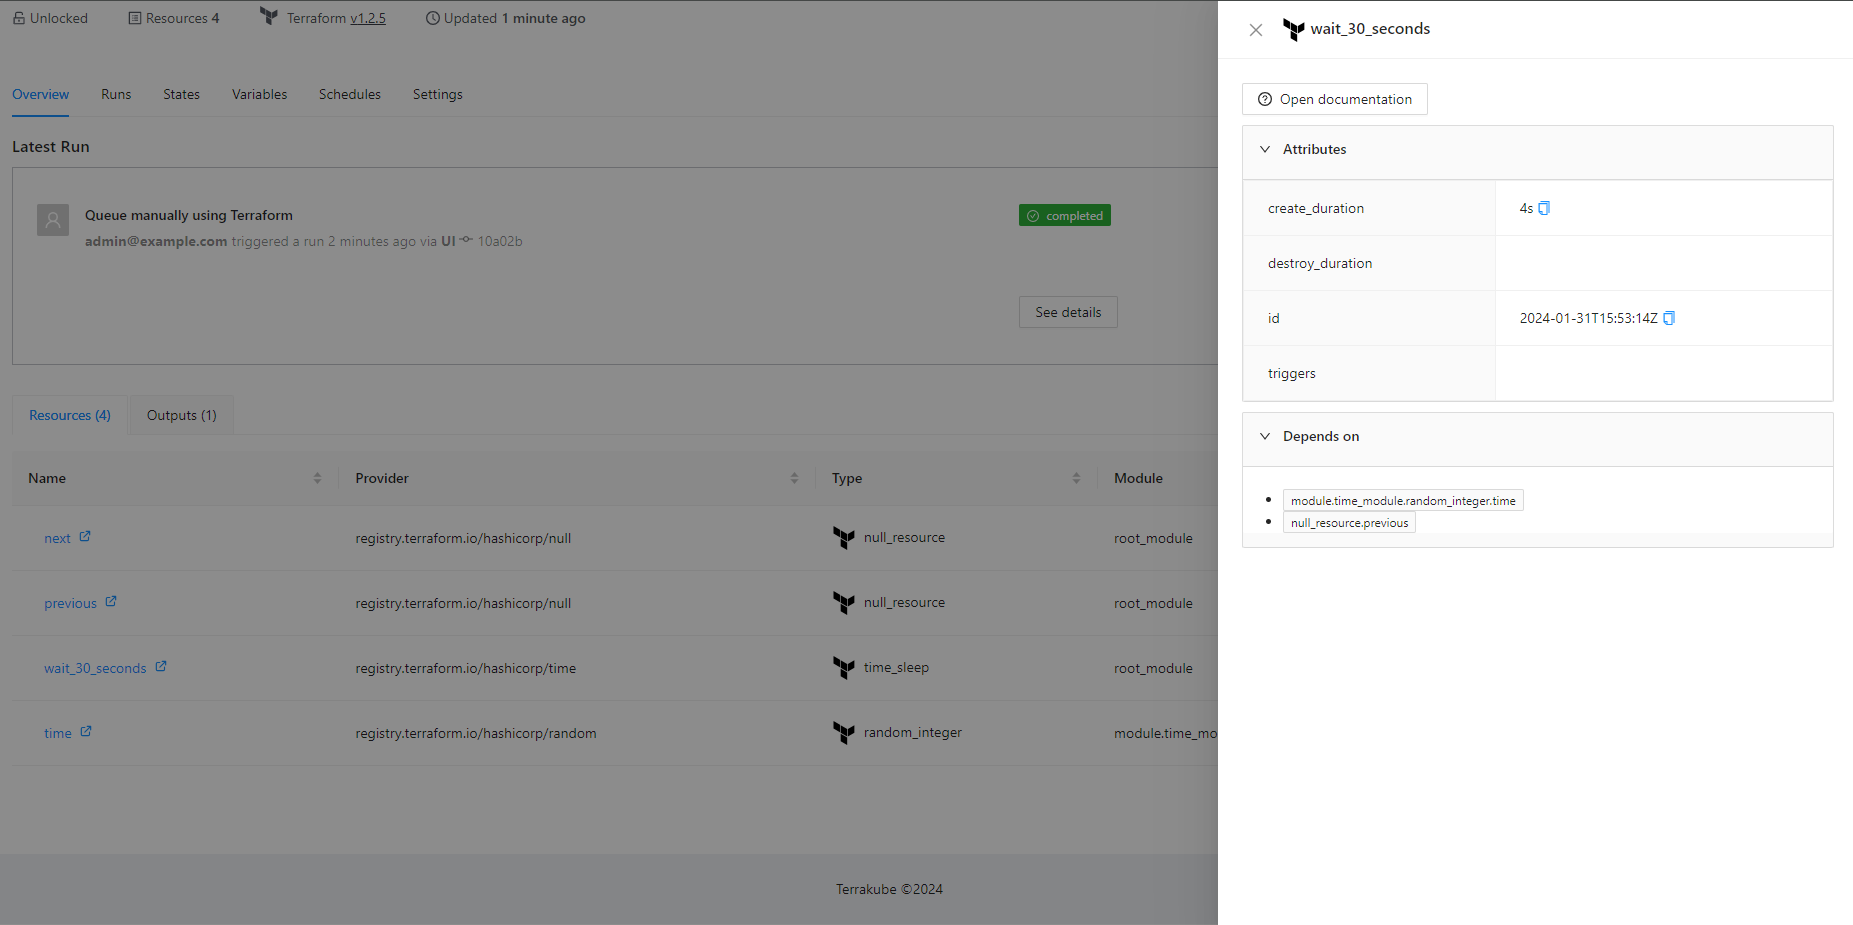
resource "null_resource" "previous" {}
resource "time_sleep" "wait_30_seconds" {
depends_on = [null_resource.previous]
create_duration = data.terraform_remote_state.remote_creation_time.outputs.creation_time
}
resource "null_resource" "next" {
depends_on = [time_sleep.wait_30_seconds]
}dex:
config:
issuer: http://terrakube-api.minikube.net/dex ## CHANGE THIS DOMAIN
#.....
#PUT ALL THE REST OF THE DEX CONFIG AND UPDATE THE URL WITH THE NEW DOMAIN
#.....
## Ingress properties
ingress:
useTls: false
ui:
enabled: true
domain: "terrakube-ui.minikube.net" ## CHANGE THIS DOMAIN
path: "/(.*)"
pathType: "Prefix"
annotations:
kubernetes.io/ingress.class: nginx
nginx.ingress.kubernetes.io/use-regex: "true"
api:
enabled: true
domain: "terrakube-api.minikube.net" ## CHANGE THIS DOMAIN
path: "/(.*)"
pathType: "Prefix"
annotations:
kubernetes.io/ingress.class: nginx
nginx.ingress.kubernetes.io/use-regex: "true"
nginx.ingress.kubernetes.io/configuration-snippet: "proxy_set_header Authorization $http_authorization;"
registry:
enabled: true
domain: "terrakube-reg.minikube.net" ## Change to your customer domain
path: "/(.*)"
pathType: "Prefix"
annotations:
kubernetes.io/ingress.class: nginx
nginx.ingress.kubernetes.io/use-regex: "true"
nginx.ingress.kubernetes.io/configuration-snippet: "proxy_set_header Authorization $http_authorization;"
dex:
enabled: true
path: "/dex/(.*)"
pathType: "Prefix"
annotations:
kubernetes.io/ingress.class: nginx
nginx.ingress.kubernetes.io/use-regex: "true"
nginx.ingress.kubernetes.io/configuration-snippet: "proxy_set_header Authorization $http_authorization;"flow:
- type: "terraformPlan"
step: 100
commands:
- runtime: "GROOVY"
priority: 100
before: true
script: |
import TerraTag
new TerraTag().loadTool(
"$workingDirectory",
"$bashToolsDirectory",
"0.1.30")
"Terratag download completed"
- runtime: "BASH"
priority: 200
before: true
script: |
cd $workingDirectory
terratag -tags="{\"environment_id\": \"development\"}"
- type: "terraformApply"
step: 300## Terrakube Storage
storage:
defaultStorage: false
gcp:
projectId: "sample project"
bucketName: "sampledata"
credentials: |
{
"type": "service_account",
"project_id": "XXXXXXX",
......
}## Terrakube Storage
storage:
defaultStorage: false
aws:
accessKey: "rqerqw"
secretKey: "sadfasfdq"
bucketName: "qerqw"
region: "us-east-1"auth:
rootUser: "admin"
rootPassword: "superadmin"
defaultBuckets: "terrakube"helm install --values terrakube.yaml terrakube terrakube-repo/terrakube -n terrakubedocker pull azbuilder/api-server:2.17.0-alpaquita
docker pull azbuilder/open-registry:2.17.0-alpaquita
docker pull azbuilder/executor:2.17.0-alpaquitamodule "consul" {
source = "git@github.com:hashicorp/example.git"
}helm install --values terrakube.yaml terrakube terrakube-repo/terrakube -n terrakubeflow:
- type: "terraformPlan"
step: 100
importComands:
repository: "https://github.com/AzBuilder/terrakube-extensions"
folder: "templates/terratag"
branch: "import-template"
- type: "terraformApply"
step: 200helm install --values terrakube.yaml terrakube terrakube-repo/terrakube -n terrakubehelm install --values terrakube.yaml terrakube terrakube-repo/terrakube -n terrakubekubectl install --values minio-setup.yaml miniostorage bitnami/minio -n terrakubekubectl get svc -o wide -n terrakube## Terrakube Storage
storage:
defaultStorage: false
minio:
accessKey: "admin"
secretKey: "superadmin"
bucketName: "terrakube"
endpoint: "http://miniostorage:9000"helm install --values terrakube.yaml terrakube terrakube-repo/terrakube -n terrakubeterrakubeUI :{
"100" : "<span>Some Content</span>"
}flow:
- type: "terraformPlan"
step: 100
name: "Plan"
commands:
- runtime: "GROOVY"
priority: 300
after: true
script: |
import Context
def uiTemplate = '{"100":"<span>Simple Text</span>"}'
new Context("$terrakubeApi", "$terrakubeToken", "$jobId", "$workingDirectory").saveProperty("terrakubeUI", uiTemplate)
"Save context completed..."
- type: "terraformApply"
step: 200
name: "Apply"## Terrakube Storage
storage:
defaultStorage: false
azure:
storageAccountName: "<<STORAGE ACCOUNT NAME>>"
storageAccountResourceGroup: "<< RESOURCE GROUP >>"
storageAccountAccessKey: "<< STORAGE ACCOUNT ACCESS KEY"helm install --values terrakube.yaml terrakube terrakube-repo/terrakube -n terrakubegit clone https://github.com/AzBuilder/terrakube.git
cd terrakube/telemetry-compose
docker-compose up -dflow:
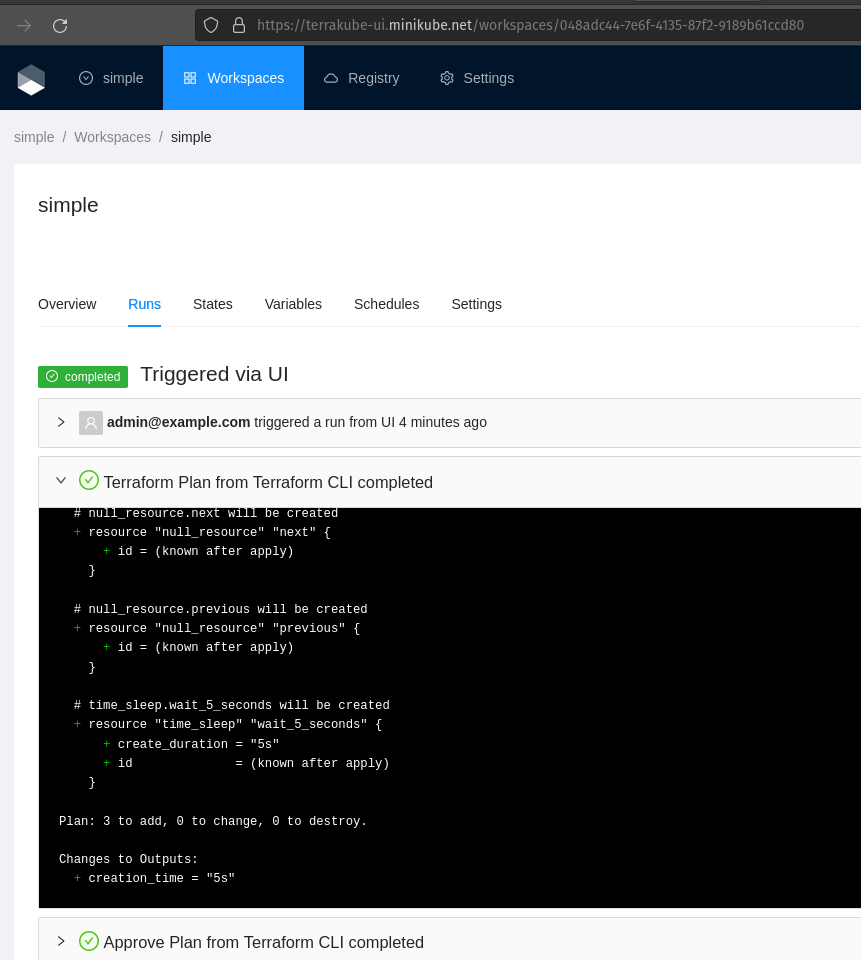
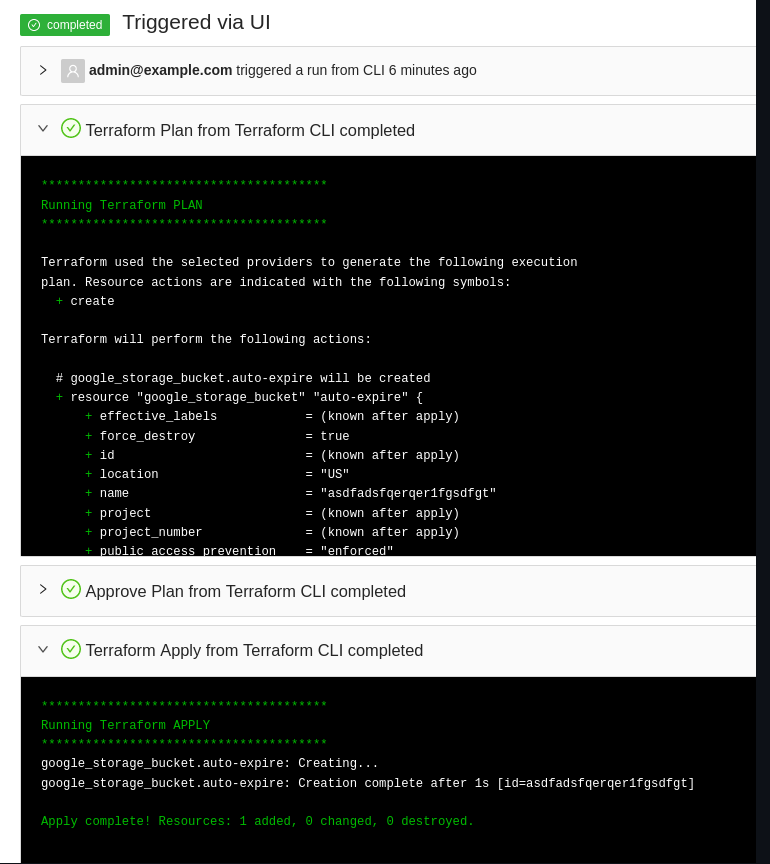
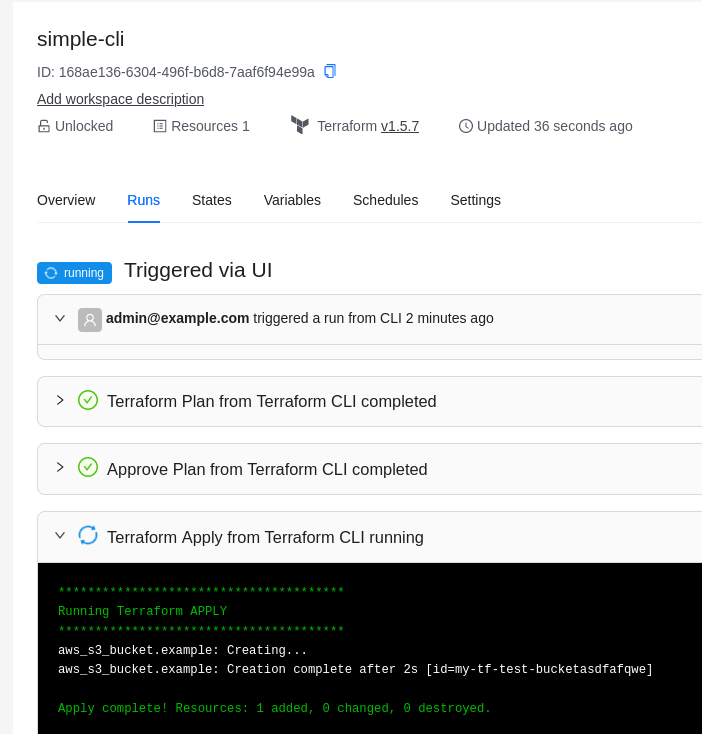
- type: "terraformPlan"
name: "Terraform Plan from Terraform CLI"
step: 100
- type: "approval"
name: "Approve Plan from Terraform CLI"
step: 150
team: "TERRAFORM_CLI"
- type: "terraformApply"
name: "Terraform Apply from Terraform CLI"
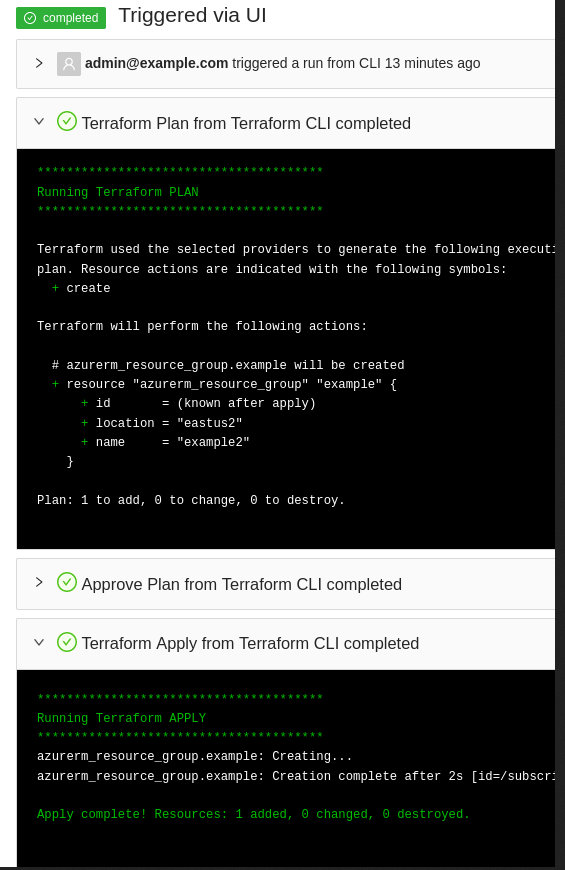
step: 200flow:
- type: "terraformPlanDestroy"
name: "Terraform Plan Destroy from Terraform CLI"
step: 100
- type: "approval"
name: "Approve Plan from Terraform CLI"
step: 150
team: "TERRAFORM_CLI"
- type: "terraformApply"
name: "Terraform Apply from Terraform CLI"
step: 200
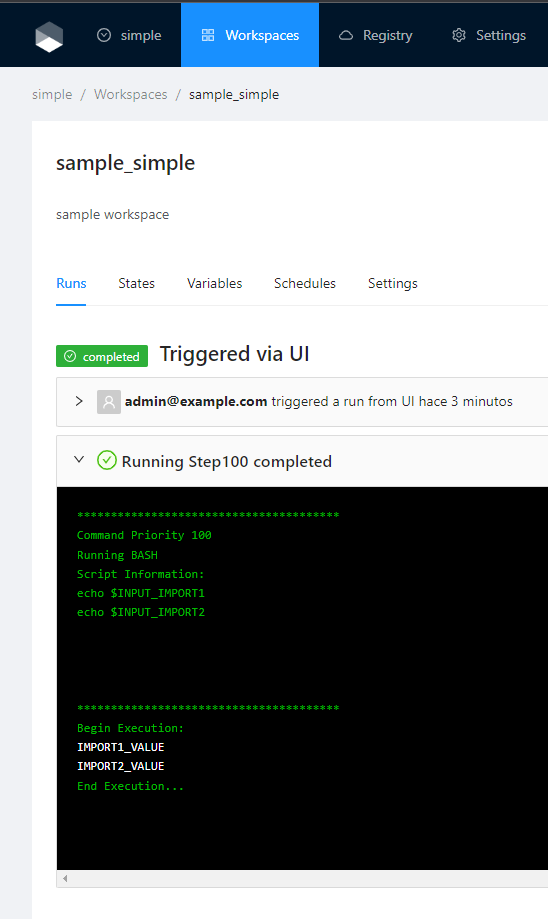
flow:
- type: "customScripts"
step: 100
inputsEnv:
INPUT_IMPORT1: $IMPORT1
INPUT_IMPORT2: $IMPORT2
commands:
- runtime: "BASH"
priority: 100
before: true
script: |
echo $INPUT_IMPORT1
echo $INPUT_IMPORT2flow:
- type: "customScripts"
step: 100
inputsTerraform:
INPUT_IMPORT1: $IMPORT1
INPUT_IMPORT2: $IMPORT2
commands:
....flow:
- type: "terraformPlan"
step: 100
importComands:
repository: "https://github.com/AzBuilder/terrakube-extensions"
folder: "templates/terratag"
branch: "import-template"
inputsEnv:
INPUT_IMPORT1: $IMPORT1
INPUT_IMPORT2: $IMPORT2
inputsTerraform:
INPUT_IMPORT1: $IMPORT1
INPUT_IMPORT2: $IMPORT2
- type: "terraformApply"
step: 200{
"name":"terraform",
"versions":{
"1.3.9":{
"builds":[
{
"arch":"amd64",
"filename":"terraform_1.3.9_linux_amd64.zip",
"name":"terraform",
"os":"linux",
"url":"https://releases.hashicorp.com/terraform/1.3.9/terraform_1.3.9_linux_amd64.zip",
"version":"1.3.9"
}
],
"name":"terraform",
"shasums":"terraform_1.3.9_SHA256SUMS",
"shasums_signature":"terraform_1.3.9_SHA256SUMS.sig",
"shasums_signatures":[
"terraform_1.3.9_SHA256SUMS.72D7468F.sig",
"terraform_1.3.9_SHA256SUMS.sig"
],
"version":"1.3.9"
}
}
}api:
version: "2.12.0"
terraformReleasesUrl: "https://eov1ys4sxa1bfy9.m.pipedream.net/"
executor:
version: "2.12.0"# Executor should be enable but we need to customize the apiServiceUrl
executor:
enabled: true
apiServiceUrl: "http://terrakube-api-service.terrakube:8080" ## The API is in another namespace called "terrakube"
# We need to disable the default openLdap but we need to provide the internal secret
# so the executor can authenticat with the API and the Registry
security:
useOpenLDAP: false
internalSecret: "AxxPdgpCi72f8WhMXCTGhtfMRp6AuBfj"
# We need to disable dex in this deployment
dex:
enabled: false
# We need to disable default storage MINIO and set some custom values
# in this example will be deploying like using an external MINIO
#(other backend storage could be used too)
storage:
defaultStorage: false
minio:
accessKey: "admin"
secretKey: "superadmin"
bucketName: "terrakube"
endpoint: "http://terrakube-minio.terrakube:9000" ## MINIO is in another namespace called "terrakube"
# We need to disable API, the default redis and default postgresql database
# But we need to provide some properties like the redis connection
api:
enabled: false
defaultRedis: false
defaultDatabase: false
properties:
redisHostname: "terrakube-redis-master.terrakube" ## REDIS is in another namespace called "terrakube"
redisPassword: "7p9iWVeRV4S944"
# We need to disable registry deployment
registry:
enabled: false
# We need to disable ui deployment
ui:
enabled: false
# We need to disable the ingress configuration
# but we need to specify the api and registry URL
ingress:
useTls: false
includeTlsHosts: false
ui:
enabled: false
api:
enabled: false
domain: "terrakube-api.minikube.net"
registry:
enabled: false
domain: "terrakube-reg.minikube.net"
dex:
enabled: falsehelm install --debug --values ./your-values.yaml terrakube terrakube-repo/terrakube -n self-hosted-executorPOST {{terrakubeApi}}/context/v1/{{jobId}}
{
"slackThreadId": "12345667",
"infracost": {}
}GET {{terrakubeApi}}/context/v1/{{jobId}}import Context
new Context("$terrakubeApi", "$terrakubeToken", "$jobId", "$workingDirectory").saveFile("infracost", "infracost.json")
new Context("$terrakubeApi", "$terrakubeToken", "$jobId", "$workingDirectory").saveProperty("slackId", "1234567890")flow:
- type: "terraformPlan"
step: 100
commands:
- runtime: "GROOVY"
priority: 100
after: true
script: |
import Infracost
String credentials = "version: \"0.1\"\n" +
"api_key: $INFRACOST_KEY \n" +
"pricing_api_endpoint: https://pricing.api.infracost.io"
new Infracost().loadTool(
"$workingDirectory",
"$bashToolsDirectory",
"0.10.12",
credentials)
"Infracost Download Completed..."
- runtime: "BASH"
priority: 200
after: true
script: |
terraform show -json terraformLibrary.tfPlan > plan.json
INFRACOST_ENABLE_DASHBOARD=true infracost breakdown --path plan.json --format json --out-file infracost.json
- runtime: "GROOVY"
priority: 300
after: true
script: |
import Context
new Context("$terrakubeApi", "$terrakubeToken", "$jobId", "$workingDirectory").saveFile("infracost", "infracost.json")
"Save context completed..."./scripts/setupDevelopmentEnvironment.shgp url 3000scripts/setup/dex/config-ldap.ldifscripts/setup/dex/config-ldap.yamlscripts/template/dex/template-config-ldap.yamlapi/src/main/resources/db/changelog/demo-data/aws.xml
api/src/main/resources/db/changelog/demo-data/gcp.xml
api/src/main/resources/db/changelog/demo-data/azure.xml
api/src/main/resources/db/changelog/demo-data/simple.xmlapi/src/main/resources/db/changelog/demo-data/simple.xmlscripts/template/thunder-tests/thunderEnvironment.json{
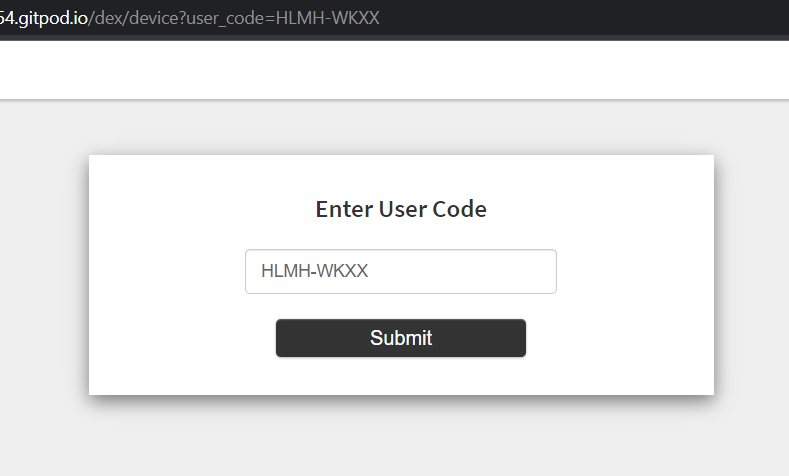
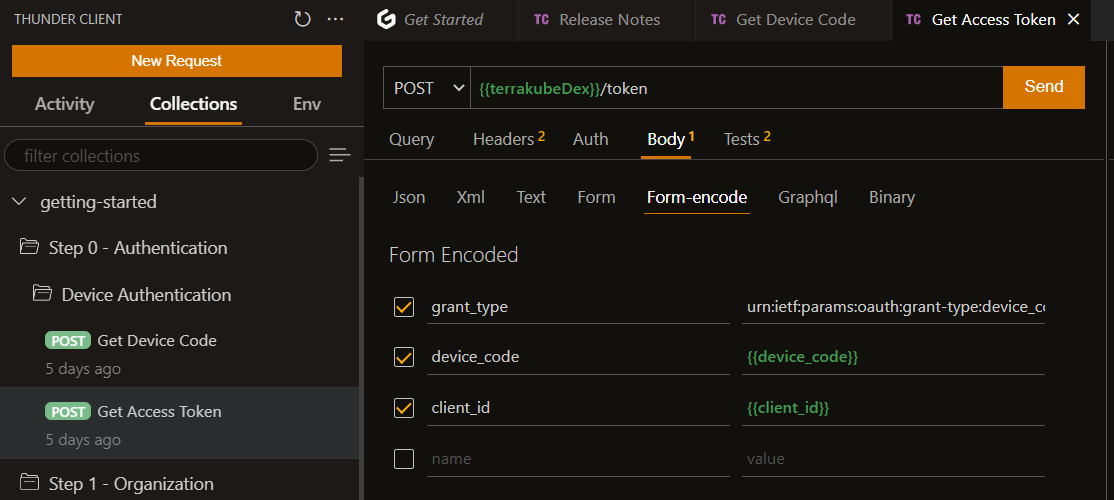
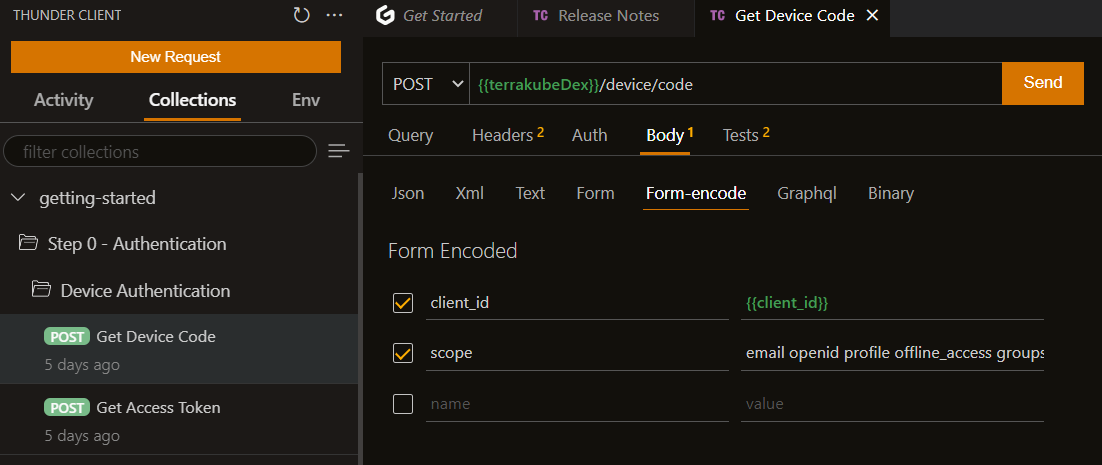
"device_code": "htlj4w73ftjfplinifqntp7ept6xaratvgauu2nj3nldlcgxjym",
"user_code": "HLMH-WKXX",
"verification_uri": "https://5556-azbuilder-terrakube-XXXXX.ws-us54.gitpod.io/dex/device",
"verification_uri_complete": "https://5556-azbuilder-terrakube-XXXX.ws-us54.gitpod.io/dex/device?user_code=HLMH-WKXX",
"expires_in": 300,
"interval": 5
}SERVICE_BINDING_ROOT: /mnt/platform/bindingscnb@terrakube-api-678cb68d5b-ns5gt:/mnt/platform/bindings$ ls
ca-certificates/mnt/platform/bindings/ca-certificatescnb@terrakube-api-678cb68d5b-ns5gt:/mnt/platform/bindings/ca-certificates$ ls
terrakubeDemo1.pem terrakubeDemo2.pem typecnb@terrakube-api-678cb68d5b-ns5gt:/mnt/platform/bindings/ca-certificates$ cat type
ca-certificates## Terrakube Security
security:
caCerts:
terrakubeDemo1.pem: |
-----BEGIN CERTIFICATE-----
MIIDZTCCA.........
-----END CERTIFICATE-----
terrakubeDemo2.pem: |
-----BEGIN CERTIFICATE-----
MIIDZTCCA.....
-----END CERTIFICATE-----
## API properties
api:
version: "2.11.2"
env:
- name: SERVICE_BINDING_ROOT
value: /mnt/platform/bindings
volumes:
- name: ca-certs
secret:
secretName: terrakube-ca-secrets
items:
- key: "terrakubeDemo1.pem"
path: "terrakubeDemo1.pem"
- key: "terrakubeDemo2.pem"
path: "terrakubeDemo2.pem"
- key: "type'
path: "type"
volumeMounts:
- name: ca-certs
mountPath: /mnt/platform/bindings/ca-certificates
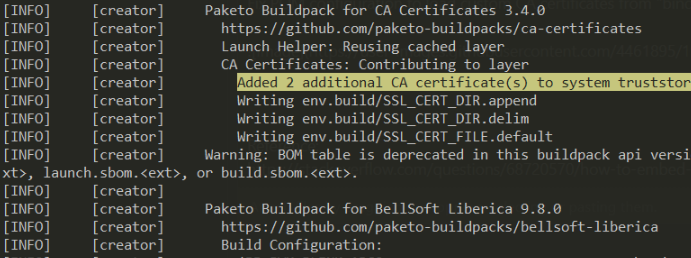
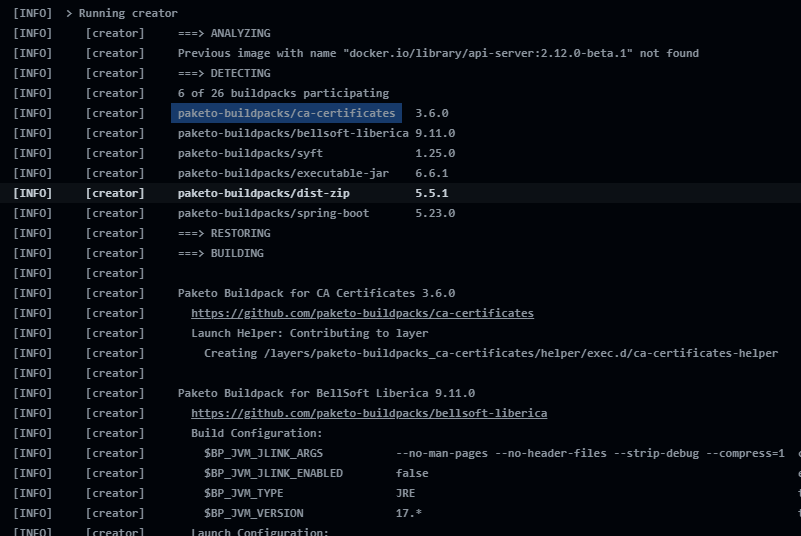
readOnly: trueAdded 2 additional CA certificate(s) to system truststore
Setting Active Processor Count to 2
Calculating JVM memory based on 5791152K available memory
For more information on this calculation, see https://paketo.io/docs/reference/java-reference/#memory-calculator
Calculated JVM Memory Configuration: -XX:MaxDirectMemorySize=10M -Xmx5033128K -XX:MaxMetaspaceSize=246023K -XX:ReservedCodeCacheSize=240M -Xss1M (Total Memory: 5791152K, Thread Count: 250, Loaded Class Count: 41022, Headroom: 0%)
Enabling Java Native Memory Tracking
Adding 126 container CA certificates to JVM truststore
Spring Cloud Bindings Enabled
Picked up JAVA_TOOL_OPTIONS: -Djava.security.properties=/layers/paketo-buildpacks_bellsoft-liberica/java-security-properties/java-security.properties -XX:+ExitOnOutOfMemoryError -XX:ActiveProcessorCount=2 -XX:MaxDirectMemorySize=10M -Xmx5033128K -XX:MaxMetaspaceSize=246023K -XX:ReservedCodeCacheSize=240M -Xss1M -XX:+UnlockDiagnosticVMOptions -XX:NativeMemoryTracking=summary -XX:+PrintNMTStatistics -Dorg.springframework.cloud.bindings.boot.enable=true
. ____ _ __ _ _
/\\ / ___'_ __ _ _(_)_ __ __ _ \ \ \ \
( ( )\___ | '_ | '_| | '_ \/ _` | \ \ \ \
\\/ ___)| |_)| | | | | || (_| | ) ) ) )
' |____| .__|_| |_|_| |_\__, | / / / /
=========|_|==============|___/=/_/_/_/
:: Spring Boot :: (v2.7.8)git clone https://github.com/AzBuilder/terrakube
cd terrakube
git checkout <<TERRAKUBE-VERSION>>
mv EXAMPLE.pem bindings/ca-certificates
# This script should be run from the root folder
./scripts/build/terrakubeBuild.shmodule "test" {
source = "git@bitbucket.org:alfespa17/private-module.git"
}module "test" {
source = "git@github.com:alfespa17/simple-terraform.git"
}terrakube_token = "TERRAKUBE_PERSONAL_ACCESS_TOKEN"
terrakube_hostname = "terrakube-api.mydomain.com"
terrakube_organization_name = "simple"
terrakube_workspace_name = "dynamic-workspace"
gcp_project_id = "my-gcp-project"
terraform {
cloud {
organization = "terrakube_organization_name"
hostname = "terrakube-api.mydomain.com"
workspaces {
name = "terrakube_workspace_name"
}
}
}
provider "google" {
project = "my-gcp-project"
region = "us-central1"
zone = "us-central1-c"
}
resource "google_storage_bucket" "auto-expire" {
name = "mysuperbukcetname"
location = "US"
force_destroy = true
public_access_prevention = "enforced"
}terrakube_token = "TERRAKUBE_PERSONAL_ACCESS_TOKEN"
terrakube_api_hostname = "TERRAKUBE-API.MYCLUSTER.COM"
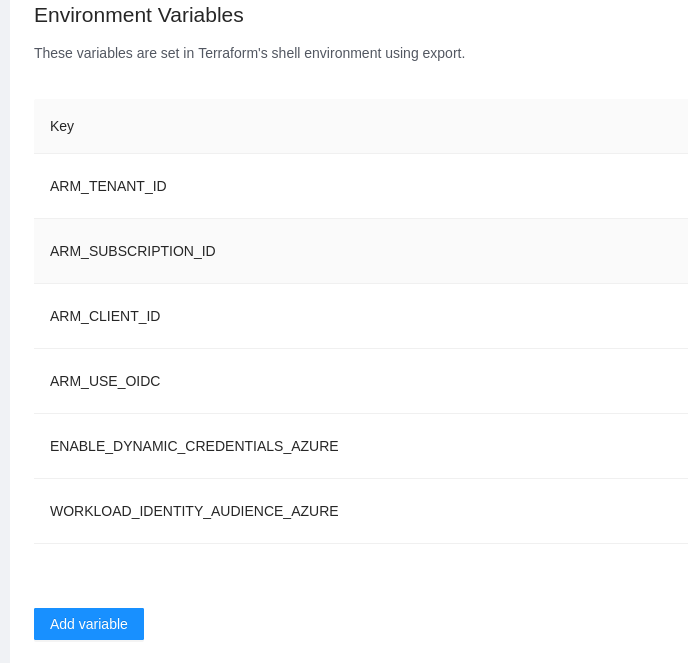
terrakube_federated_credentials_audience="aws.workload.identity"
terrakube_organization_name="simple"
terrakube_workspace_name = "dynamic-workspace-aws"
aws_region = "us-east-1"terraform {
cloud {
organization = "terrakube_organization_name"
hostname = "terrakube-api.mydomain.com"
workspaces {
name = "terrakube_workspace_name"
}
}
}
provider "aws" {
}
resource "aws_s3_bucket" "example" {
bucket = "my-tf-superbucket-awerqerq"
tags = {
Name = "My bucket"
Environment = "Dev"
}
}terrakube_token = "TERRAKUBE_PERSONAL_ACCESS_TOKEN"
terrakube_api_hostname = "TERRAKUBE-API.MYCLUSTER.COM"
terrakube_federated_credentials_audience = "api://AzureADTokenExchange"
terrakube_organization_name = "simple"
terrakube_workspace_name = "dynamic-azure"terraform {
cloud {
organization = "terrakube_organization_name"
hostname = "terrakube-api.mydomain.com"
workspaces {
name = "terrakube_workspace_name"
}
}
}
provider "azurerm" {
features {}
}
resource "azurerm_resource_group" "example" {
name = "randomstring-aejthtyu"
location = "East US 2"
}
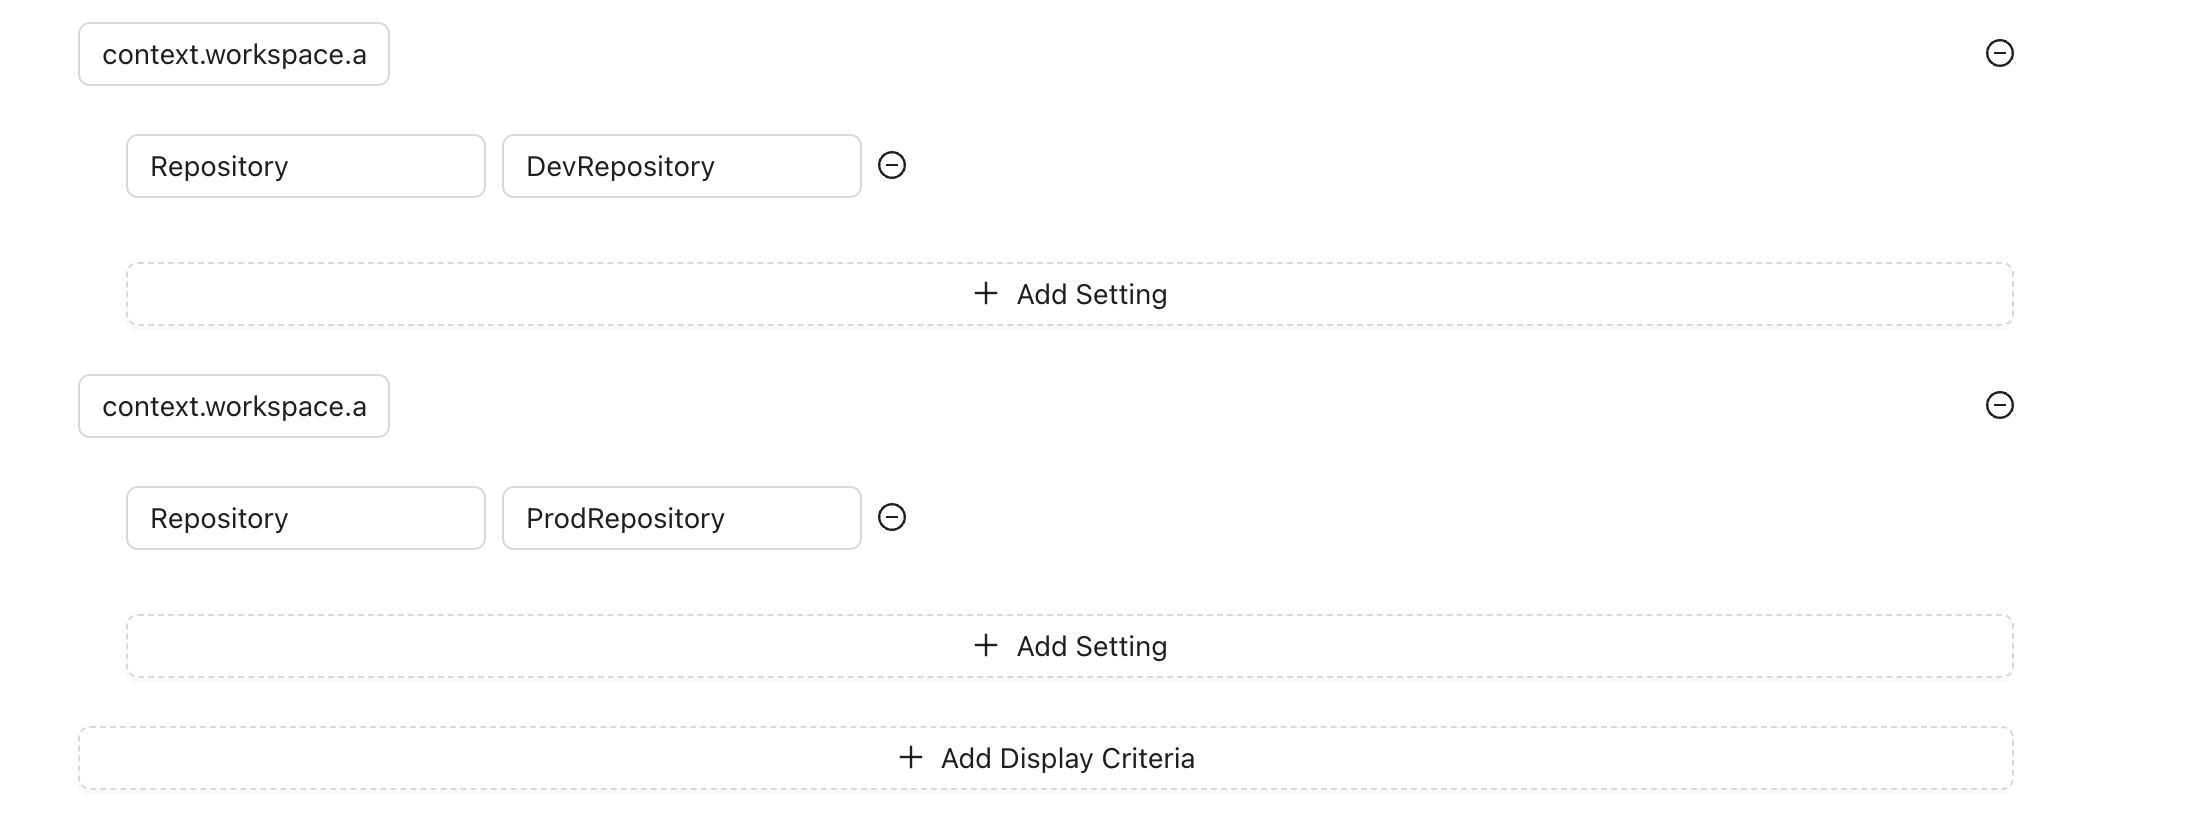
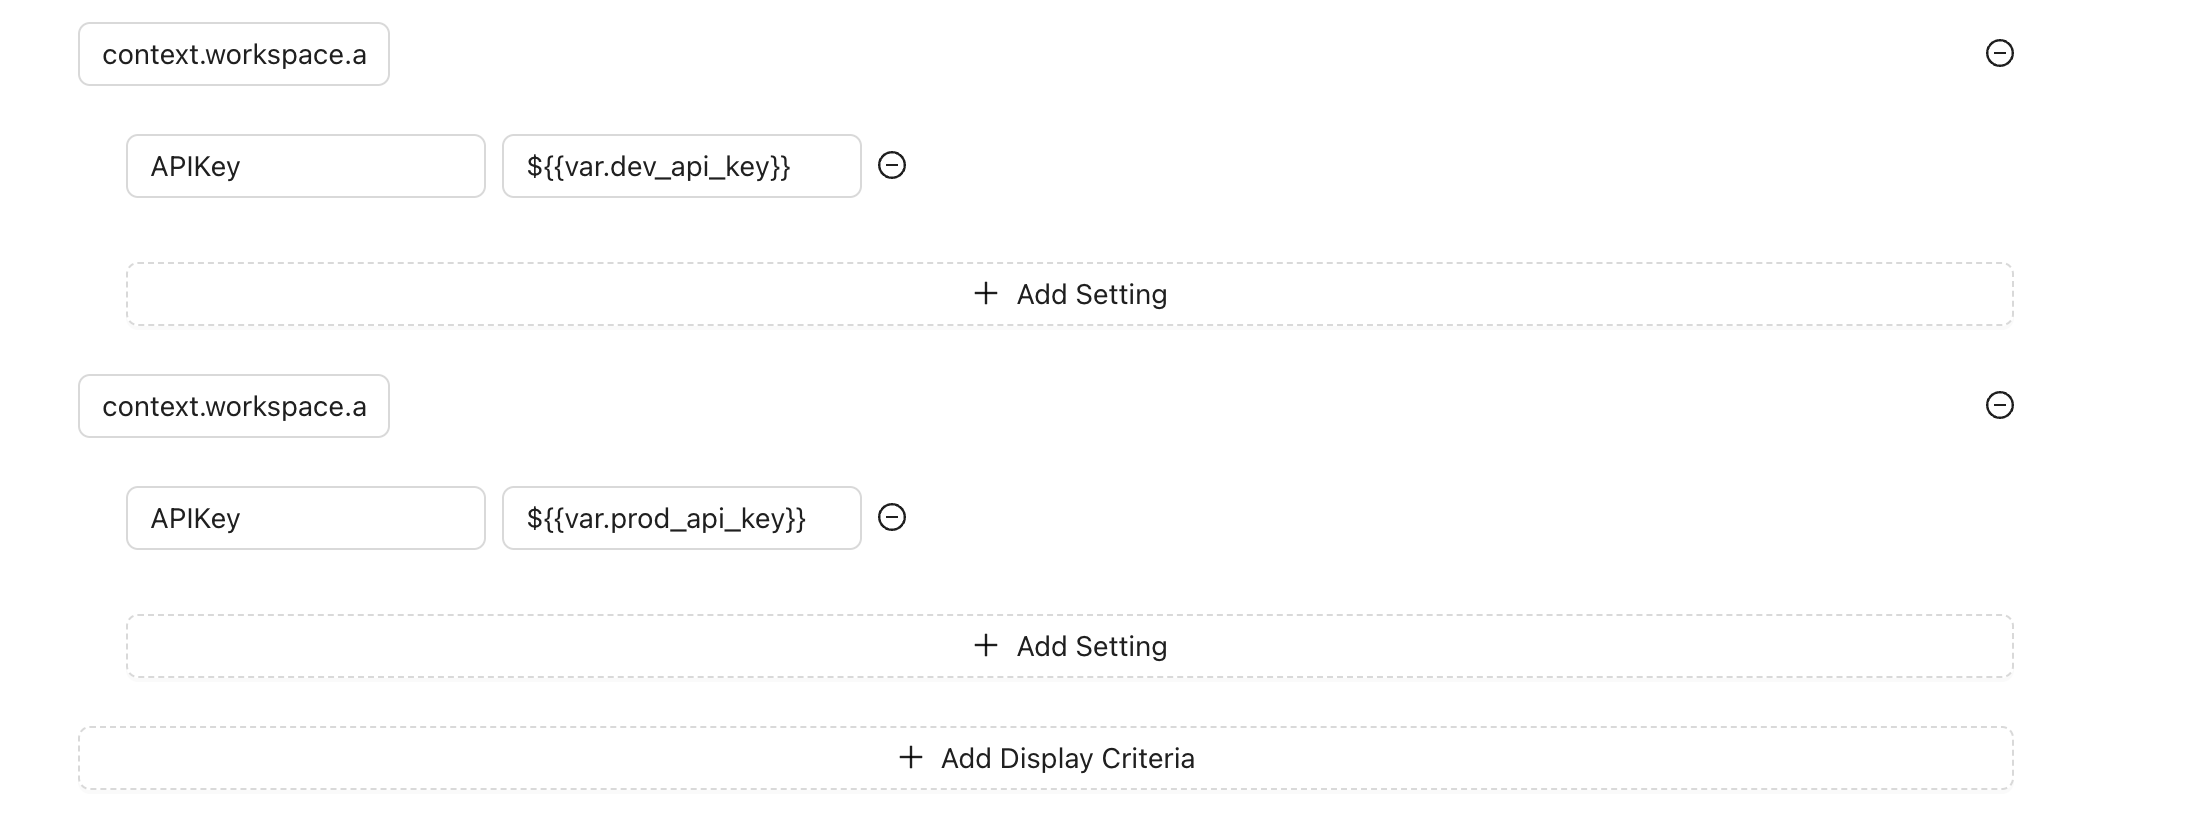
truecontext.workspace.attributes.terraformVersion === "1.0.0"context.state.provider.includes("azurerm")context.state.type.includes("azurerm_virtual_machine")context.workspace.attributes.startsWith("prod")context.workspace.attributes.startsWith("dev")flow:
- type: "customScripts"
step: 100
inputsTerraform:
SIZE: $SIZE_SMALL
commands:
- runtime: "BASH"
priority: 100
before: true
script: |
echo "SIZE : $SIZE"
- type: "scheduleTemplates"
step: 200
templates:
- name: "schedule1"
schedule: "0 0/5 * ? * * *"
- name: "schedule2"
schedule: "0 0/10 * ? * * *"Work in progress
script:
- pipe: azbuilder/terrakube-pipe:1.0.0
variables:
LOGIN_ENDPOINT: "<string>" #optional Default: https://login.microsoftonline.com
TERRAKUBE_TENANT_ID: "<string>"
TERRAKUBE_APPLICATION_ID: "<string>"
TERRAKUBE_APPLICATION_SECRET: "<string>"
TERRAKUBE_APPLICATION_SCOPE: "<string>" #optional Default: api://Terrakube/.default
TERRAKUBE_ORGANIZATION: "<string>"
TERRAKUBE_WORKSPACE: "<string>"
TERRAKUBE_TEMPLATE: "<string>"
TERRAKUBE_ENDPOINT: "<string>"
DEBUG: "<boolean>" # Optional Default: false

GET https://TERRAKUBE.MYSUPERDOMAIN.COM/.well-known/openid-configuration
{
"issuer": "https://TERRAKUBE.MYSUPERDOMAIN.COM",
"jwks_uri": "https://TERRAKUBE.MYSUPERDOMAIN.COM/.well-known/jwks",
"response_types_supported": [
"id_token"
],
"claims_supported": [
"sub",
"aud",
"exp",
"iat",
"iss",
"jti",
"terrakube_workspace_id",
"terrakube_organization_id",
"terrakube_job_id"
],
"id_token_signing_alg_values_supported": [
"RS256"
],
"scopes_supported": [
"openid"
],
"subject_types_supported": [
"public"
]
}GET https://TERRAKUBE.MYSUPERDOMAIN.COM/.well-known/jwks
{
"keys": [
{
"kty": "RSA",
"use": "sig",
"n": "ALEzGE4Rn2WhxOhIuXAzq7e-WvRLCJfoqrHMUXtpt6gefNmWGo9trbea84KyeKdvzE9wBwWxnz_U5d_utmLLztVA2FLdDfnndh7pF4Fp7hB-lhaT1hV2EsiFsc9oefCYmkzXmHylfNQOuqNlRA_2Xu5pHovrF79WW01hWSjhGTkpj6pxFG4t7Tl54SWnJ83CvGDAKuoO9c1M1iTKikB3ENMK8WfU-wZJ4oLTAfhSydqZxZuGRhiwPGsEQOpRynyHJ54XWZHmFdsWs_eGRsfs1iTPbiQSBZbaEwz36HF4QdqFzzLGd67sTtZku_YEsUbJW8cbK6nOFEdR0BSTtSV-lPk=",
"e": "AQAB",
"kid": "03446895-220d-47e1-9564-4eeaa3691b42",
"alg": "RS256"
}
]
}JWT HEADER
{
"kid": "12345",
"alg": "RS256"
}
JWT BODY
{
"sub": "organization:TERRAKUBE_ORG_NAME:workspace:TERRAKUBE_WORKSPACE_NAME",
"aud": "api://AzureADTokenExchange",
"jti": "12345678",
"terrakube_workspace_id": "1",
"terrakube_organization_id": "2",
"terrakube_job_id": "3",
"iat": 1713397293,
"iss": "https://terrakube-api.example.com",
"exp": 1713397353
}
SIGNATUREJWT HEADER
{
"kid": "03446895-220d-47e1-9564-4eeaa3691b42",
"alg": "RS256"
}
JWT BODY
{
"sub": "organization:TERRAKUBE_ORG_NAME:workspace:TERRAKUBE_WORKSPACE_NAME",
"aud": "https://iam.googleapis.com/projects/xxxxx/locations/global/workloadIdentityPools/xxxxx/providers/xxxxx",
"jti": "d4432299-5dad-4b1e-9756-544639e84cec",
"terrakube_workspace_id": "d9b58bd3-f3fc-4056-a026-1163297e80a8",
"terrakube_organization_id": "8abe206b-29a8-4ed8-8a3b-30237e295659",
"terrakube_job_id": "1",
"iat": 1713915600,
"iss": "https://terrakube-api.example.com",
"exp": 1713917400
}
SIGNATUREJWT HEADER
{
"kid": "03446895-220d-47e1-9564-4eeaa3691b42",
"alg": "RS256"
}
JWT BODY
{
"sub": "organization:TERRAKUBE_ORG_NAME:workspace:TERRAKUBE_WORKSPACE_NAME",
"aud": "aws.workload.identity",
"jti": "d4432299-5dad-4b1e-9756-544639e84cec",
"terrakube_workspace_id": "d9b58bd3-f3fc-4056-a026-1163297e80a8",
"terrakube_organization_id": "8abe206b-29a8-4ed8-8a3b-30237e295659",
"terrakube_job_id": "1",
"iat": 1713915600,
"iss": "https://terrakube-api.example.com",
"exp": 1713917400
}
SIGNATUREscript:
- pipe: docker://azbuilder/terrakube-pipe:1.0.0
variables:
TERRAKUBE_TENANT_ID: "36857254-c824-409f-96f5-d3f2de37b016"
TERRAKUBE_APPLICATION_ID: "36857254-c824-409f-96f5-d3f2de37b016"
TERRAKUBE_APPLICATION_SECRET: "SuperSecret"
TERRAKUBE_ORGANIZATION: "terrakube"
TERRAKUBE_WORKSPACE: "bitbucket"
TERRAKUBE_TEMPLATE: "vulnerability-snyk"
TERRAKUBE_ENDPOINT: "https://terrakube.interal/service"script:
- pipe: docker://azbuilder/terrakube-pipe:1.0.0
variables:
LOGIN_ENDPOINT: "https://login.microsoftonline.com"
TERRAKUBE_TENANT_ID: "36857254-c824-409f-96f5-d3f2de37b016"
TERRAKUBE_APPLICATION_ID: "36857254-c824-409f-96f5-d3f2de37b016"
TERRAKUBE_APPLICATION_SECRET: "SuperSecret"
TERRAKUBE_APPLICATION_SCOPE: "api://TerrakubeApp/.default"
TERRAKUBE_ORGANIZATION: "terrakube"
TERRAKUBE_WORKSPACE: "bitbucket"
TERRAKUBE_TEMPLATE: "vulnerability-snyk"
TERRAKUBE_ENDPOINT: "https://terrakube.interal/service"
DEBUG: "true" connectors:
- type: oidc
id: TerrakubeClient
name: TerrakubeClient
config:
issuer: "[http|https]://<KEYCLOAK_SERVER>/auth/realms/<MY_REALM>"
clientID: "TerrakubeClient"
clientSecret: "<TerrakubeClient's secret>"
redirectURI: "[http|https]://<TERRAKUBE-API URL>/dex/callback"
insecureEnableGroups: trueconfig:
.....
userNameKey: emailhelm repo add terrakube-repo https://AzBuilder.github.io/terrakube-helm-chart
helm repo updateminikube start
minikube addons enable ingress
minikube addons enable storage-provisioner
minikube ip kubectl create namespace terrakubesudo nano /etc/hosts
192.168.59.100 terrakube-ui.minikube.net
192.168.59.100 terrakube-api.minikube.net
192.168.59.100 terrakube-reg.minikube.nethelm install terrakube terrakube-repo/terrakube -n terrakubeallow-snippet-annotations: "true"
Reference: https://github.com/AzBuilder/terrakube/issues/618#issuecomment-1838980451OTEL_JAVAAGENT_ENABLE=trueOTEL_TRACES_EXPORTER=jaeger
OTEL_EXPORTER_JAEGER_ENDPOINT=http://jaeger-all-in-one:14250
OTEL_SERVICE_NAME=TERRAKUBE-API# UPDATE THE DEX CLIENT ID AND SCOPE
security:
dexClientId: "example-app"
dexClientScope: "email openid profile offline_access groups"
useOpenLDAP: false
# UPDATE THE DEX CONFIG
dex:
config:
issuer: http://terrakube-api.minikube.net/dex
storage:
type: memory
web:
http: 0.0.0.0:5556
allowedOrigins: ['*']
skipApprovalScreen: true
oauth2:
responseTypes: ["code", "token", "id_token"]
connectors:
- type: ldap
name: OpenLDAP
id: ldap
config:
# The following configurations seem to work with OpenLDAP:
#
# 1) Plain LDAP, without TLS:
host: terrakube-openldap-service:389
insecureNoSSL: true
#
# 2) LDAPS without certificate validation:
#host: localhost:636
#insecureNoSSL: false
#insecureSkipVerify: true
#
# 3) LDAPS with certificate validation:
#host: YOUR-HOSTNAME:636
#insecureNoSSL: false
#insecureSkipVerify: false
#rootCAData: 'CERT'
# ...where CERT="$( base64 -w 0 your-cert.crt )"
# This would normally be a read-only user.
bindDN: cn=admin,dc=example,dc=org
bindPW: admin
usernamePrompt: Email Address
userSearch:
baseDN: ou=People,dc=example,dc=org
filter: "(objectClass=person)"
username: mail
# "DN" (case sensitive) is a special attribute name. It indicates that
# this value should be taken from the entity's DN not an attribute on
# the entity.
idAttr: DN
emailAttr: mail
nameAttr: cn
groupSearch:
baseDN: ou=Groups,dc=example,dc=org
filter: "(objectClass=groupOfNames)"
userMatchers:
# A user is a member of a group when their DN matches
# the value of a "member" attribute on the group entity.
- userAttr: DN
groupAttr: member
# The group name should be the "cn" value.
nameAttr: cn
staticClients:
- id: example-app
redirectURIs:
- 'http://terrakube-ui.minikube.net'
- '/device/callback'
- 'http://localhost:10000/login'
- 'http://localhost:10001/login'
name: 'example-app'
public: trueflow:
- type: "customScripts"
step: 100
inputsTerraform:
SIZE: $SIZE_SMALL
commands:
- runtime: "BASH"
priority: 100
before: true
script: |
echo "SIZE : $SIZE"flow:
- type: "customScripts"
step: 100
inputsTerraform:
SIZE: $SIZE_BIG
commands:
- runtime: "BASH"
priority: 100
before: true
script: |
echo "SIZE : $SIZE"apiVersion: v1
kind: ServiceAccount
metadata:
name: terrakube-api-service-account
namespace: terrakubeapiVersion: rbac.authorization.k8s.io/v1
kind: Role
metadata:
namespace: terrakube
name: terrakube-api-role
rules:
- apiGroups: ["batch"]
resources: ["jobs"]
verbs: ["get", "list", "watch", "create", "update", "patch", "delete"]apiVersion: rbac.authorization.k8s.io/v1
kind: RoleBinding
metadata:
name: terrakube-api-role-binding
namespace: terrakube
subjects:
- kind: ServiceAccount
name: terrakube-api-service-account
namespace: terrakube
roleRef:
kind: Role
name: terrakube-api-role
apiGroup: rbac.authorization.k8s.io## API properties
api:
image: "azbuilder/api-server"
version: "2.22.0"
serviceAccountName: "terrakube-api-service-account"
env:
- name: ExecutorEphemeralNamespace
value: terrakube
- name: ExecutorEphemeralImage
value: azbuilder/executor:2.22.0
- name: ExecutorEphemeralSecret
value: terrakube-executor-secretsapi:
env:
- name: JAVA_TOOL_OPTIONS
value: "-Dorg.terrakube.executor.ephemeral.nodeSelector.diskType=ssd -Dorg.terrakube.executor.ephemeral.nodeSelector.nodeType=spot" nodeSelector:
disktype: ssd
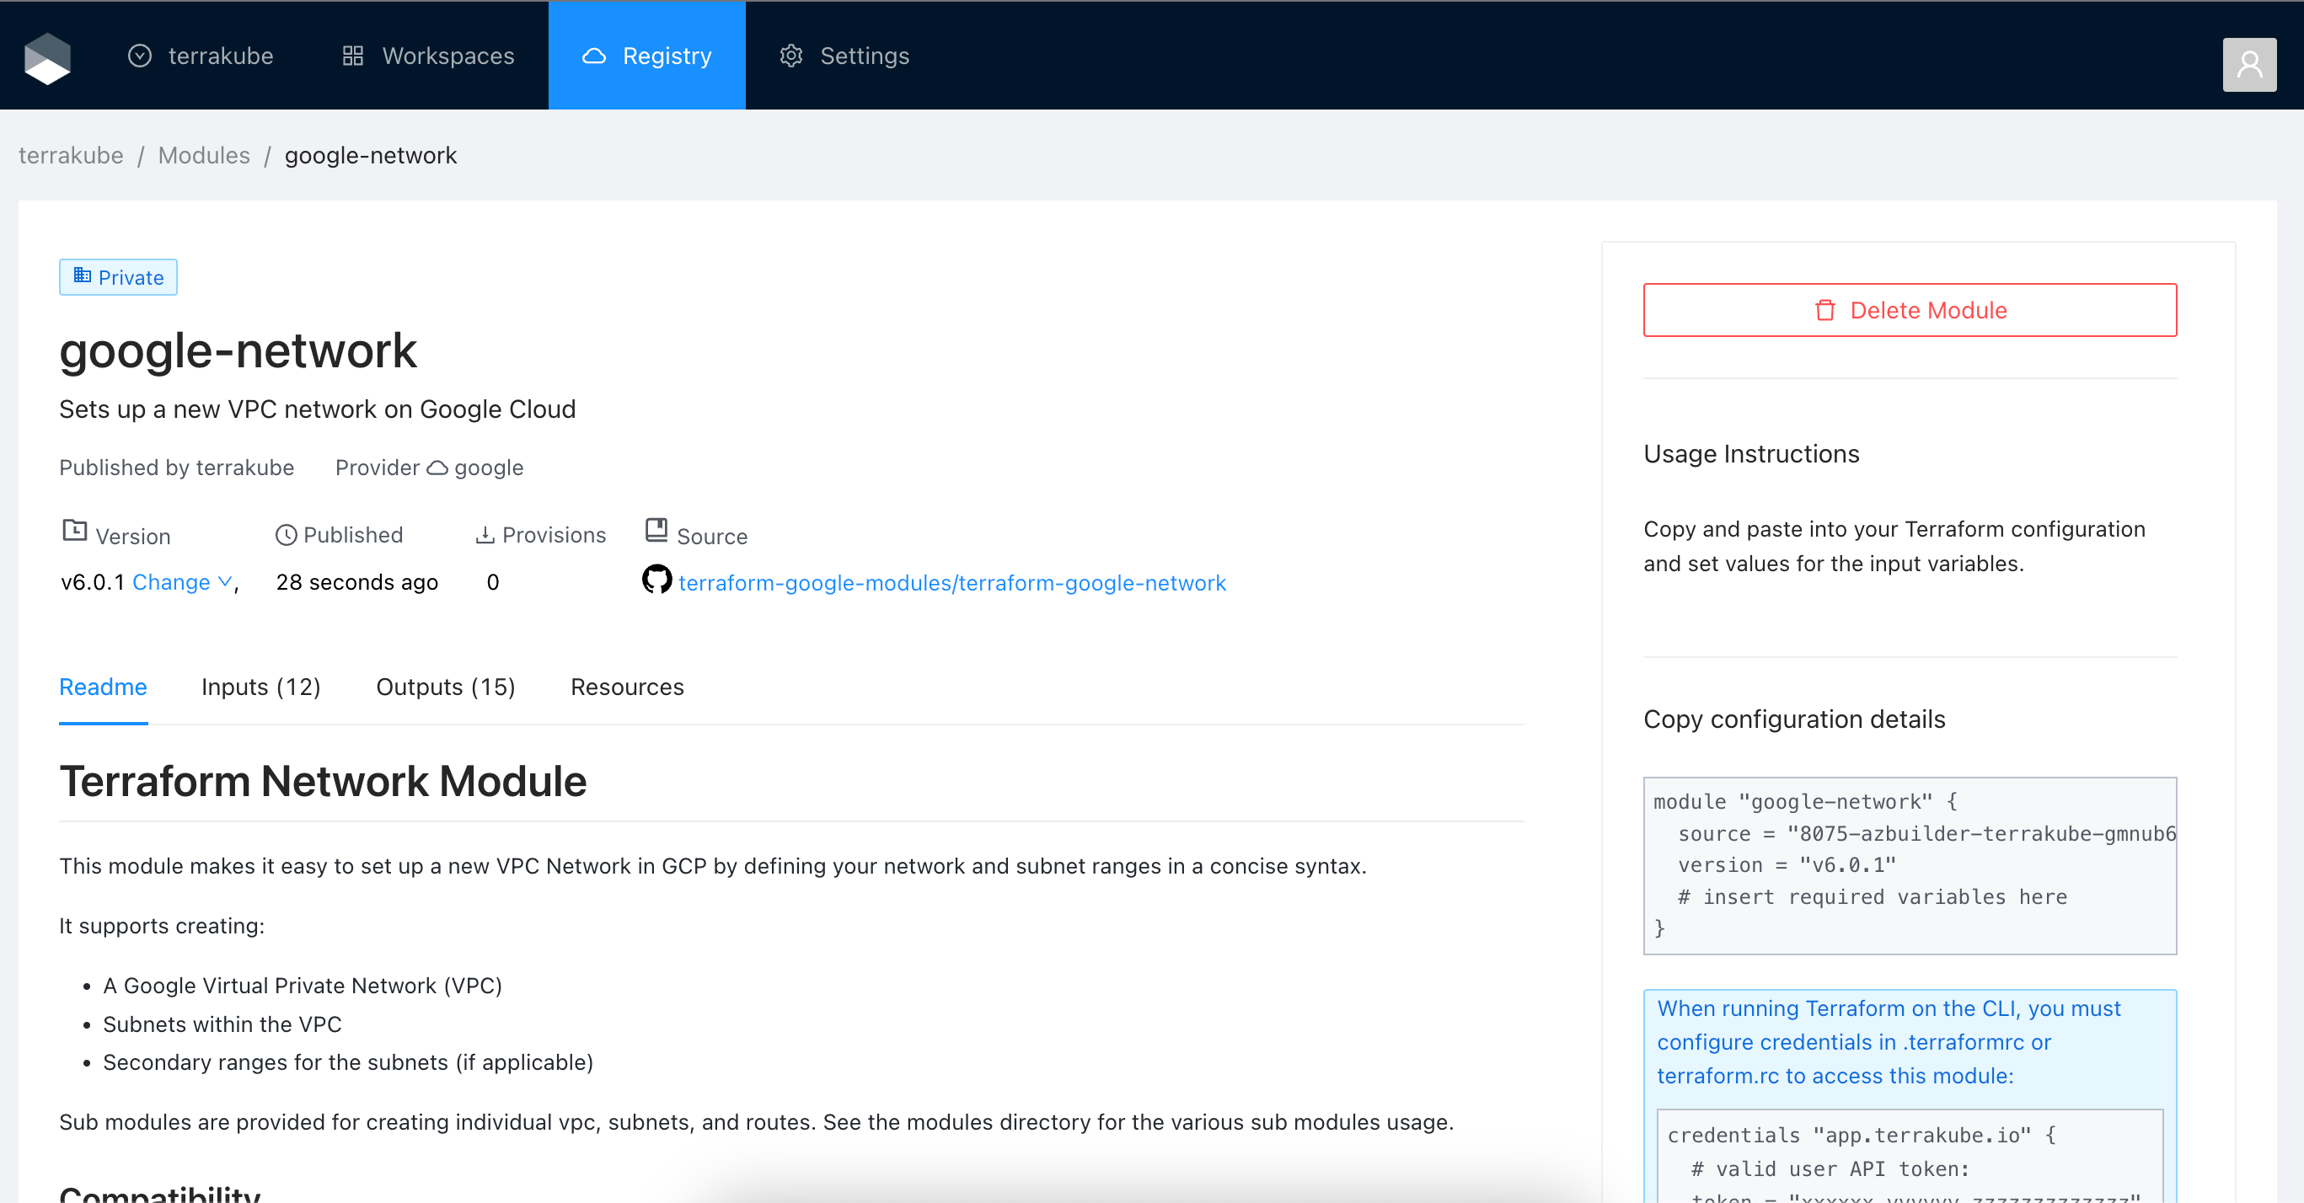
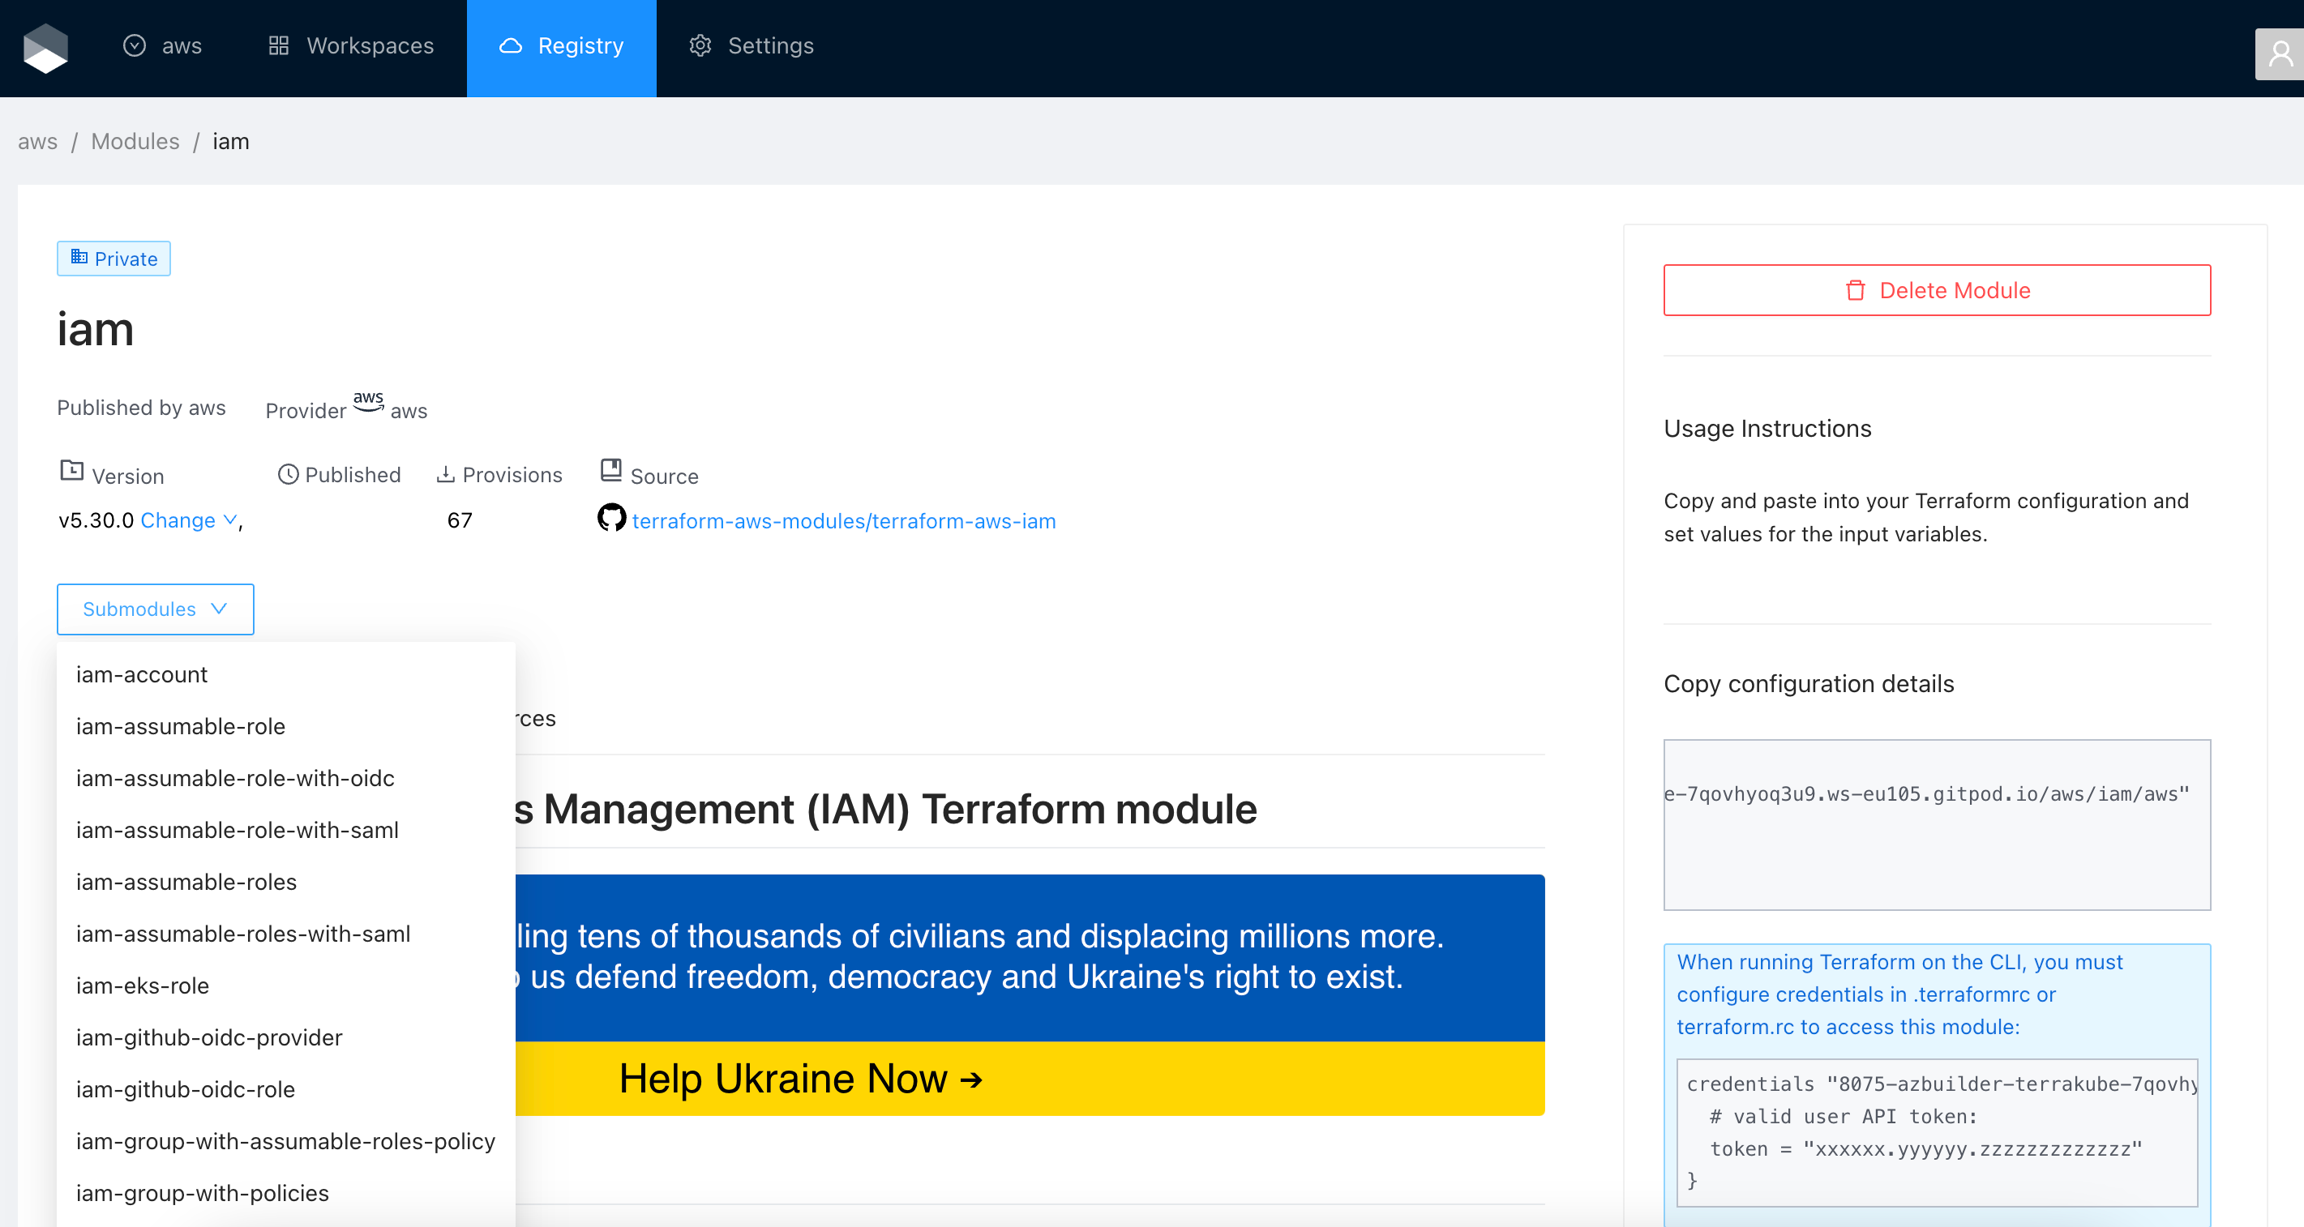
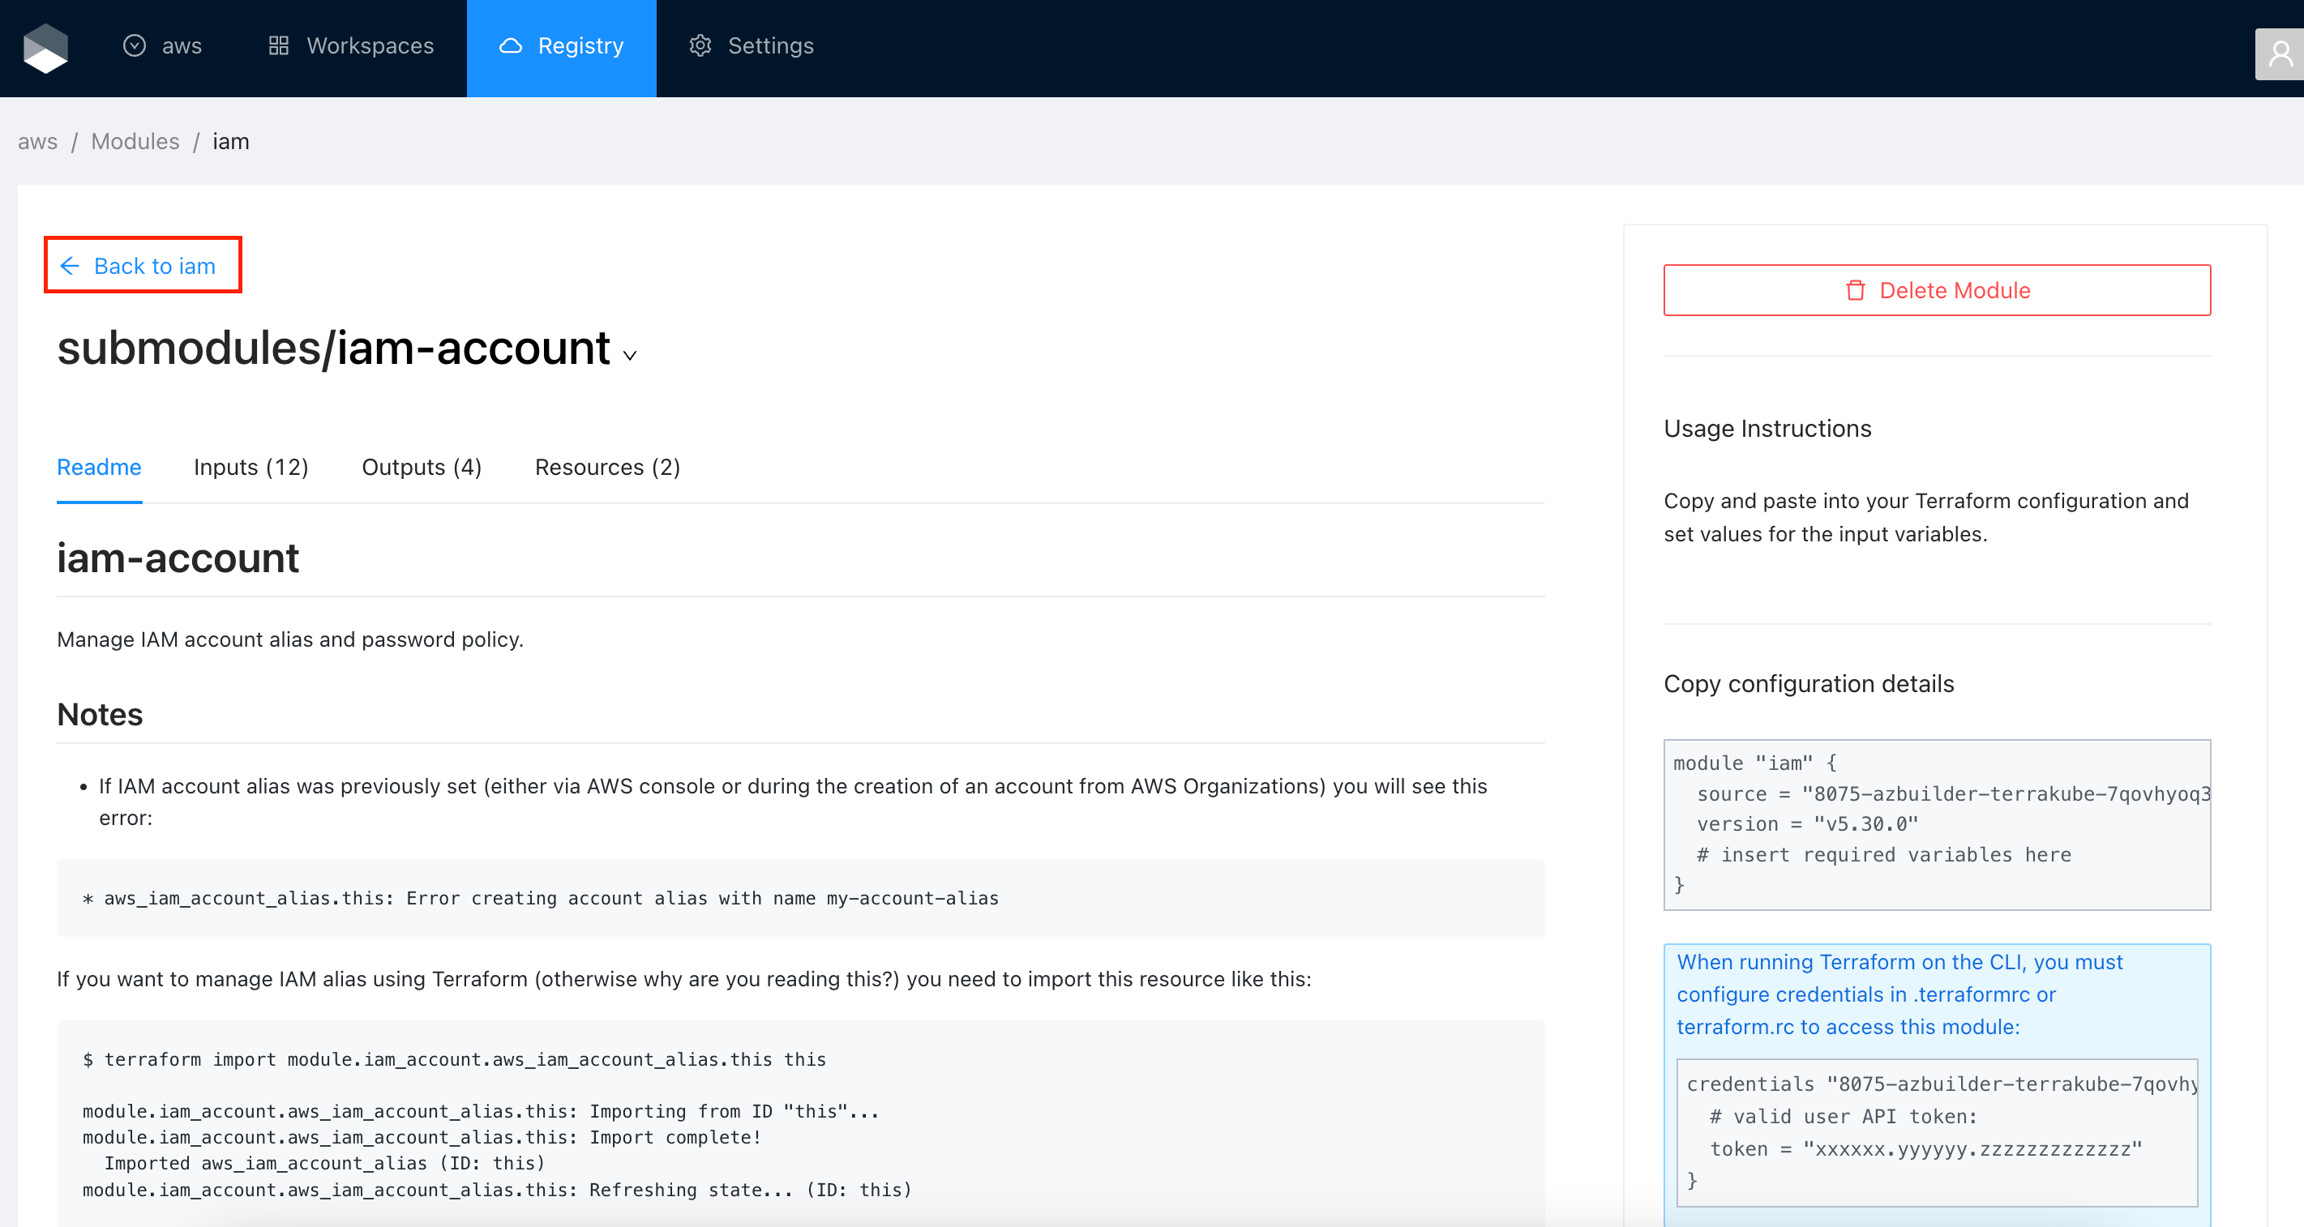
nodeType: spotmodule "iam" {
source = "8075-azbuilder-terrakube-7qovhyoq3u9.ws-eu105.gitpod.io/aws/iam/aws//modules/iam-account"
version = "v5.30.0"
# insert required variables here
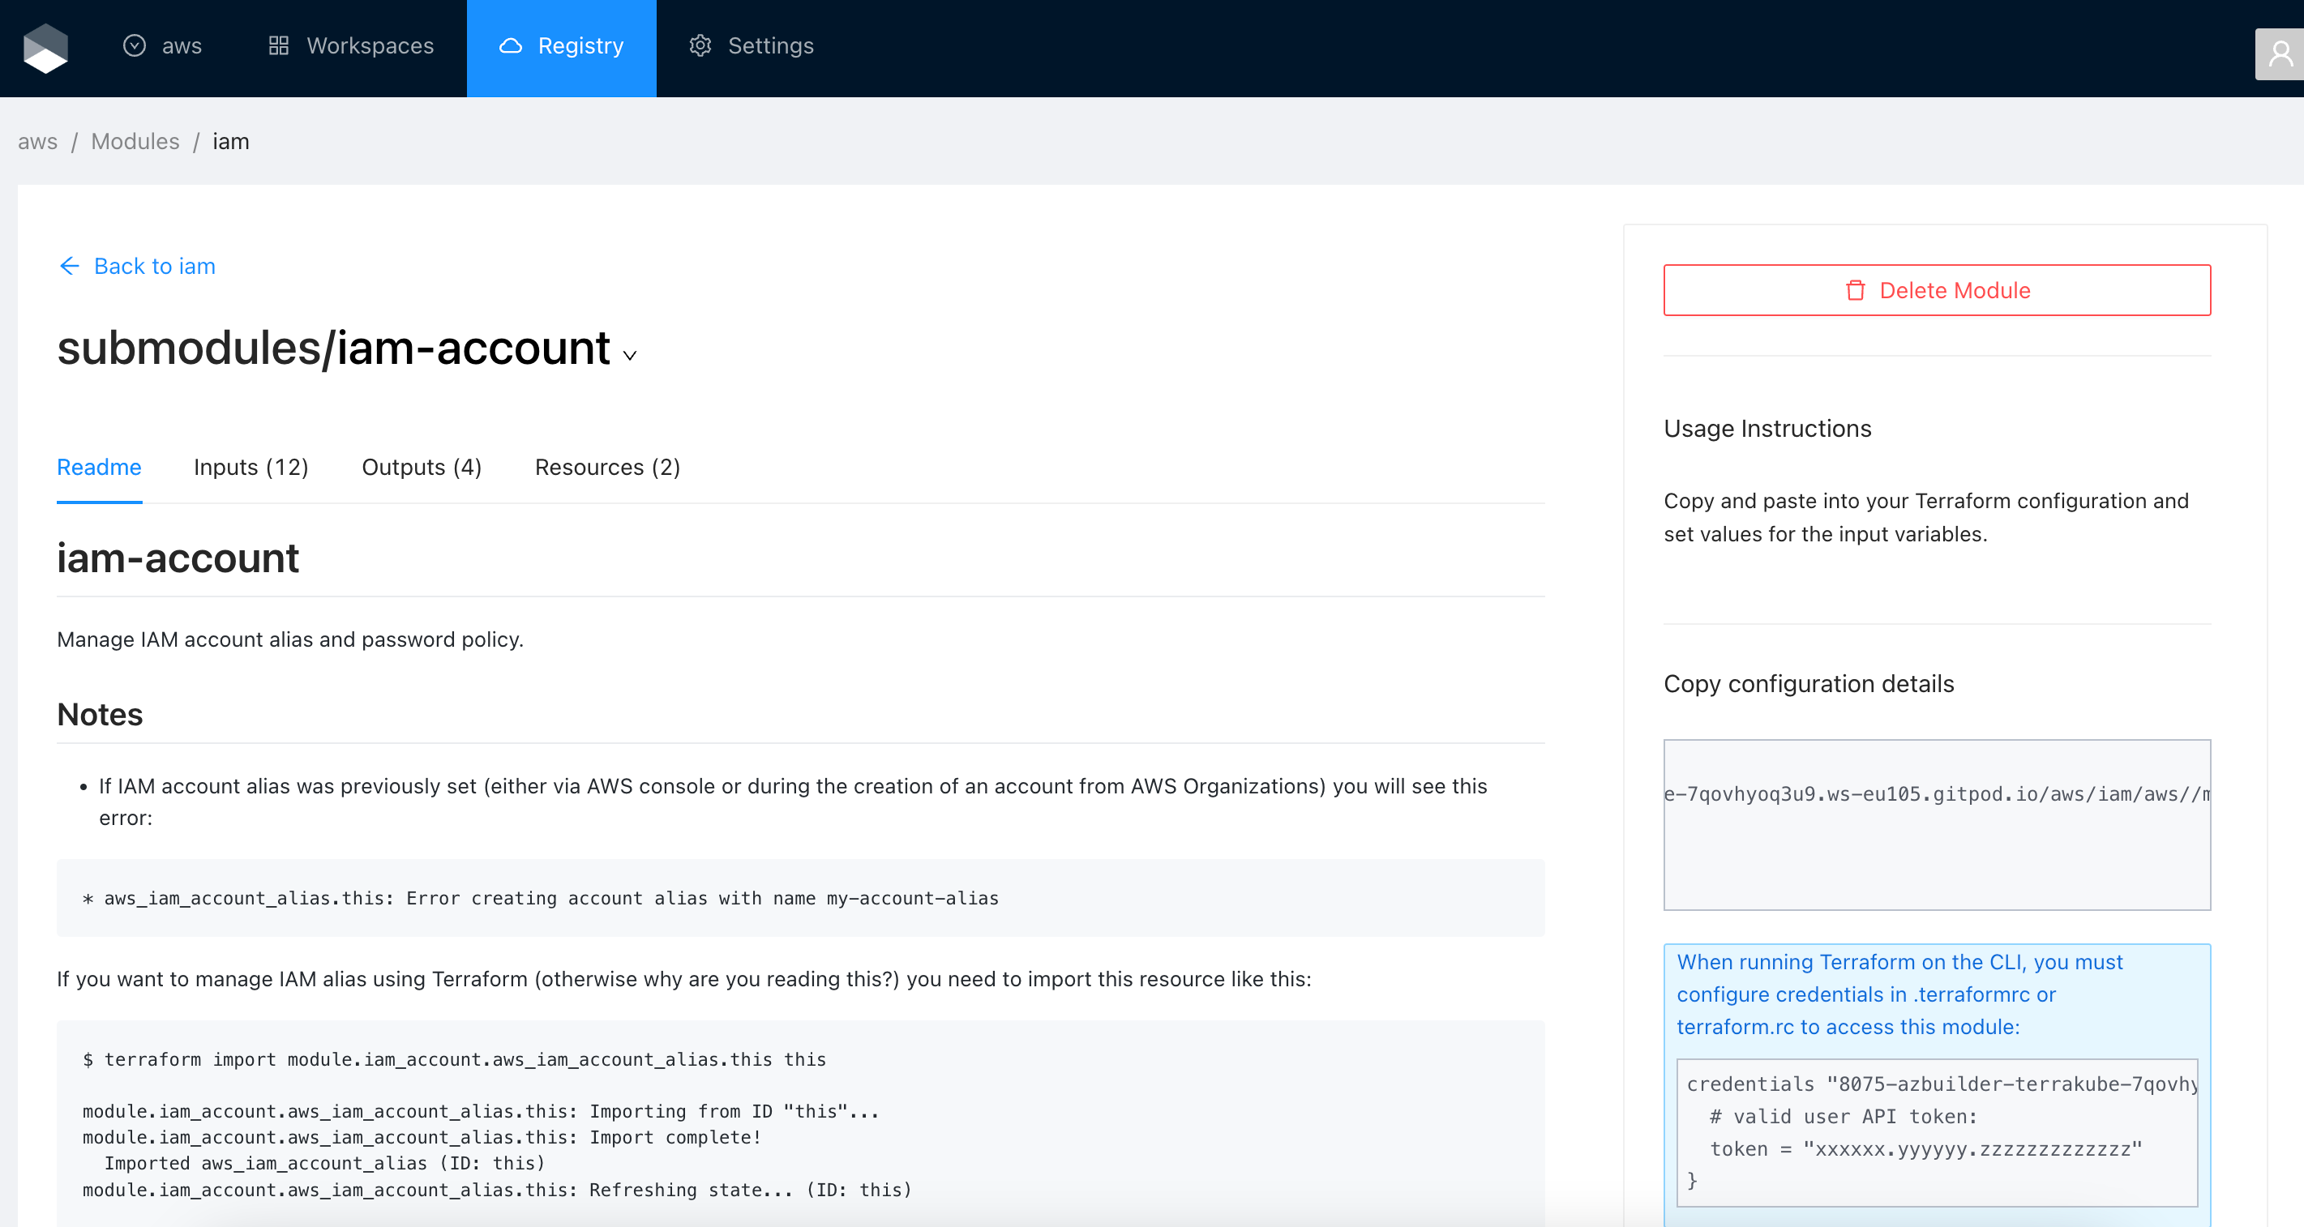
}credentials "8075-azbuilder-terrakube-gmnub6flawx.ws-us89b.gitpod.io" {
# valid user API token:
token = "xxxxxx.yyyyyy.zzzzzzzzzzzzz"
}terraform login [terrakube hostname]
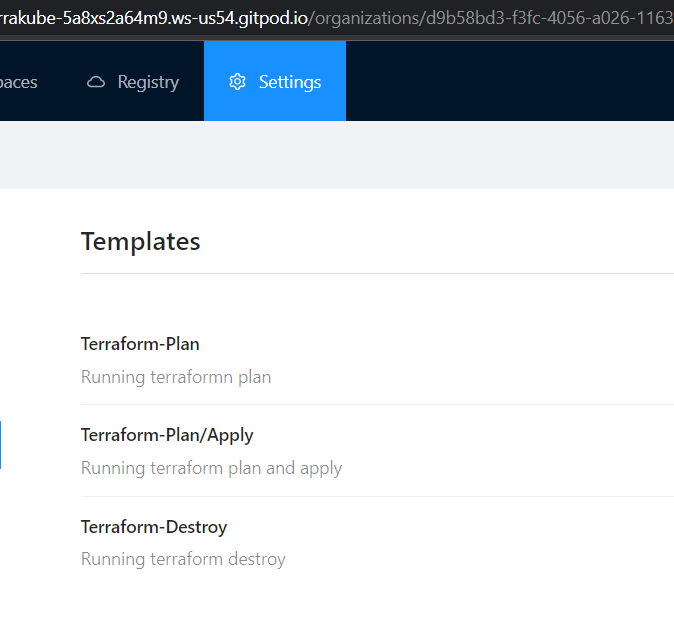
name: Terrakube Plan
on:
pull_request:
types: [opened, synchronize, reopened]
jobs:
build:
runs-on: ubuntu-latest
name: "Running Terrakube Plan"
steps:
- uses: actions/checkout@v3
with:
fetch-depth: 0
- uses: AzBuilder/terrakube-action-github@main
with:
TERRAKUBE_TOKEN: ${{ secrets.TERRAKUBE_PAT }}
TERRAKUBE_TEMPLATE: "Terraform-Plan"
TERRAKUBE_ENDPOINT: ${{ secrets.TERRAKUBE_ENDPOINT }}
TERRAKUBE_BRANCH: ${{ github.head_ref }}
TERRAKUBE_ORGANIZATION: "terrakube_organization_name"
GITHUB_TOKEN: ${{ secrets.GITHUB_TOKEN }}
SHOW_OUTPUT: true

name: Terrakube Apply
on:
push:
branches:
- main
jobs:
build:
runs-on: ubuntu-latest
name: "Running Terrakube Apply"
steps:
- uses: actions/checkout@v3
with:
fetch-depth: 0
- uses: AzBuilder/terrakube-action-github@main
with:
TERRAKUBE_TOKEN: ${{ secrets.TERRAKUBE_PAT }}
TERRAKUBE_TEMPLATE: "Terraform-Plan/Apply"
TERRAKUBE_ENDPOINT: ${{ secrets.TERRAKUBE_GITPOD }}
TERRAKUBE_BRANCH: "main"
TERRAKUBE_ORGANIZATION: "terrakube_organization_name"
GITHUB_TOKEN: ${{ secrets.GITHUB_TOKEN }}
SHOW_OUTPUT: false{
"terraform": "1.2.9"
}git clone https://github.com/AzBuilder/terrakube-action-github.git
yarn install
yarn build({ context }) => {
const fetchData = async () => {
try {
const response = await axiosInstance.get(`${context.apiUrl}/proxy/v1`, {
params: {
targetUrl: 'https://jsonplaceholder.typicode.com/posts/1/comments',
proxyheaders: JSON.stringify({
'Content-Type': 'application/json',
}),
workspaceId: context.workspace.id
}
});
console.log(response.data);
} catch (error) {
console.error('Error fetching data:', error);
}
};const response = await axiosInstance.post(`${context.apiUrl}/proxy/v1`, {
targetUrl: 'https://api.openai.com/v1/chat/completions',
proxyHeaders: JSON.stringify({
'Content-Type': 'application/json',
'Authorization': 'Bearer ${{var.OPENAI_API_KEY}}'
}),
workspaceId: context.workspace.id,
proxyBody: JSON.stringify({
model: 'gpt-4',
messages: updatedMessages,
})
}, {
headers: {
'Content-Type': 'application/json',
}
});
GET https://registry.terraform.io/v1/providers/hashicorp/random/versions
GET https://registry.terraform.io/v1/providers/hashicorp/random/3.0.1/download/linux/amd64POST https://terrakube-api.minikube.net/api/v1/organization/d9b58bd3-f3fc-4056-a026-1163297e80a8/provider
Content-Type: application/vnd.api+json
Authorization: Bearer (PAT TOKEN)
{
"data": {
"type": "provider",
"attributes": {
"name": "random",
"description": "random provider"
}
}
}POST https://terrakube-api.minikube.net/api/v1/organization/d9b58bd3-f3fc-4056-a026-1163297e80a8/provider/950ce3fd-3f11-46e4-8ef2-34ec3718de3e/version
Content-Type: application/vnd.api+json
Authorization: Bearer (PAT TOKEN)
{
"data": {
"type": "version",
"attributes": {
"versionNumber": "3.0.1",
"protocols": "5.0"
}
}
}POST https://terrakube-api.minikube.net/api/v1/organization/d9b58bd3-f3fc-4056-a026-1163297e80a8/provider/950ce3fd-3f11-46e4-8ef2-34ec3718de3e/version/8bc7127a-3215-486a-ac68-45fb8676f5a2/implementation
Content-Type: application/vnd.api+json
Authorization: Bearer (PAT TOKEN)
{
"data": {
"type": "implementation",
"attributes": {
"os": "linux",
"arch": "amd64",
"filename": "terraform-provider-random_3.0.1_linux_amd64.zip",
"downloadUrl": "https://releases.hashicorp.com/terraform-provider-random/3.0.1/terraform-provider-random_3.0.1_linux_amd64.zip",
"shasumsUrl": "https://releases.hashicorp.com/terraform-provider-random/3.0.1/terraform-provider-random_3.0.1_SHA256SUMS",
"shasumsSignatureUrl": "https://releases.hashicorp.com/terraform-provider-random/3.0.1/terraform-provider-random_3.0.1_SHA256SUMS.72D7468F.sig",
"shasum": "e385e00e7425dda9d30b74ab4ffa4636f4b8eb23918c0b763f0ffab84ece0c5c",
"keyId": "34365D9472D7468F",
"asciiArmor": "-----BEGIN PGP PUBLIC KEY BLOCK-----\n\nmQINBGB9+xkBEACabYZOWKmgZsHTdRDiyPJxhbuUiKX65GUWkyRMJKi/1dviVxOX\nPG6hBPtF48IFnVgxKpIb7G6NjBousAV+CuLlv5yqFKpOZEGC6sBV+Gx8Vu1CICpl\nZm+HpQPcIzwBpN+Ar4l/exCG/f/MZq/oxGgH+TyRF3XcYDjG8dbJCpHO5nQ5Cy9h\nQIp3/Bh09kET6lk+4QlofNgHKVT2epV8iK1cXlbQe2tZtfCUtxk+pxvU0UHXp+AB\n0xc3/gIhjZp/dePmCOyQyGPJbp5bpO4UeAJ6frqhexmNlaw9Z897ltZmRLGq1p4a\nRnWL8FPkBz9SCSKXS8uNyV5oMNVn4G1obCkc106iWuKBTibffYQzq5TG8FYVJKrh\nRwWB6piacEB8hl20IIWSxIM3J9tT7CPSnk5RYYCTRHgA5OOrqZhC7JefudrP8n+M\npxkDgNORDu7GCfAuisrf7dXYjLsxG4tu22DBJJC0c/IpRpXDnOuJN1Q5e/3VUKKW\nmypNumuQpP5lc1ZFG64TRzb1HR6oIdHfbrVQfdiQXpvdcFx+Fl57WuUraXRV6qfb\n4ZmKHX1JEwM/7tu21QE4F1dz0jroLSricZxfaCTHHWNfvGJoZ30/MZUrpSC0IfB3\niQutxbZrwIlTBt+fGLtm3vDtwMFNWM+Rb1lrOxEQd2eijdxhvBOHtlIcswARAQAB\ntERIYXNoaUNvcnAgU2VjdXJpdHkgKGhhc2hpY29ycC5jb20vc2VjdXJpdHkpIDxz\nZWN1cml0eUBoYXNoaWNvcnAuY29tPokCVAQTAQoAPhYhBMh0AR8KtAURDQIQVTQ2\nXZRy10aPBQJgffsZAhsDBQkJZgGABQsJCAcCBhUKCQgLAgQWAgMBAh4BAheAAAoJ\nEDQ2XZRy10aPtpcP/0PhJKiHtC1zREpRTrjGizoyk4Sl2SXpBZYhkdrG++abo6zs\nbuaAG7kgWWChVXBo5E20L7dbstFK7OjVs7vAg/OLgO9dPD8n2M19rpqSbbvKYWvp\n0NSgvFTT7lbyDhtPj0/bzpkZEhmvQaDWGBsbDdb2dBHGitCXhGMpdP0BuuPWEix+\nQnUMaPwU51q9GM2guL45Tgks9EKNnpDR6ZdCeWcqo1IDmklloidxT8aKL21UOb8t\ncD+Bg8iPaAr73bW7Jh8TdcV6s6DBFub+xPJEB/0bVPmq3ZHs5B4NItroZ3r+h3ke\nVDoSOSIZLl6JtVooOJ2la9ZuMqxchO3mrXLlXxVCo6cGcSuOmOdQSz4OhQE5zBxx\nLuzA5ASIjASSeNZaRnffLIHmht17BPslgNPtm6ufyOk02P5XXwa69UCjA3RYrA2P\nQNNC+OWZ8qQLnzGldqE4MnRNAxRxV6cFNzv14ooKf7+k686LdZrP/3fQu2p3k5rY\n0xQUXKh1uwMUMtGR867ZBYaxYvwqDrg9XB7xi3N6aNyNQ+r7zI2lt65lzwG1v9hg\nFG2AHrDlBkQi/t3wiTS3JOo/GCT8BjN0nJh0lGaRFtQv2cXOQGVRW8+V/9IpqEJ1\nqQreftdBFWxvH7VJq2mSOXUJyRsoUrjkUuIivaA9Ocdipk2CkP8bpuGz7ZF4uQIN\nBGB9+xkBEACoklYsfvWRCjOwS8TOKBTfl8myuP9V9uBNbyHufzNETbhYeT33Cj0M\nGCNd9GdoaknzBQLbQVSQogA+spqVvQPz1MND18GIdtmr0BXENiZE7SRvu76jNqLp\nKxYALoK2Pc3yK0JGD30HcIIgx+lOofrVPA2dfVPTj1wXvm0rbSGA4Wd4Ng3d2AoR\nG/wZDAQ7sdZi1A9hhfugTFZwfqR3XAYCk+PUeoFrkJ0O7wngaon+6x2GJVedVPOs\n2x/XOR4l9ytFP3o+5ILhVnsK+ESVD9AQz2fhDEU6RhvzaqtHe+sQccR3oVLoGcat\nma5rbfzH0Fhj0JtkbP7WreQf9udYgXxVJKXLQFQgel34egEGG+NlbGSPG+qHOZtY\n4uWdlDSvmo+1P95P4VG/EBteqyBbDDGDGiMs6lAMg2cULrwOsbxWjsWka8y2IN3z\n1stlIJFvW2kggU+bKnQ+sNQnclq3wzCJjeDBfucR3a5WRojDtGoJP6Fc3luUtS7V\n5TAdOx4dhaMFU9+01OoH8ZdTRiHZ1K7RFeAIslSyd4iA/xkhOhHq89F4ECQf3Bt4\nZhGsXDTaA/VgHmf3AULbrC94O7HNqOvTWzwGiWHLfcxXQsr+ijIEQvh6rHKmJK8R\n9NMHqc3L18eMO6bqrzEHW0Xoiu9W8Yj+WuB3IKdhclT3w0pO4Pj8gQARAQABiQI8\nBBgBCgAmFiEEyHQBHwq0BRENAhBVNDZdlHLXRo8FAmB9+xkCGwwFCQlmAYAACgkQ\nNDZdlHLXRo9ZnA/7BmdpQLeTjEiXEJyW46efxlV1f6THn9U50GWcE9tebxCXgmQf\nu+Uju4hreltx6GDi/zbVVV3HCa0yaJ4JVvA4LBULJVe3ym6tXXSYaOfMdkiK6P1v\nJgfpBQ/b/mWB0yuWTUtWx18BQQwlNEQWcGe8n1lBbYsH9g7QkacRNb8tKUrUbWlQ\nQsU8wuFgly22m+Va1nO2N5C/eE/ZEHyN15jEQ+QwgQgPrK2wThcOMyNMQX/VNEr1\nY3bI2wHfZFjotmek3d7ZfP2VjyDudnmCPQ5xjezWpKbN1kvjO3as2yhcVKfnvQI5\nP5Frj19NgMIGAp7X6pF5Csr4FX/Vw316+AFJd9Ibhfud79HAylvFydpcYbvZpScl\n7zgtgaXMCVtthe3GsG4gO7IdxxEBZ/Fm4NLnmbzCIWOsPMx/FxH06a539xFq/1E2\n1nYFjiKg8a5JFmYU/4mV9MQs4bP/3ip9byi10V+fEIfp5cEEmfNeVeW5E7J8PqG9\nt4rLJ8FR4yJgQUa2gs2SNYsjWQuwS/MJvAv4fDKlkQjQmYRAOp1SszAnyaplvri4\nncmfDsf0r65/sd6S40g5lHH8LIbGxcOIN6kwthSTPWX89r42CbY8GzjTkaeejNKx\nv1aCrO58wAtursO1DiXCvBY7+NdafMRnoHwBk50iPqrVkNA8fv+auRyB2/G5Ag0E\nYH3+JQEQALivllTjMolxUW2OxrXb+a2Pt6vjCBsiJzrUj0Pa63U+lT9jldbCCfgP\nwDpcDuO1O05Q8k1MoYZ6HddjWnqKG7S3eqkV5c3ct3amAXp513QDKZUfIDylOmhU\nqvxjEgvGjdRjz6kECFGYr6Vnj/p6AwWv4/FBRFlrq7cnQgPynbIH4hrWvewp3Tqw\nGVgqm5RRofuAugi8iZQVlAiQZJo88yaztAQ/7VsXBiHTn61ugQ8bKdAsr8w/ZZU5\nHScHLqRolcYg0cKN91c0EbJq9k1LUC//CakPB9mhi5+aUVUGusIM8ECShUEgSTCi\nKQiJUPZ2CFbbPE9L5o9xoPCxjXoX+r7L/WyoCPTeoS3YRUMEnWKvc42Yxz3meRb+\nBmaqgbheNmzOah5nMwPupJYmHrjWPkX7oyyHxLSFw4dtoP2j6Z7GdRXKa2dUYdk2\nx3JYKocrDoPHh3Q0TAZujtpdjFi1BS8pbxYFb3hHmGSdvz7T7KcqP7ChC7k2RAKO\nGiG7QQe4NX3sSMgweYpl4OwvQOn73t5CVWYp/gIBNZGsU3Pto8g27vHeWyH9mKr4\ncSepDhw+/X8FGRNdxNfpLKm7Vc0Sm9Sof8TRFrBTqX+vIQupYHRi5QQCuYaV6OVr\nITeegNK3So4m39d6ajCR9QxRbmjnx9UcnSYYDmIB6fpBuwT0ogNtABEBAAGJBHIE\nGAEKACYCGwIWIQTIdAEfCrQFEQ0CEFU0Nl2UctdGjwUCYH4bgAUJAeFQ2wJAwXQg\nBBkBCgAdFiEEs2y6kaLAcwxDX8KAsLRBCXaFtnYFAmB9/iUACgkQsLRBCXaFtnYX\nBhAAlxejyFXoQwyGo9U+2g9N6LUb/tNtH29RHYxy4A3/ZUY7d/FMkArmh4+dfjf0\np9MJz98Zkps20kaYP+2YzYmaizO6OA6RIddcEXQDRCPHmLts3097mJ/skx9qLAf6\nrh9J7jWeSqWO6VW6Mlx8j9m7sm3Ae1OsjOx/m7lGZOhY4UYfY627+Jf7WQ5103Qs\nlgQ09es/vhTCx0g34SYEmMW15Tc3eCjQ21b1MeJD/V26npeakV8iCZ1kHZHawPq/\naCCuYEcCeQOOteTWvl7HXaHMhHIx7jjOd8XX9V+UxsGz2WCIxX/j7EEEc7CAxwAN\nnWp9jXeLfxYfjrUB7XQZsGCd4EHHzUyCf7iRJL7OJ3tz5Z+rOlNjSgci+ycHEccL\nYeFAEV+Fz+sj7q4cFAferkr7imY1XEI0Ji5P8p/uRYw/n8uUf7LrLw5TzHmZsTSC\nUaiL4llRzkDC6cVhYfqQWUXDd/r385OkE4oalNNE+n+txNRx92rpvXWZ5qFYfv7E\n95fltvpXc0iOugPMzyof3lwo3Xi4WZKc1CC/jEviKTQhfn3WZukuF5lbz3V1PQfI\nxFsYe9WYQmp25XGgezjXzp89C/OIcYsVB1KJAKihgbYdHyUN4fRCmOszmOUwEAKR\n3k5j4X8V5bk08sA69NVXPn2ofxyk3YYOMYWW8ouObnXoS8QJEDQ2XZRy10aPMpsQ\nAIbwX21erVqUDMPn1uONP6o4NBEq4MwG7d+fT85rc1U0RfeKBwjucAE/iStZDQoM\nZKWvGhFR+uoyg1LrXNKuSPB82unh2bpvj4zEnJsJadiwtShTKDsikhrfFEK3aCK8\nZuhpiu3jxMFDhpFzlxsSwaCcGJqcdwGhWUx0ZAVD2X71UCFoOXPjF9fNnpy80YNp\nflPjj2RnOZbJyBIM0sWIVMd8F44qkTASf8K5Qb47WFN5tSpePq7OCm7s8u+lYZGK\nwR18K7VliundR+5a8XAOyUXOL5UsDaQCK4Lj4lRaeFXunXl3DJ4E+7BKzZhReJL6\nEugV5eaGonA52TWtFdB8p+79wPUeI3KcdPmQ9Ll5Zi/jBemY4bzasmgKzNeMtwWP\nfk6WgrvBwptqohw71HDymGxFUnUP7XYYjic2sVKhv9AevMGycVgwWBiWroDCQ9Ja\nbtKfxHhI2p+g+rcywmBobWJbZsujTNjhtme+kNn1mhJsD3bKPjKQfAxaTskBLb0V\nwgV21891TS1Dq9kdPLwoS4XNpYg2LLB4p9hmeG3fu9+OmqwY5oKXsHiWc43dei9Y\nyxZ1AAUOIaIdPkq+YG/PhlGE4YcQZ4RPpltAr0HfGgZhmXWigbGS+66pUj+Ojysc\nj0K5tCVxVu0fhhFpOlHv0LWaxCbnkgkQH9jfMEJkAWMOuQINBGCAXCYBEADW6RNr\nZVGNXvHVBqSiOWaxl1XOiEoiHPt50Aijt25yXbG+0kHIFSoR+1g6Lh20JTCChgfQ\nkGGjzQvEuG1HTw07YhsvLc0pkjNMfu6gJqFox/ogc53mz69OxXauzUQ/TZ27GDVp\nUBu+EhDKt1s3OtA6Bjz/csop/Um7gT0+ivHyvJ/jGdnPEZv8tNuSE/Uo+hn/Q9hg\n8SbveZzo3C+U4KcabCESEFl8Gq6aRi9vAfa65oxD5jKaIz7cy+pwb0lizqlW7H9t\nQlr3dBfdIcdzgR55hTFC5/XrcwJ6/nHVH/xGskEasnfCQX8RYKMuy0UADJy72TkZ\nbYaCx+XXIcVB8GTOmJVoAhrTSSVLAZspfCnjwnSxisDn3ZzsYrq3cV6sU8b+QlIX\n7VAjurE+5cZiVlaxgCjyhKqlGgmonnReWOBacCgL/UvuwMmMp5TTLmiLXLT7uxeG\nojEyoCk4sMrqrU1jevHyGlDJH9Taux15GILDwnYFfAvPF9WCid4UZ4Ouwjcaxfys\n3LxNiZIlUsXNKwS3mhiMRL4TRsbs4k4QE+LIMOsauIvcvm8/frydvQ/kUwIhVTH8\n0XGOH909bYtJvY3fudK7ShIwm7ZFTduBJUG473E/Fn3VkhTmBX6+PjOC50HR/Hyb\nwaRCzfDruMe3TAcE/tSP5CUOb9C7+P+hPzQcDwARAQABiQRyBBgBCgAmFiEEyHQB\nHwq0BRENAhBVNDZdlHLXRo8FAmCAXCYCGwIFCQlmAYACQAkQNDZdlHLXRo/BdCAE\nGQEKAB0WIQQ3TsdbSFkTYEqDHMfIIMbVzSerhwUCYIBcJgAKCRDIIMbVzSerh0Xw\nD/9ghnUsoNCu1OulcoJdHboMazJvDt/znttdQSnULBVElgM5zk0Uyv87zFBzuCyQ\nJWL3bWesQ2uFx5fRWEPDEfWVdDrjpQGb1OCCQyz1QlNPV/1M1/xhKGS9EeXrL8Dw\nF6KTGkRwn1yXiP4BGgfeFIQHmJcKXEZ9HkrpNb8mcexkROv4aIPAwn+IaE+NHVtt\nIBnufMXLyfpkWJQtJa9elh9PMLlHHnuvnYLvuAoOkhuvs7fXDMpfFZ01C+QSv1dz\nHm52GSStERQzZ51w4c0rYDneYDniC/sQT1x3dP5Xf6wzO+EhRMabkvoTbMqPsTEP\nxyWr2pNtTBYp7pfQjsHxhJpQF0xjGN9C39z7f3gJG8IJhnPeulUqEZjhRFyVZQ6/\nsiUeq7vu4+dM/JQL+i7KKe7Lp9UMrG6NLMH+ltaoD3+lVm8fdTUxS5MNPoA/I8cK\n1OWTJHkrp7V/XaY7mUtvQn5V1yET5b4bogz4nME6WLiFMd+7x73gB+YJ6MGYNuO8\ne/NFK67MfHbk1/AiPTAJ6s5uHRQIkZcBPG7y5PpfcHpIlwPYCDGYlTajZXblyKrw\nBttVnYKvKsnlysv11glSg0DphGxQJbXzWpvBNyhMNH5dffcfvd3eXJAxnD81GD2z\nZAriMJ4Av2TfeqQ2nxd2ddn0jX4WVHtAvLXfCgLM2Gveho4jD/9sZ6PZz/rEeTvt\nh88t50qPcBa4bb25X0B5FO3TeK2LL3VKLuEp5lgdcHVonrcdqZFobN1CgGJua8TW\nSprIkh+8ATZ/FXQTi01NzLhHXT1IQzSpFaZw0gb2f5ruXwvTPpfXzQrs2omY+7s7\nfkCwGPesvpSXPKn9v8uhUwD7NGW/Dm+jUM+QtC/FqzX7+/Q+OuEPjClUh1cqopCZ\nEvAI3HjnavGrYuU6DgQdjyGT/UDbuwbCXqHxHojVVkISGzCTGpmBcQYQqhcFRedJ\nyJlu6PSXlA7+8Ajh52oiMJ3ez4xSssFgUQAyOB16432tm4erpGmCyakkoRmMUn3p\nwx+QIppxRlsHznhcCQKR3tcblUqH3vq5i4/ZAihusMCa0YrShtxfdSb13oKX+pFr\naZXvxyZlCa5qoQQBV1sowmPL1N2j3dR9TVpdTyCFQSv4KeiExmowtLIjeCppRBEK\neeYHJnlfkyKXPhxTVVO6H+dU4nVu0ASQZ07KiQjbI+zTpPKFLPp3/0sPRJM57r1+\naTS71iR7nZNZ1f8LZV2OvGE6fJVtgJ1J4Nu02K54uuIhU3tg1+7Xt+IqwRc9rbVr\npHH/hFCYBPW2D2dxB+k2pQlg5NI+TpsXj5Zun8kRw5RtVb+dLuiH/xmxArIee8Jq\nZF5q4h4I33PSGDdSvGXn9UMY5Isjpg==\n=7pIB\n-----END PGP PUBLIC KEY BLOCK-----",
"trustSignature": "5.0",
"source": "HashiCorp",
"sourceUrl": "https://www.hashicorp.com/security.html"
}
}
}


terraform {
required_providers {
random = {
source = "terrakube-reg.minikube.net/simple/random"
version = "3.0.1"
}
}
}user@pop-os:~/git/simple-terraform$ terraform init
Initializing the backend...
Initializing modules...
Initializing provider plugins...
- Finding terrakube-reg.minikube.net/simple/random versions matching "3.0.1"...
- Finding latest version of hashicorp/null...
- Finding latest version of hashicorp/time...
- Finding latest version of hashicorp/random...
- Installing hashicorp/null v3.2.2...
- Installed hashicorp/null v3.2.2 (signed by HashiCorp)
- Installing hashicorp/time v0.12.0...
- Installed hashicorp/time v0.12.0 (signed by HashiCorp)
- Installing hashicorp/random v3.6.2...
- Installed hashicorp/random v3.6.2 (signed by HashiCorp)
- Installing terrakube-reg.minikube.net/simple/random v3.0.1...
- Installed terrakube-reg.minikube.net/simple/random v3.0.1 (signed by HashiCorp)
Terraform has created a lock file .terraform.lock.hcl to record the provider
selections it made above. Include this file in your version control repository
so that Terraform can guarantee to make the same selections by default when
you run "terraform init" in the future.
Terraform has been successfully initialized!
You may now begin working with Terraform. Try running "terraform plan" to see
any changes that are required for your infrastructure. All Terraform commands
should now work.
If you ever set or change modules or backend configuration for Terraform,
rerun this command to reinitialize your working directory. If you forget, other
commands will detect it and remind you to do so if necessary.export TERRAKUBE_SERVER="my-terrakube.com"
export TERRAKUBE_PATH="terrakube"
export TERRAKUBE_SCHEME="https"
export TERRAKUBE_TENANT_ID="59a1b348-548d-4360-b2e2-9d2b849527a8"
export TERRAKUBE_CLIENT_ID="7a307a36-e08b-4954-a9fb-03a67e082fc4"
terrakube loginTo sign in, use a web browser to open the page
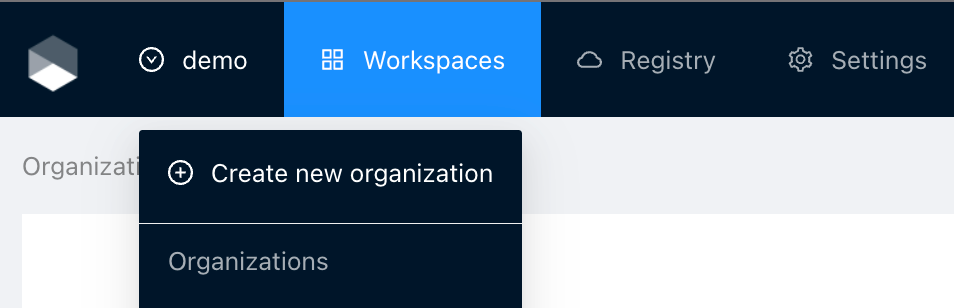
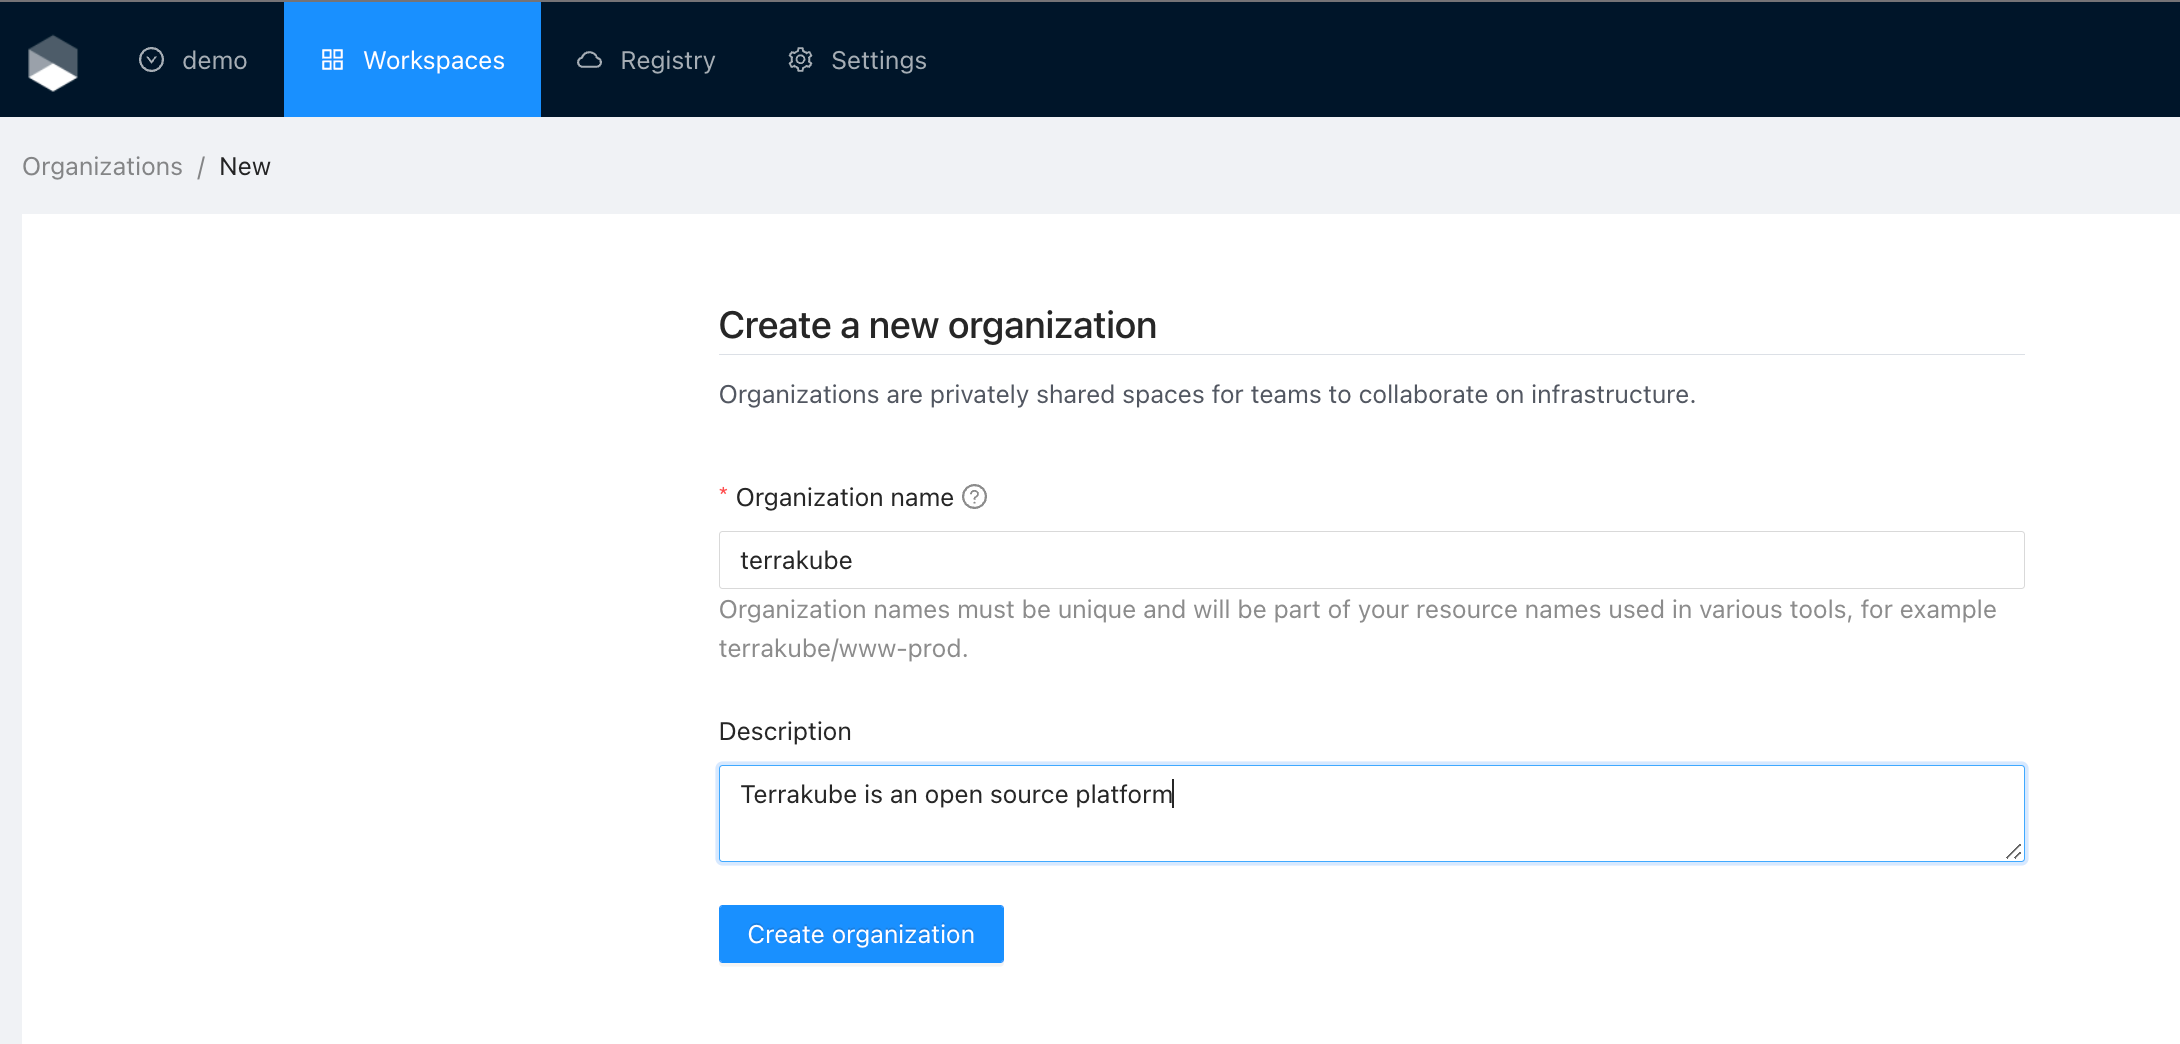
https://microsoft.com/devicelogin and enter the code AAM4MVU96 to authenticate.terrakube organization listterrakube organization create --name MyOrganization --description "Getting started Organization" {
"attributes": {
"description": "Getting started Organization",
"name": "MyOrganization"
},
"id": "8a6e9998-165c-49f0-953c-d3fb0924731a",
"relationships": {
"job": {},
"module": {},
"workspace": {}
},
"type": "organization"
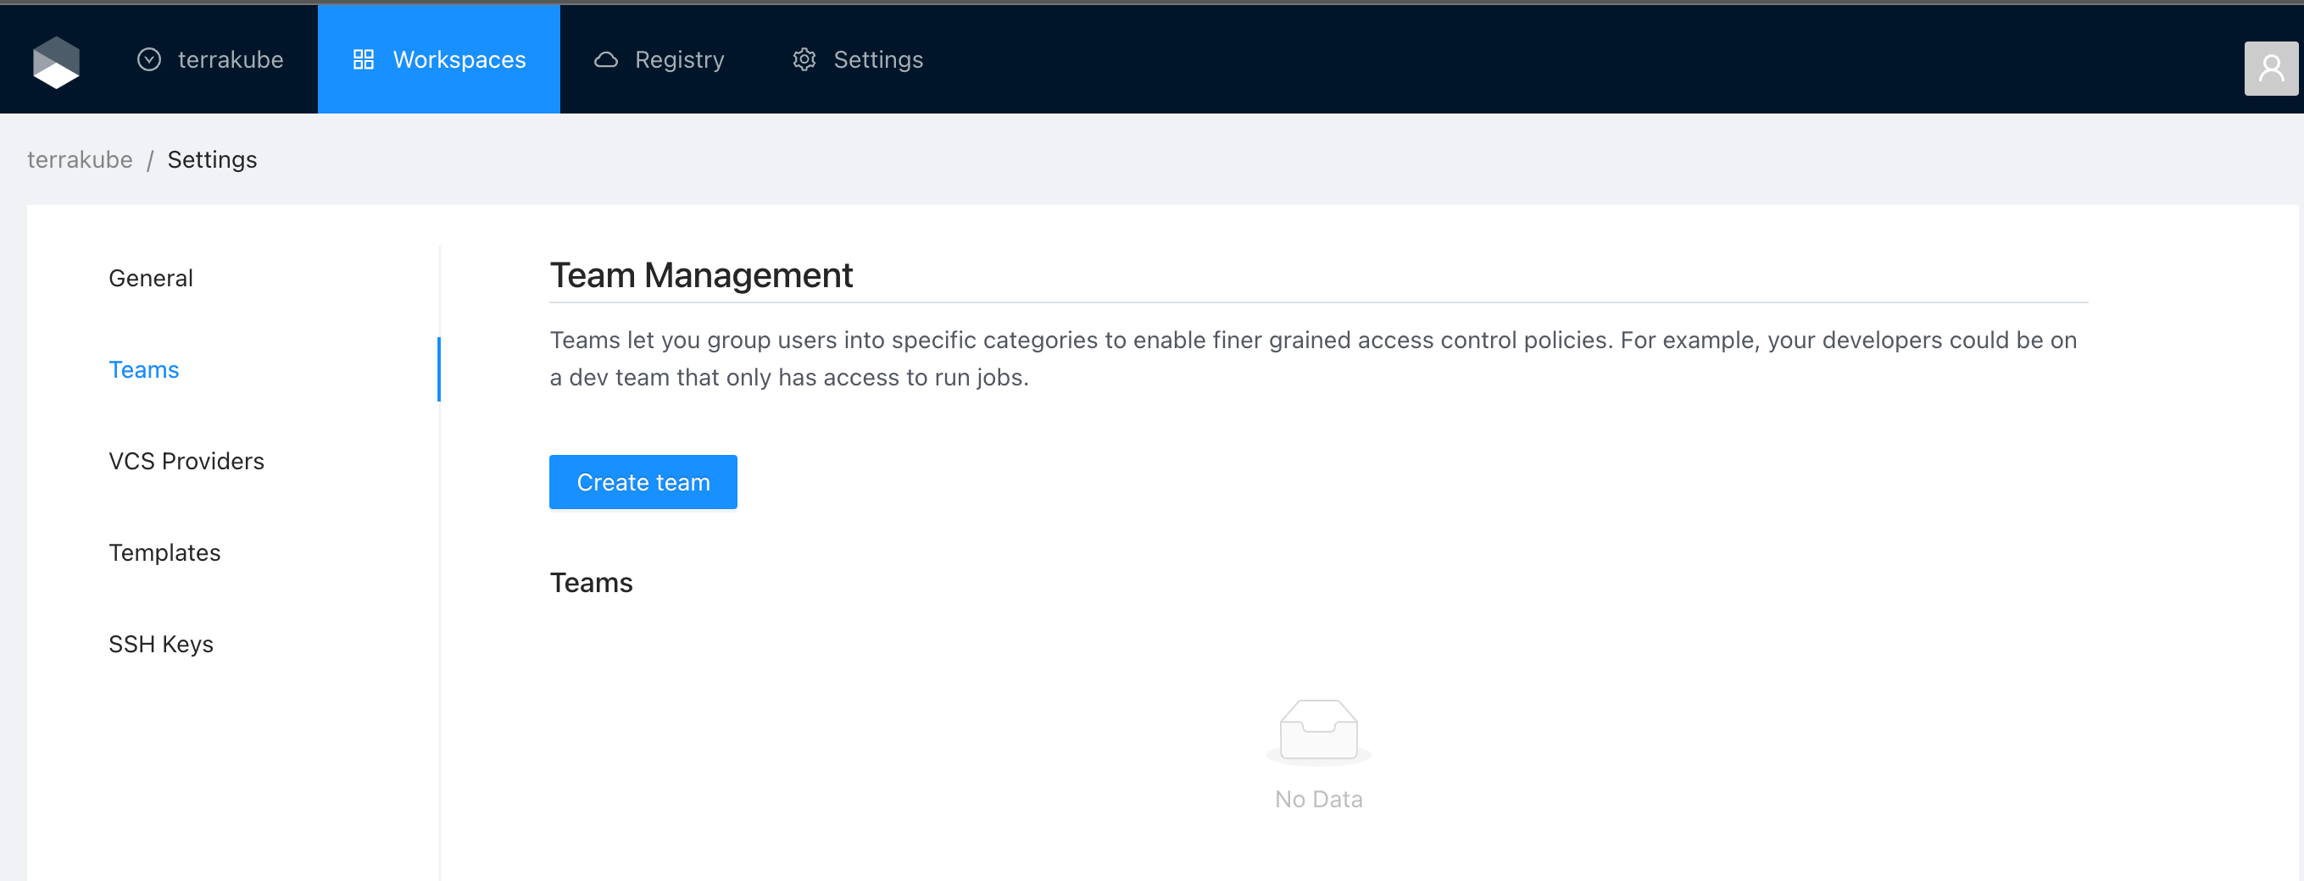
}terrakube team create --organization-id 8a6e9998-165c-49f0-953c-d3fb0924731a --name AZB_USER --manage-workspace=true --manage-module=true --manage-provider=trueterrakube workspace create --organization-id 8a6e9998-165c-49f0-953c-d3fb0924731a --name MyWorkspace --source https://github.com/AzBuilder/terraform-sample-repository.git --branch master --terraform-version 0.15.0terrakube workspace variable create --organization-id 8a6e9998-165c-49f0-953c-d3fb0924731a --workspace-id 38b6635a-d38e-46f2-a95e-d00a416de4fd --key tag_name --value "Hola mundo" --hcl=false --sensitive=false --category TERRAFORM export TERRAKUBE_ORGANIZATION_ID=8a6e9998-165c-49f0-953c-d3fb0924731a
terrakube workspace create --name MyWorkspace --source https://github.com/AzBuilder/terraform-sample-repository.git --branch master --terraform-version 0.15.0
export TERRAKUBE_WORKSPACE_ID=38b6635a-d38e-46f2-a95e-d00a416de4fd
terrakube workspace variable create --key tag_name --value "Hola mundo" --hcl=false --sensitive=false --category TERRAFORM terrakube job create --organization-id 8a6e9998-165c-49f0-953c-d3fb0924731a --workspace-id 38b6635a-d38e-46f2-a95e-d00a416de4fd --command apply terrakube job list --organization-id 8a6e9998-165c-49f0-953c-d3fb0924731aterrakube module create --organization-id 8a6e9998-165c-49f0-953c-d3fb0924731a --name myModule --description "module description" --provider azurerm --source https://github.com/AzBuilder/terraform-sample-repository.git # without shorthand
terrakube organization create --name MyOrganization --description "Getting started Organization"
# using shorthand
terrakube organization create -n MyOrganization -d "Getting started Organization" # without alias
terrakube organization create --name MyOrganization --description "Getting started Organization"
# using alias and shorthand
terrakube org create -n MyOrganization -d "Getting started Organization"# creating multiple modules without env variables
terrakube module create --organization-id 8a6e9998-165c-49f0-953c-d3fb0924731a --name myModule --description "module description" --provider azurerm --source https://github.com/AzBuilder/terraform-sample-repository.git
terrakube module create --organization-id 8a6e9998-165c-49f0-953c-d3fb0924731a --name myModule2 --description "module description 2" --provider azurerm --source https://github.com/AzBuilder/terraform-sample-repository.git
terrakube module create --organization-id 8a6e9998-165c-49f0-953c-d3fb0924731a --name myModule3 --description "module description 3" --provider azurerm --source https://github.com/AzBuilder/terraform-sample-repository.git
# creating multiple modules using shorthand, alias and env variables
export TERRAKUBE_ORGANIZATION_ID=8a6e9998-165c-49f0-953c-d3fb0924731a
terrakube mod create -n myModule -d "module description" -p azurerm -s https://github.com/AzBuilder/terraform-sample-repository.git
terrakube mod create -n myModule2 -d "module description 2" -p azurerm -s https://github.com/AzBuilder/terraform-sample-repository.git
terrakube mod create -n myModule3 -d "module description 3" -p azurerm -s https://github.com/AzBuilder/terraform-sample-repository.gitflow:
- name: "Plan"
type: "terraformPlan"
step: 100
- name: "Apply"
type: "terraformApply"
step: 200flow:
- type: "terraformPlanDestroy"
name: "Terraform Plan Destroy from Terraform CLI"
step: 100
- type: "approval"
name: "Approve Plan from Terraform CLI"
step: 150
team: "TERRAFORM_CLI"
- type: "terraformApply"
name: "Terraform Apply from Terraform CLI"
step: 200flow:
- type: "terraformDestroy"
step: 100
- type: "disableWorkspace"
step: 200flow:
- name: "Plan"
type: "terraformPlan"
step: 100
commands:
- runtime: "GROOVY"
priority: 100
before: true
script: |
@Grapes([
@Grab('commons-io:commons-io:2.8.0'),
@Grab('org.apache.commons:commons-compress:1.21'),
])
import org.apache.commons.io.FileUtils
class TerraTagDownloader {
def downloadTerraTag(workingDirectory, version, os, arch) {
String terraTagFile = "terratag_${version}_${os}_${arch}.tar.gz"
String terraTagURL = "https://github.com/env0/terratag/releases/download/v${version}/${terraTagFile}"
println "Downloading $terraTagURL"
FileUtils.copyURLToFile(new URL(terraTagURL), new File("${workingDirectory}/${terraTagFile}"))
}
}
new TerraTagDownloader().downloadTerraTag("$workingDirectory", "0.1.29", "darwin", "amd64")
"TerraTag Download Compledted..."
- runtime: "BASH"
priority: 200
before: true
script: |
cd $workingDirectory;
tar -xvf terratag_0.1.29_darwin_amd64.tar.gz;
chmod +x terratag;
./terratag -tags="{\"environment_id\": \"development\"}"
- name: "Apply"
type: "terraformApply"
step: 300
- name: "Destroy"
type: "terraformDestroy"
step: 400flow:
- name: "Plan"
type: "terraformPlan"
step: 100
commands:
- runtime: "GROOVY"
priority: 100
before: true
script: |
import TerraTag
new TerraTag().loadTool(
"$workingDirectory",
"$bashToolsDirectory",
"0.1.30")
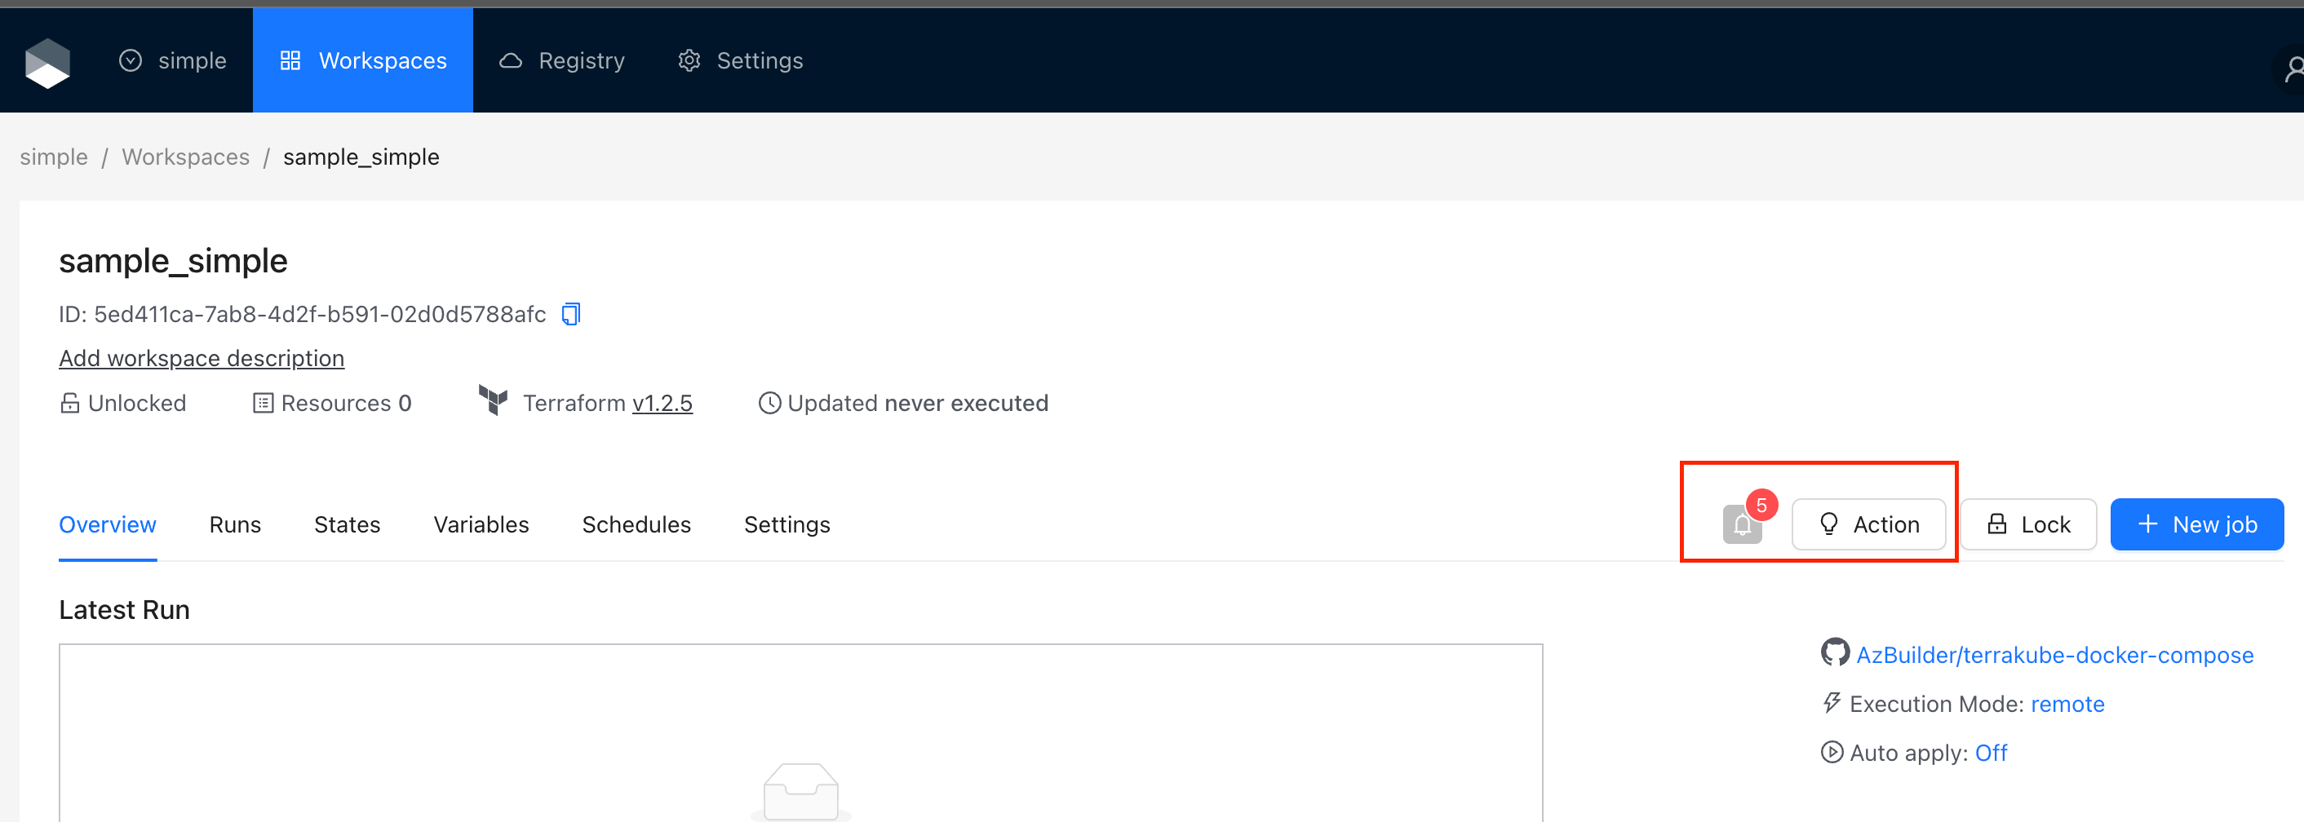
"Terratag download completed"Create Action({ context }) => {
return (
<Button>
Quick Start
</Button>
);
};({ context }) => {
const [messageApi, contextHolder] = message.useMessage();
const showMessage = () => {
messageApi.success('Hello Actions');
};
return (
<>
{contextHolder}
<Button onClick={showMessage}>
Quick Start
</Button>
</>
);
};({ context }) => {
const [messageApi, contextHolder] = window.antd.message.useMessage();
const showMessage = () => {
messageApi.success(`Hello ${context.workspace.attributes.name}`);
};
return (
<>
{contextHolder}
<Button onClick={showMessage}>
Quick Start
</Button>
</>
);
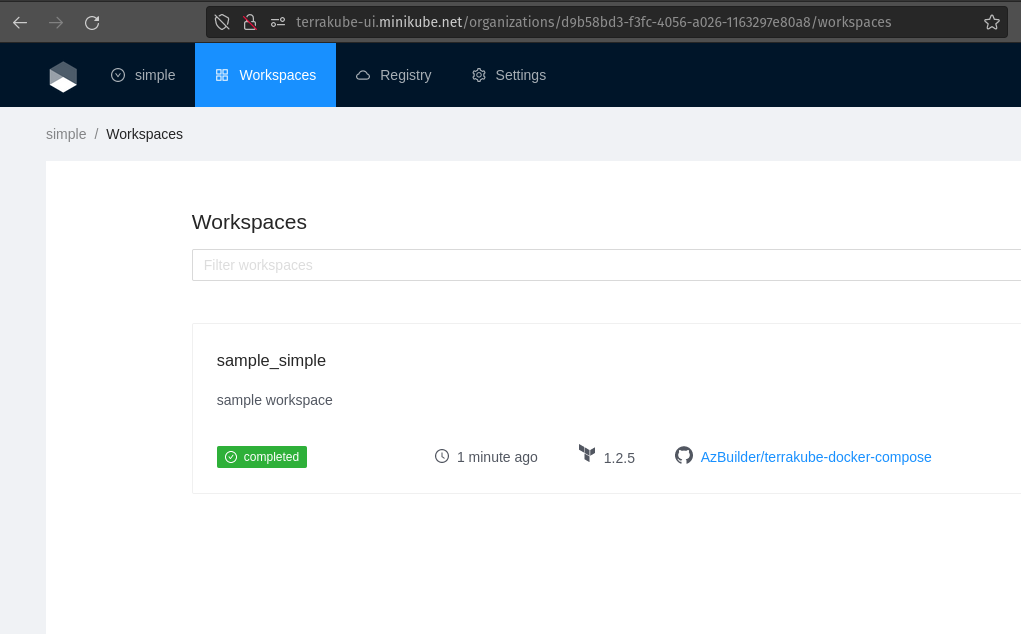
};context.workspace.attributes.name === "sample_simple"({ context }) => {
const [dialogVisible, setDialogVisible] = useState(false);
const [loading, setLoading] = useState(false);
const [comments, setComments] = useState([]);
const fetchData = async () => {
setLoading(true);
try {
const response = await axiosInstance.get(`${context.apiUrl}/proxy/v1`, {
params: {
targetUrl: 'https://jsonplaceholder.typicode.com/posts/1/comments',
proxyheaders: JSON.stringify({
'Content-Type': 'application/json',
}),
workspaceId: context.workspace.id
}
});
setComments(response.data);
setDialogVisible(true);
} catch (error) {
console.error('Error fetching data:', error);
message.error('Error fetching data');
} finally {
setLoading(false);
}
};
const closeDialog = () => {
setDialogVisible(false);
};
return (
<>
<Button
type="default"
onClick={fetchData}
loading={loading}
>
Quick Start
</Button>
<Modal
title="Comments"
visible={dialogVisible}
onCancel={closeDialog}
footer={[
<Button key="close" onClick={closeDialog}>
Close
</Button>,
]}
>
{comments.map((comment) => (
<div key={comment.id} style={{ marginBottom: '10px' }}>
<p><b>ID:</b> {comment.id}</p>
<p><b>Name:</b> {comment.name}</p>
<p><b>Email:</b> {comment.email}</p>
<p><b>Comment:</b> {comment.body}</p>
</div>
))}
</Modal>
</>
);
};## Dex
dex:
config:
issuer: https://api.terrakube.azure.com/dex
storage:
type: memory
oauth2:
responseTypes: ["code", "token", "id_token"]
skipApprovalScreen: true
web:
allowedOrigins: ['*']
staticClients:
- id: microsoft
redirectURIs:
- 'https://ui.terrakube.azure.com'
- 'http://localhost:10001/login'
- 'http://localhost:10000/login'
- '/device/callback'
name: 'microsoft'
public: true
connectors:
- type: microsoft
id: microsoft
name: microsoft
config:
clientID: "<<CHANGE_THIS>>"
clientSecret: "<<CHANGE_THIS>>"
redirectURI: "https://api.terrakube.azure.com/dex/callback"
tenant: "<<CHANGE_THIS>>"git clone https://github.com/AzBuilder/terrakube-helm-chart.git## Global Name
name: "terrakube"
## Terrakube Security
security:
adminGroup: "<<CHANGE_THIS>>" # The value should be a valida azure ad group (example: TERRAKUBE_ADMIN)
patSecret: "<<CHANGE_THIS>>" # Sample Key 32 characters z6QHX!y@Nep2QDT!53vgH43^PjRXyC3X
internalSecret: "<<CHANGE_THIS>>" # Sample Key 32 characters Kb^8cMerPNZV6hS!9!kcD*KuUPUBa^B3
dexClientId: "microsoft"
dexClientScope: "email openid profile offline_access groups"
## Terraform Storage
storage:
azure:
storageAccountName: "XXXXXXX" # <<CHANGE_THIS>>
storageAccountResourceGroup: "XXXXXXX" # <<CHANGE_THIS>>
storageAccountAccessKey: "XXXXXXX" # <<CHANGE_THIS>>
## Dex
dex:
config:
issuer: https://api.terrakube.azure.com/dex
storage:
type: memory
oauth2:
responseTypes: ["code", "token", "id_token"]
skipApprovalScreen: true
web:
allowedOrigins: ['*']
staticClients:
- id: microsoft
redirectURIs:
- 'https://ui.terrakube.azure.com'
- 'http://localhost:10001/login'
- 'http://localhost:10000/login'
- '/device/callback'
name: 'microsoft'
public: true
connectors:
- type: microsoft
id: microsoft
name: microsoft
config:
clientID: "<<CHANGE_THIS>>"
clientSecret: "<<CHANGE_THIS>>"
redirectURI: "https://api.terrakube.azure.com/dex/callback"
tenant: "<<CHANGE_THIS>>"
## API properties
api:
enabled: true
replicaCount: "1"
serviceType: "ClusterIP"
properties:
databaseType: "H2"
## Executor properties
executor:
enabled: true
replicaCount: "1"
serviceType: "ClusterIP"
properties:
toolsRepository: "https://github.com/AzBuilder/terrakube-extensions"
toolsBranch: "main"
## Registry properties
registry:
enabled: true
replicaCount: "1"
serviceType: "ClusterIP"
## UI Properties
ui:
enabled: true
replicaCount: "1"
serviceType: "ClusterIP"
## Ingress properties
ingress:
useTls: true
ui:
enabled: true
domain: "ui.terrakube.azure.com"
path: "/(.*)"
pathType: "Prefix"
annotations:
kubernetes.io/ingress.class: nginx
nginx.ingress.kubernetes.io/use-regex: "true"
cert-manager.io/cluster-issuer: letsencrypt
api:
enabled: true
domain: "api.terrakube.azure.com"
path: "/(.*)"
pathType: "Prefix"
annotations:
kubernetes.io/ingress.class: nginx
nginx.ingress.kubernetes.io/use-regex: "true"
nginx.ingress.kubernetes.io/configuration-snippet: "proxy_set_header Authorization $http_authorization;"
cert-manager.io/cluster-issuer: letsencrypt
registry:
enabled: true
domain: "registry.terrakube.azure.com"
path: "/(.*)"
pathType: "Prefix"
annotations:
kubernetes.io/ingress.class: nginx
nginx.ingress.kubernetes.io/use-regex: "true"
nginx.ingress.kubernetes.io/configuration-snippet: "proxy_set_header Authorization $http_authorization;"
cert-manager.io/cluster-issuer: letsencrypt
dex:
enabled: true
path: "/dex/(.*)"
pathType: "Prefix"
annotations:
kubernetes.io/ingress.class: nginx
nginx.ingress.kubernetes.io/use-regex: "true"
nginx.ingress.kubernetes.io/configuration-snippet: "proxy_set_header Authorization $http_authorization;"
cert-manager.io/cluster-issuer: letsencrypt
helm install --debug --values ./values.yaml terrakube ./terrakube-helm-chart/ -n terrakube
flow:
- type: "terraformPlan"
name: "Terraform Plan with Cost Estimation"
step: 100
commands:
- runtime: "GROOVY"
priority: 100
after: true
script: |
import Infracost
String credentials = "version: \"0.1\"\n" +
"api_key: $INFRACOST_KEY \n" +
"pricing_api_endpoint: https://pricing.api.infracost.io"
new Infracost().loadTool(
"$workingDirectory",
"$bashToolsDirectory",
"0.10.12",
credentials)
"Infracost Download Completed..."
- runtime: "BASH"
priority: 200
after: true
script: |
terraform show -json terraformLibrary.tfPlan > plan.json;
INFRACOST_ENABLE_DASHBOARD=true infracost breakdown --path plan.json --format json --out-file infracost.json;
totalCost=$(jq -r '.totalMonthlyCost' infracost.json);
urlTotalCost=$(jq -r '.shareUrl' infracost.json);
echo "Total Monthly Cost: $totalCost USD"
echo "For more detail information please visit: $urlTotalCost"
if (($totalCost < 100));
then
echo "The total cost for the resource is below 100 USD. Deployment is approved";
else
echo "The total cost for the resource is above 100 USD, cancelling operation";
exit 1
fi;
- type: "terraformApply"
name: "Terraform Apply"
step: 200...
flow:
- type: "terraformPlan"
name: "Terraform Plan with Cost Estimation"
step: 100
...


# Linux Path /etc/hosts
# Windows Path c:\Windows\System32\Drivers\etc\hosts
127.0.0.1 ui.terrakube.docker.com
127.0.0.1 registry.terrakube.docker.com## Global Name
name: "terrakube"
## Terrakube Security
security:
adminGroup: "<<CHANGE_THIS>>" # This should be your Github team the format is OrganizationName:TeamName (Example: MyOrg:TERRAKUBE_ADMIN)
patSecret: "<<CHANGE_THIS>>" # Sample Key 32 characters z6QHX!y@Nep2QDT!53vgH43^PjRXyC3X
internalSecret: "<<CHANGE_THIS>>" # Sample Key 32 characters Kb^8cMerPNZV6hS!9!kcD*KuUPUBa^B3
dexClientId: "github"
dexClientScope: "email openid profile offline_access groups"
dexIssuerUri: "http://host.docker.internal/dex" # Change for your real domain
## Terraform Storage
storage:
# SELECT THE TYPE OF STORAGE THAT YOU WANT TO USE AND REPLACE THE VALUES
#azure:
# storageAccountName: "<<CHANGE_THIS>>"
# storageAccountResourceGroup: "<<CHANGE_THIS>>"
# storageAccountAccessKey: "<<CHANGE_THIS>>"
#aws:
# accessKey: "<<CHANGE_THIS>>"
# secretKey: "<<CHANGE_THIS>>"
# bucketName: "<<CHANGE_THIS>>"
# region: "<<CHANGE_THIS>>"
#gcp:
# projectId: "<<CHANGE_THIS>>"
# bucketName: "<<CHANGE_THIS>>"
# credentials: |
# ## GCP JSON CREDENTIALS for service account with access to read/write to the storage bucket
# {
# "type": "service_account",
# "project_id": "",
# "private_key_id": "",
# "private_key": "",
# "client_email": "",
# "client_id": "",
# "auth_uri": "",
# "token_uri": "",
# "auth_provider_x509_cert_url": "",
# "client_x509_cert_url": ""
# }
## Dex
dex:
enabled: true
version: "v2.32.0"
replicaCount: "1"
serviceType: "ClusterIP"
resources:
limits:
cpu: 512m
memory: 256Mi
requests:
cpu: 256m
memory: 128Mi
properties:
config:
issuer: http://host.docker.internal/dex
storage:
type: memory
oauth2:
responseTypes: ["code", "token", "id_token"]
skipApprovalScreen: true
web:
allowedOrigins: ["*"]
staticClients:
- id: github
redirectURIs:
- 'http://ui.terrakube.docker.com'
- 'http://localhost:10001/login'
- 'http://localhost:10000/login'
- '/device/callback'
name: 'github'
public: true
connectors:
- type: github
id: github
name: gitHub
config:
clientID: "<<CHANGE_THIS>>"
clientSecret: "<<CHANGE_THIS>>"
redirectURI: "http://host.docker.internal/dex/callback"
loadAllGroups: true
## API properties
api:
enabled: true
version: "2.6.0"
replicaCount: "1"
serviceType: "ClusterIP"
properties:
databaseType: "H2"
## Executor properties
executor:
enabled: true
version: "2.6.0"
replicaCount: "1"
serviceType: "ClusterIP"
properties:
toolsRepository: "https://github.com/AzBuilder/terrakube-extensions"
toolsBranch: "main"
## Registry properties
registry:
enabled: true
version: "2.6.0"
replicaCount: "1"
serviceType: "ClusterIP"
## UI Properties
ui:
enabled: true
version: "2.6.0"
replicaCount: "1"
serviceType: "ClusterIP"
## Ingress properties
ingress:
useTls: false
ui:
enabled: true
domain: "ui.terrakube.docker.com"
path: "/(.*)"
pathType: "Prefix"
annotations:
kubernetes.io/ingress.class: nginx
nginx.ingress.kubernetes.io/use-regex: "true"
cert-manager.io/cluster-issuer: letsencrypt
api:
enabled: true
domain: "host.docker.internal"
path: "/(.*)"
pathType: "Prefix"
annotations:
kubernetes.io/ingress.class: nginx
nginx.ingress.kubernetes.io/use-regex: "true"
nginx.ingress.kubernetes.io/configuration-snippet: "proxy_set_header Authorization $http_authorization;"
registry:
enabled: true
domain: "registry.terrakube.docker.com"
path: "/(.*)"
pathType: "Prefix"
annotations:
kubernetes.io/ingress.class: nginx
nginx.ingress.kubernetes.io/use-regex: "true"
nginx.ingress.kubernetes.io/configuration-snippet: "proxy_set_header Authorization $http_authorization;"
dex:
enabled: true
path: "/dex/(.*)"
pathType: "Prefix"
annotations:
kubernetes.io/ingress.class: nginx
nginx.ingress.kubernetes.io/use-regex: "true"
nginx.ingress.kubernetes.io/configuration-snippet: "proxy_set_header Authorization $http_authorization;"helm install --debug --values ./values.yaml terrakube ./terrakube-helm-chart/ -n terrakube## Dex
dex:
config:
issuer: https://terrakube-api.yourdomain.com/dex #<<CHANGE_THIS>>
storage:
type: memory
oauth2:
responseTypes: ["code", "token", "id_token"]
skipApprovalScreen: true
web:
allowedOrigins: ["*"]
staticClients:
- id: cognito
redirectURIs:
- 'https://ui.yourdomain.com' #<<CHANGE_THIS>>
- 'http://localhost:3000'
- 'http://localhost:10001/login'
- 'http://localhost:10000/login'
- '/device/callback'
name: 'cognito'
public: true
connectors:
- type: oidc
id: cognito
name: cognito
config:
issuer: "https://cognito-idp.XXXXX.amazonaws.com/XXXXXXX" #<<CHANGE_THIS>>
clientID: "XXXX" #<<CHANGE_THIS>>
clientSecret: "XXXXX" #<<CHANGE_THIS>>
redirectURI: "https://terrakube-api.yourdomain.com/dex/callback" #<<CHANGE_THIS>>
scopes:
- openid
- email
- profile
insecureSkipEmailVerified: true
insecureEnableGroups: true
userNameKey: "cognito:username"
claimMapping:
groups: "cognito:groups"git clone https://github.com/AzBuilder/terrakube-helm-chart.git## Global Name
name: "terrakube"
## Terrakube Security
security:
adminGroup: "<<CHANGE_THIS>>" # The value should be a valida azure ad group (example: TERRAKUBE_ADMIN)
patSecret: "<<CHANGE_THIS>>" # Sample Key 32 characters z6QHX!y@Nep2QDT!53vgH43^PjRXyC3X
internalSecret: "<<CHANGE_THIS>>" # Sample Key 32 characters Kb^8cMerPNZV6hS!9!kcD*KuUPUBa^B3
dexClientId: "cognito"
dexClientScope: "email openid profile offline_access groups"
## Terraform Storage
storage:
aws:
accessKey: "XXXXX" #<<CHANGE_THIS>>
secretKey: "XXXXX" #<<CHANGE_THIS>>
bucketName: "XXXXX" #<<CHANGE_THIS>>
region: "XXXXX" #<<CHANGE_THIS>>
## Dex
dex:
config:
issuer: https://terrakube-api.yourdomain.com/dex #<<CHANGE_THIS>>
storage:
type: memory
oauth2:
responseTypes: ["code", "token", "id_token"]
skipApprovalScreen: true
web:
allowedOrigins: ["*"]
staticClients:
- id: cognito
redirectURIs:
- 'https://ui.yourdomain.com' #<<CHANGE_THIS>>
- 'http://localhost:3000'
- 'http://localhost:10001/login'
- 'http://localhost:10000/login'
- '/device/callback'
name: 'cognito'
public: true
connectors:
- type: oidc
id: cognito
name: cognito
config:
issuer: "https://cognito-idp.XXXXX.amazonaws.com/XXXXXXX" #<<CHANGE_THIS>>
clientID: "XXXX" #<<CHANGE_THIS>>
clientSecret: "XXXXX" #<<CHANGE_THIS>>
redirectURI: "https://terrakube-api.yourdomain.com/dex/callback" #<<CHANGE_THIS>>
scopes:
- openid
- email
- profile
insecureSkipEmailVerified: true
insecureEnableGroups: true
userNameKey: "cognito:username"
claimMapping:
groups: "cognito:groups"
## API properties
api:
enabled: true
replicaCount: "1"
serviceType: "ClusterIP"
properties:
databaseType: "H2"
## Executor properties
executor:
enabled: true
replicaCount: "1"
serviceType: "ClusterIP"
properties:
toolsRepository: "https://github.com/AzBuilder/terrakube-extensions"
toolsBranch: "main"
## Registry properties
registry:
enabled: true
replicaCount: "1"
serviceType: "ClusterIP"
## UI Properties
ui:
enabled: true
replicaCount: "1"
serviceType: "ClusterIP"
## Ingress properties
ingress:
useTls: true
ui:
enabled: true
domain: "ui.terrakube.azure.com"
path: "/(.*)"
pathType: "Prefix"
annotations:
kubernetes.io/ingress.class: nginx
nginx.ingress.kubernetes.io/use-regex: "true"
cert-manager.io/cluster-issuer: letsencrypt
api:
enabled: true
domain: "api.terrakube.azure.com"
path: "/(.*)"
pathType: "Prefix"
annotations:
kubernetes.io/ingress.class: nginx
nginx.ingress.kubernetes.io/use-regex: "true"
nginx.ingress.kubernetes.io/configuration-snippet: "proxy_set_header Authorization $http_authorization;"
cert-manager.io/cluster-issuer: letsencrypt
registry:
enabled: true
domain: "registry.terrakube.azure.com"
path: "/(.*)"
pathType: "Prefix"
annotations:
kubernetes.io/ingress.class: nginx
nginx.ingress.kubernetes.io/use-regex: "true"
nginx.ingress.kubernetes.io/configuration-snippet: "proxy_set_header Authorization $http_authorization;"
cert-manager.io/cluster-issuer: letsencrypt
dex:
enabled: true
path: "/dex/(.*)"
pathType: "Prefix"
annotations:
kubernetes.io/ingress.class: nginx
nginx.ingress.kubernetes.io/use-regex: "true"
nginx.ingress.kubernetes.io/configuration-snippet: "proxy_set_header Authorization $http_authorization;"
cert-manager.io/cluster-issuer: letsencrypt
helm install --debug --values ./values.yaml terrakube ./terrakube-helm-chart/ -n terrakubeflow:
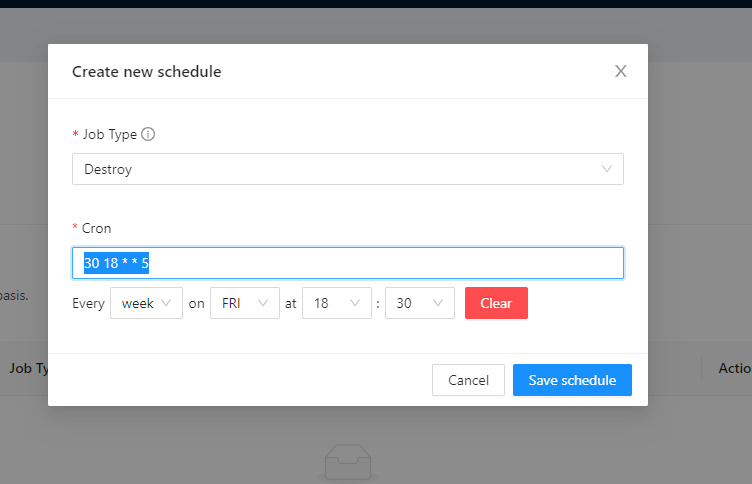
- type: "terraformDestroy"
name: "Destroy Playground"
step: 100
- type: "disableWorkspace"
name: "Delete Workspace"
step: 200
flow:
- type: "terraformPlan"
name: "Terraform Plan from Terraform CLI"
step: 100
- type: "approval"
name: "Approve Plan from Terraform CLI"
step: 150
team: "TERRAFORM_CLI"
- type: "terraformApply"
name: "Terraform Apply from Terraform CLI"
step: 200
- type: "scheduleTemplates"
step: 300
name: "Setup auto destroy"
templates:
- name: "delete-playground"
schedule: "0 0/5 * ? * * *"
name: "Setup auto destroy"
templates:
- name: "delete-playground"
schedule: "0 0/5 * ? * * *"terraform {
cloud {
organization = "playground"
hostname = "8080-azbuilder-terrakube-h128dcdc7l1.ws-us105.gitpod.io"
workspaces {
tags = ["myplayground", "example"]
}
}
}
resource "null_resource" "previous" {}
resource "time_sleep" "wait_5_seconds" {
depends_on = [null_resource.previous]
create_duration = "5s"
}
resource "null_resource" "next" {
depends_on = [time_sleep.wait_5_seconds]
}
output "creation_time" {
value = time_sleep.wait_5_seconds.create_duration
}terraform login 8080-azbuilder-terrakube-h128dcdc7l1.ws-us105.gitpod.ioPreparing the remote apply...
To view this run in a browser, visit:
https://8080-azbuilder-terrakube-h128dcdc7l1.ws-us105.gitpod.io/app/playground/myplayground/runs/1
Waiting for the plan to start...
***************************************
Running Terraform PLAN
***************************************
Terraform used the selected providers to generate the following execution
plan. Resource actions are indicated with the following symbols:
+ create
Terraform will perform the following actions:
# null_resource.next will be created
+ resource "null_resource" "next" {
+ id = (known after apply)
}
# null_resource.previous will be created
+ resource "null_resource" "previous" {
+ id = (known after apply)
}
# time_sleep.wait_5_seconds will be created
+ resource "time_sleep" "wait_5_seconds" {
+ create_duration = "5s"
+ id = (known after apply)
}
Plan: 3 to add, 0 to change, 0 to destroy.
Changes to Outputs:
+ creation_time = "5s"
Do you want to perform these actions in workspace "myplayground"?
Terraform will perform the actions described above.
Only 'yes' will be accepted to approve.
Enter a value: yes
null_resource.previous: Creating...
null_resource.previous: Creation complete after 0s [id=7198759863280029870]
time_sleep.wait_5_seconds: Creating...
time_sleep.wait_5_seconds: Creation complete after 5s [id=2023-10-18T16:05:14Z]
null_resource.next: Creating...
null_resource.next: Creation complete after 0s [id=855270182201609076]
Apply complete! Resources: 3 added, 0 changed, 0 destroyed.
Outputs:
creation_time = "5s"
...
- runtime: "GROOVY"
priority: 100
after: true
script: |
import Infracost
String credentials = "version: \"0.1\"\n" +
"api_key: $INFRACOST_KEY \n" +
"pricing_api_endpoint: https://pricing.api.infracost.io"
new Infracost().loadTool(
"$workingDirectory",
"$bashToolsDirectory",
"0.10.12",
credentials)
"Infracost Download Completed..."
......
- runtime: "BASH"
priority: 200
after: true
script: |
terraform show -json terraformLibrary.tfPlan > plan.json;
INFRACOST_ENABLE_DASHBOARD=true infracost breakdown --path plan.json --format json --out-file infracost.json;
totalCost=$(jq -r '.totalMonthlyCost' infracost.json);
urlTotalCost=$(jq -r '.shareUrl' infracost.json);
echo "Total Monthly Cost: $totalCost USD"
echo "For more detail information please visit: $urlTotalCost"
if (($totalCost < 100));
then
echo "The total cost for the resource is below 100 USD. Deployment is approved";
else
echo "The total cost for the resource is above 100 USD, cancelling operation";
exit 1
fi;
...terraform {
required_providers {
azurerm = {
source = "hashicorp/azurerm"
version = "=3.25.0"
}
}
}
provider "azurerm" {
features {}
}
resource "azurerm_resource_group" "example" {
name = "api-rg-pro"
location = "West Europe"
}
resource "azurerm_app_service_plan" "example" {
name = "api-appserviceplan-pro"
location = azurerm_resource_group.example.location
resource_group_name = azurerm_resource_group.example.name
sku {
tier = "Standard"
size = "S1"
}
}terraform {
required_providers {
azurerm = {
source = "hashicorp/azurerm"
version = "=3.25.0"
}
}
}
provider "azurerm" {
features {}
}
resource "azurerm_resource_group" "example" {
name = "api-rg-pro"
location = "East Us 2"
}
resource "azurerm_app_service_plan" "example" {
name = "api-appserviceplan-pro"
location = azurerm_resource_group.example.location
resource_group_name = azurerm_resource_group.example.name
sku {
tier = "Standard"
size = "S2"
}
}

package terrakube.plan.information
import input as tfplan
created := create_count {
resources := [resource | resource:= tfplan.resource_changes[_]; resource.change.actions[_] == "create"]
create_count := count(resources)
}
deleted := delete_count {
resources := [resource | resource:= tfplan.resource_changes[_]; resource.change.actions[_] == "delete"]
delete_count := count(resources)
}
updated := updated_count {
resources := [resource | resource:= tfplan.resource_changes[_]; resource.change.actions[_] == "update"]
updated_count := count(resources)
}
no_change := no_change_count {
resources := [resource | resource:= tfplan.resource_changes[_]; resource.change.actions[_] == "no-op"]
no_change_count := count(resources){
"created": 2,
"deleted": 4,
"no_change": 2,
"updated": 5
}flow:
- type: "terraformPlan"
step: 100
name: "Running Terraform Plan with Drift Detection and Slack Notification"
commands:
- runtime: "GROOVY"
priority: 100
after: true
script: |
import Opa
new Opa().loadTool(
"$workingDirectory",
"$bashToolsDirectory",
"0.45.0")
"Opa Download Completed..."
- runtime: "BASH"
priority: 200
after: true
script: |
cd $workingDirectory;
terraform show -json terraformLibrary.tfPlan > tfplan.json;
echo "Validating terraform plan information";
opa exec --decision terrakube/plan/information --bundle .terrakube/toolsRepository/policy/ tfplan.json | jq '.result[0].result' > drift_detection.json;
cat drift_detection.json;
- runtime: "GROOVY"
priority: 300
after: true
script: |
import SlackApp
import groovy.json.JsonSlurper
import groovy.json.JsonOutput
File drift_detection = new File("${workingDirectory}/drift_detection.json")
String drift_detection_content = drift_detection.text
println drift_detection_content
def jsonSlurper = new JsonSlurper()
def body = jsonSlurper.parseText(drift_detection_content)
def changes = body.created + body.updated + body.deleted
if (changes > 0) {
new SlackApp().sendMessageWithoutAttachment(
"#general",
"Hello team, Terrakube has deteted an infrastructure drift, please review the following workspace $workspaceId inside organization $organizationId",
"$SLACK_TOKEN",
terrakubeOutput);
} else {
new SlackApp().sendMessageWithoutAttachment(
"#general",
"Hello team, Terrakube did not detect any infrastructure drift for workspace $workspaceId inside organization $organizationId",
"$SLACK_TOKEN",
terrakubeOutput);
}
"Drift Detection Completed..."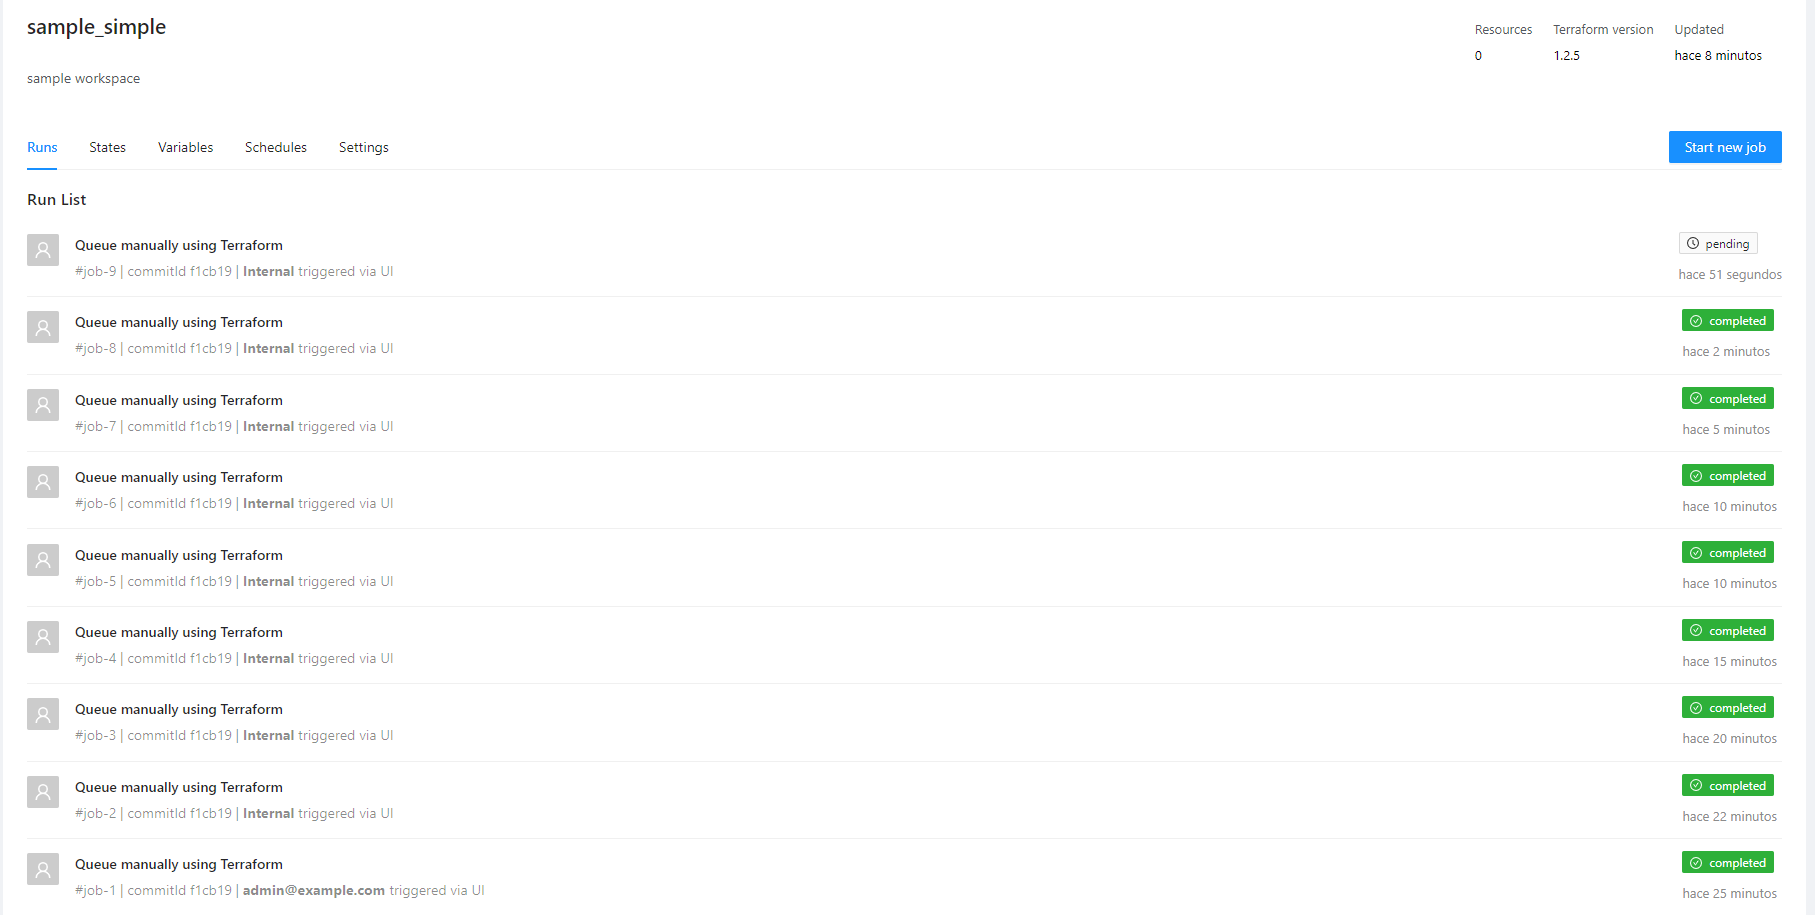

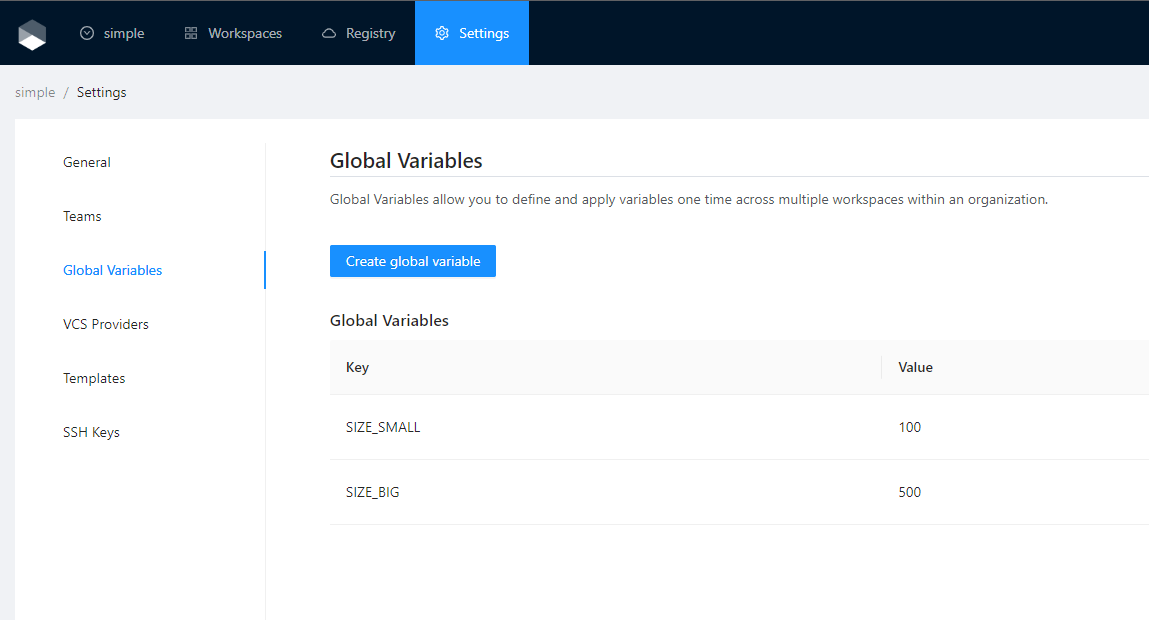
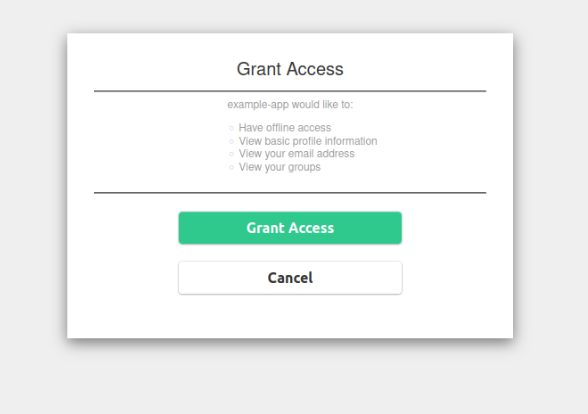
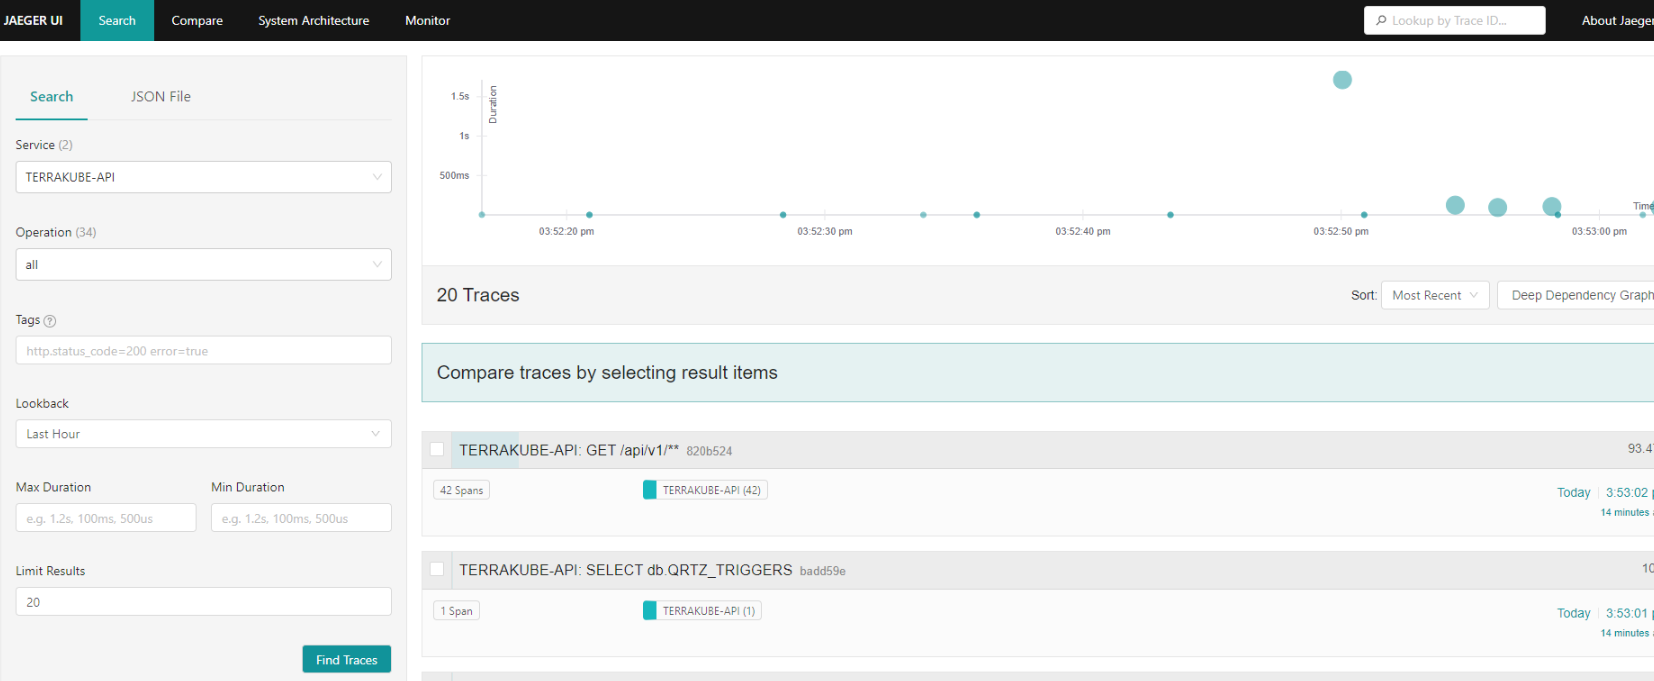
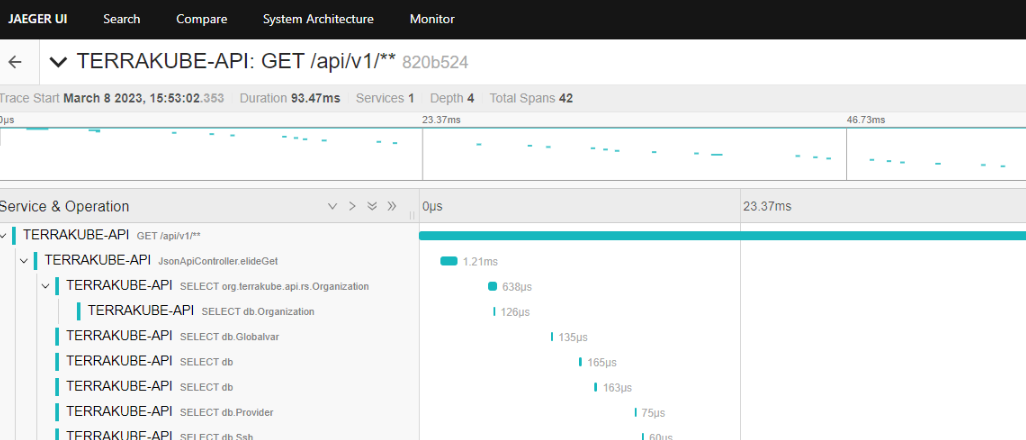
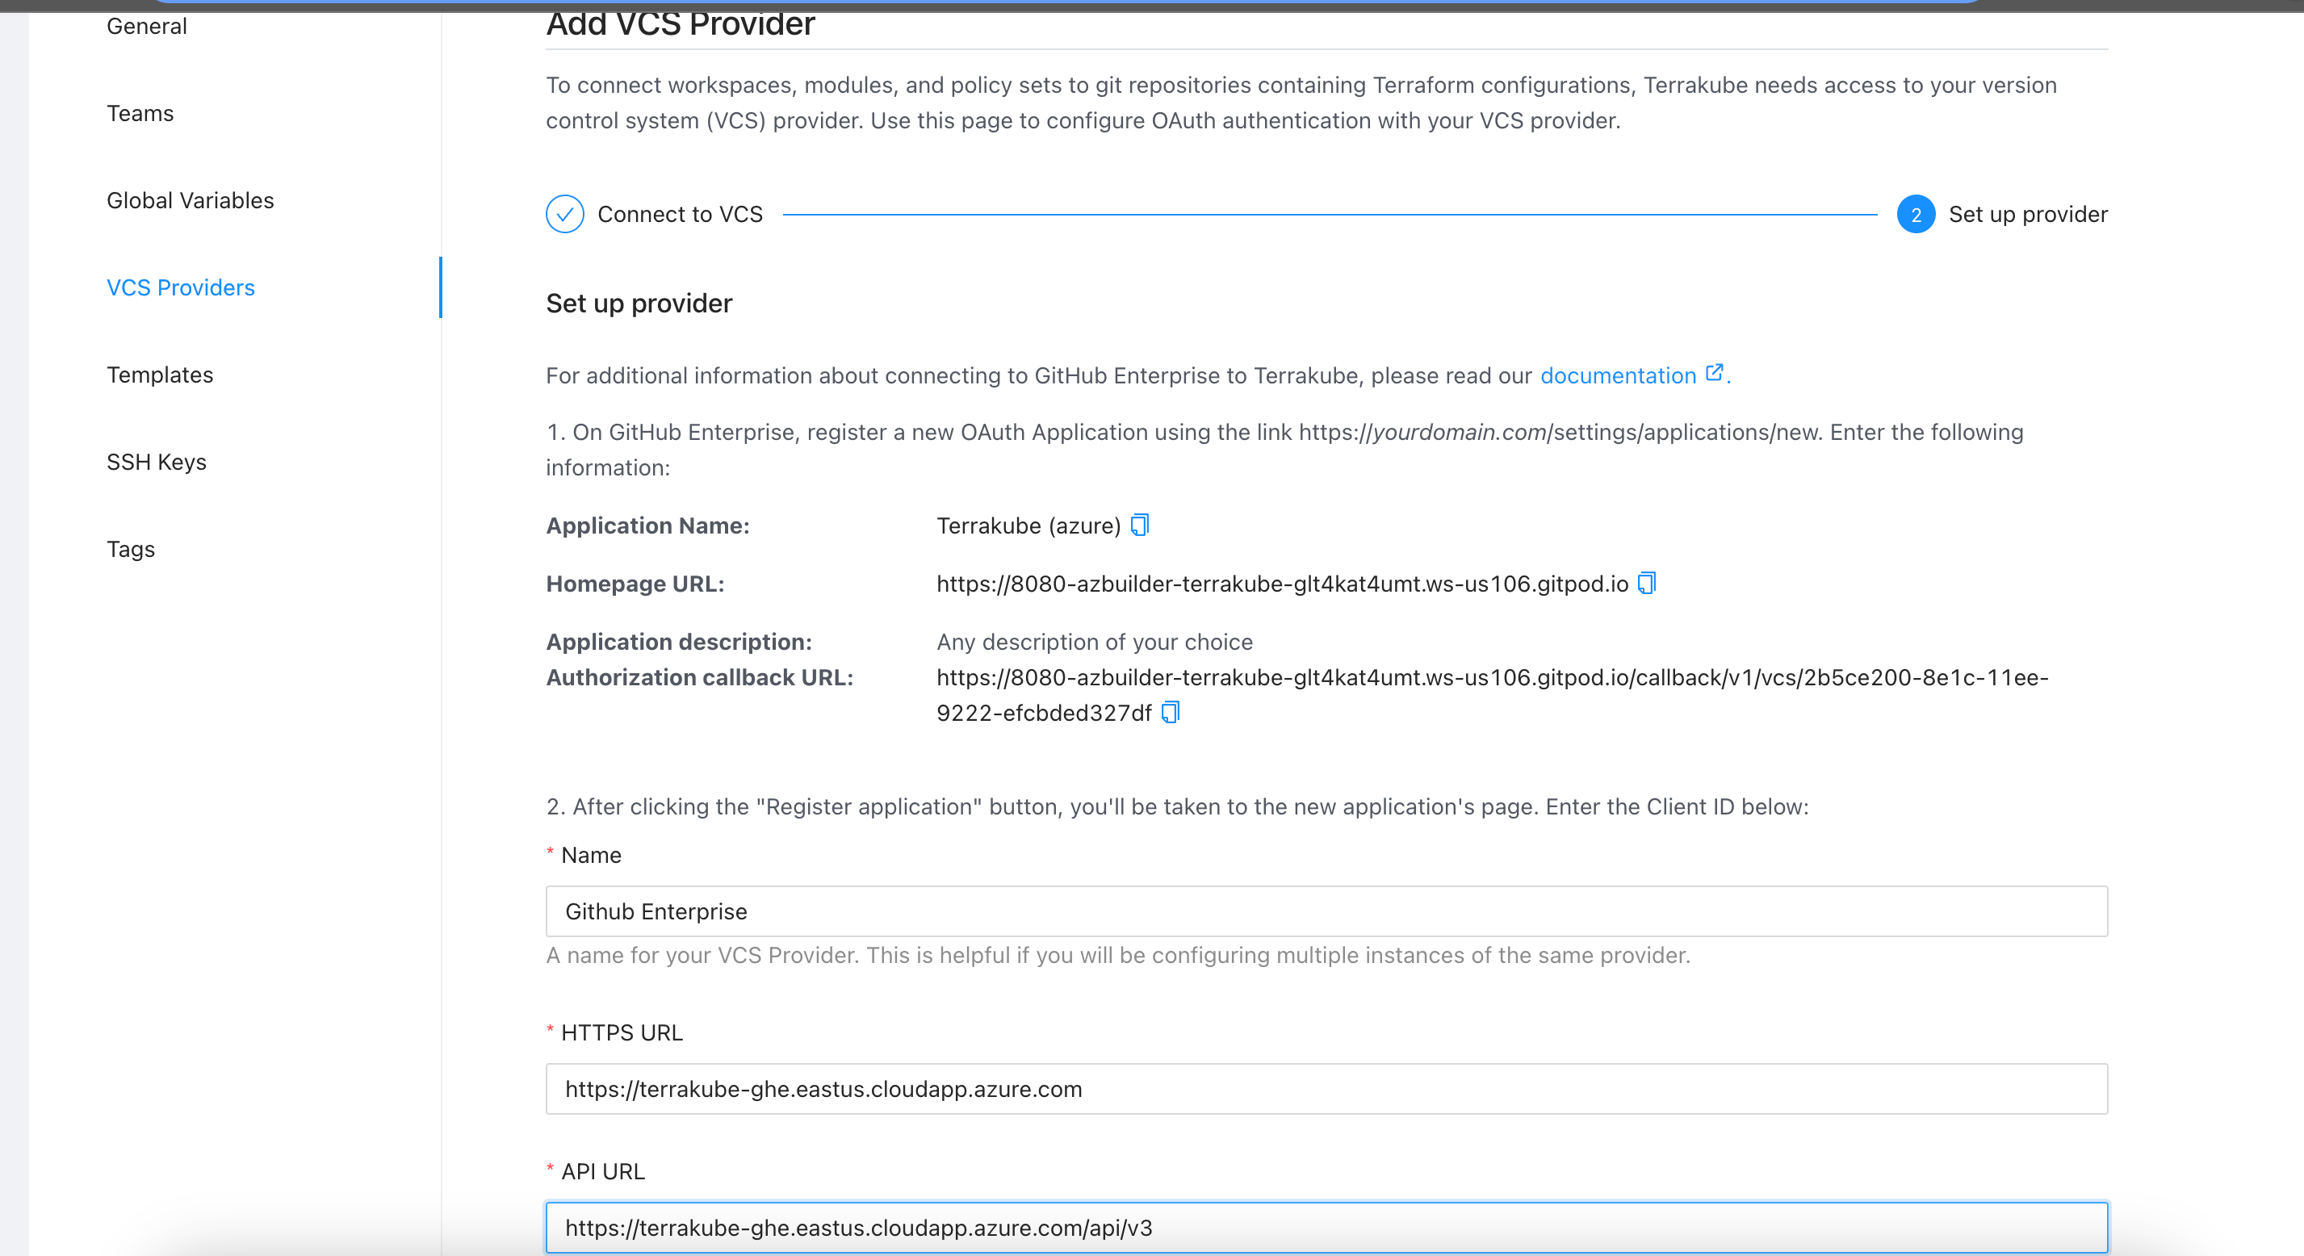
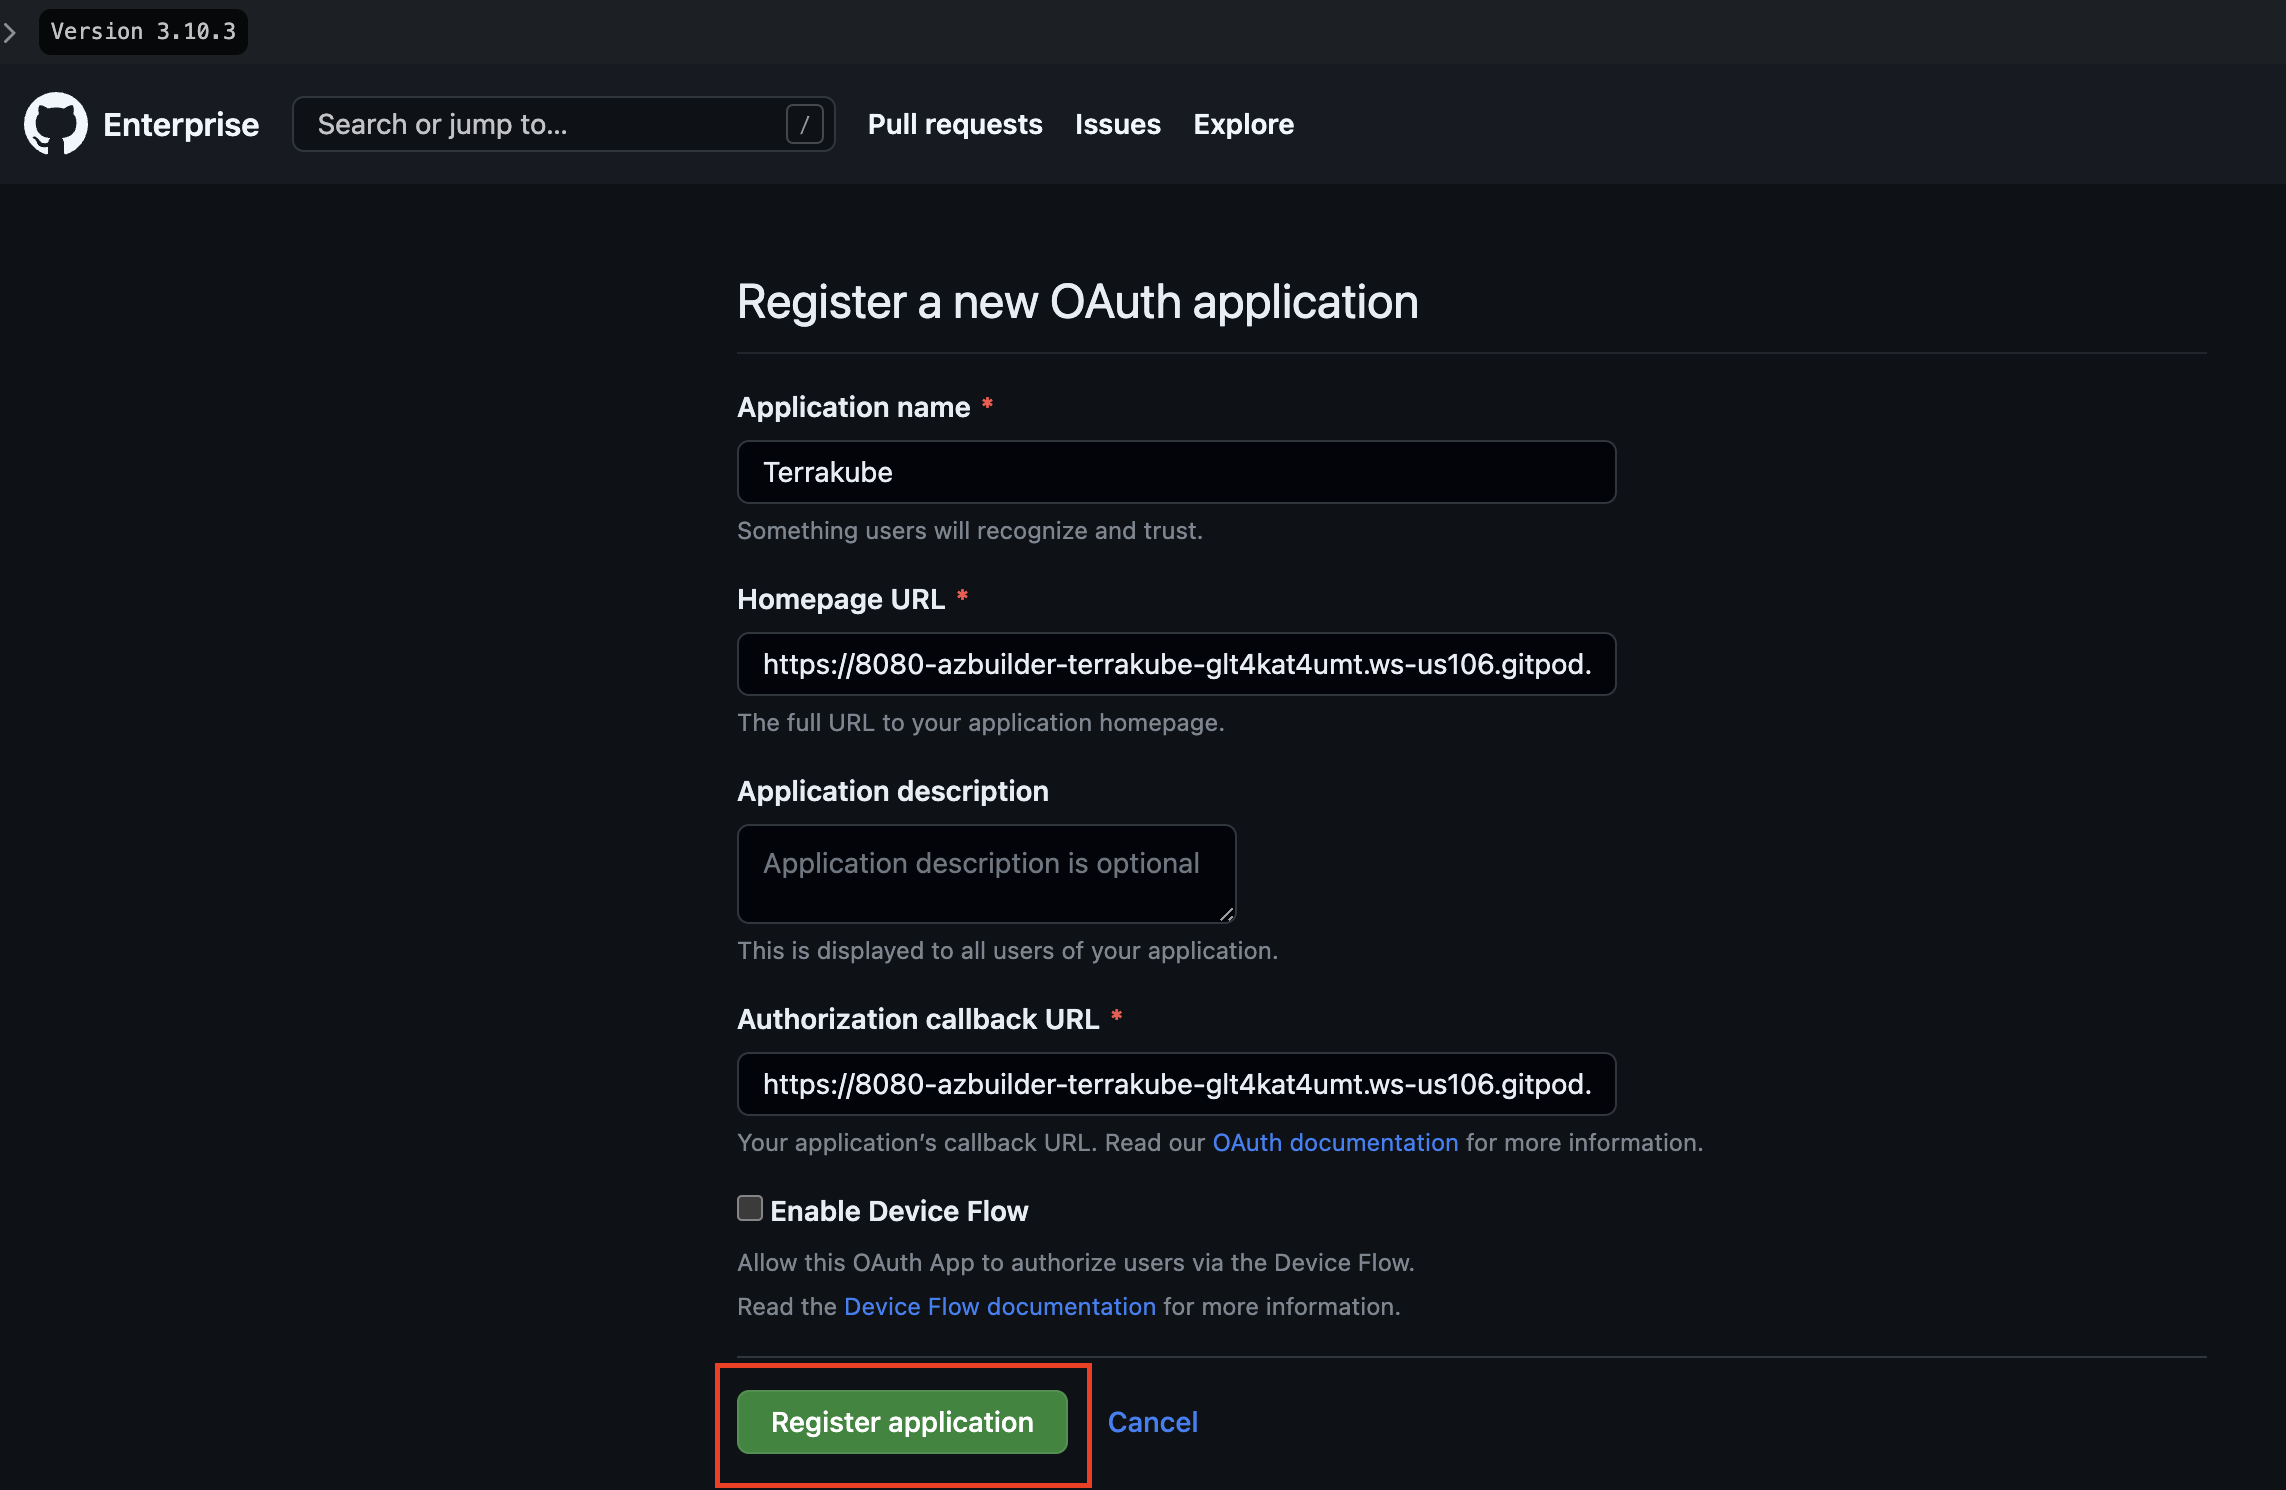
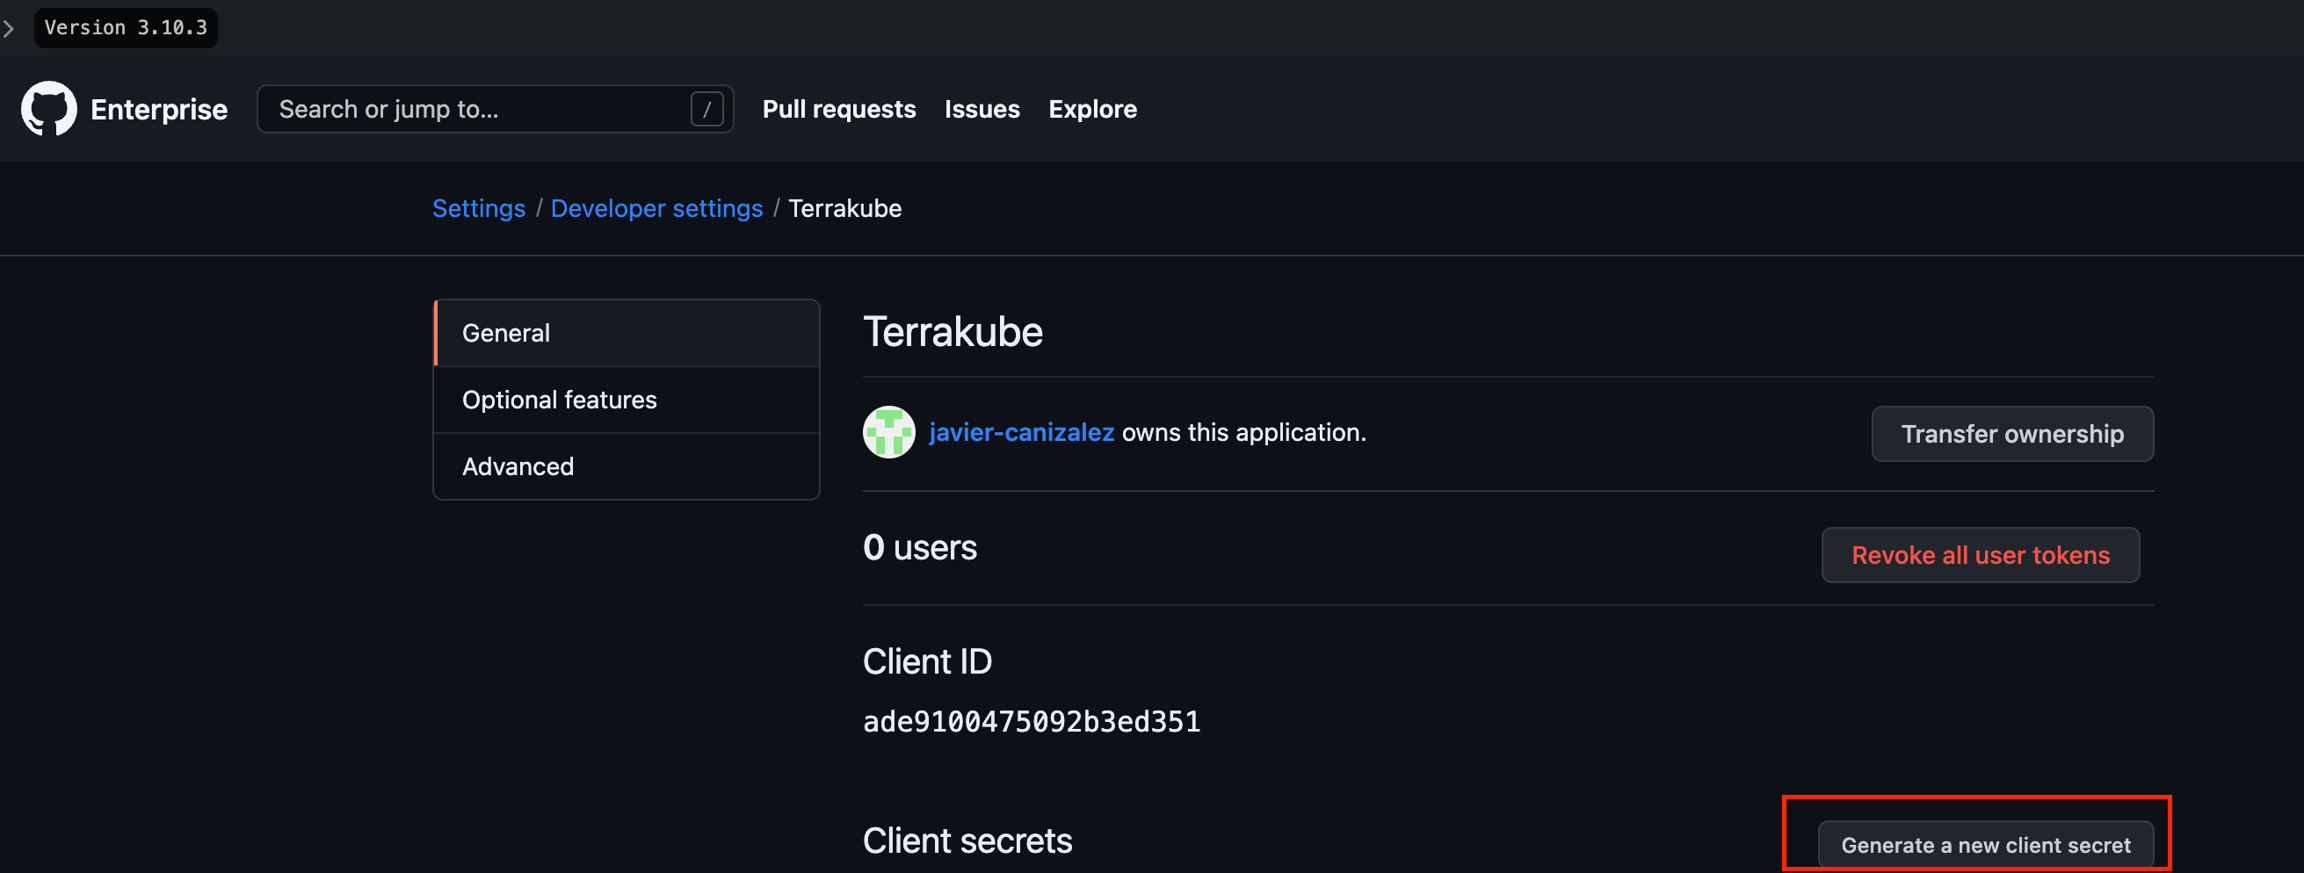
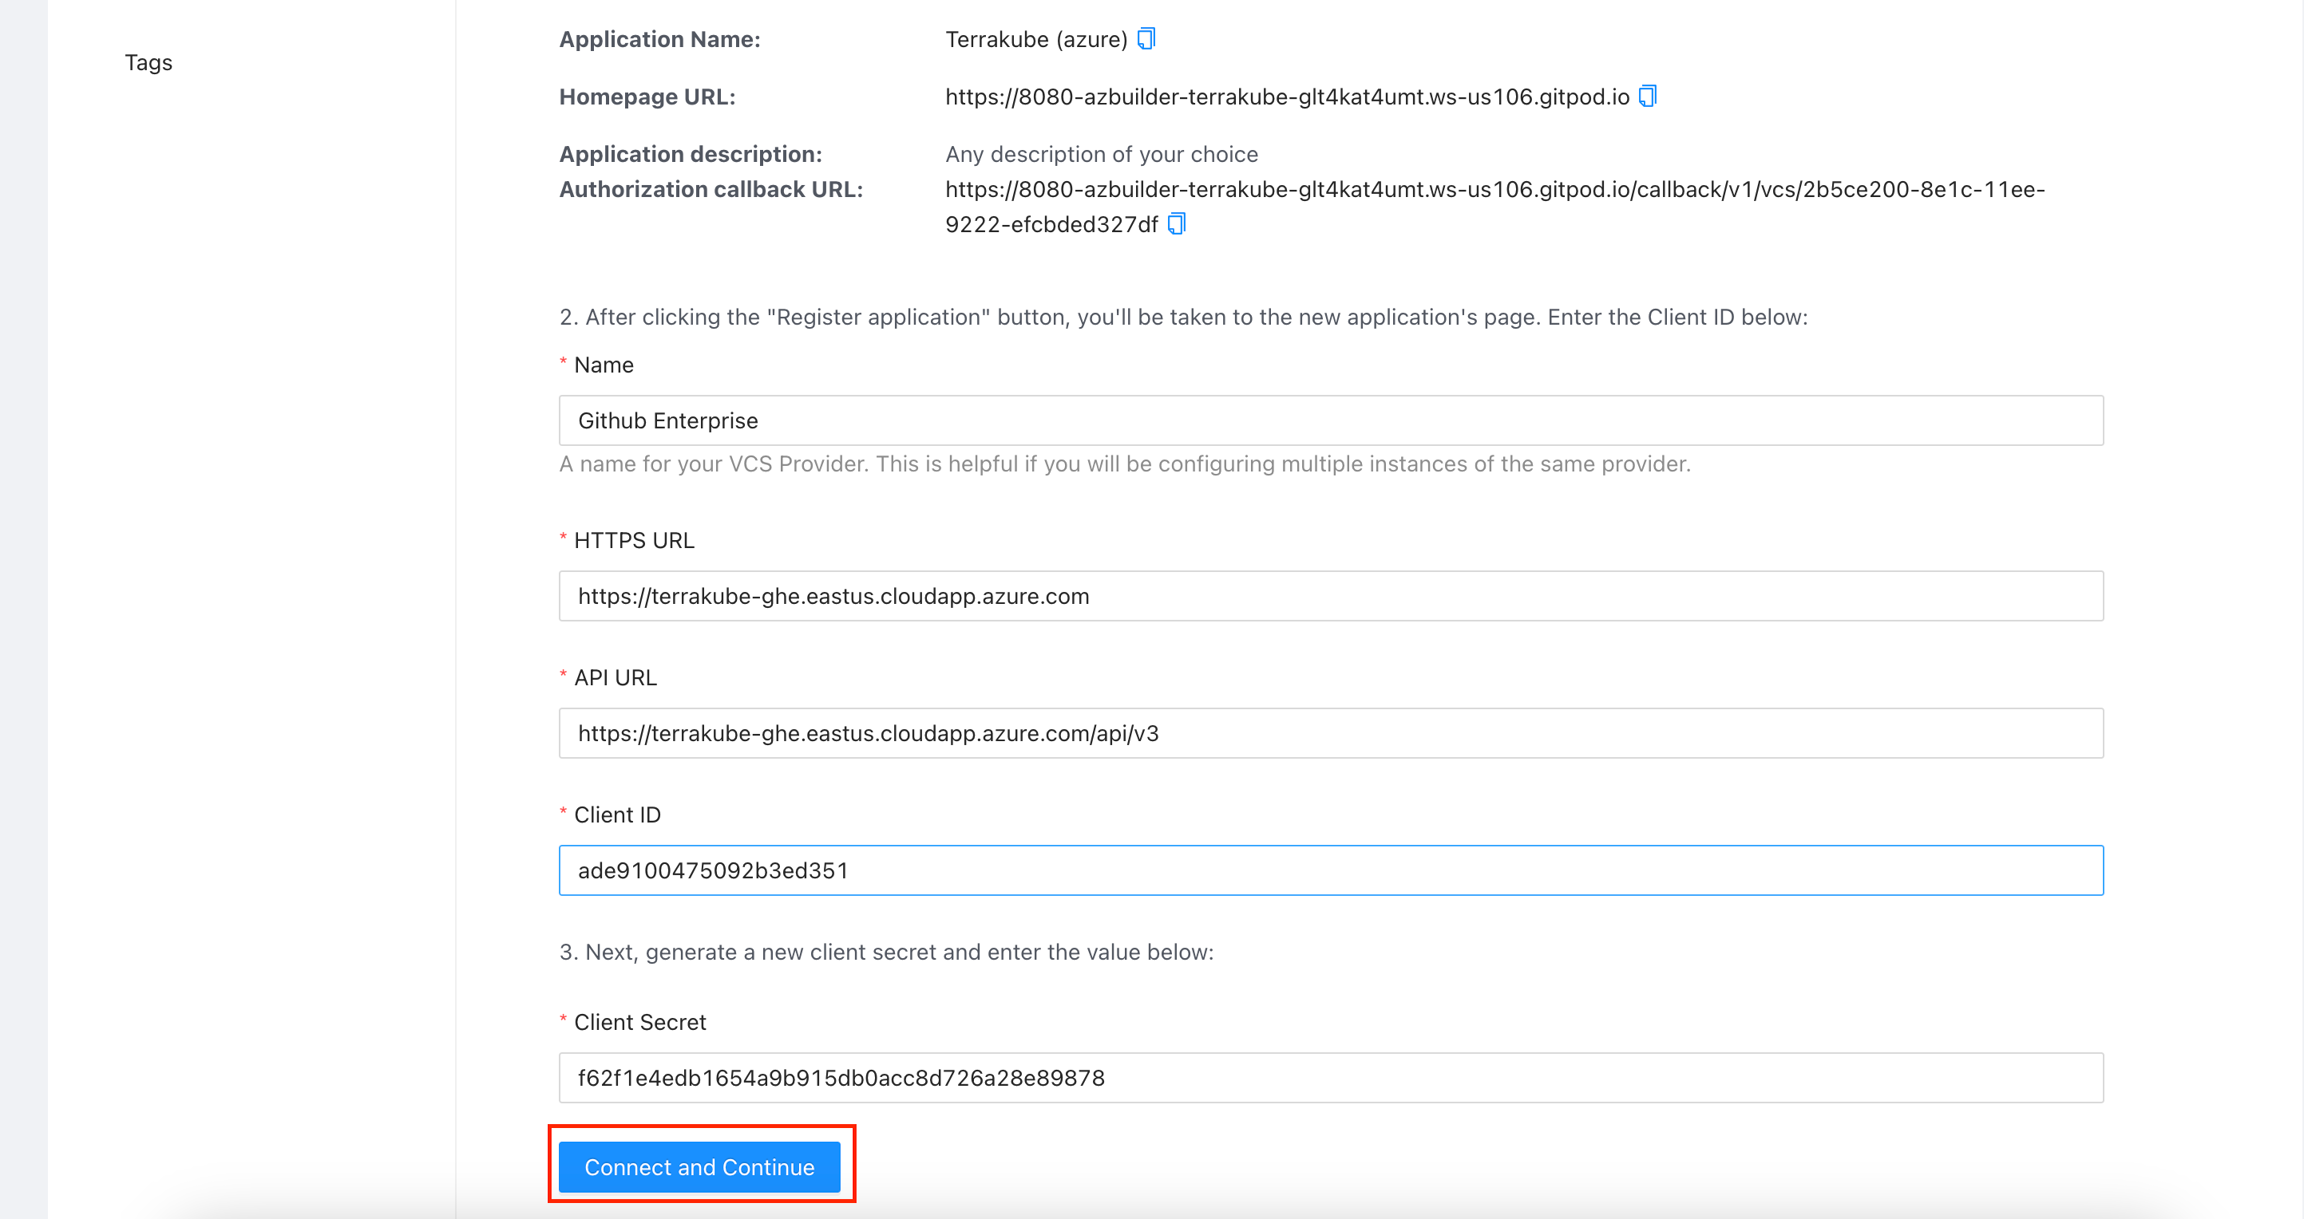
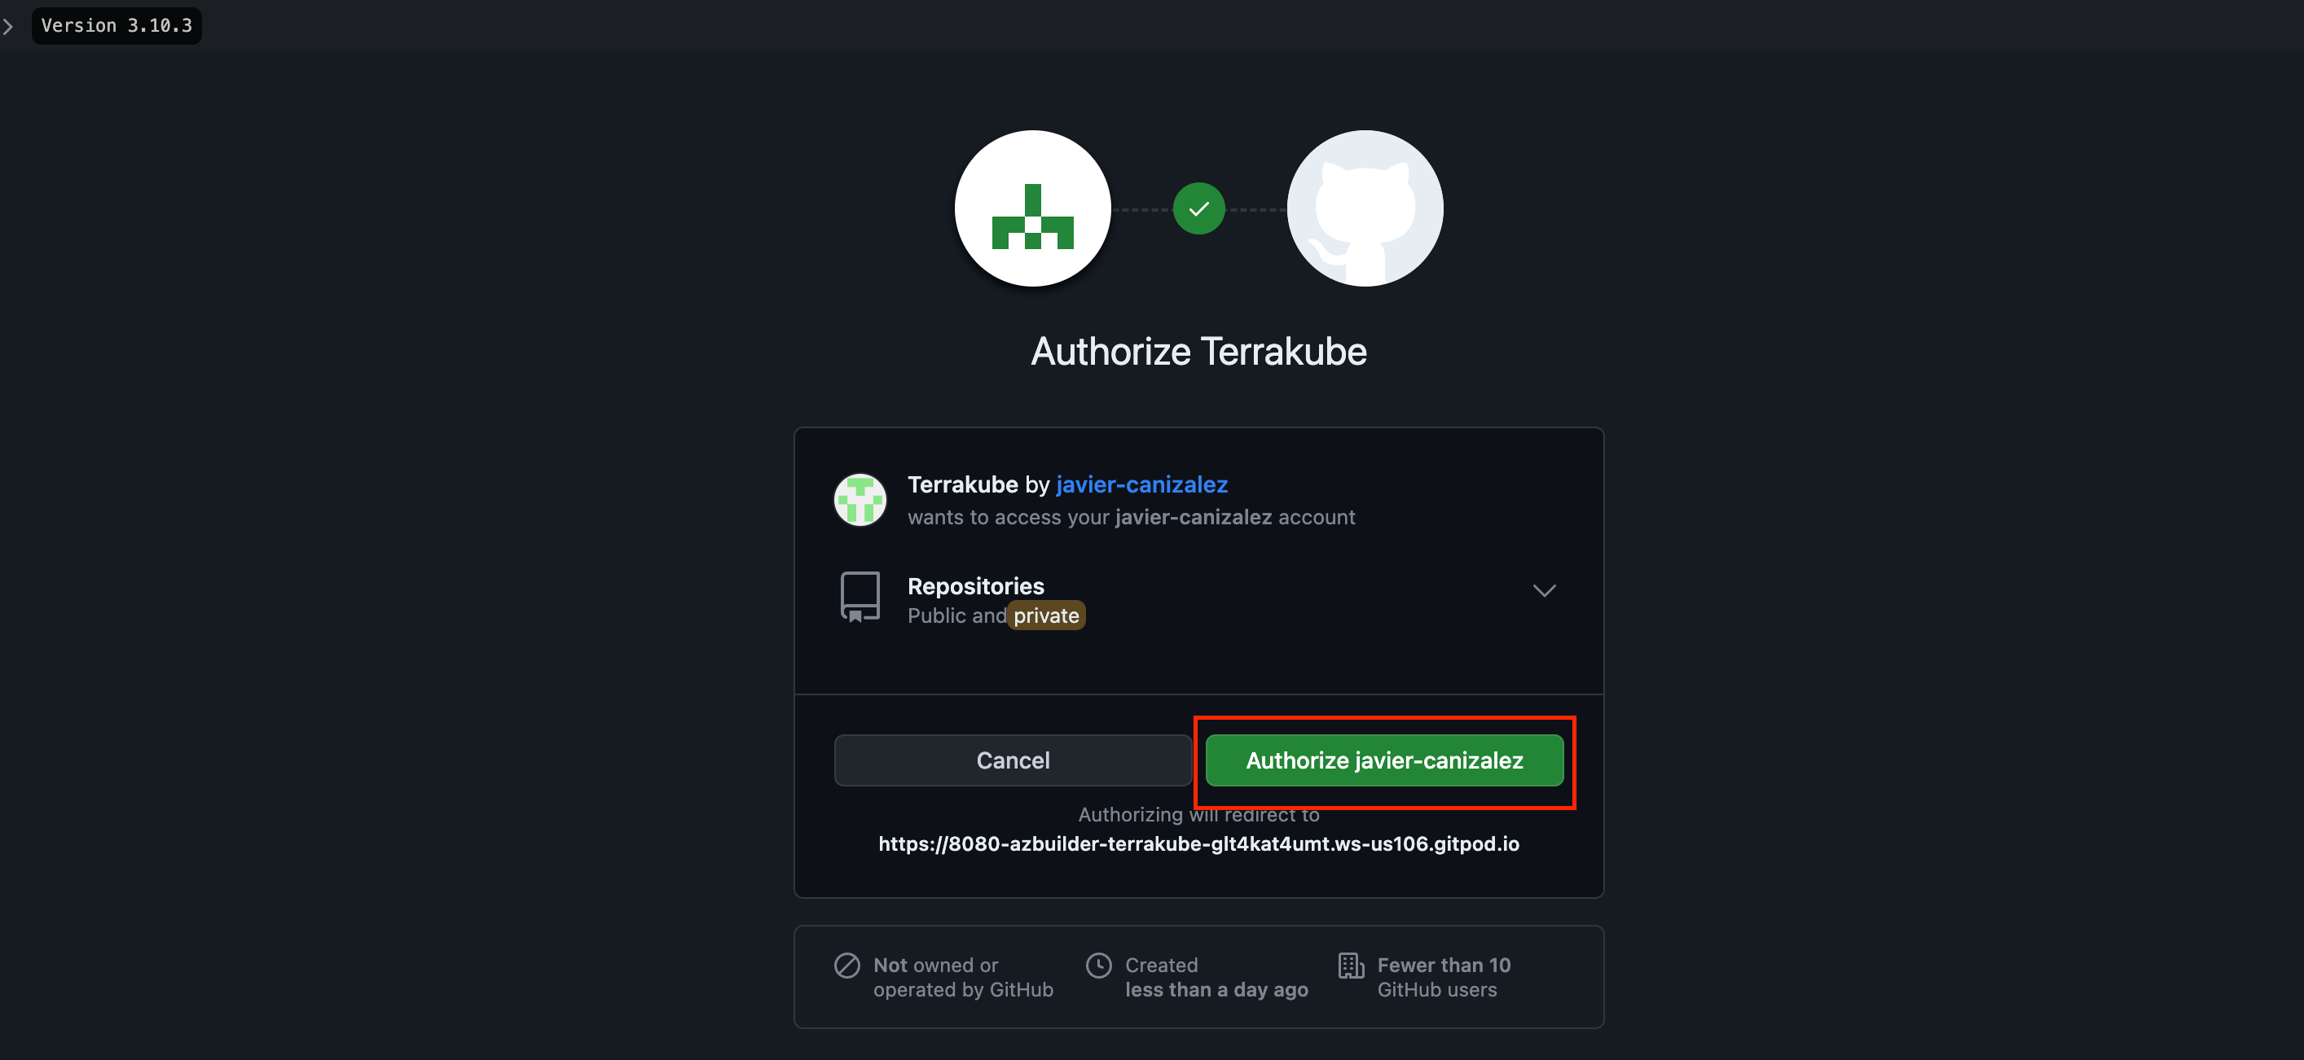
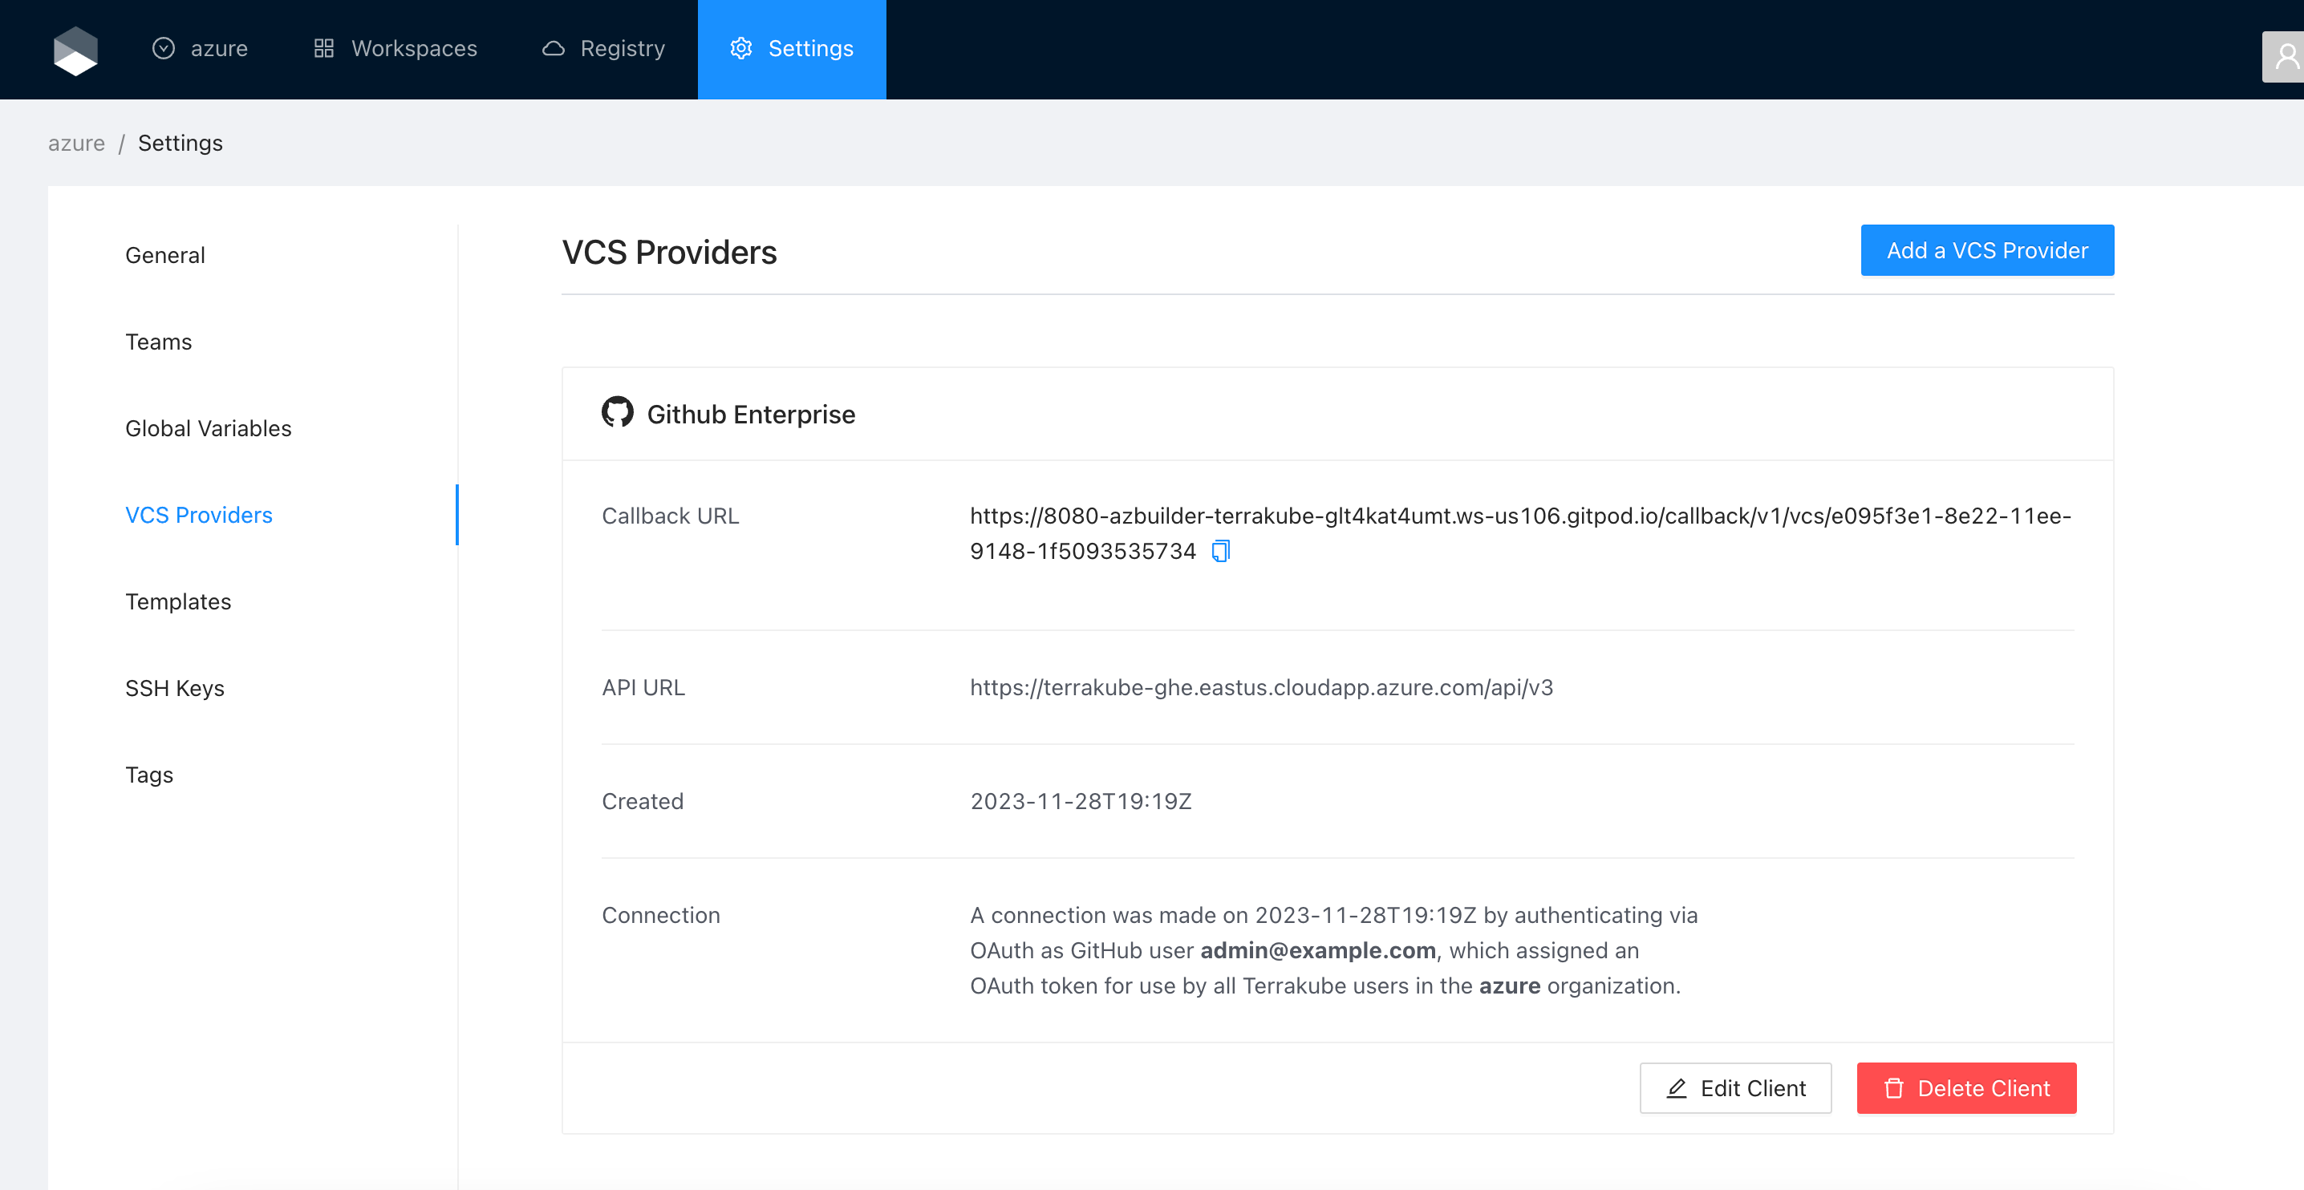
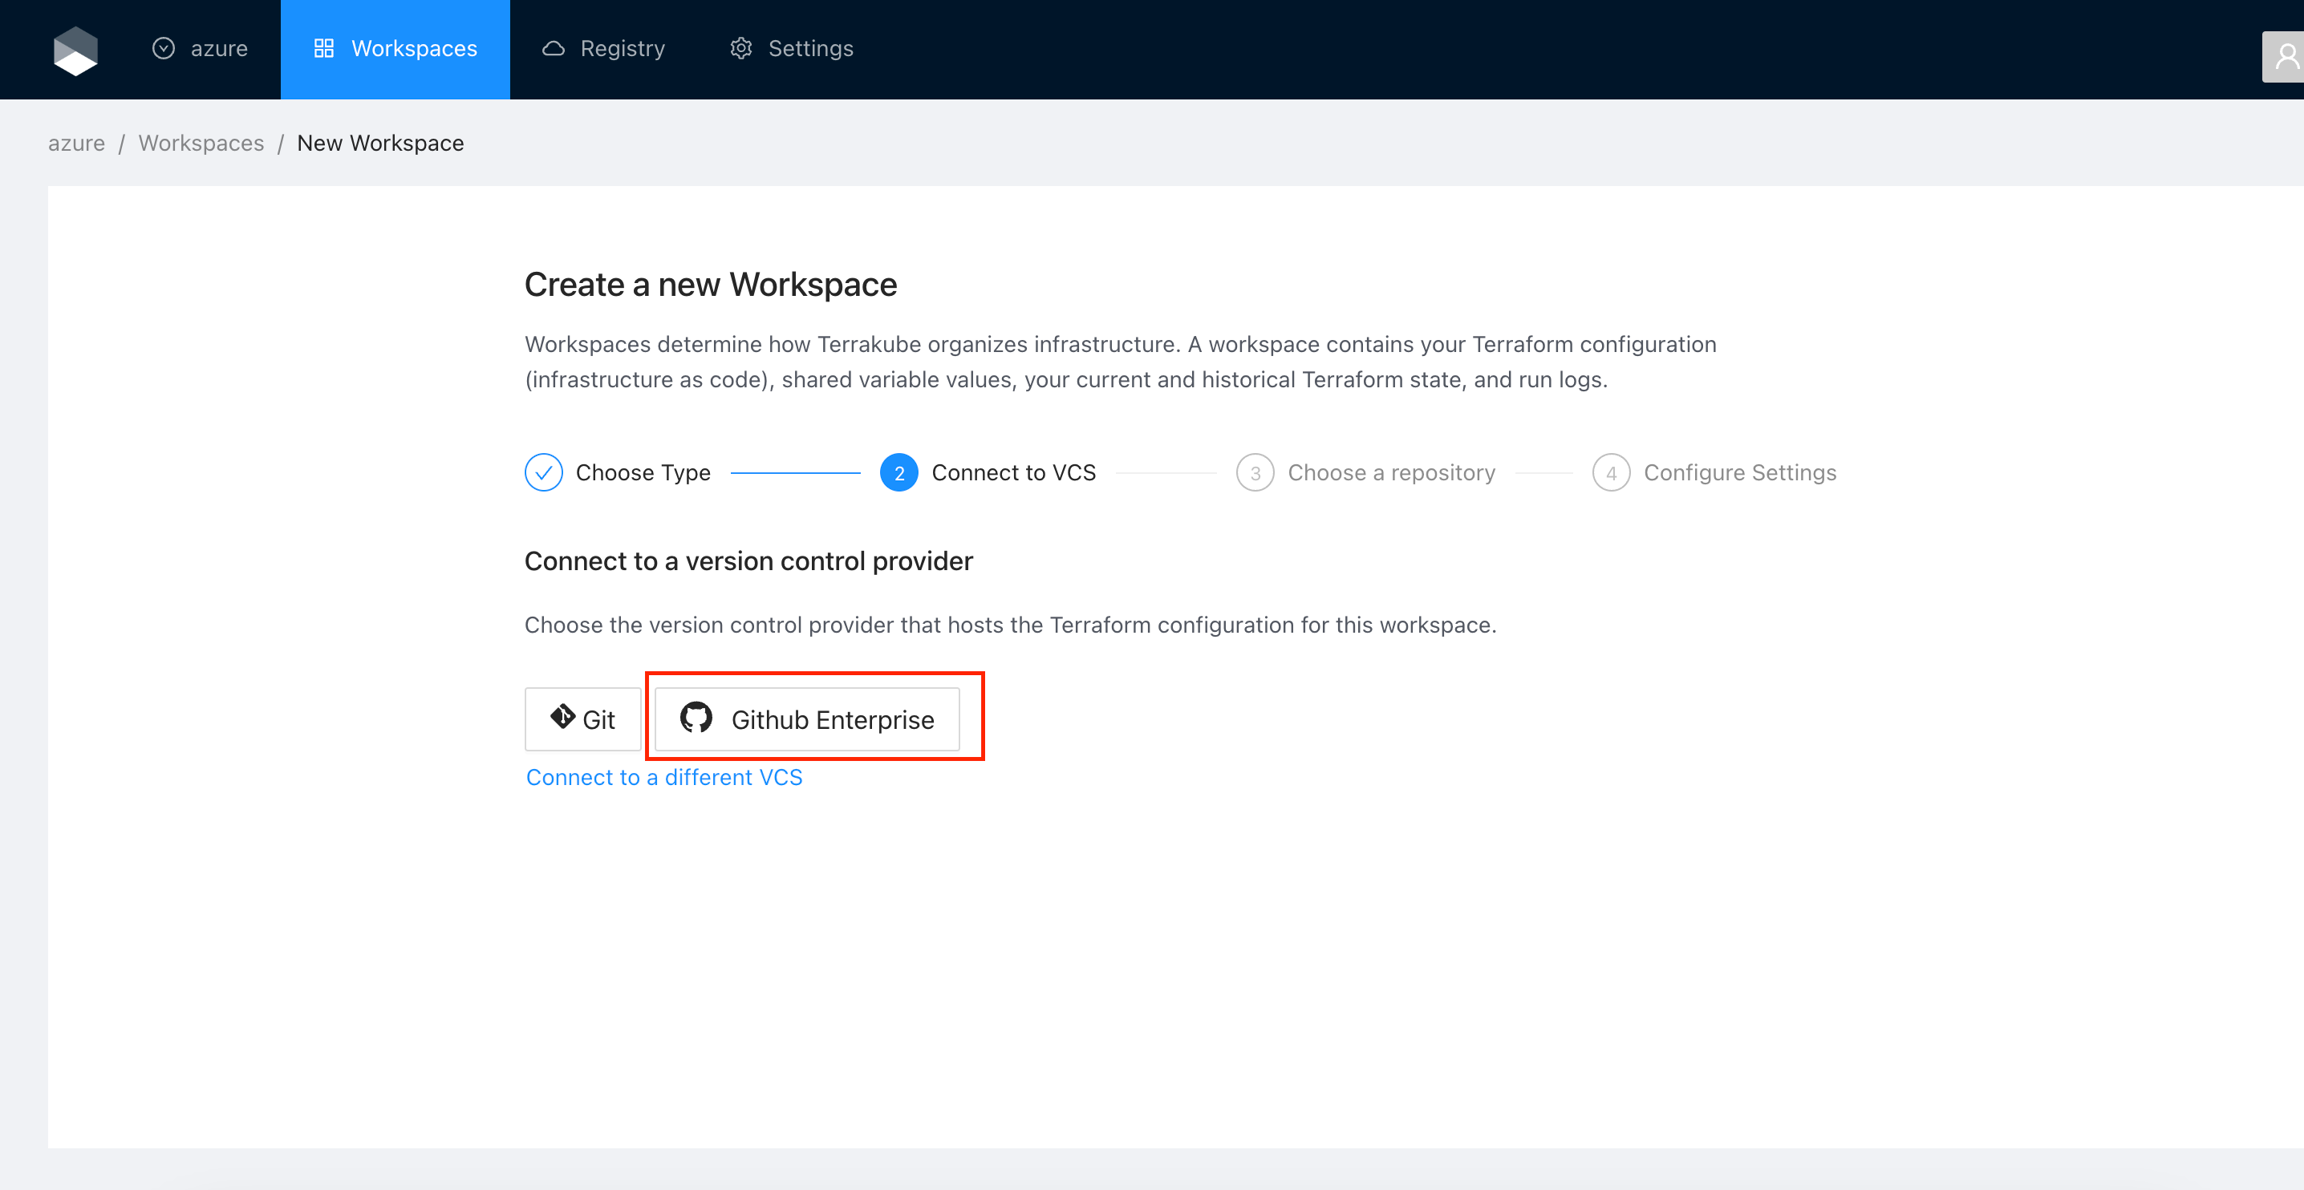
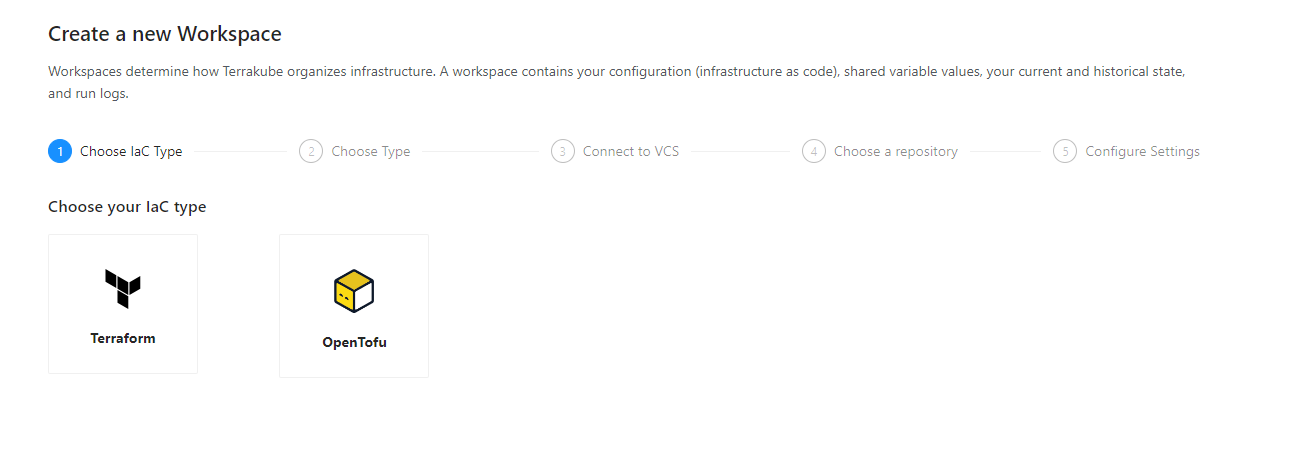
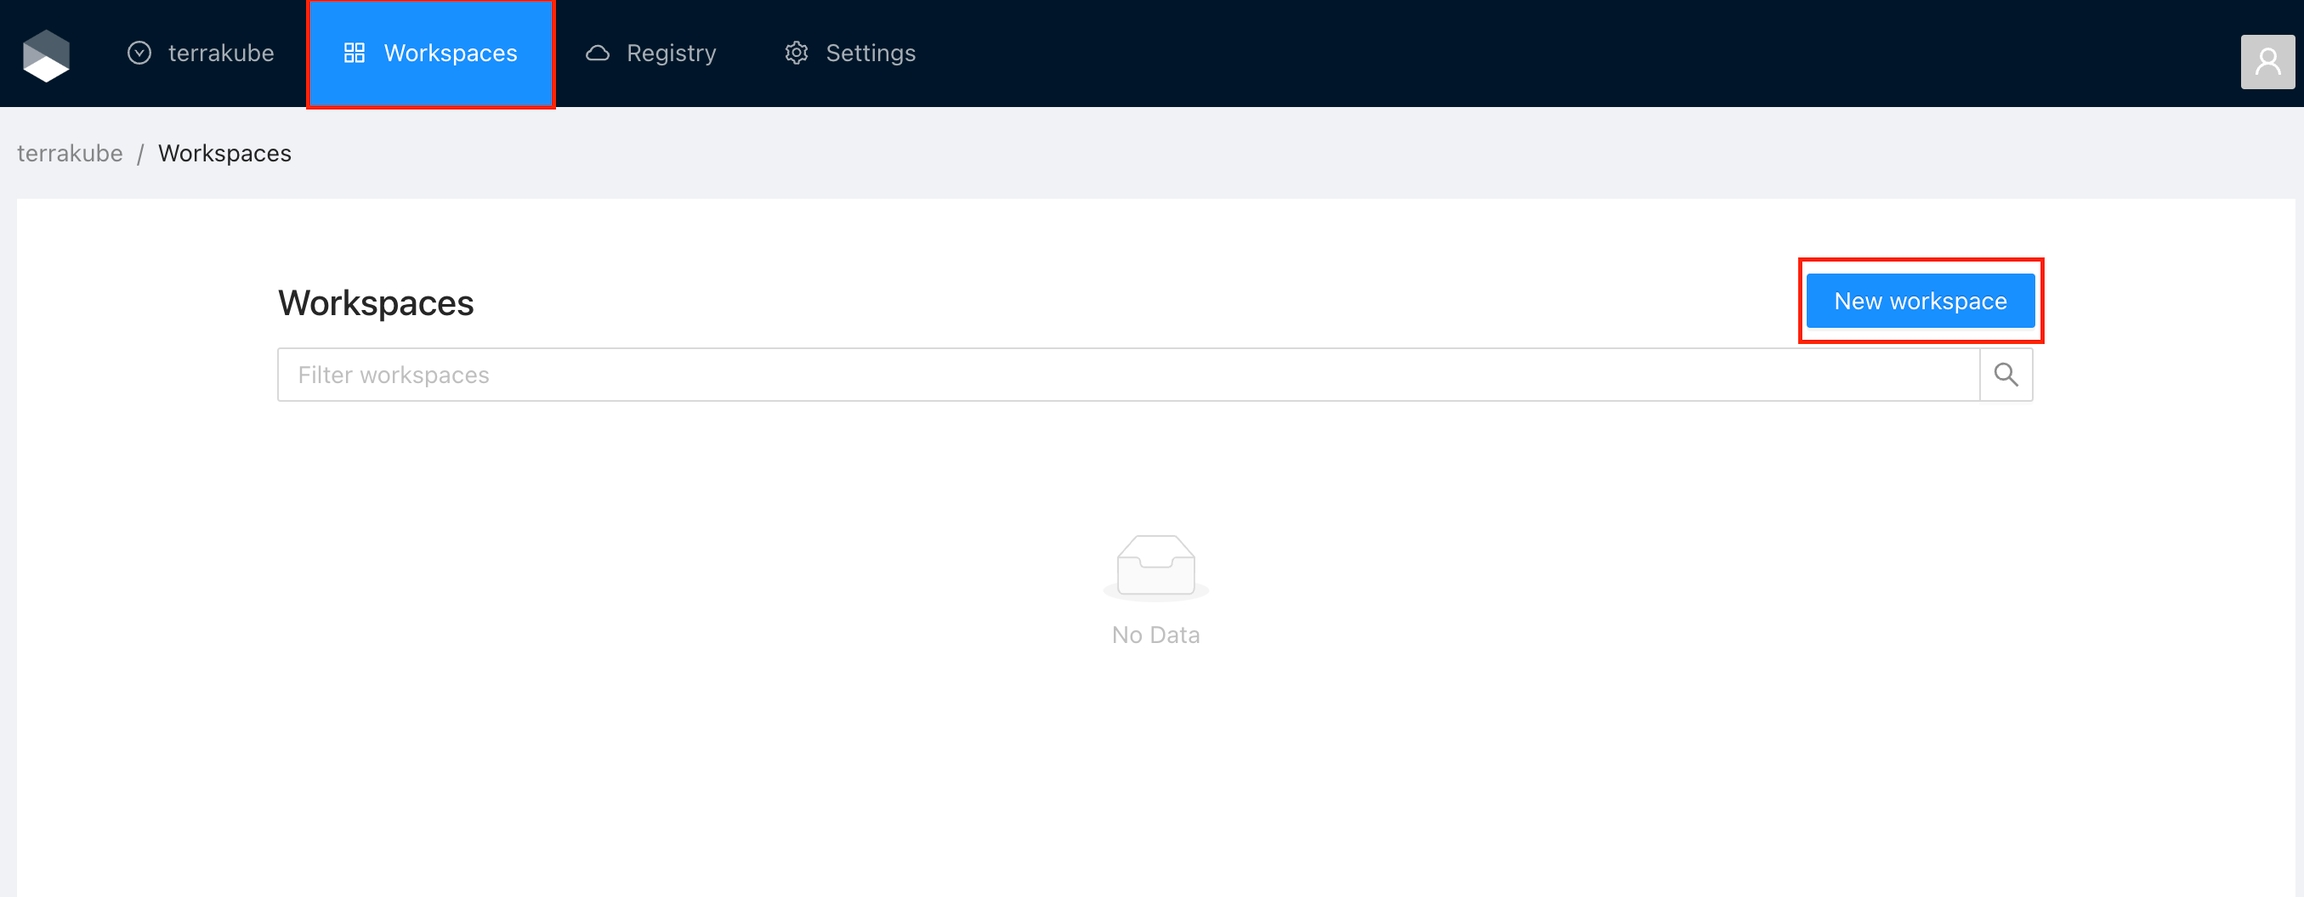
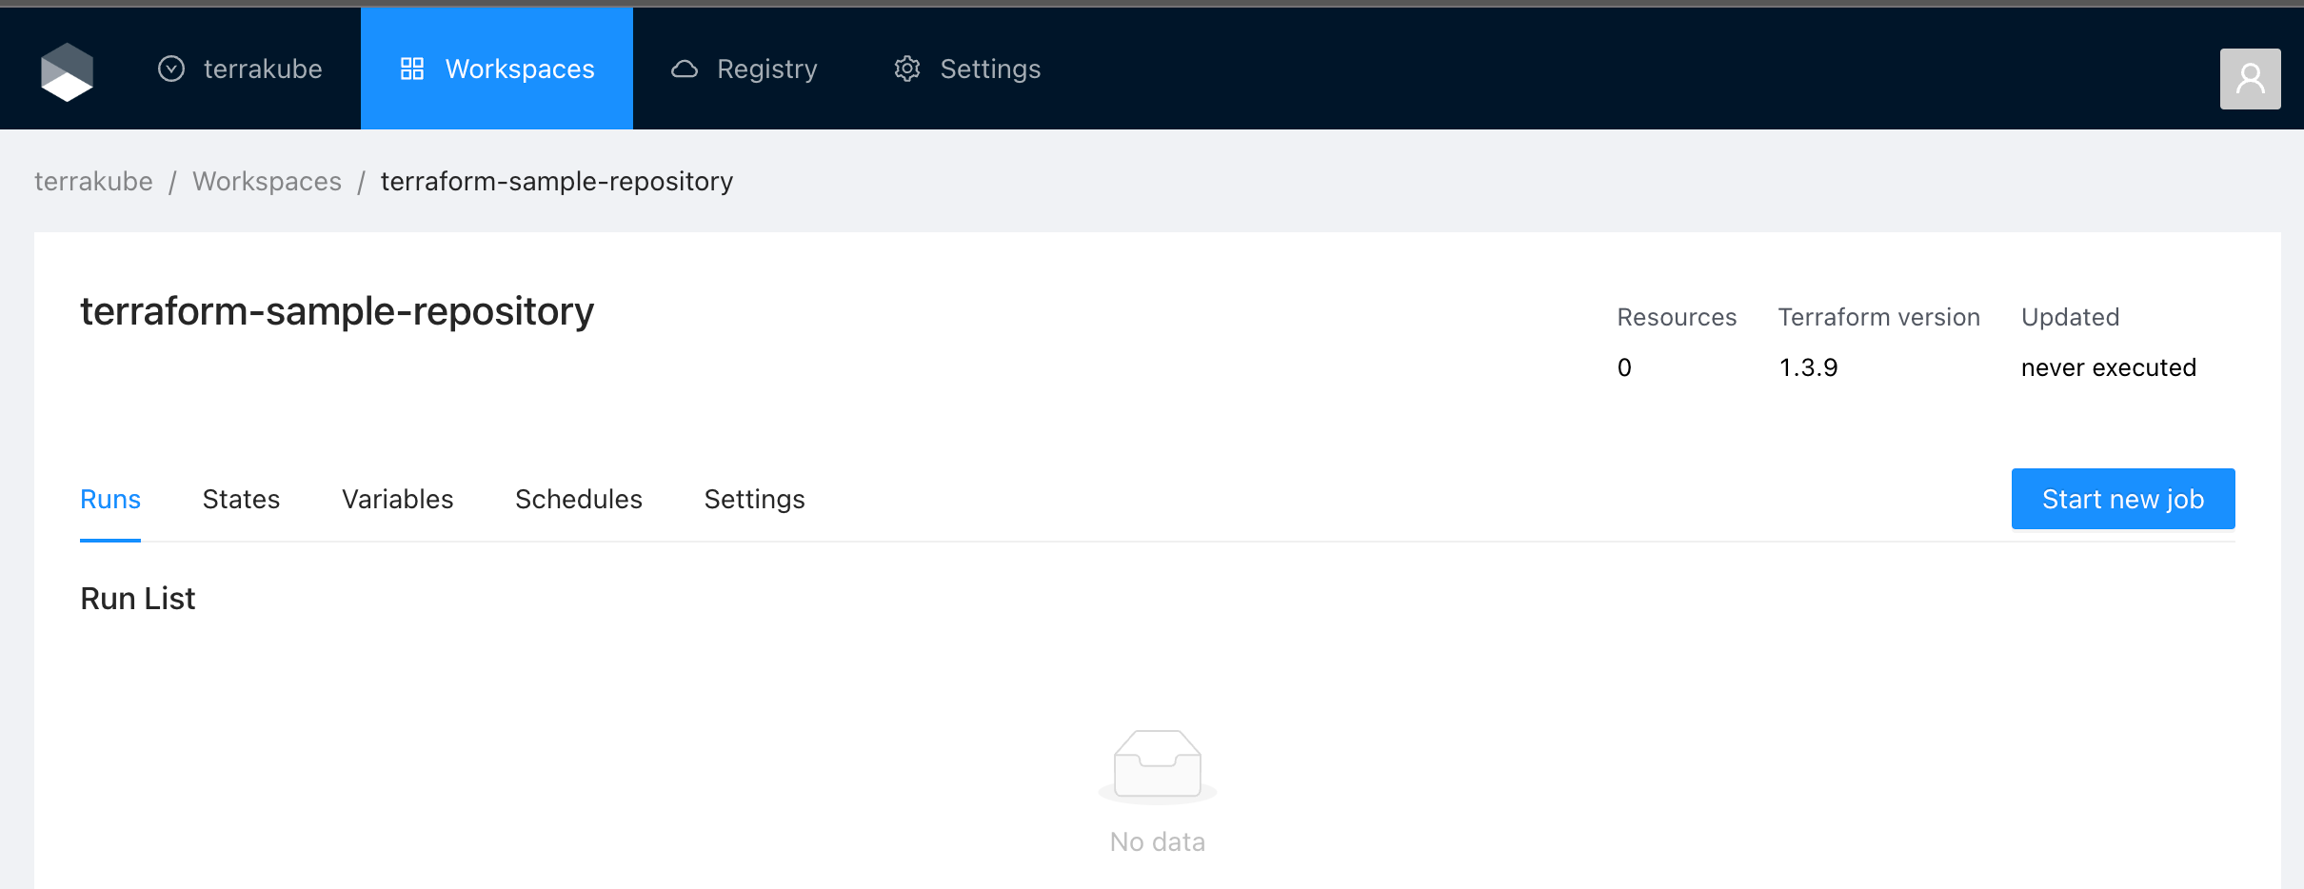
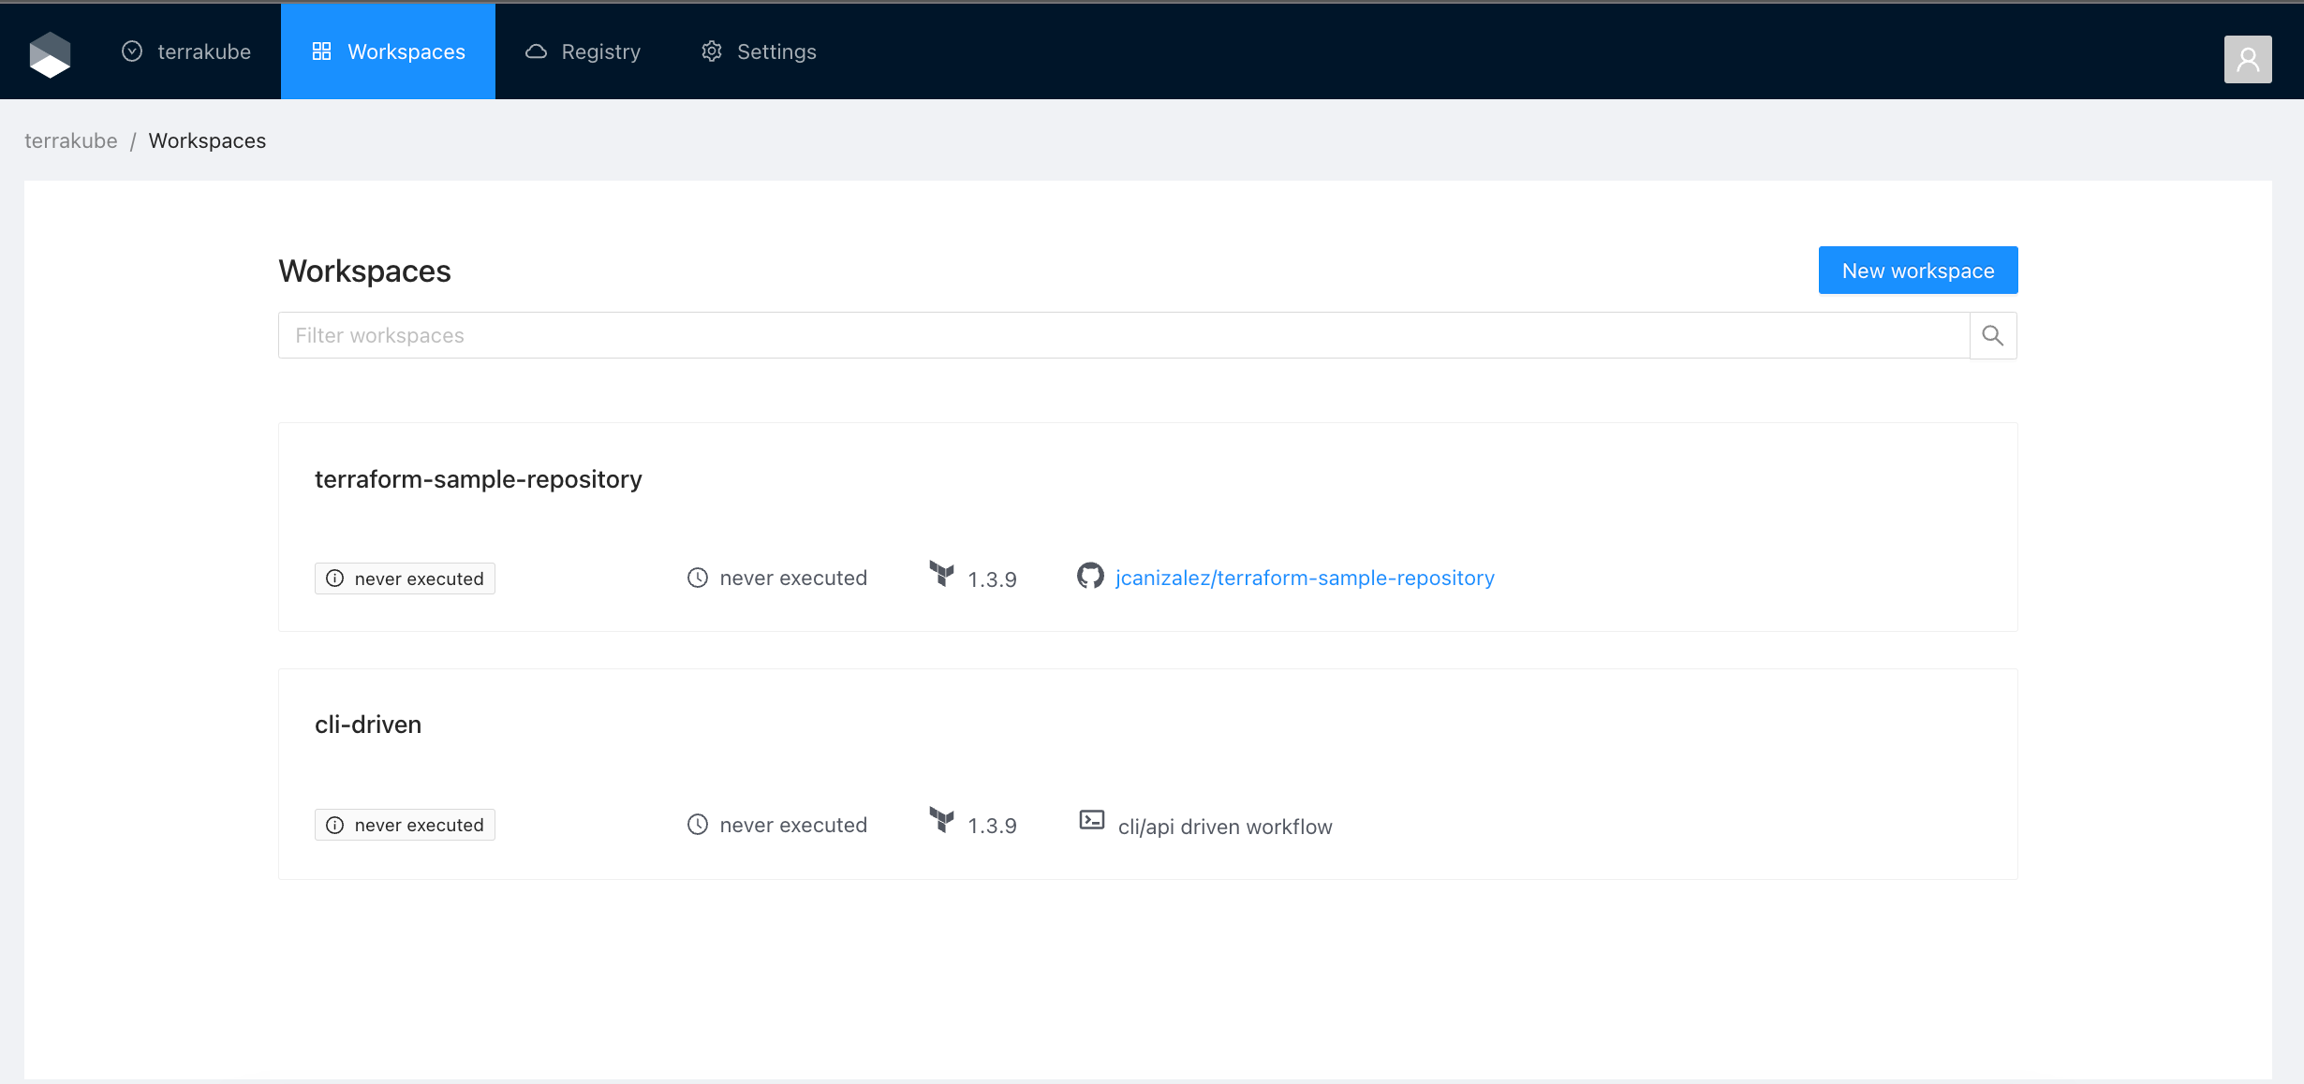
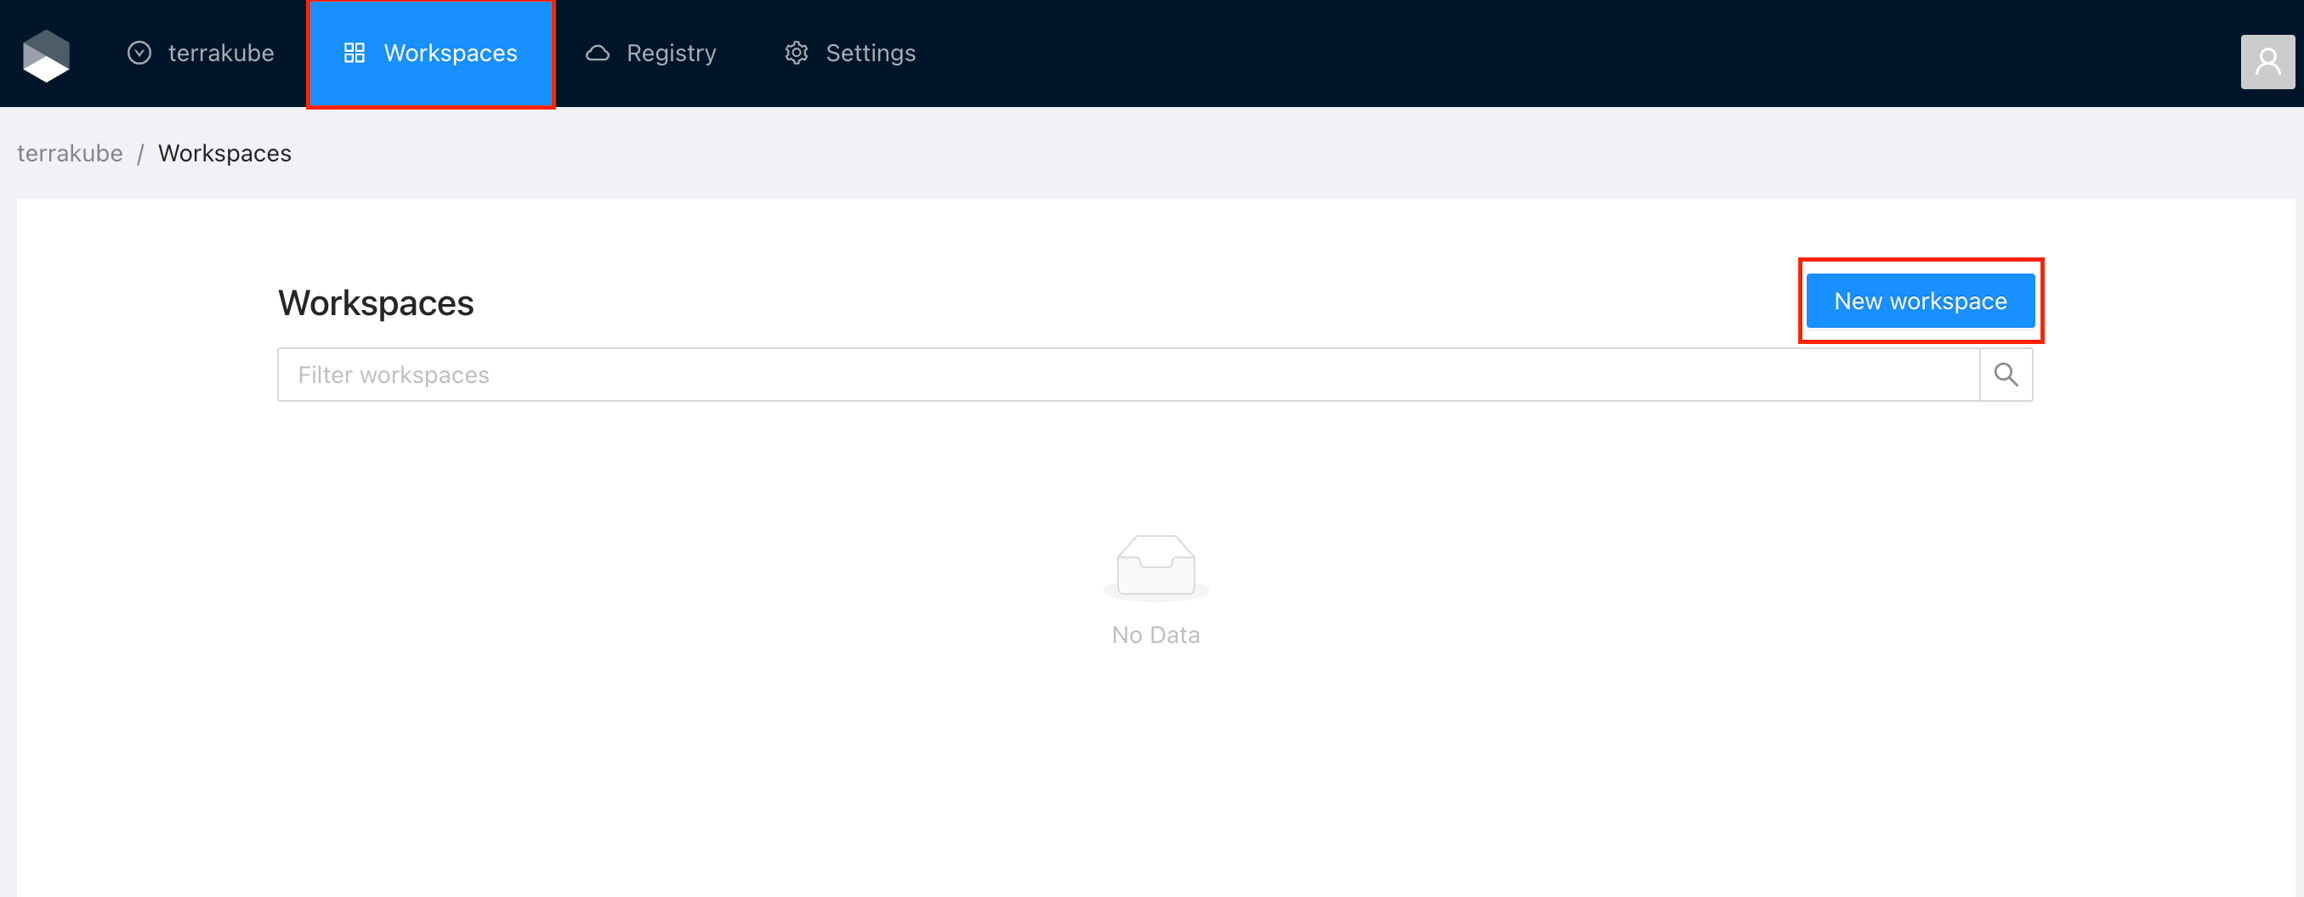
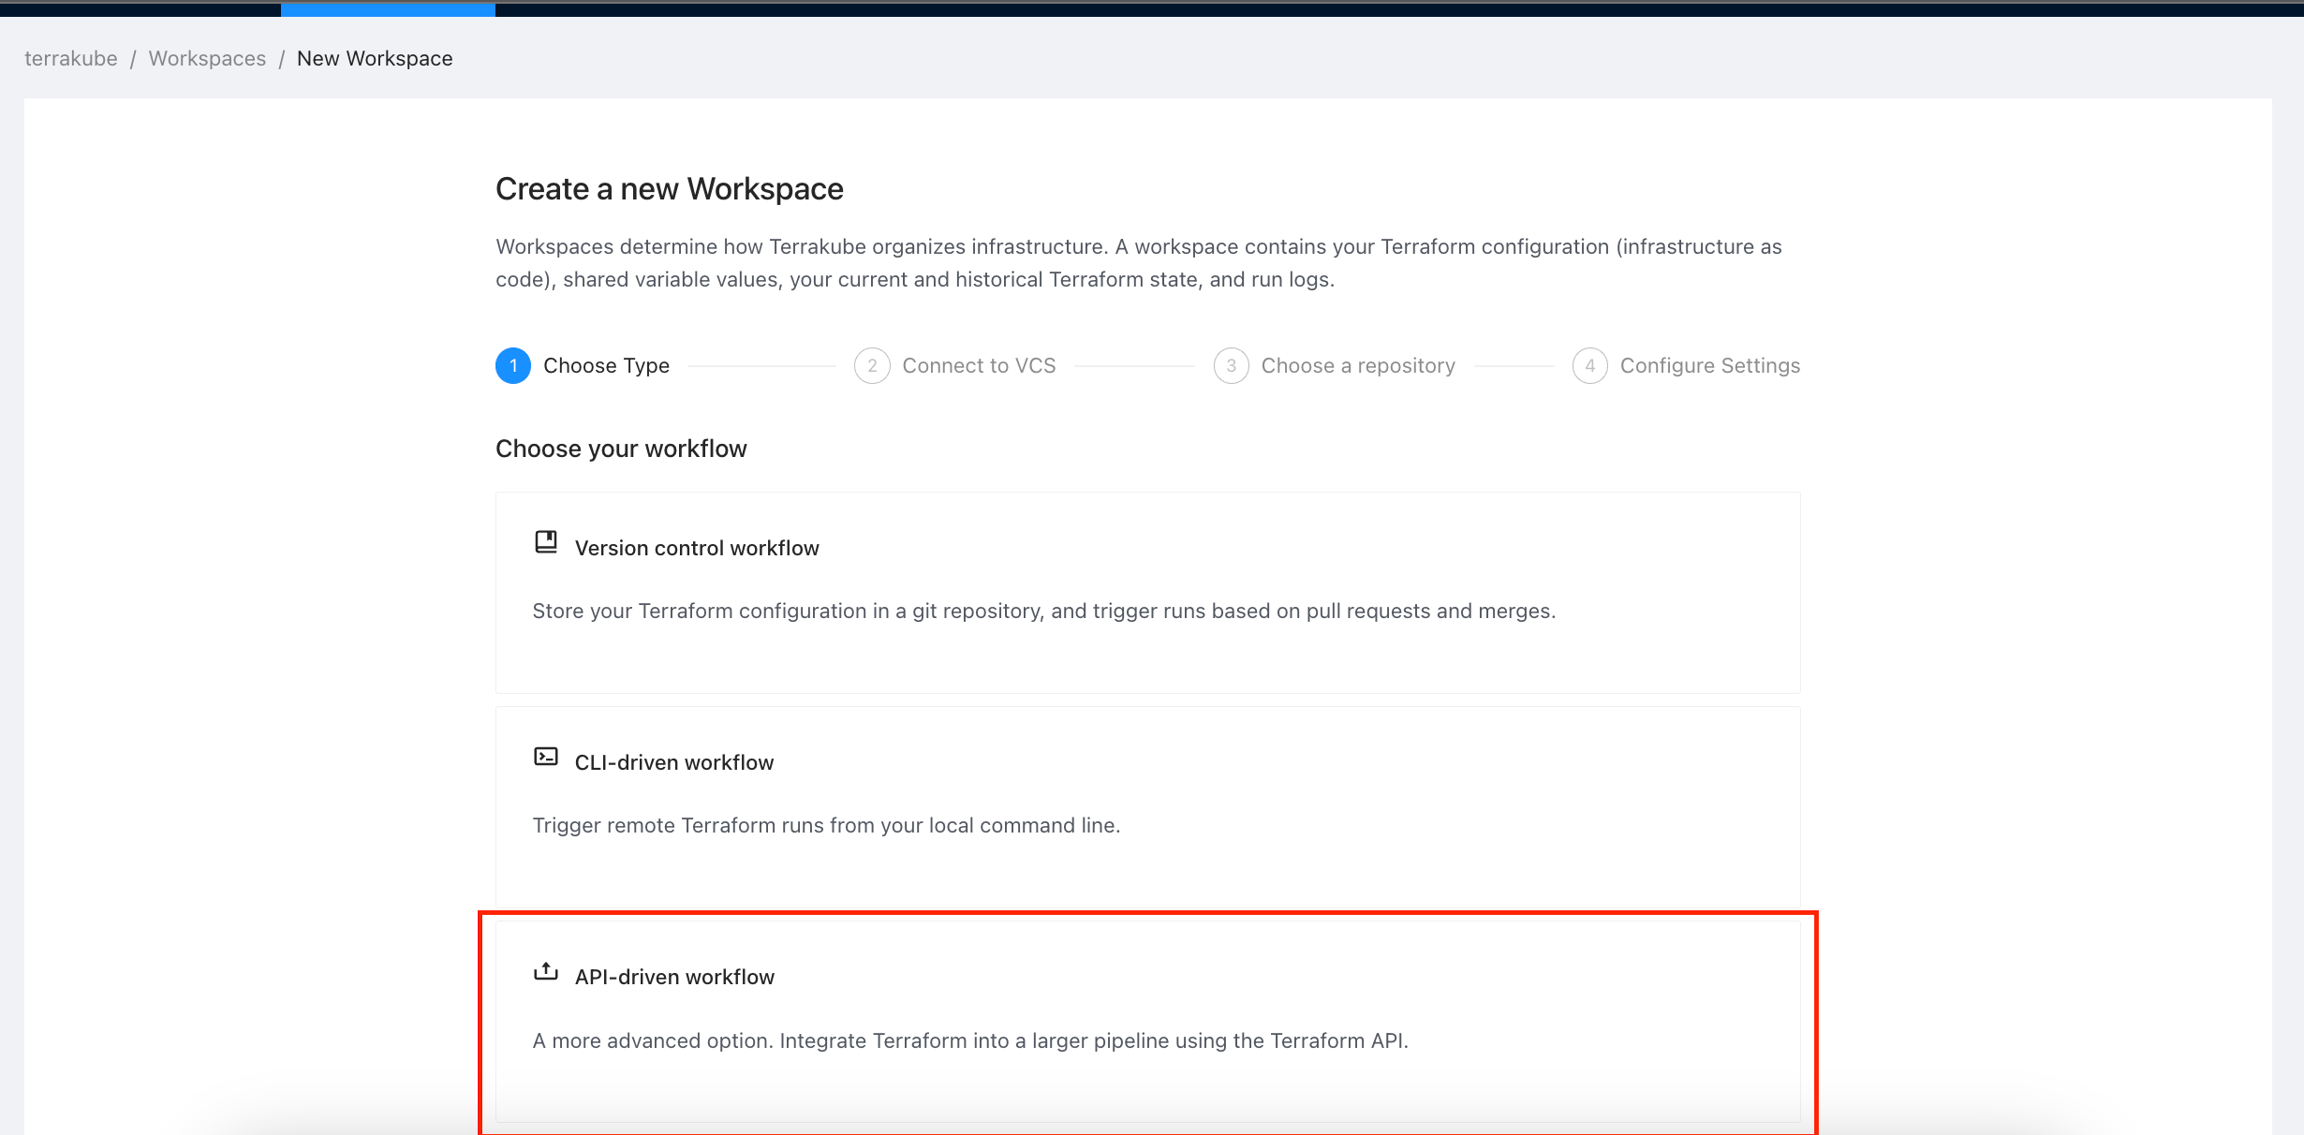
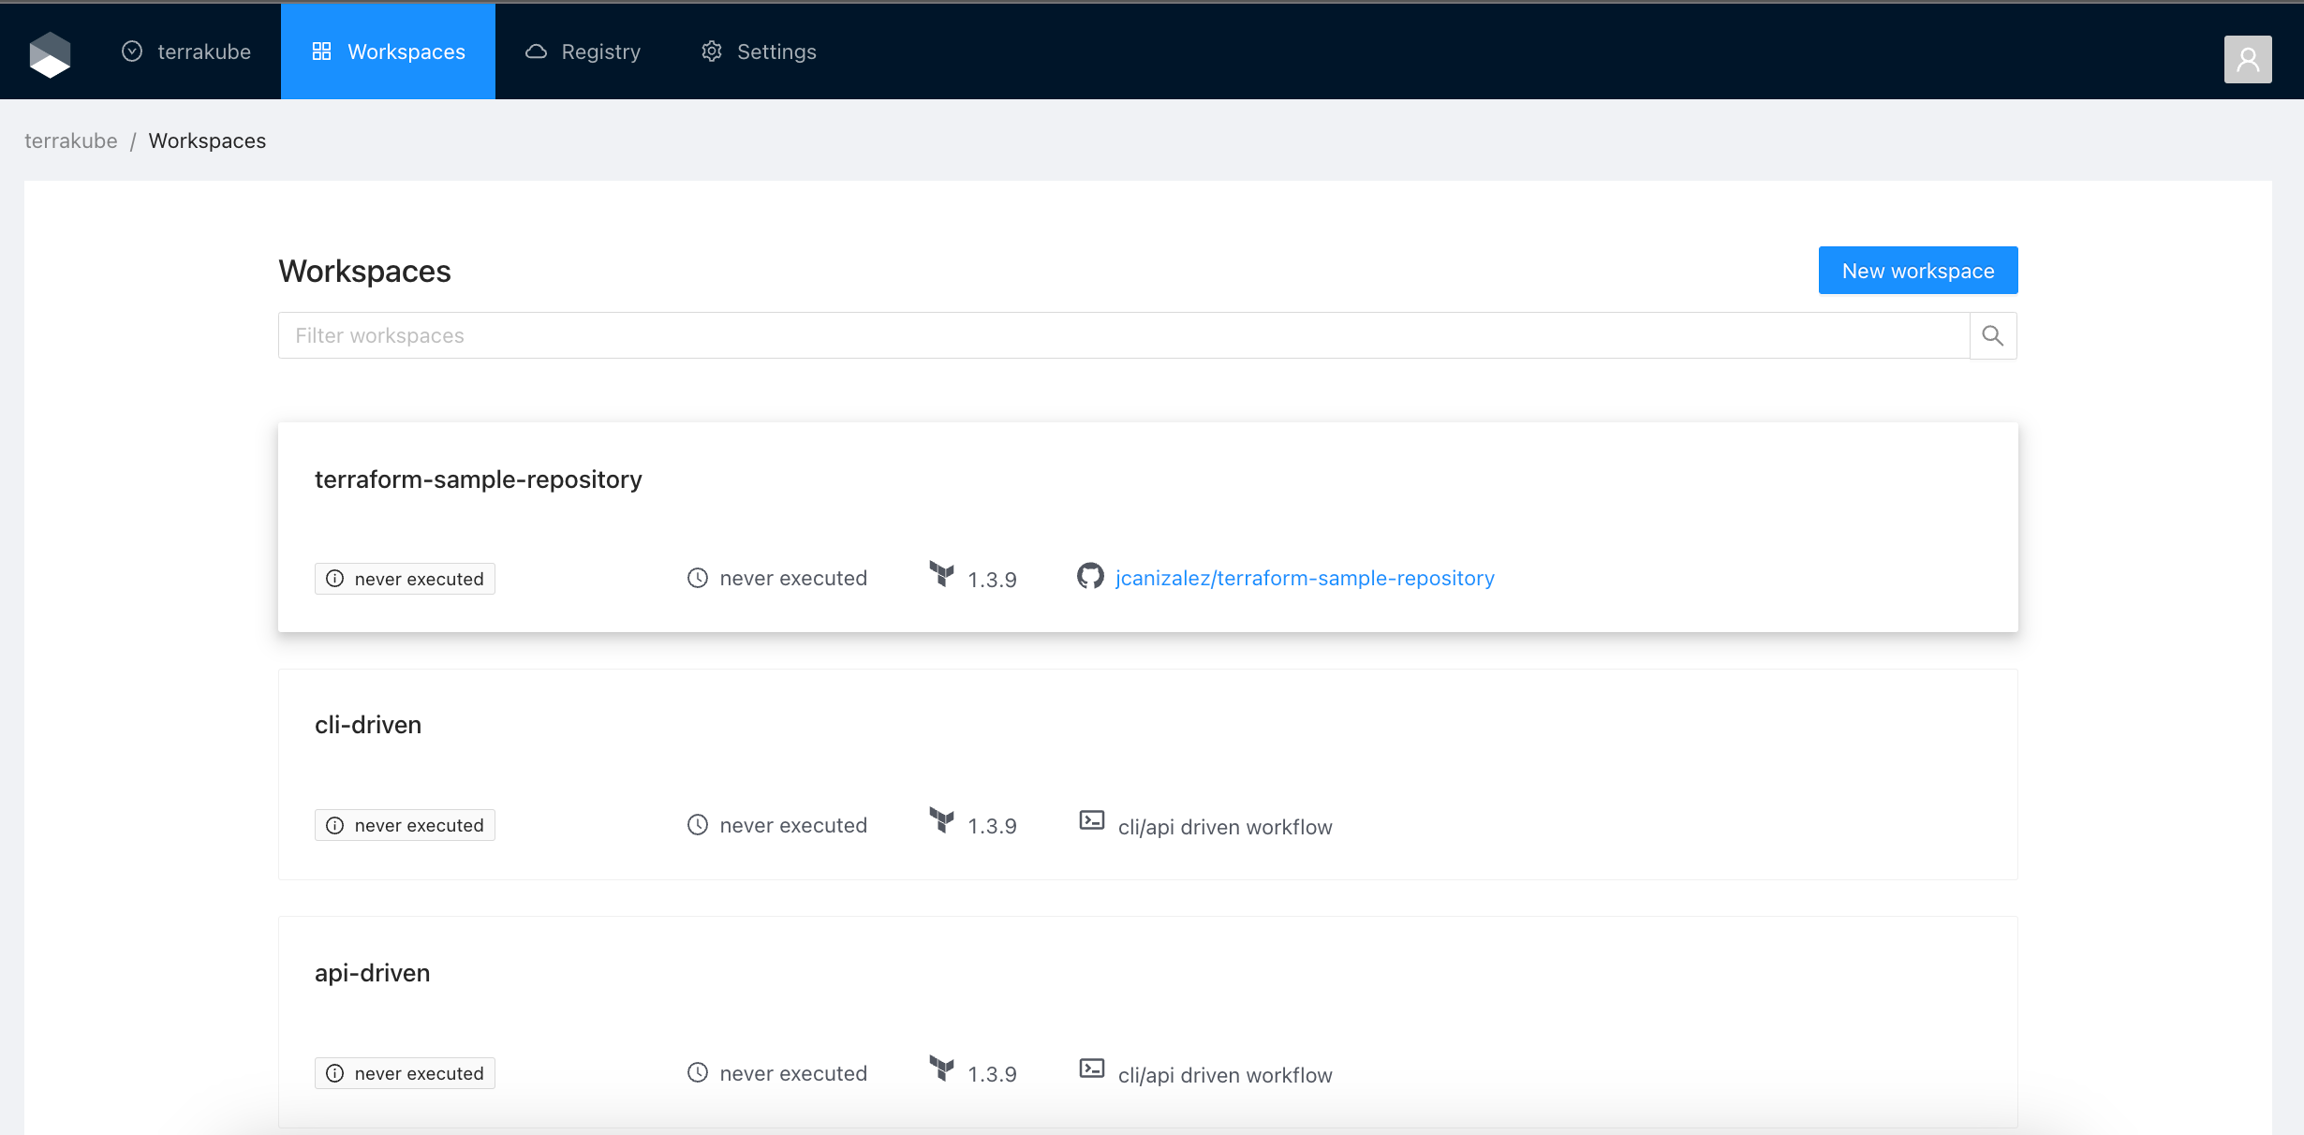
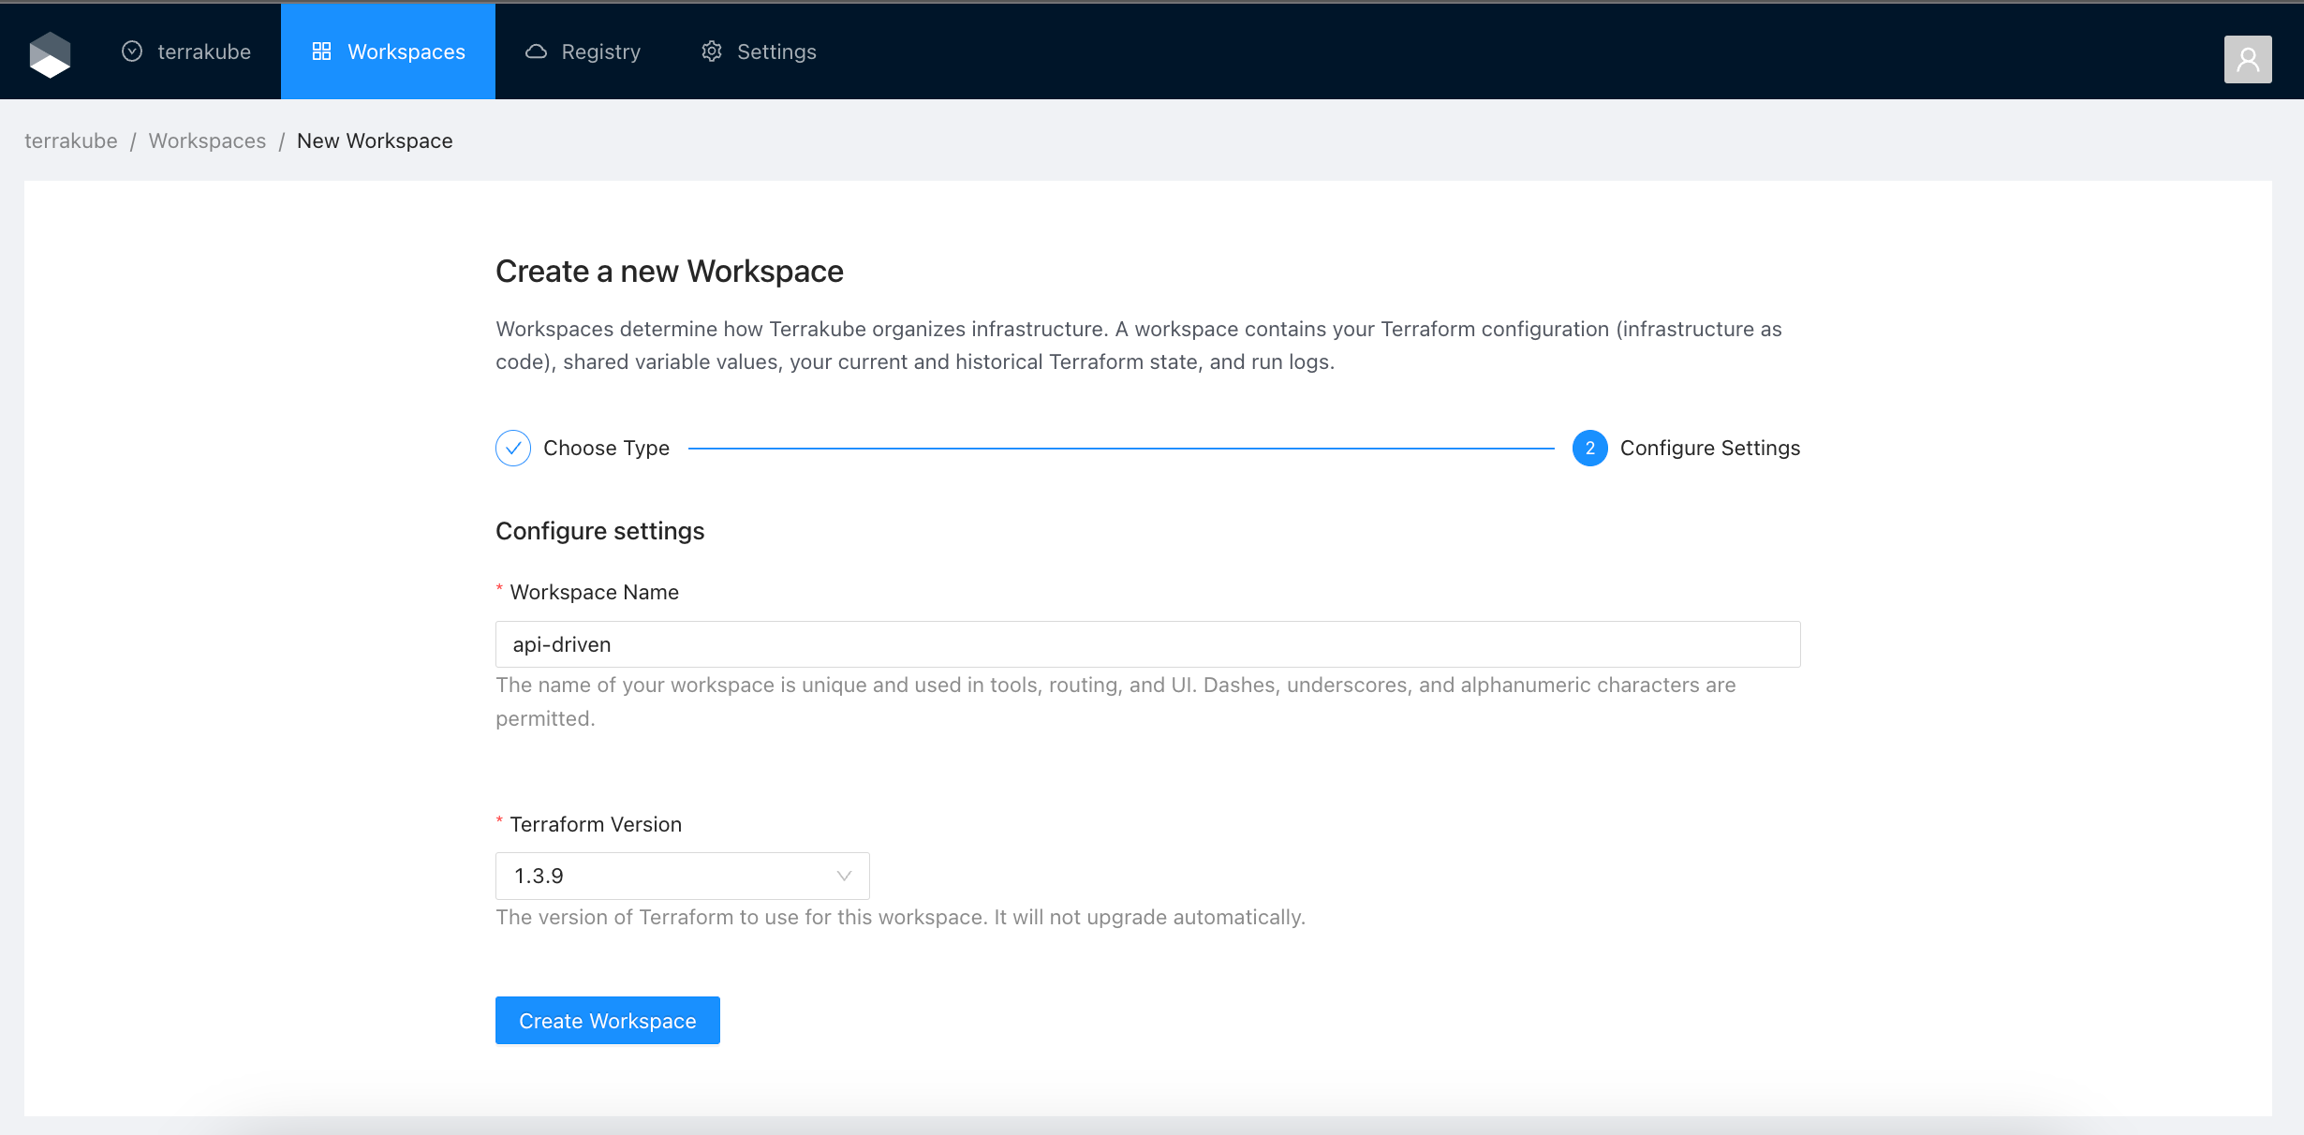
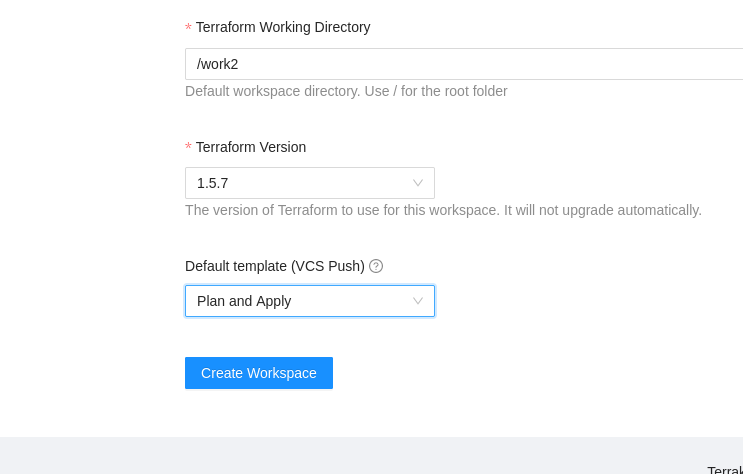
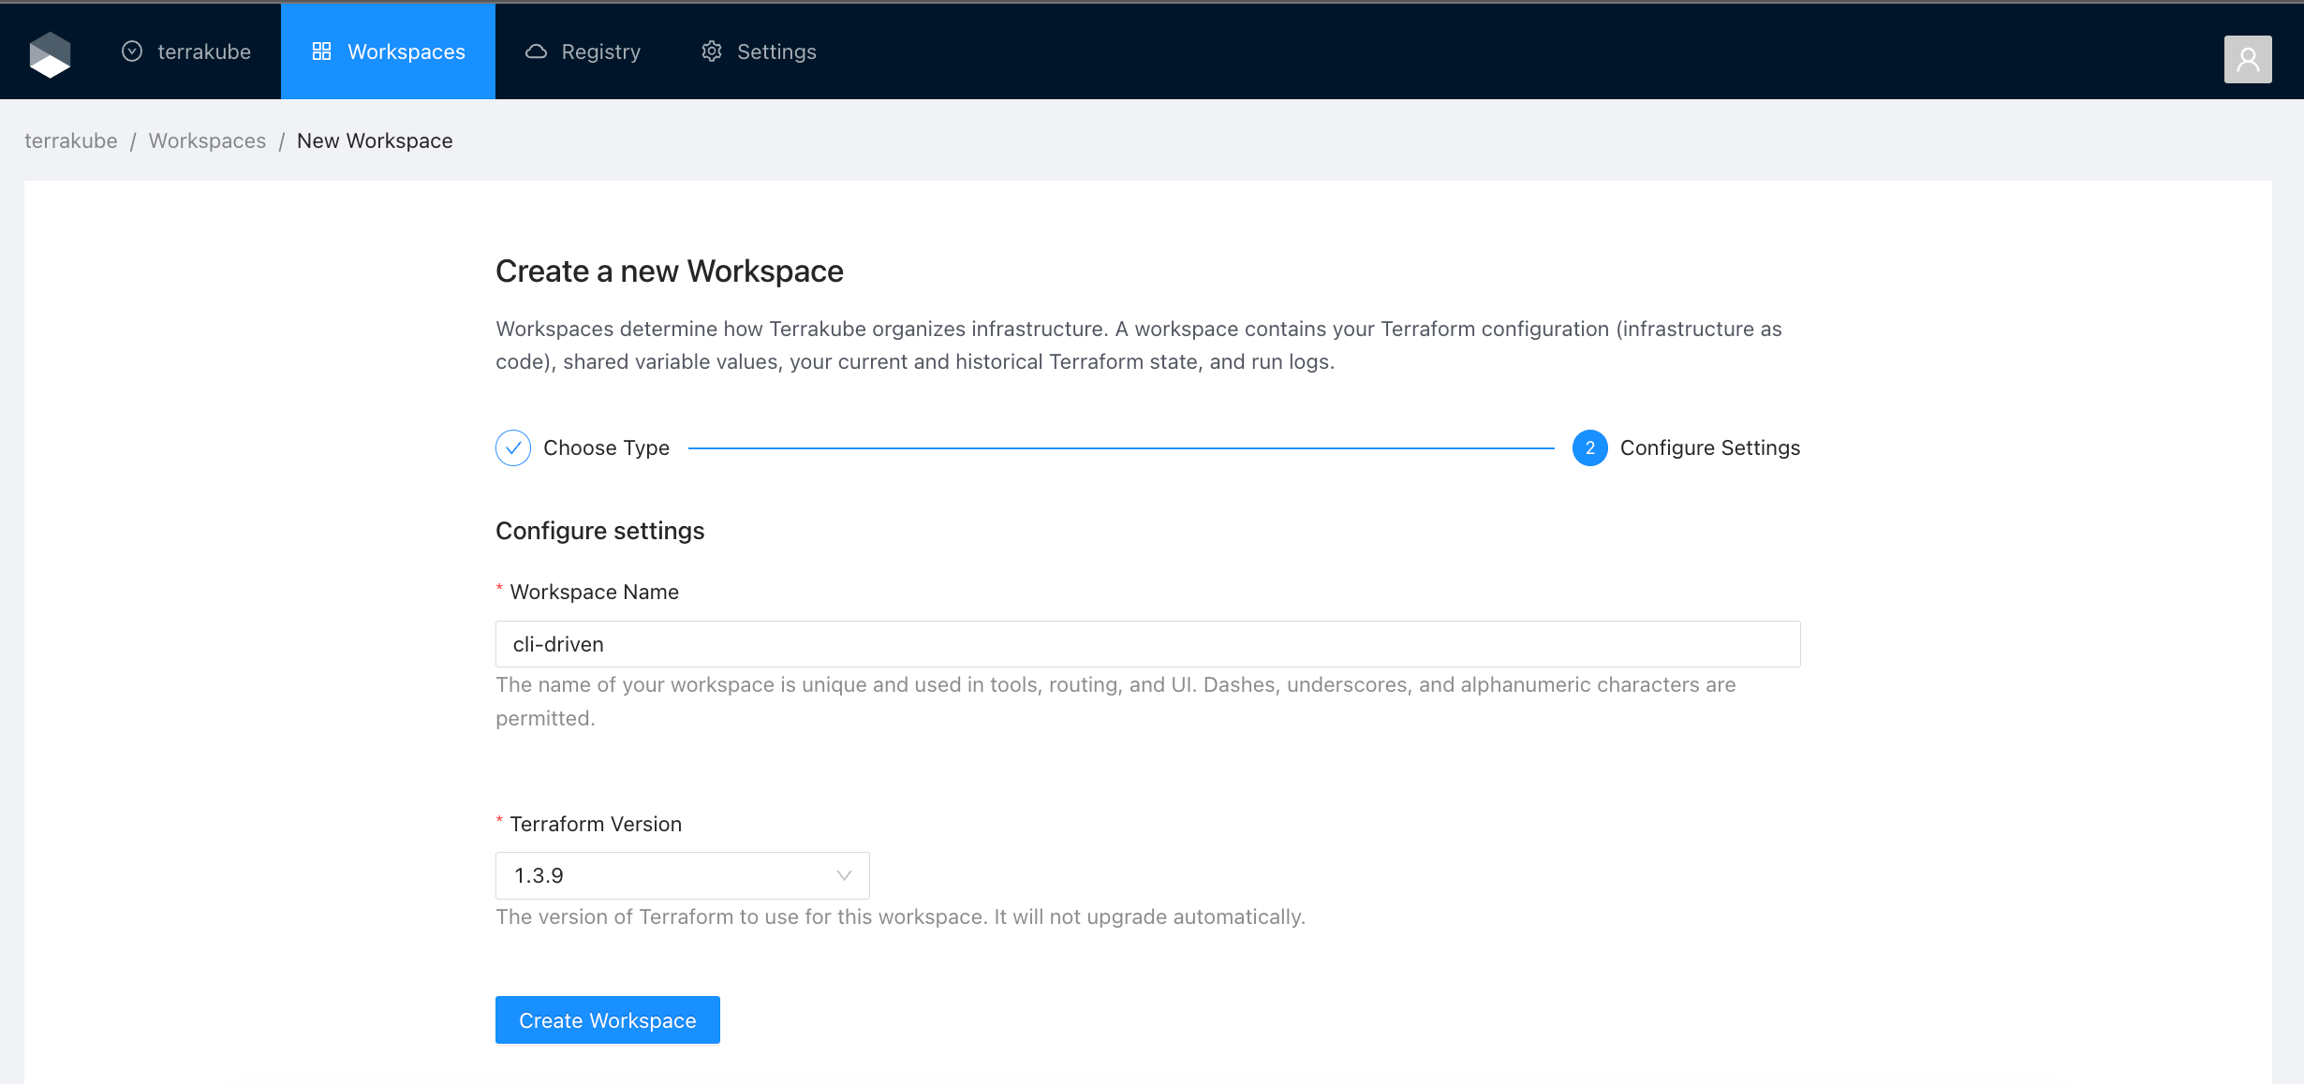
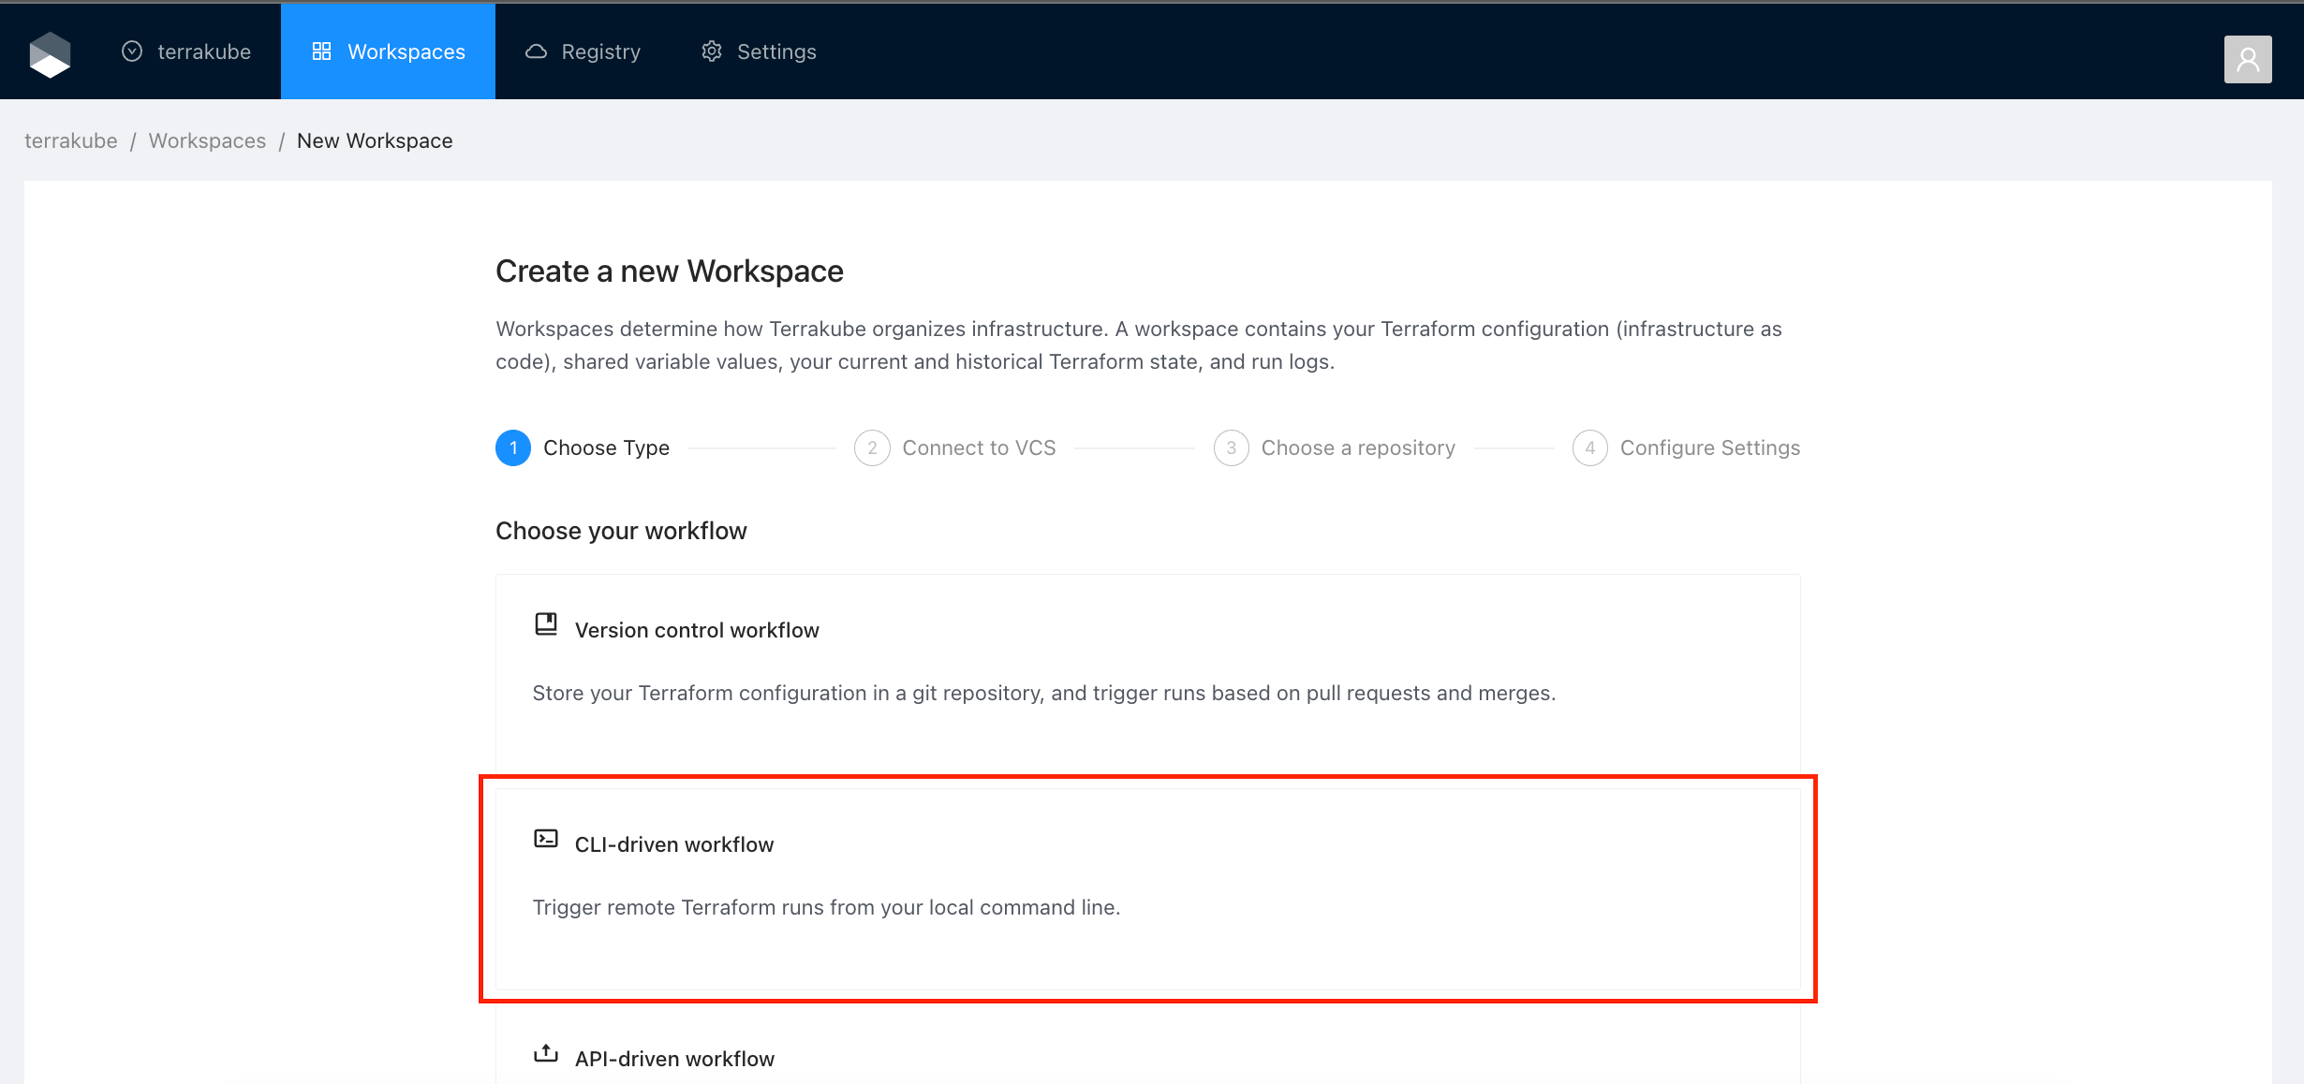
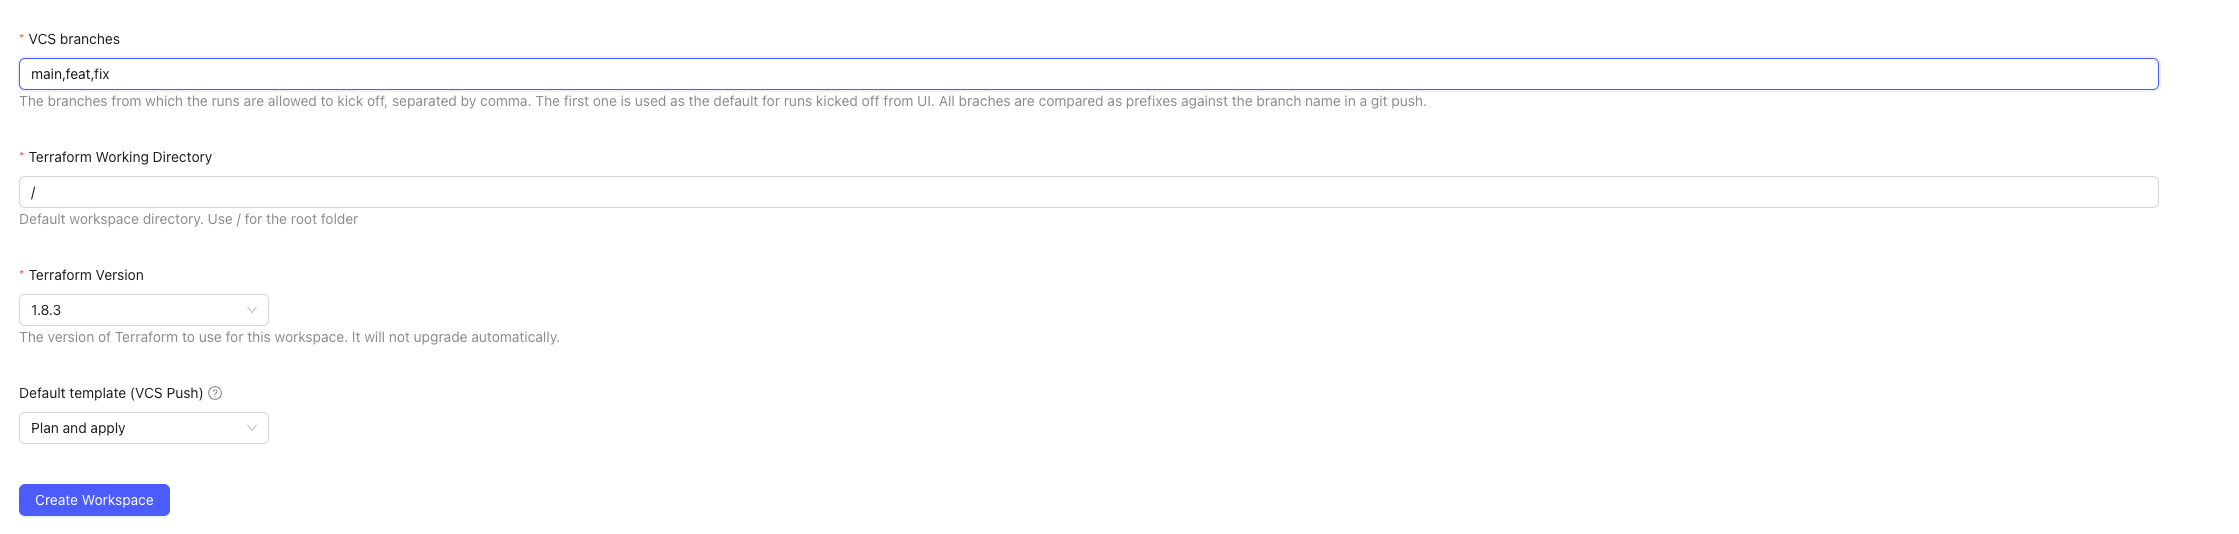
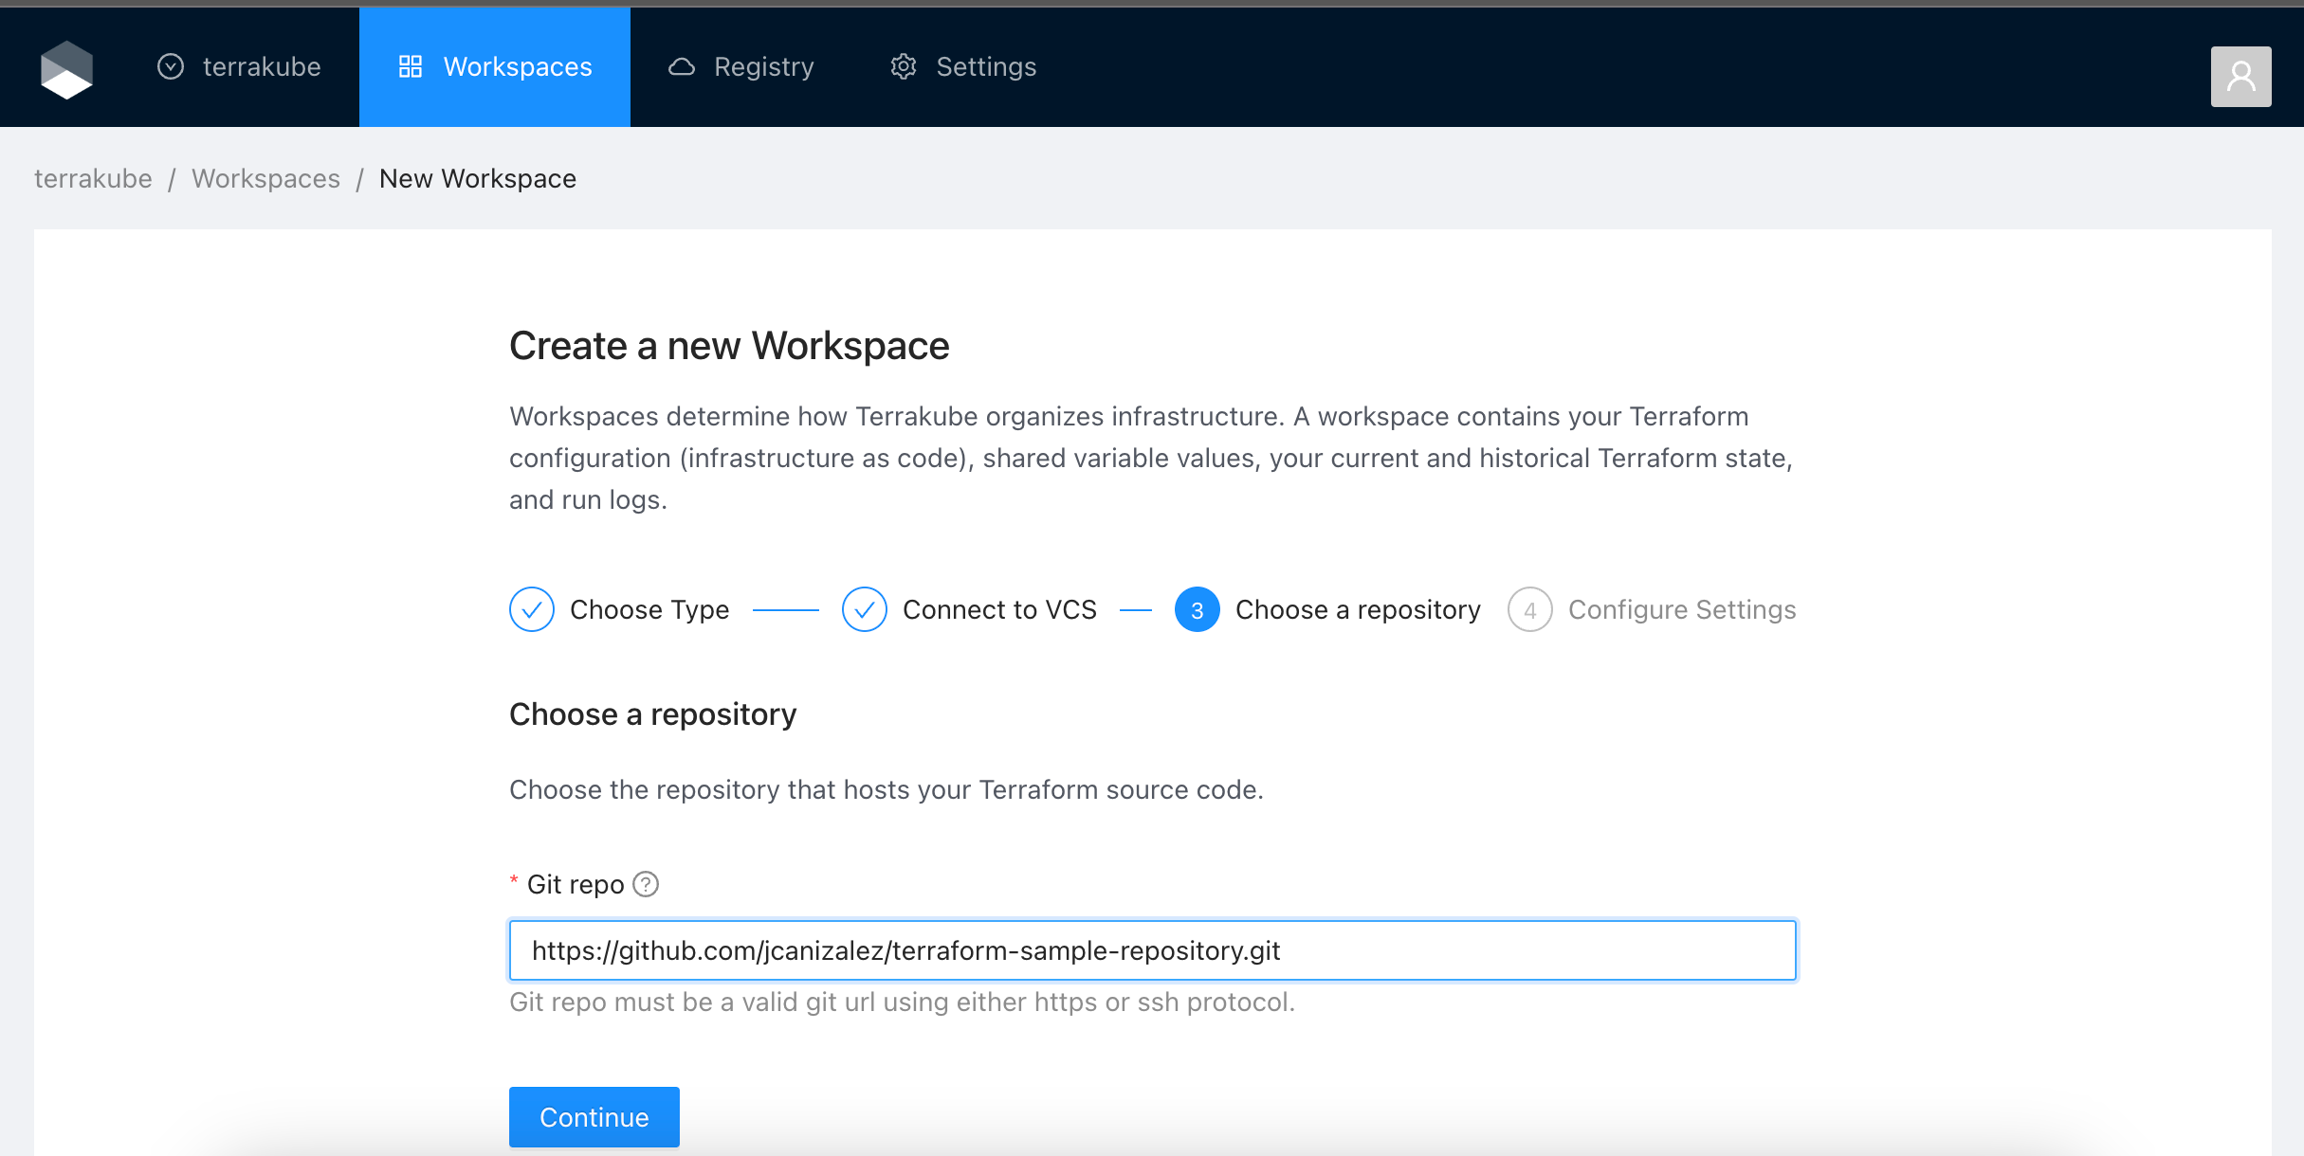
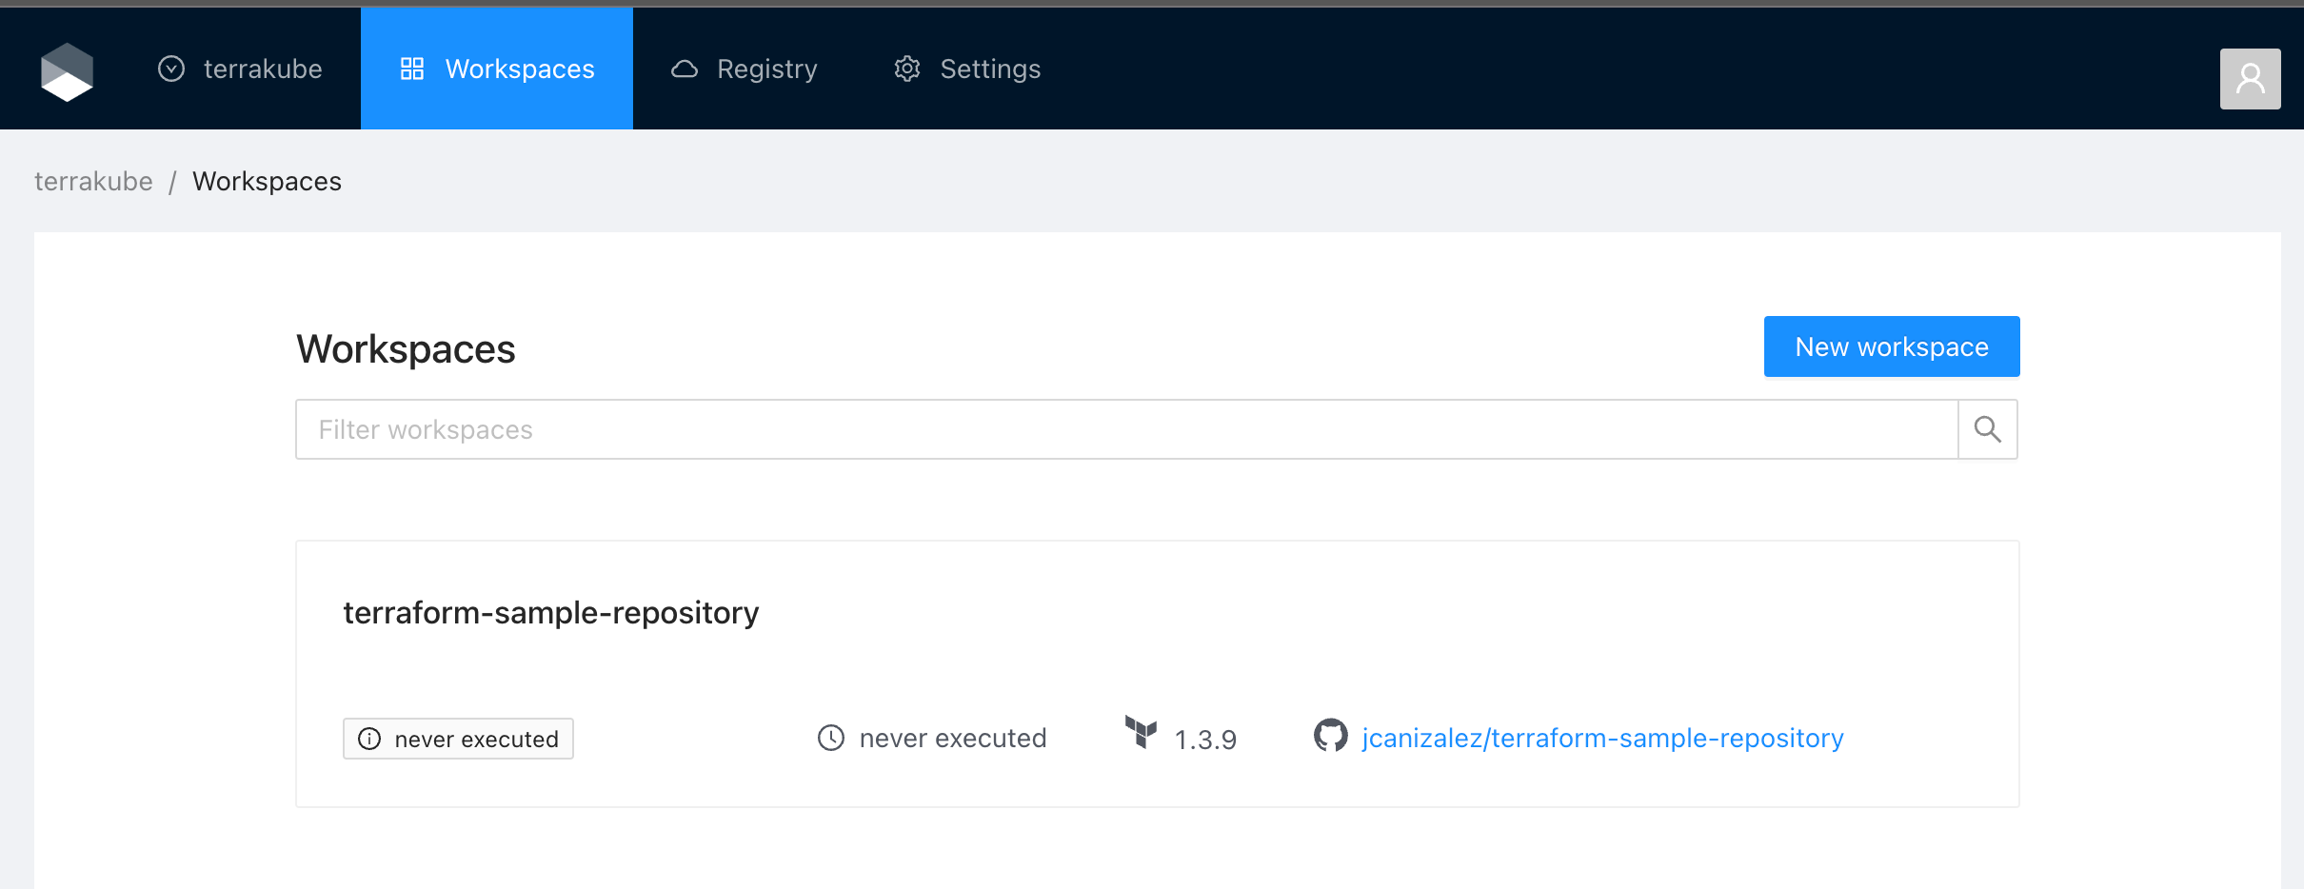
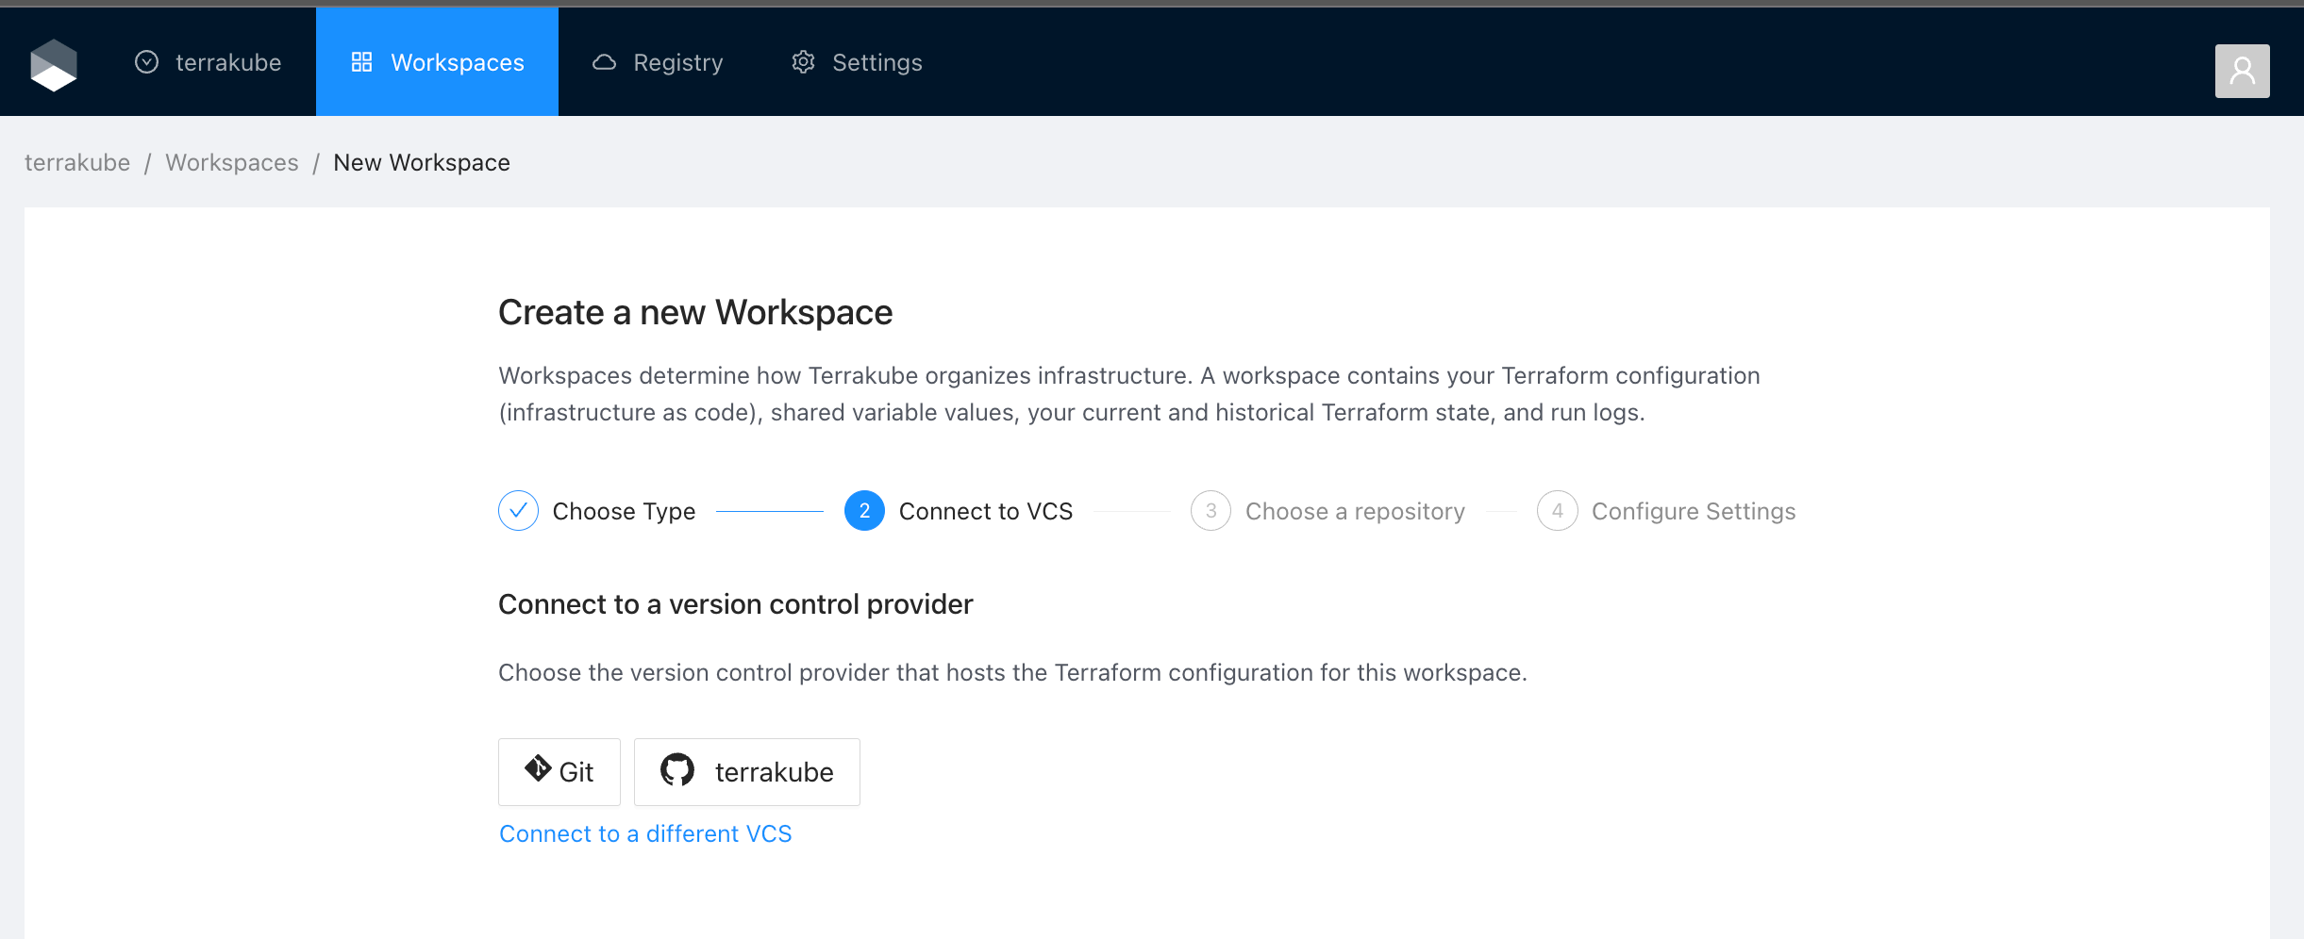

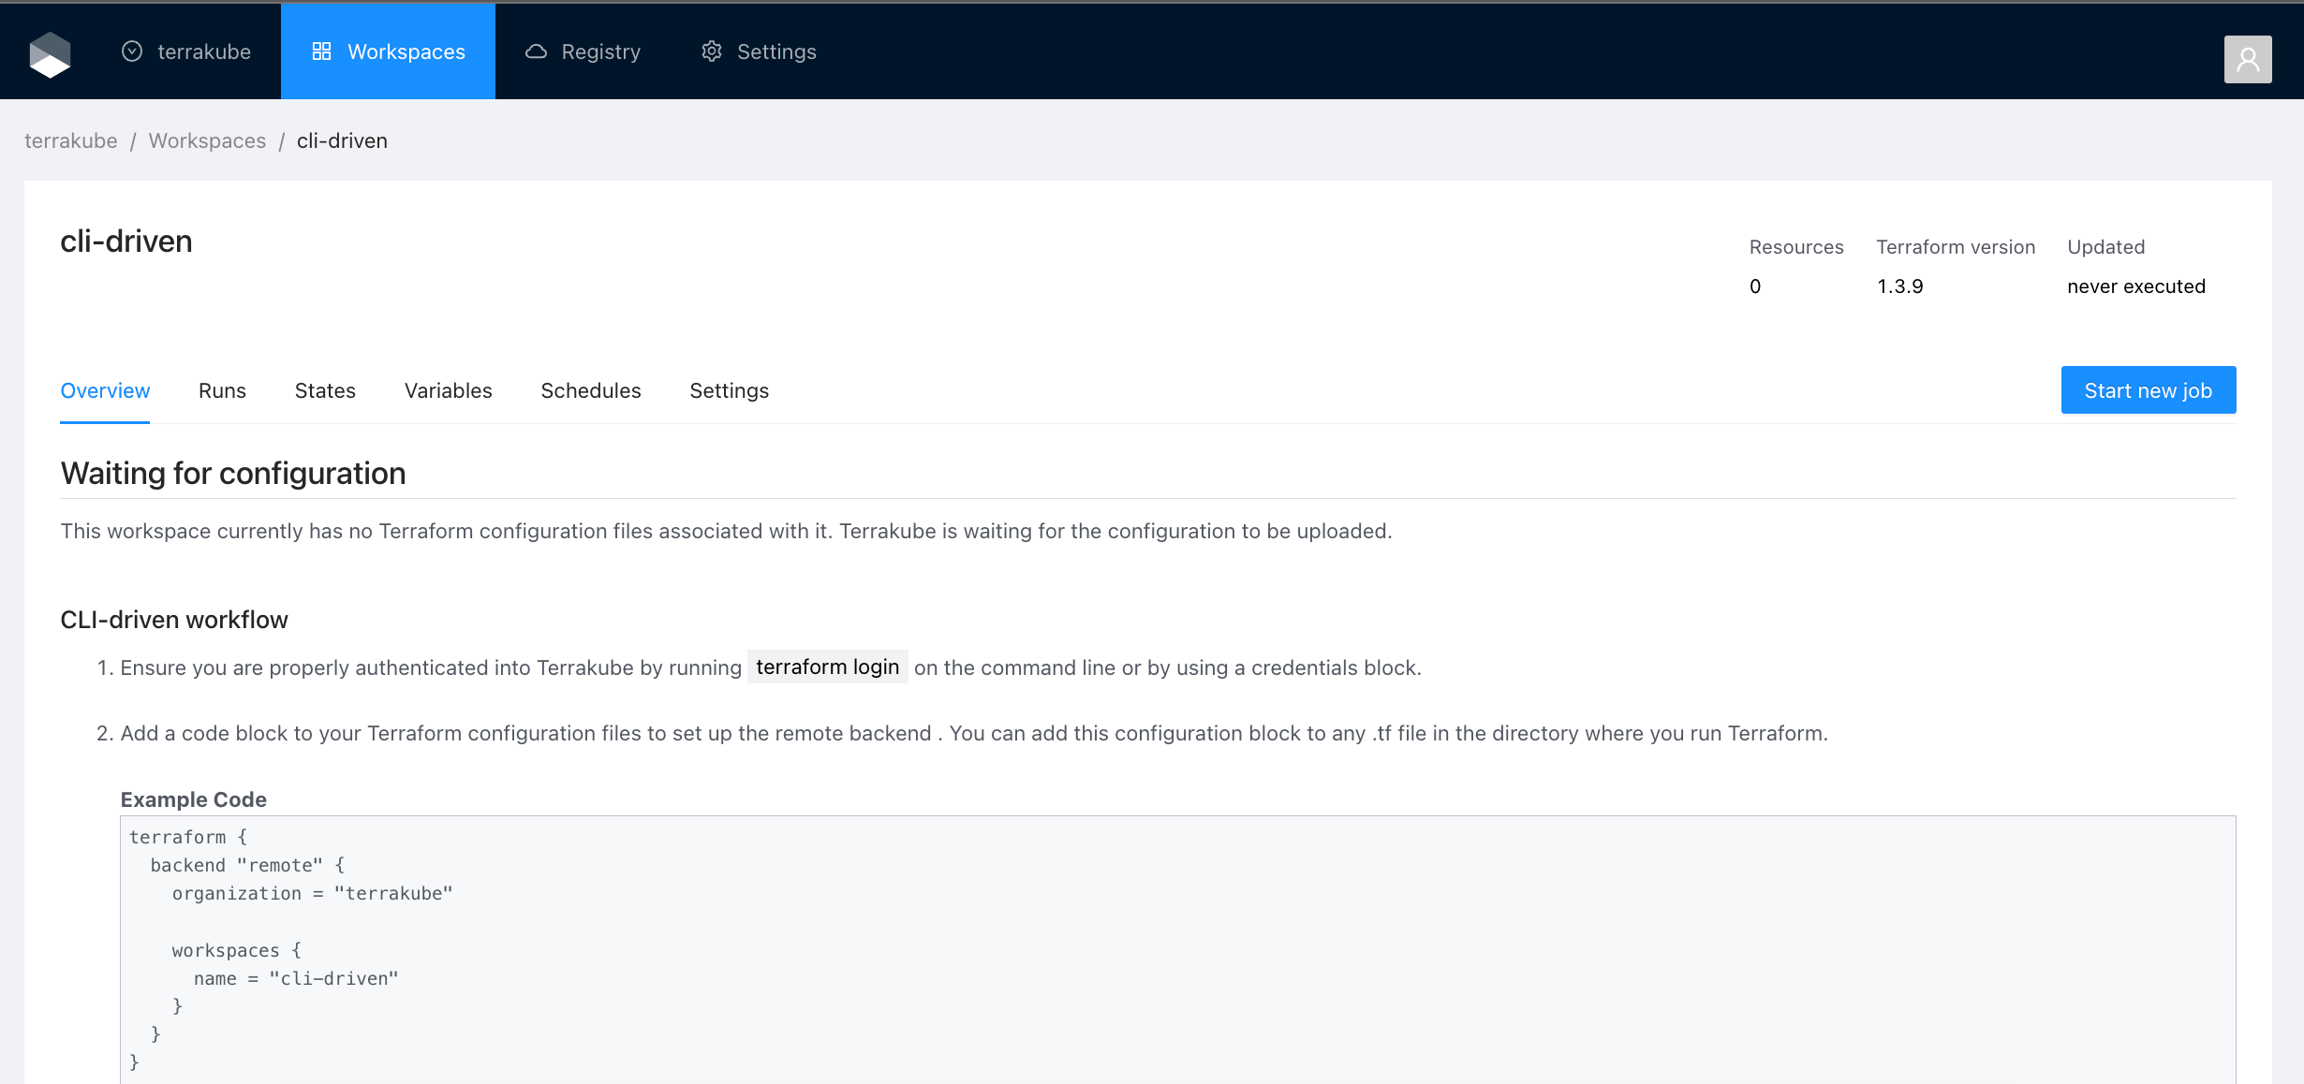
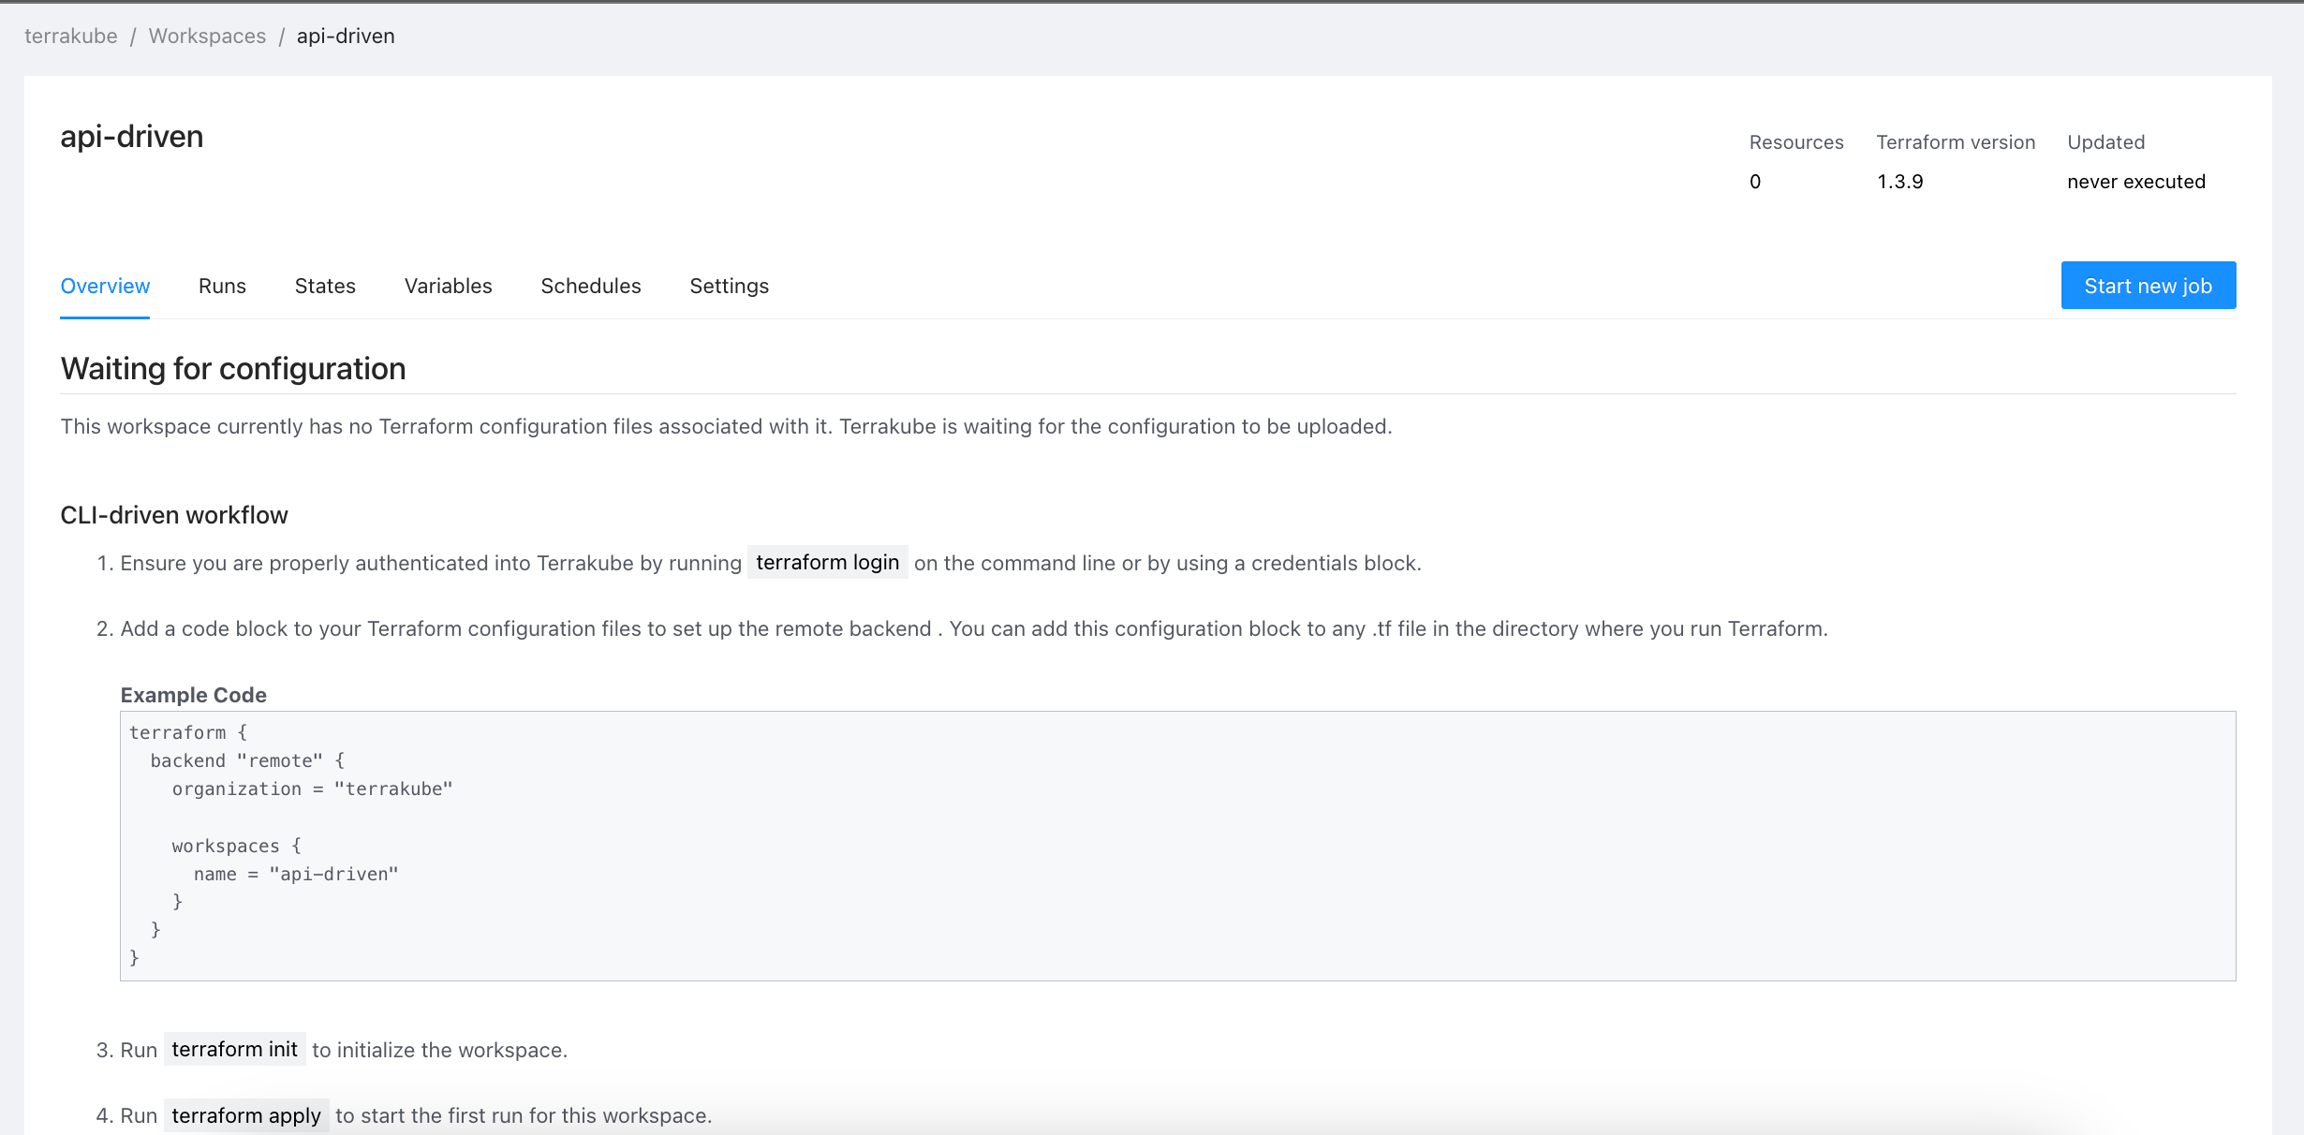
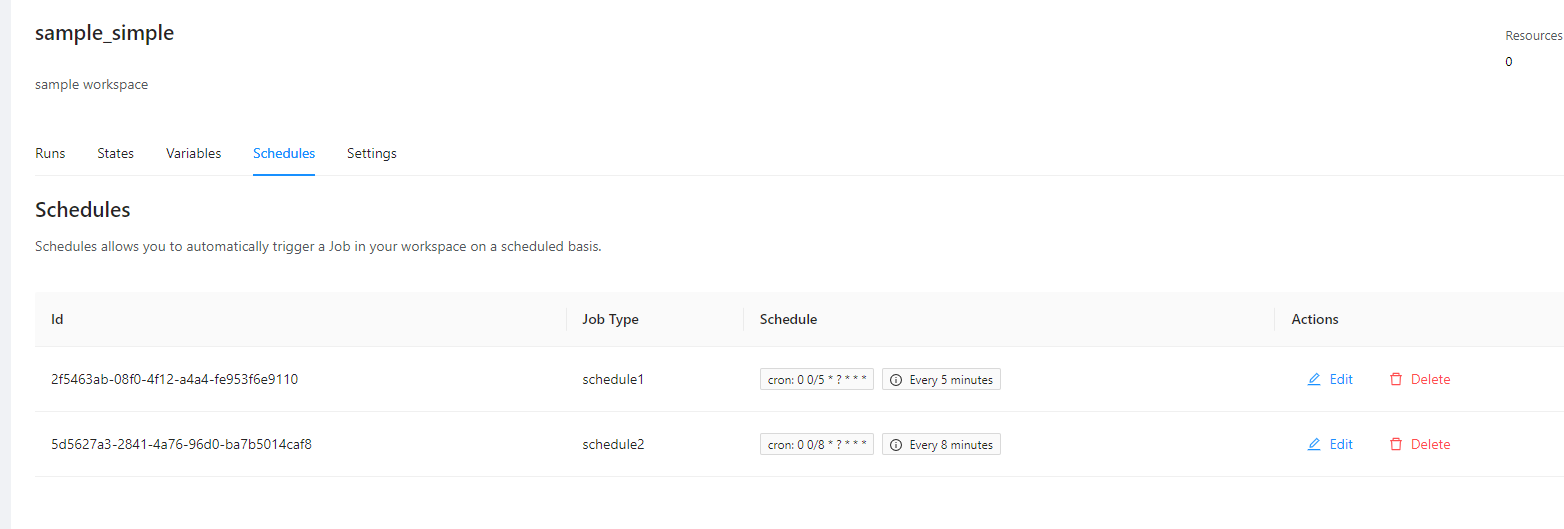
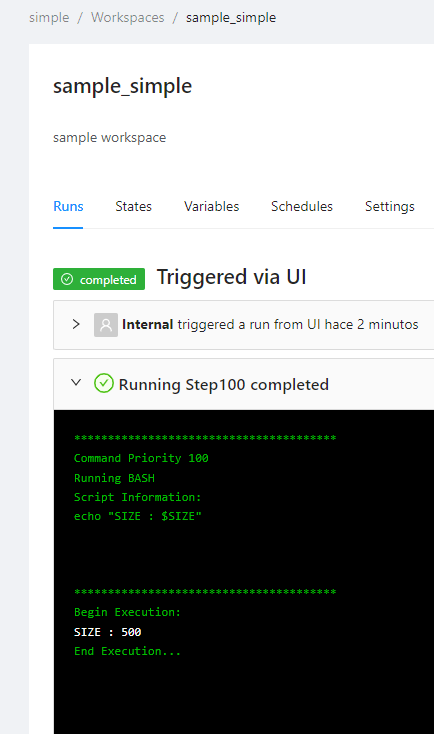
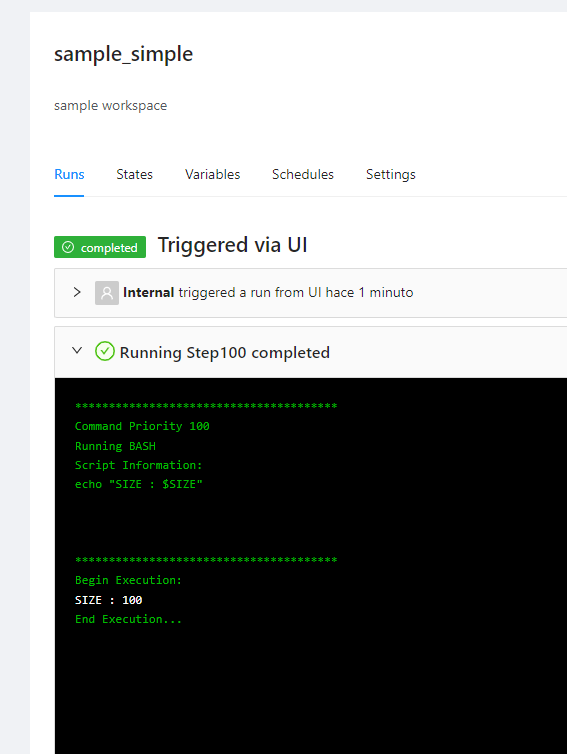
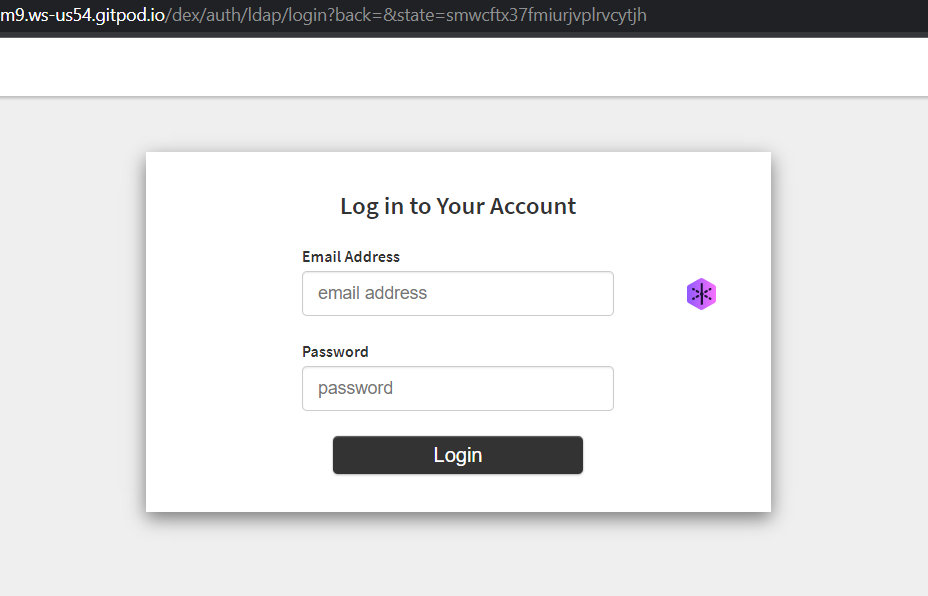
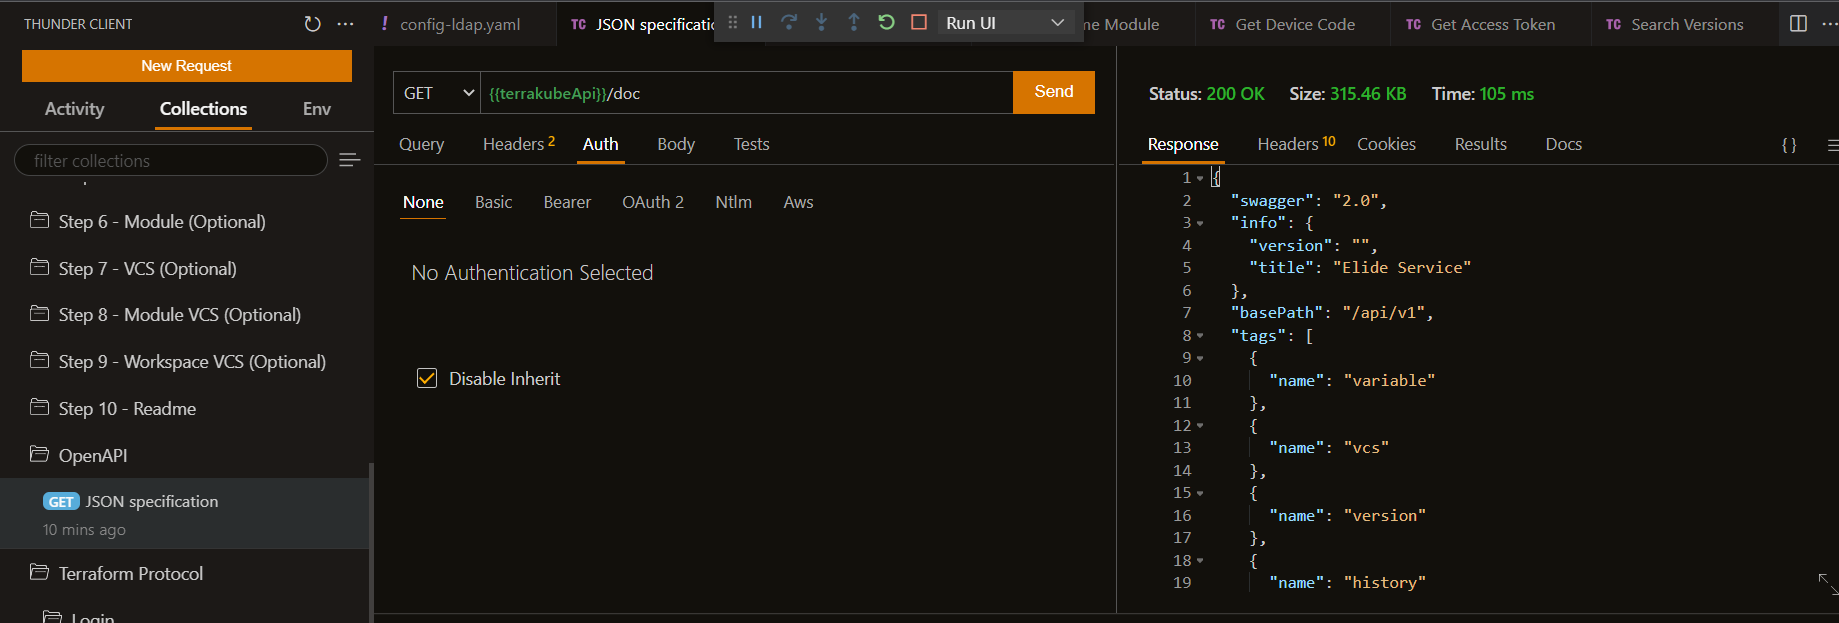
user@pop-os:~/git/simple-terraform$ terraform apply --auto-approve
Running apply in Terraform Cloud. Output will stream here. Pressing Ctrl-C
will cancel the remote apply if it's still pending. If the apply started it
will stop streaming the logs, but will not stop the apply running remotely.
Preparing the remote apply...
To view this run in a browser, visit:
https://8080-azbuilder-terrakube-jdlq1j61x7k.ws-us110.gitpod.io/app/simple/auto-approve/runs/1
Waiting for the plan to start...
***************************************
Running Terraform PLAN
***************************************
Terraform used the selected providers to generate the following execution
plan. Resource actions are indicated with the following symbols:
+ create
Terraform will perform the following actions:
# null_resource.next will be created
+ resource "null_resource" "next" {
+ id = (known after apply)
}
# time_sleep.wait_30_seconds will be created
+ resource "time_sleep" "wait_30_seconds" {
+ create_duration = (known after apply)
+ id = (known after apply)
}
# module.time_module.random_integer.time will be created
+ resource "random_integer" "time" {
+ id = (known after apply)
+ max = 5
+ min = 1
+ result = (known after apply)
}
Plan: 3 to add, 0 to change, 0 to destroy.
Changes to Outputs:
+ creation_time = (known after apply)
+ fake_data = {
+ data = "Hello World"
+ resource = {
+ resource1 = "fake"
}
}
module.time_module.random_integer.time: Creating...
module.time_module.random_integer.time: Creation complete after 0s [id=5]
time_sleep.wait_30_seconds: Creating...
time_sleep.wait_30_seconds: Creation complete after 5s [id=2024-04-16T22:25:15Z]
null_resource.next: Creating...
null_resource.next: Creation complete after 0s [id=7860036023219461249]
Apply complete! Resources: 6 added, 0 changed, 0 destroyed.
Outputs:
creation_time = "5s"
fake_data = {
"data" = "Hello World"
"resource" = {
"resource1" = "fake"
}
}
terraform {
backend "remote" {
hostname = "8080-azbuilder-terrakube-7tnuq3gnkgf.ws-us108.gitpod.io"
organization = "simple"
workspaces {
prefix = "my-app-"
}
}
}api.properties.databasePort: "5432"user@pop-os:~/git/simple-terraform$ terraform plan
Running plan in Terraform Cloud. Output will stream here. Pressing Ctrl-C
will stop streaming the logs, but will not stop the plan running remotely.
Preparing the remote plan...
To view this run in a browser, visit:
https://8080-azbuilder-terrakube-3it4oxf0vpt.ws-us107.gitpod.io/app/simple/simple-terraform/runs/2
Waiting for the plan to start...
***************************************
Running Terraform PLAN
***************************************
null_resource.previous: Refreshing state... [id=2942672164070633234]
module.time_module.random_integer.time: Refreshing state... [id=4]
time_sleep.wait_30_seconds: Refreshing state... [id=2023-12-28T20:29:16Z]
null_resource.next: Refreshing state... [id=1447023117451433293]
null_resource.next2: Refreshing state... [id=8910164257527828565]
Terraform used the selected providers to generate the following execution
plan. Resource actions are indicated with the following symbols:
+ create
Terraform will perform the following actions:
# null_resource.next3 will be created
+ resource "null_resource" "next3" {
+ id = (known after apply)
}
Plan: 1 to add, 0 to change, 0 to destroy.
terraform plan -refresh=false
Running plan in Terraform Cloud. Output will stream here. Pressing Ctrl-C
will stop streaming the logs, but will not stop the plan running remotely.
Preparing the remote plan...
To view this run in a browser, visit:
https://8080-azbuilder-terrakube-3it4oxf0vpt.ws-us107.gitpod.io/app/simple/simple-terraform/runs/3
Waiting for the plan to start...
***************************************
Running Terraform PLAN
***************************************
Terraform used the selected providers to generate the following execution
plan. Resource actions are indicated with the following symbols:
+ create
Terraform will perform the following actions:
# null_resource.next3 will be created
+ resource "null_resource" "next3" {
+ id = (known after apply)
}
Plan: 1 to add, 0 to change, 0 to destroy.provider "terrakube" {
endpoint = "http://terrakube-api.minikube.net"
token = "(PERSONAL ACCESS TOKEN OR TEAM TOKEN)"
}
data "terrakube_organization" "org" {
name = "simple"
}
data "terrakube_vcs" "vcs" {
name = "sample_vcs"
organization_id = data.terrakube_organization.org.id
}
data "terrakube_ssh" "ssh" {
name = "sample_ssh"
organization_id = data.terrakube_organization.org.id
}
resource "terrakube_team" "team" {
name = "TERRAKUBE_SUPER_ADMIN"
organization_id = data.terrakube_vcs.vcs.organization_id
manage_workspace = false
manage_module = false
manage_provider = true
manage_vcs = true
manage_template = true
}
resource "terrakube_module" "module1" {
name = "module_public_connection"
organization_id = data.terrakube_ssh.ssh.organization_id
description = "module_public_connection"
provider_name = "aws"
source = "https://github.com/terraform-aws-modules/terraform-aws-vpc.git"
}POST {{terrakubeApi}}/access-token/v1/teams
Authorization: Bearer (PERSONAL ACCESS TOKEN)
Request Body:
{
"days": "1",
"group": "TERRAKUBE_ADMIN",
"description": "Sample Team Token"
}data "terraform_remote_state" "remote_creation_time" {
backend = "remote"
config = {
organization = "simple"
hostname = "8080-azbuilder-terrakube-vg8s9w8fhaj.ws-us102.gitpod.io"
workspaces = {
name = "simple_tag1"
}
}
}terraform {
cloud {
organization = "simple"
hostname = "8080-azbuilder-terrakube-md8dylvuzta.ws-us101.gitpod.io"
workspaces {
tags = ["networking", "development"]
}
}
}terraform {
cloud {
hostname = "8080-azbuilder-terrakube-q8aleg88vlc.ws-us92.gitpod.io"
organization = "migrate-org"
workspaces {
name = "migrate-state"
}
}
}terraform login 8080-azbuilder-terrakube-q8aleg88vlc.ws-us92.gitpod.io
terraform init -migrate-stateflow:
- type: "terraformPlan"
step: 100
importComands:
repository: "https://github.com/AzBuilder/terrakube-extensions"
folder: "templates/terratag"
branch: "import-template"
inputsEnv:
INPUT_IMPORT1: $IMPORT1
INPUT_IMPORT2: $IMPORT2
inputsTerraform:
INPUT_IMPORT1: $IMPORT1
INPUT_IMPORT2: $IMPORT2
- type: "terraformApply"
step: 200flow:
- type: "customScripts"
step: 100
inputsTerraform:
SIZE: $SIZE_SMALL
commands:
- runtime: "BASH"
priority: 100
before: true
script: |
echo "SIZE : $SIZE"
- type: "scheduleTemplates"
step: 200
templates:
- name: "schedule1"
schedule: "0 0/5 * ? * * *"
- name: "schedule2"
schedule: "0 0/10 * ? * * *"flow:
- type: "terraformPlan"
step: 100
importComands:
repository: "https://github.com/AzBuilder/terrakube-extensions"
folder: "templates/terratag"
branch: "import-template"
- type: "terraformApply"
step: 200## Dex
dex:
enabled: true
config:
issuer: https://api.terrakube.gcp.com/dex #<<CHANGE_THIS>>
storage:
type: memory
oauth2:
responseTypes: ["code", "token", "id_token"]
web:
allowedOrigins: ["*"]
staticClients:
- id: google
redirectURIs:
- 'https://ui.terrakube.gcp.com' #<<CHANGE_THIS>>
- 'http://localhost:3000'
- 'http://localhost:10001/login'
- 'http://localhost:10000/login'
- '/device/callback'
name: 'google'
public: true
connectors:
- type: google
id: google
name: google
config:
clientID: "<<CHANGE_THIS>>"
clientSecret: "<<CHANGE_THIS>>"
redirectURI: "https://api.terrakube.gcp.com/dex/callback"
serviceAccountFilePath: "/etc/gcp/secret/gcp-credentials" # GCP CREDENTIAL FILE WILL BE IN THIS PATH
adminEmail: "<<CHANGE_THIS>>"git clone https://github.com/AzBuilder/terrakube-helm-chart.git## Global Name
name: "terrakube"
## Terrakube Security
security:
adminGroup: "<<CHANGE_THIS>>" # The value should be a gcp group (format: group_name@yourdomain.com example: terrakube_admin@terrakube.org)
patSecret: "<<CHANGE_THIS>>" # Sample Key 32 characters z6QHX!y@Nep2QDT!53vgH43^PjRXyC3X
internalSecret: "<<CHANGE_THIS>>" # Sample Key 32 characters Kb^8cMerPNZV6hS!9!kcD*KuUPUBa^B3
dexClientId: "google"
dexClientScope: "email openid profile offline_access groups"
gcpCredentials: |
## GCP JSON CREDENTIALS for service account with API Scope https://www.googleapis.com/auth/admin.directory.group.readonly
{
"type": "service_account",
"project_id": "",
"private_key_id": "",
"private_key": "",
"client_email": "",
"client_id": "",
"auth_uri": "",
"token_uri": "",
"auth_provider_x509_cert_url": "",
"client_x509_cert_url": ""
}
## Terraform Storage
storage:
gcp:
projectId: "<<CHANGE_THIS>>"
bucketName: "<<CHANGE_THIS>>"
credentials: |
## GCP JSON CREDENTIALS for service account with access to write to the storage bucket
{
"type": "service_account",
"project_id": "",
"private_key_id": "",
"private_key": "",
"client_email": "",
"client_id": "",
"auth_uri": "",
"token_uri": "",
"auth_provider_x509_cert_url": "",
"client_x509_cert_url": ""
}
## Dex
dex:
enabled: true
config:
issuer: https://api.terrakube.gcp.com/dex #<<CHANGE_THIS>>
storage:
type: memory
oauth2:
responseTypes: ["code", "token", "id_token"]
web:
allowedOrigins: ["*"]
staticClients:
- id: google
redirectURIs:
- 'https://ui.terrakube.gcp.com' #<<CHANGE_THIS>>
- 'http://localhost:3000'
- 'http://localhost:10001/login'
- 'http://localhost:10000/login'
- '/device/callback'
name: 'google'
public: true
connectors:
- type: google
id: google
name: google
config:
clientID: "<<CHANGE_THIS>>"
clientSecret: "<<CHANGE_THIS>>"
redirectURI: "https://api.terrakube.gcp.com/dex/callback"
serviceAccountFilePath: "/etc/gcp/secret/gcp-credentials" # GCP CREDENTIAL FILE WILL BE IN THIS PATH
adminEmail: "<<CHANGE_THIS>>"
## API properties
api:
enabled: true
replicaCount: "1"
serviceType: "ClusterIP"
properties:
databaseType: "H2"
## Executor properties
executor:
enabled: true
replicaCount: "1"
serviceType: "ClusterIP"
properties:
toolsRepository: "https://github.com/AzBuilder/terrakube-extensions"
toolsBranch: "main"
## Registry properties
registry:
enabled: true
replicaCount: "1"
serviceType: "ClusterIP"
## UI Properties
ui:
enabled: true
replicaCount: "1"
serviceType: "ClusterIP"
## Ingress properties
ingress:
useTls: true
ui:
enabled: true
domain: "terrakube-ui.yourdomain.com"
path: "/(.*)"
pathType: "Prefix"
annotations:
kubernetes.io/ingress.class: nginx
nginx.ingress.kubernetes.io/use-regex: "true"
cert-manager.io/cluster-issuer: letsencrypt
api:
enabled: true
domain: "terrakube-api.yourdomain.com"
path: "/(.*)"
pathType: "Prefix"
annotations:
kubernetes.io/ingress.class: nginx
nginx.ingress.kubernetes.io/use-regex: "true"
nginx.ingress.kubernetes.io/configuration-snippet: "proxy_set_header Authorization $http_authorization;"
cert-manager.io/cluster-issuer: letsencrypt
registry:
enabled: true
domain: "terrakube-reg.yourdomain.com"
path: "/(.*)"
pathType: "Prefix"
annotations:
kubernetes.io/ingress.class: nginx
nginx.ingress.kubernetes.io/use-regex: "true"
nginx.ingress.kubernetes.io/configuration-snippet: "proxy_set_header Authorization $http_authorization;"
cert-manager.io/cluster-issuer: letsencrypt
dex:
enabled: true
path: "/dex/(.*)"
pathType: "Prefix"
annotations:
kubernetes.io/ingress.class: nginx
nginx.ingress.kubernetes.io/use-regex: "true"
nginx.ingress.kubernetes.io/configuration-snippet: "proxy_set_header Authorization $http_authorization;"
cert-manager.io/cluster-issuer: letsencrypthelm install --debug --values ./values.yaml terrakube ./terrakube-helm-chart/ -n terrakubeflow:
- type: "terraformPlan"
step: 100
name: "Running Terraform Plan with Drift Detection and Slack Notification" commands:
- runtime: "GROOVY"
priority: 100
after: true
script: |
import Opa
new Opa().loadTool(
"$workingDirectory",
"$bashToolsDirectory",
"0.45.0")
"Opa Download Completed..." - runtime: "BASH"
priority: 200
after: true
script: |
cd $workingDirectory;
terraform show -json terraformLibrary.tfPlan > tfplan.json;
echo "Validating terraform plan information";
opa exec --decision terrakube/plan/information --bundle .terrakube/toolsRepository/policy/ tfplan.json | jq '.result[0].result' > drift_detection.json;
cat drift_detection.json;
- runtime: "GROOVY"
priority: 300
after: true
script: |
import SlackApp
import groovy.json.JsonSlurper
import groovy.json.JsonOutput
File drift_detection = new File("${workingDirectory}/drift_detection.json")
String drift_detection_content = drift_detection.text
println drift_detection_content
def jsonSlurper = new JsonSlurper()
def body = jsonSlurper.parseText(drift_detection_content)
def changes = body.created + body.updated + body.deleted
if (changes > 0) {
new SlackApp().sendMessageWithoutAttachment(
"#general",
"Hello team, Terrakube has deteted an infrastructure drift, please review the following workspace $workspaceId inside organization $organizationId",
"$SLACK_TOKEN",
terrakubeOutput);
} else {
new SlackApp().sendMessageWithoutAttachment(
"#general",
"Hello team, Terrakube did not detect any infrastructure drift for workspace $workspaceId inside organization $organizationId",
"$SLACK_TOKEN",
terrakubeOutput);
}terraform {
required_providers {
azurerm = {
source = "hashicorp/azurerm"
version = "=3.25.0"
}
}
}
provider "azurerm" {
features {}
}
resource "azurerm_resource_group" "example" {
name = "api-rg-pro"
location = "East Us 2"
}
resource "azurerm_app_service_plan" "example" {
name = "api-appserviceplan-pro"
location = azurerm_resource_group.example.location
resource_group_name = azurerm_resource_group.example.name
sku {
tier = "Basic"
size = "B1"
}
}terraform {
backend "remote" {
hostname = "terrakube-api.example.com"
organization = "simple"
workspaces {
name = "workspace1"
}
}
}
resource "random_string" "random" {
terraform {
cloud {
organization = "simple"
hostname = "terrakube-api.example.com"
workspaces {
name = "samplecloud"
}
}
}
resource "random_string" "random" {

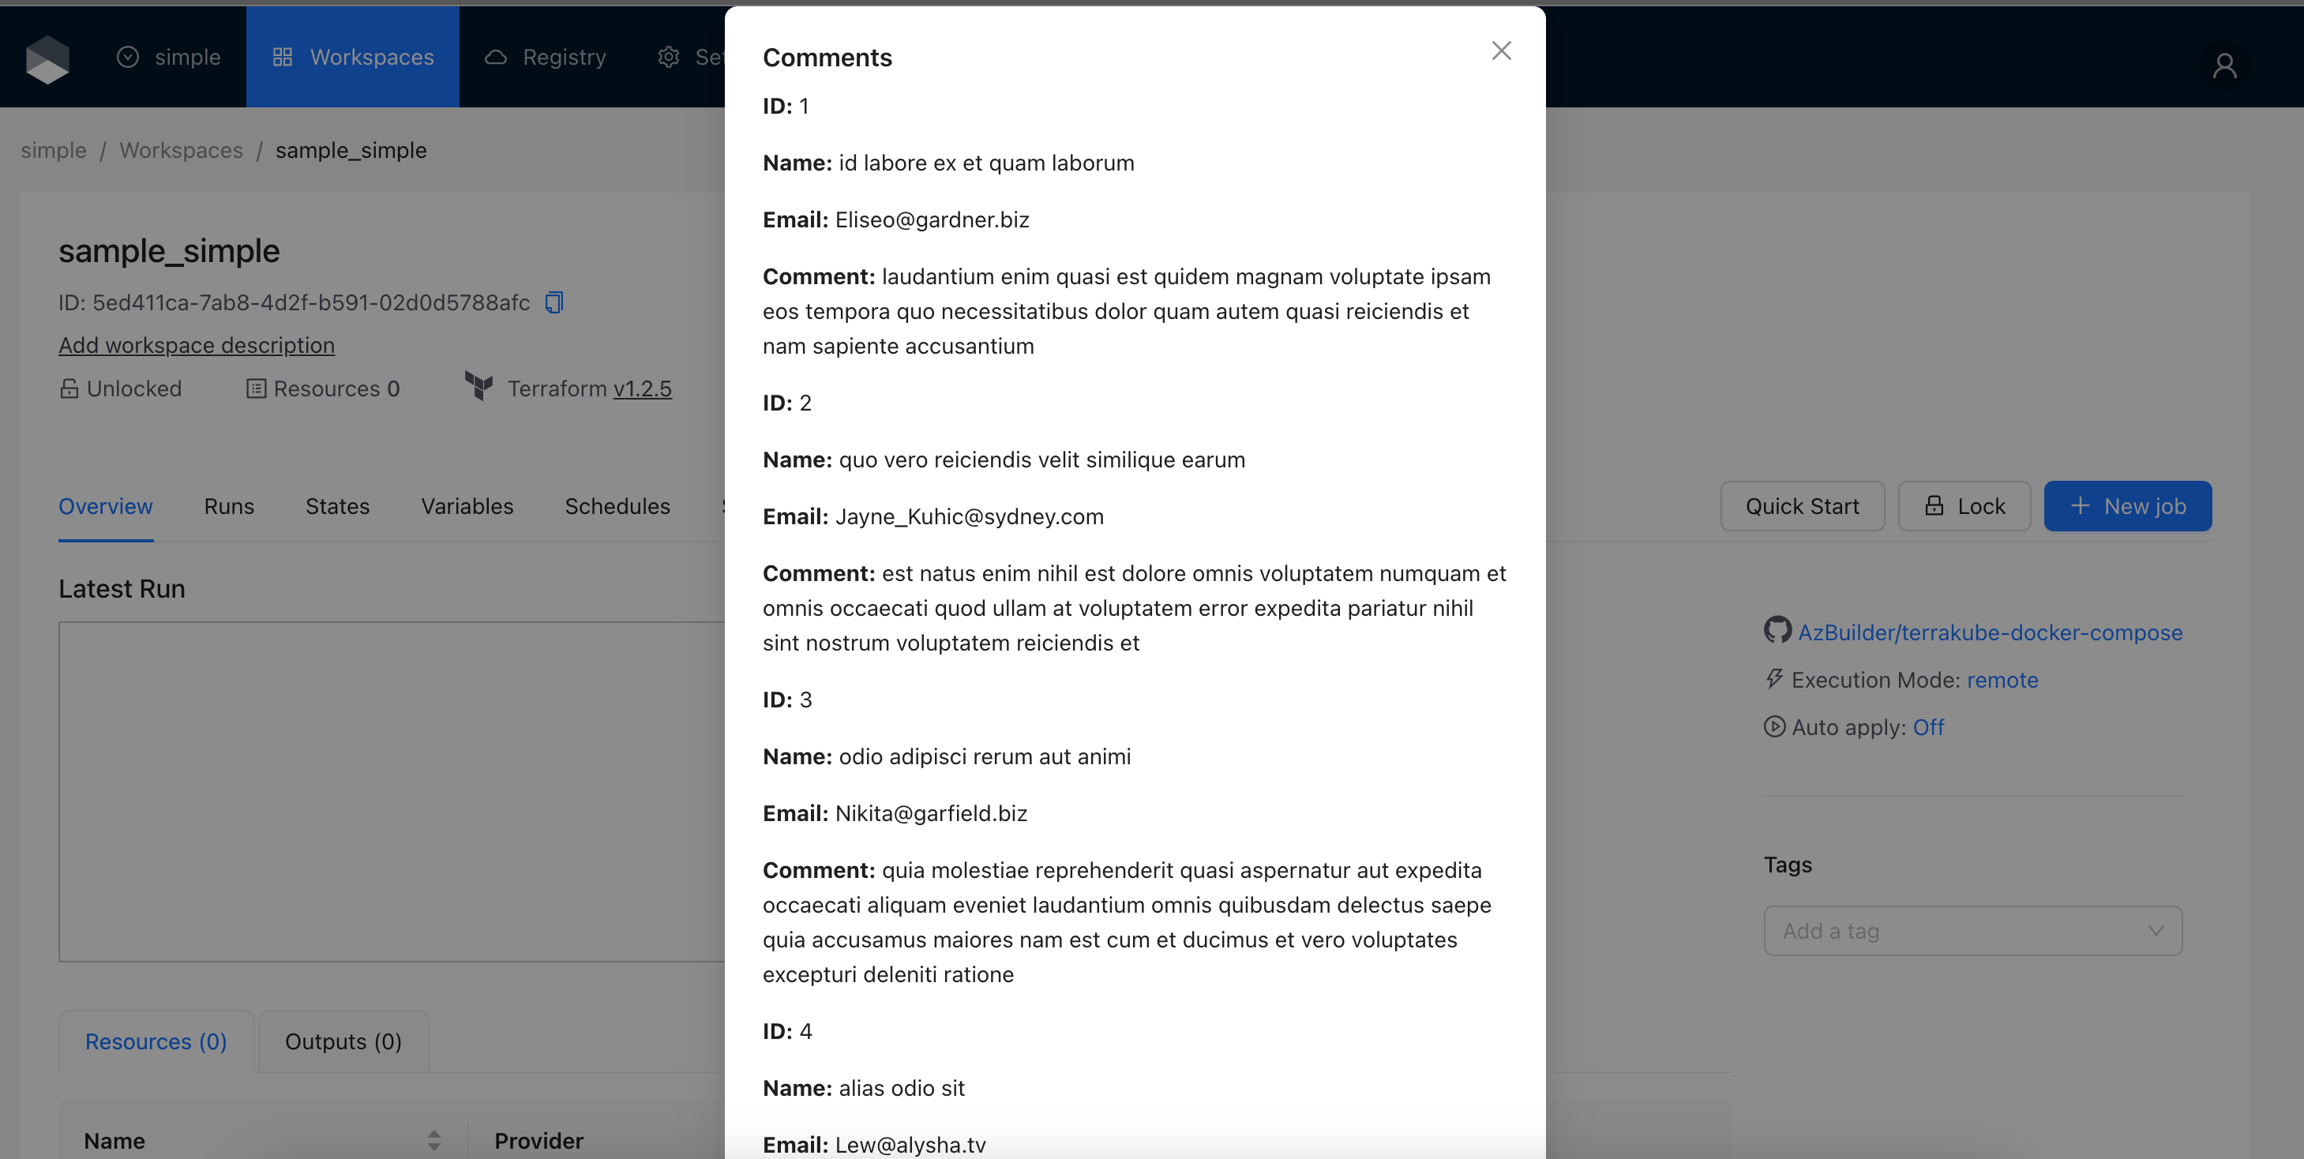
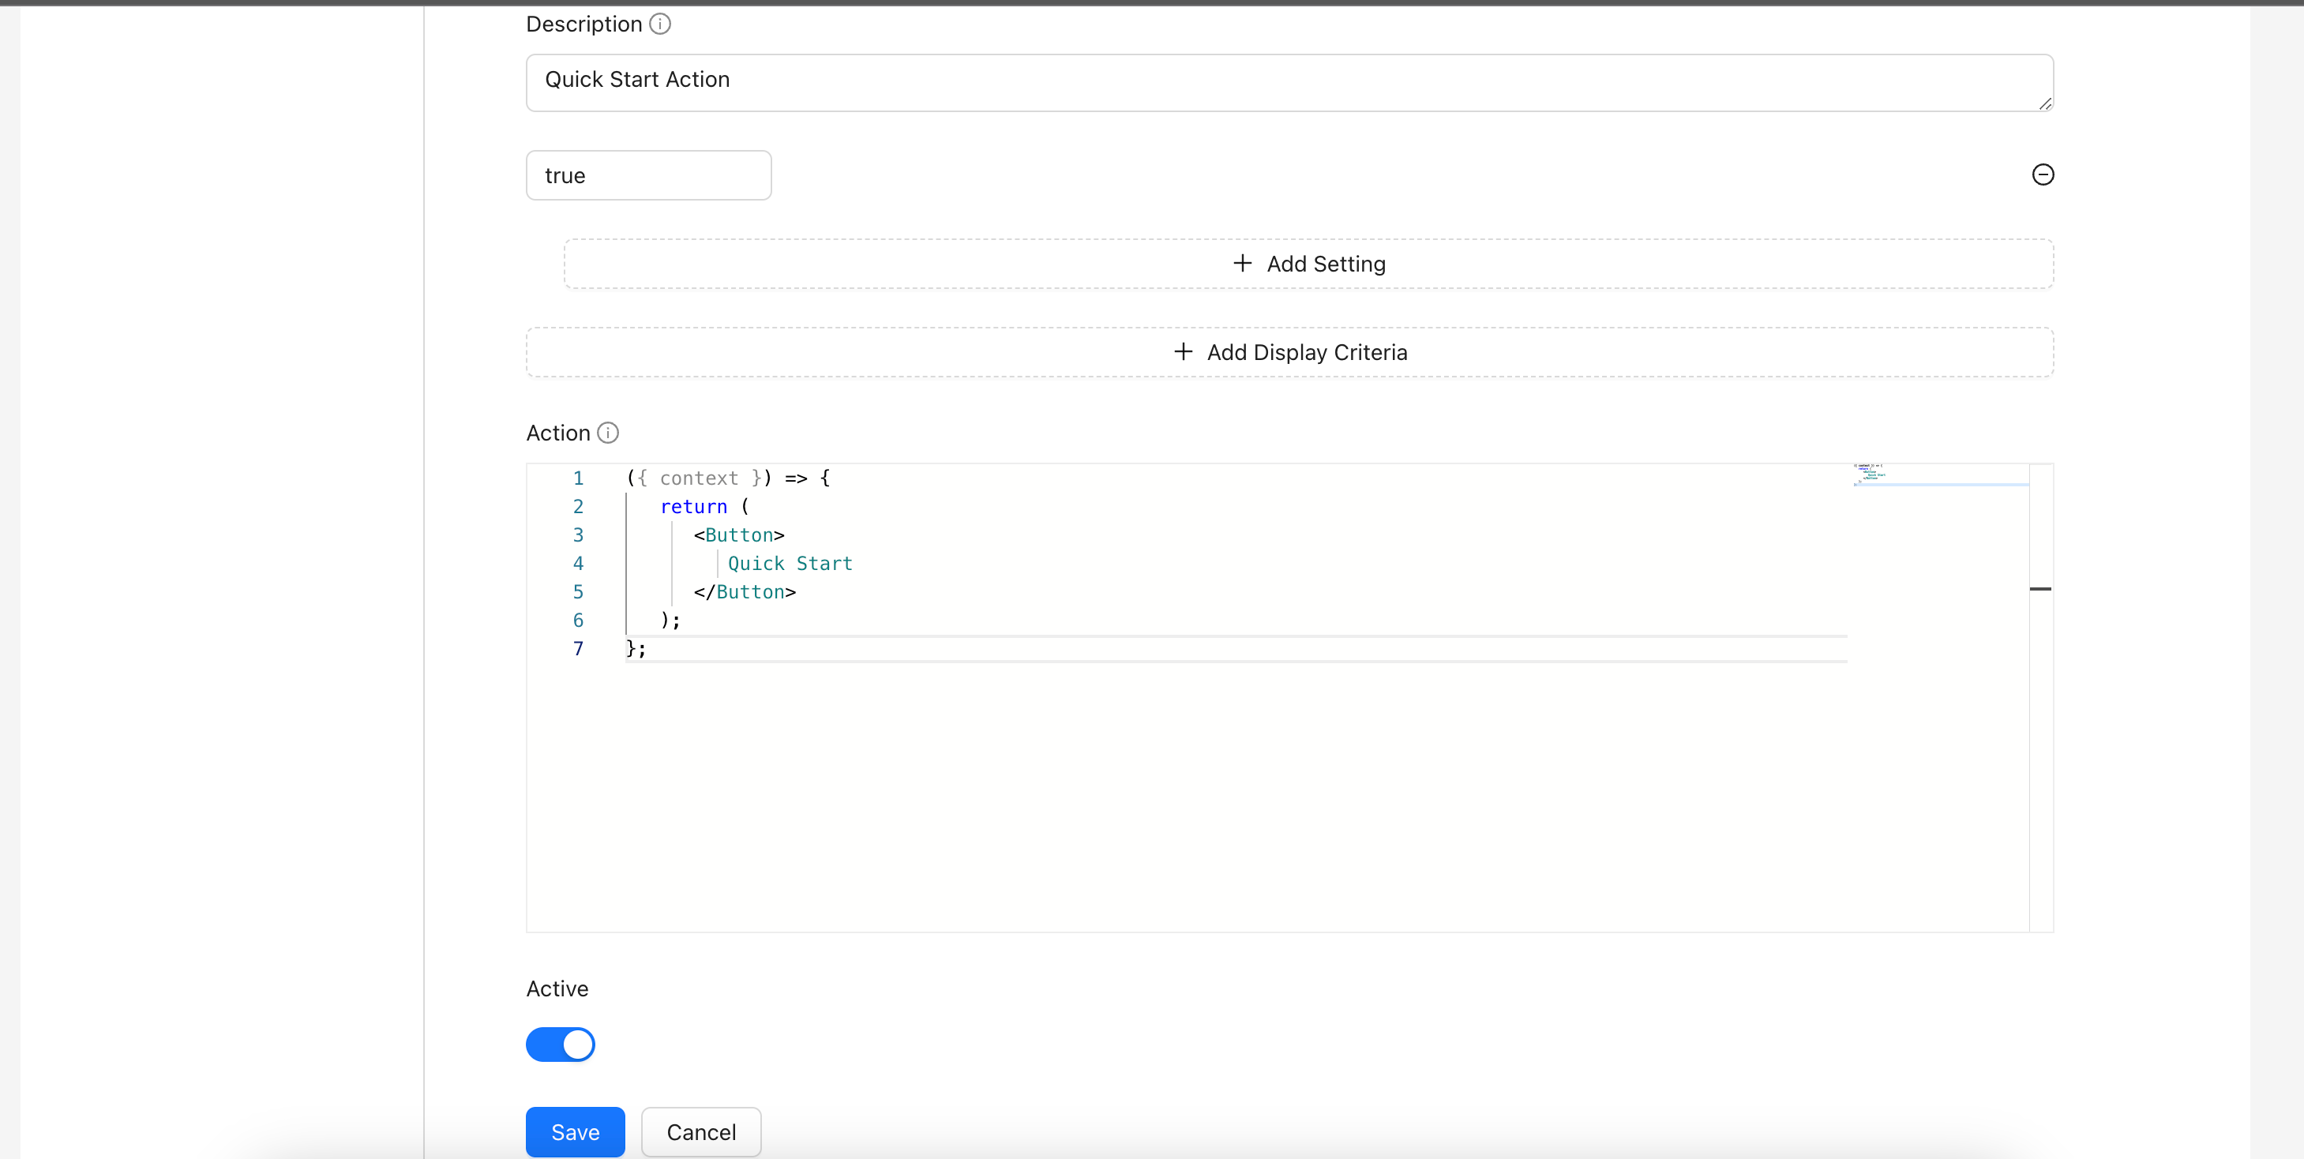

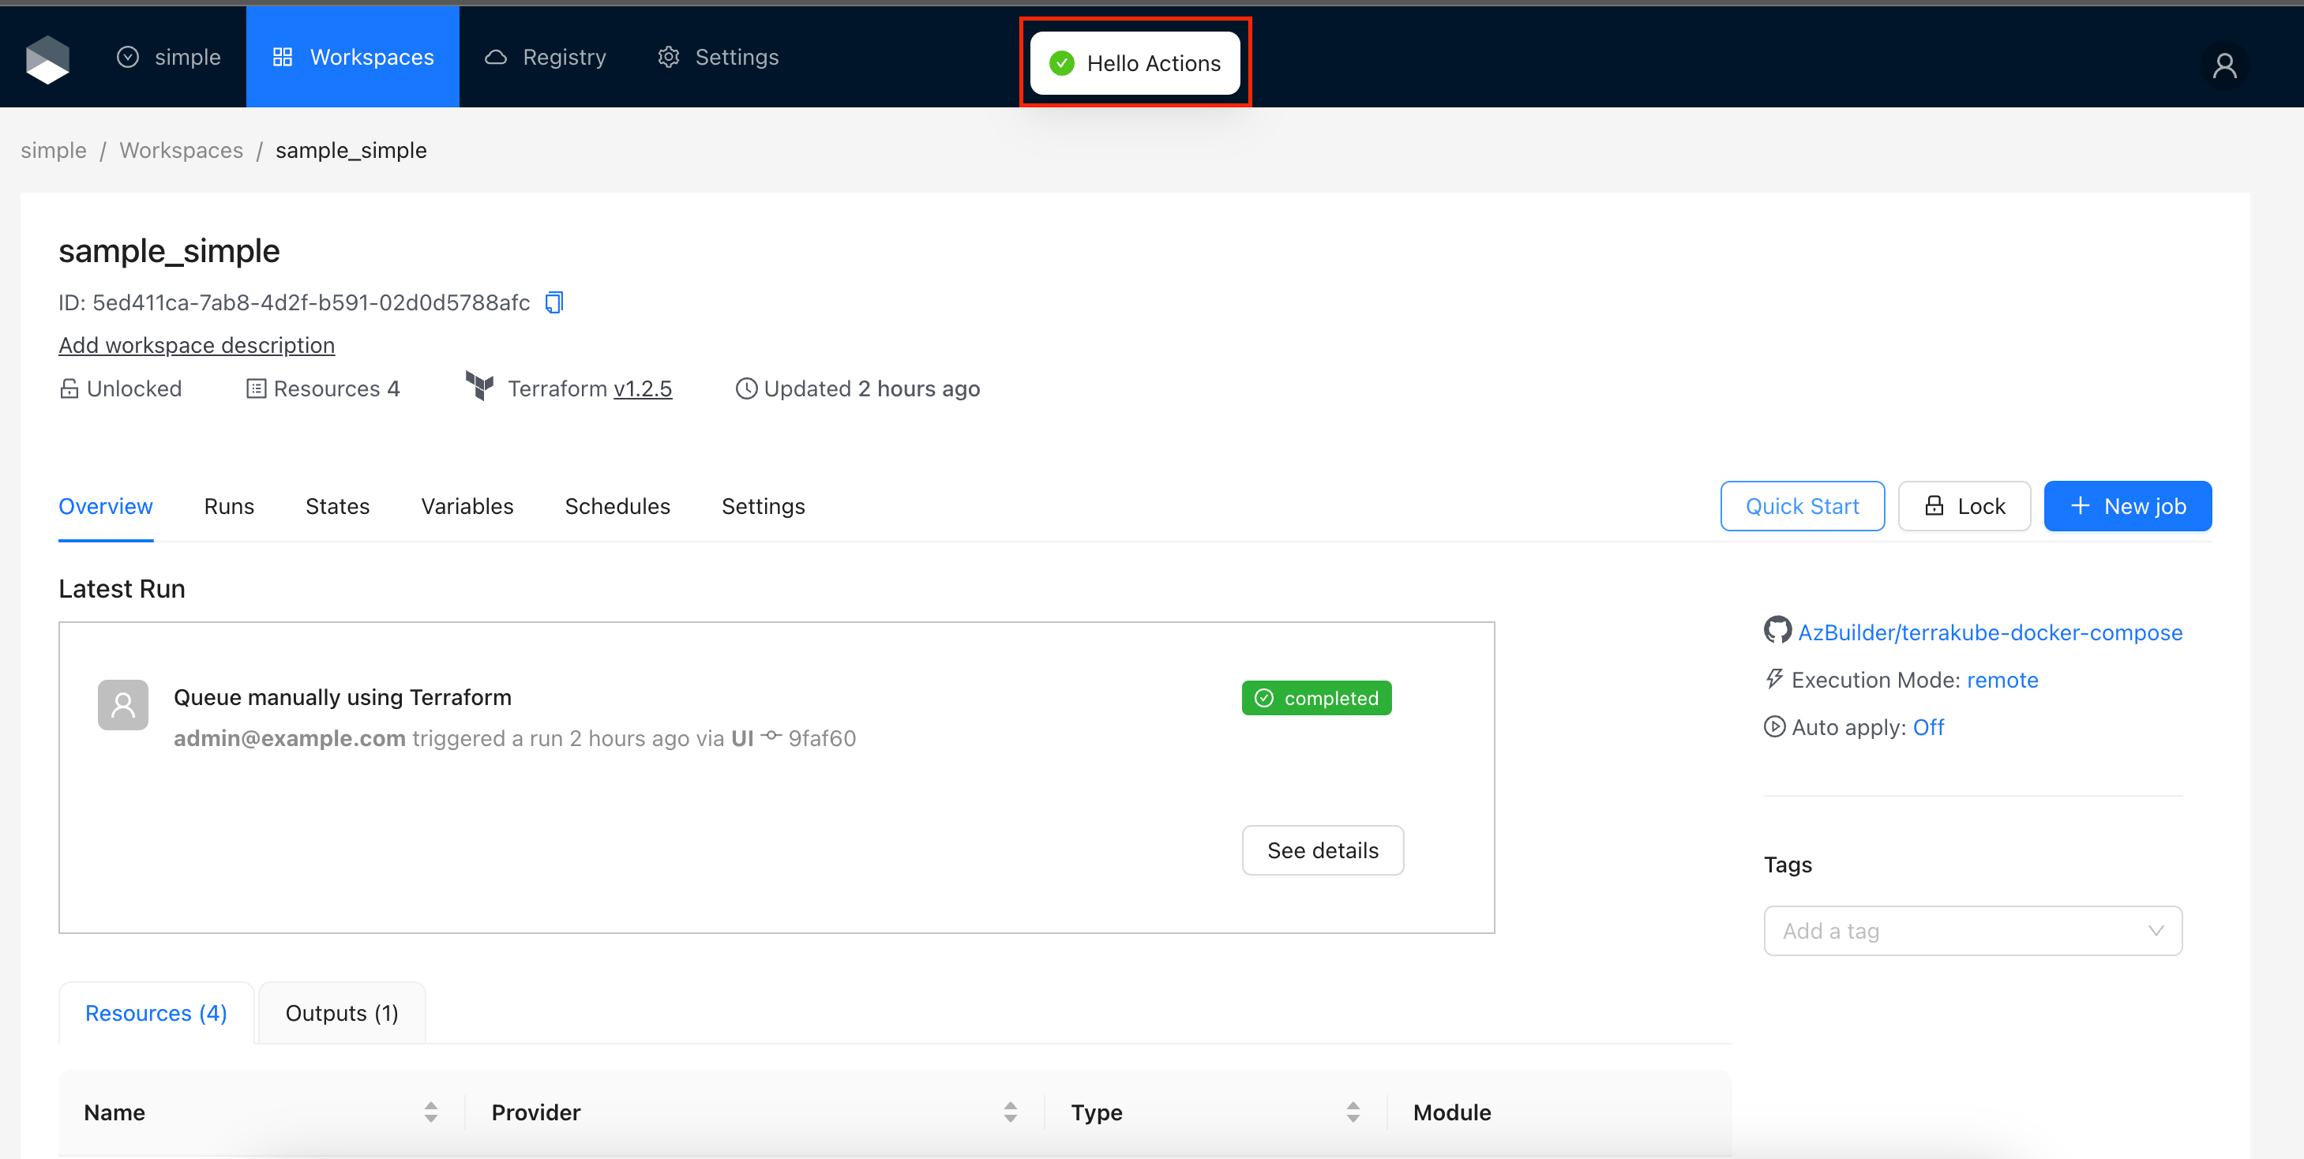
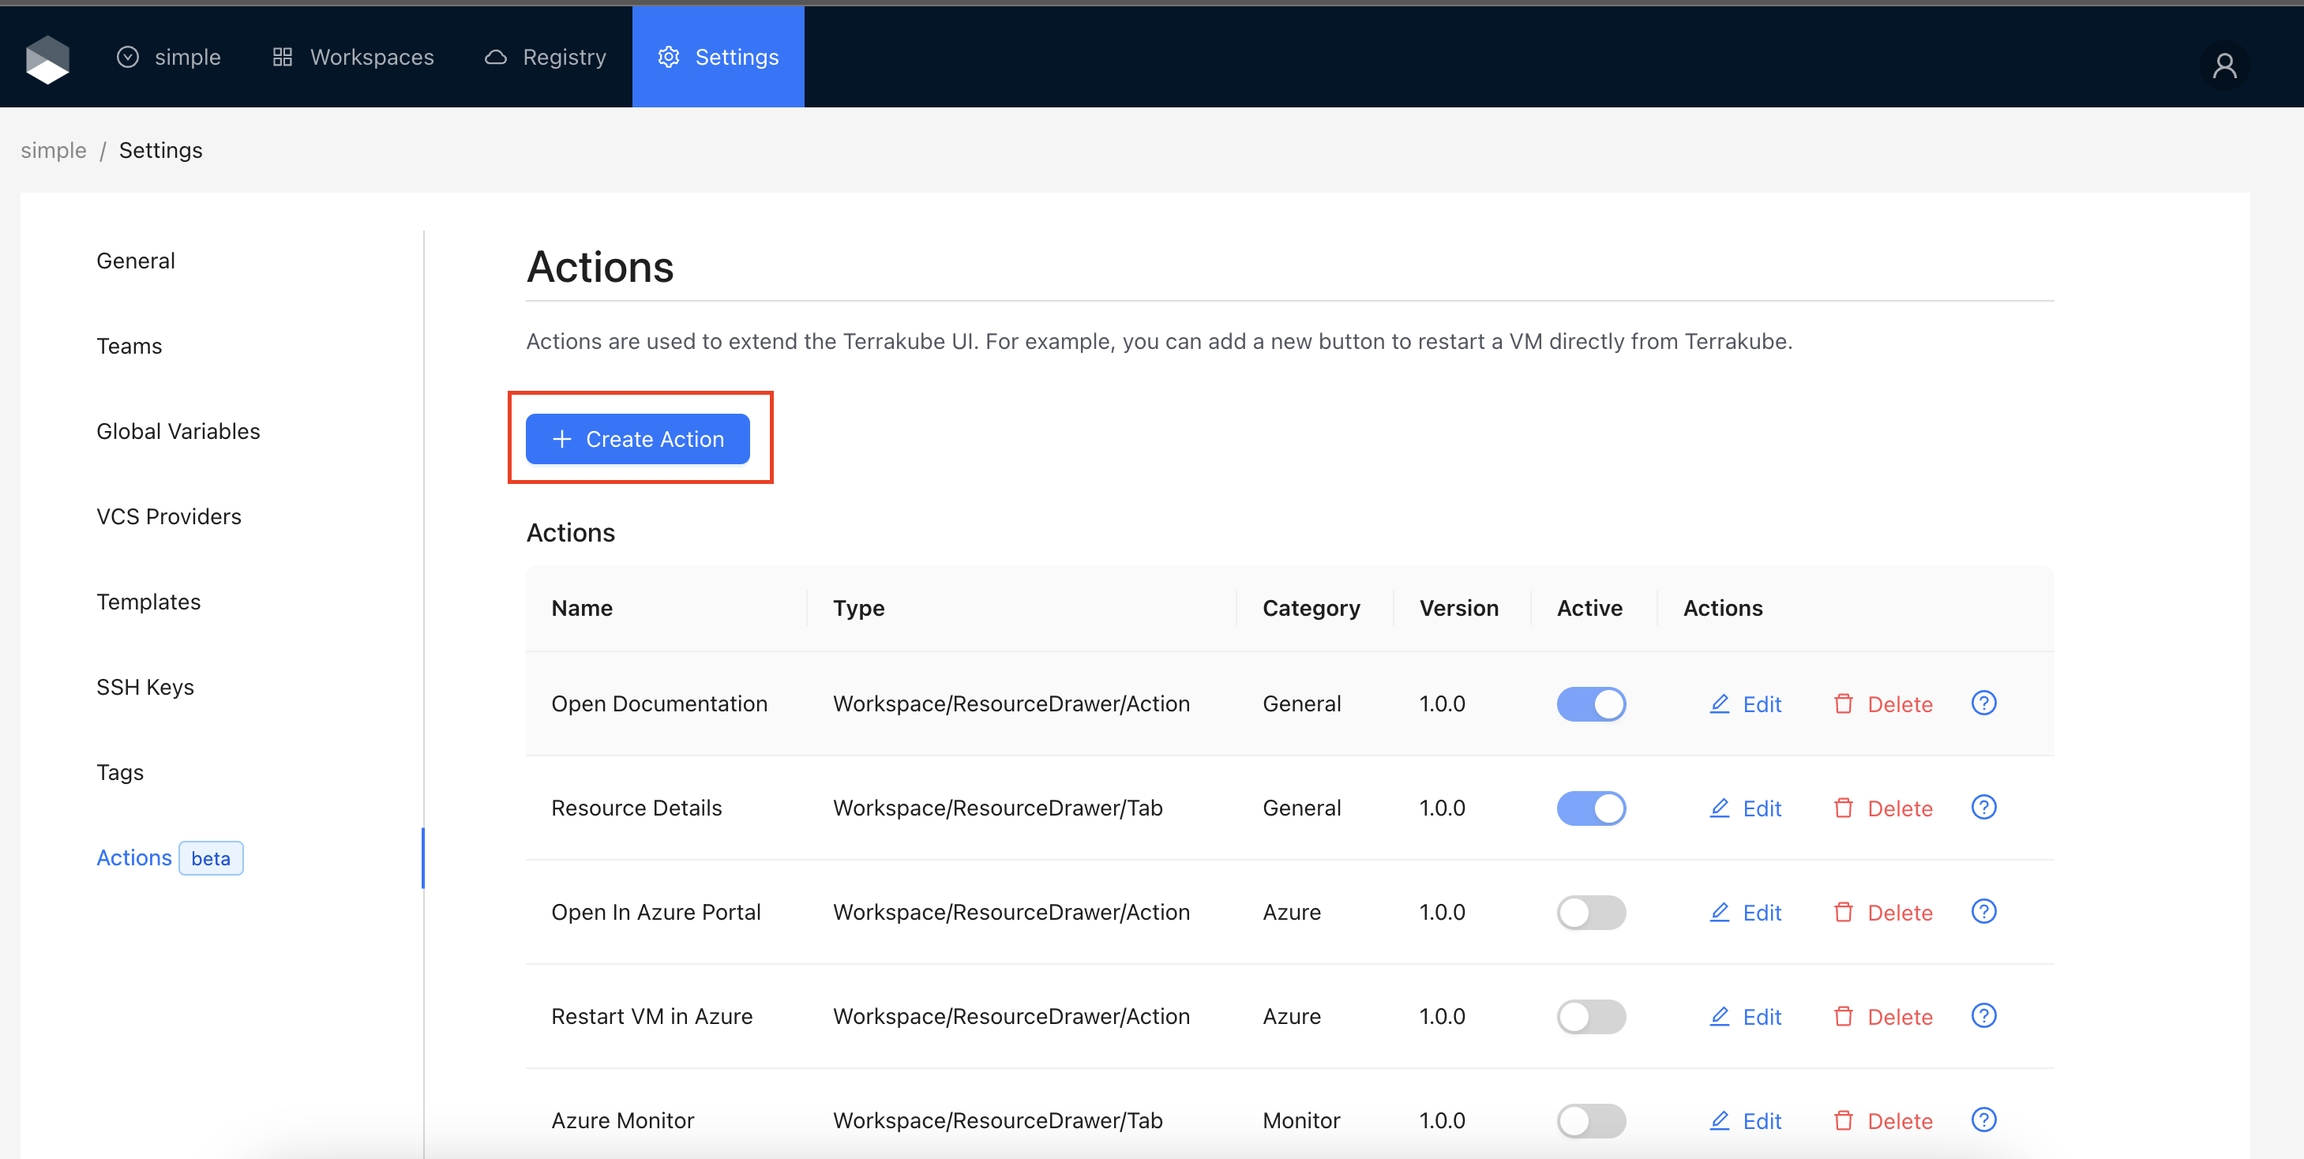
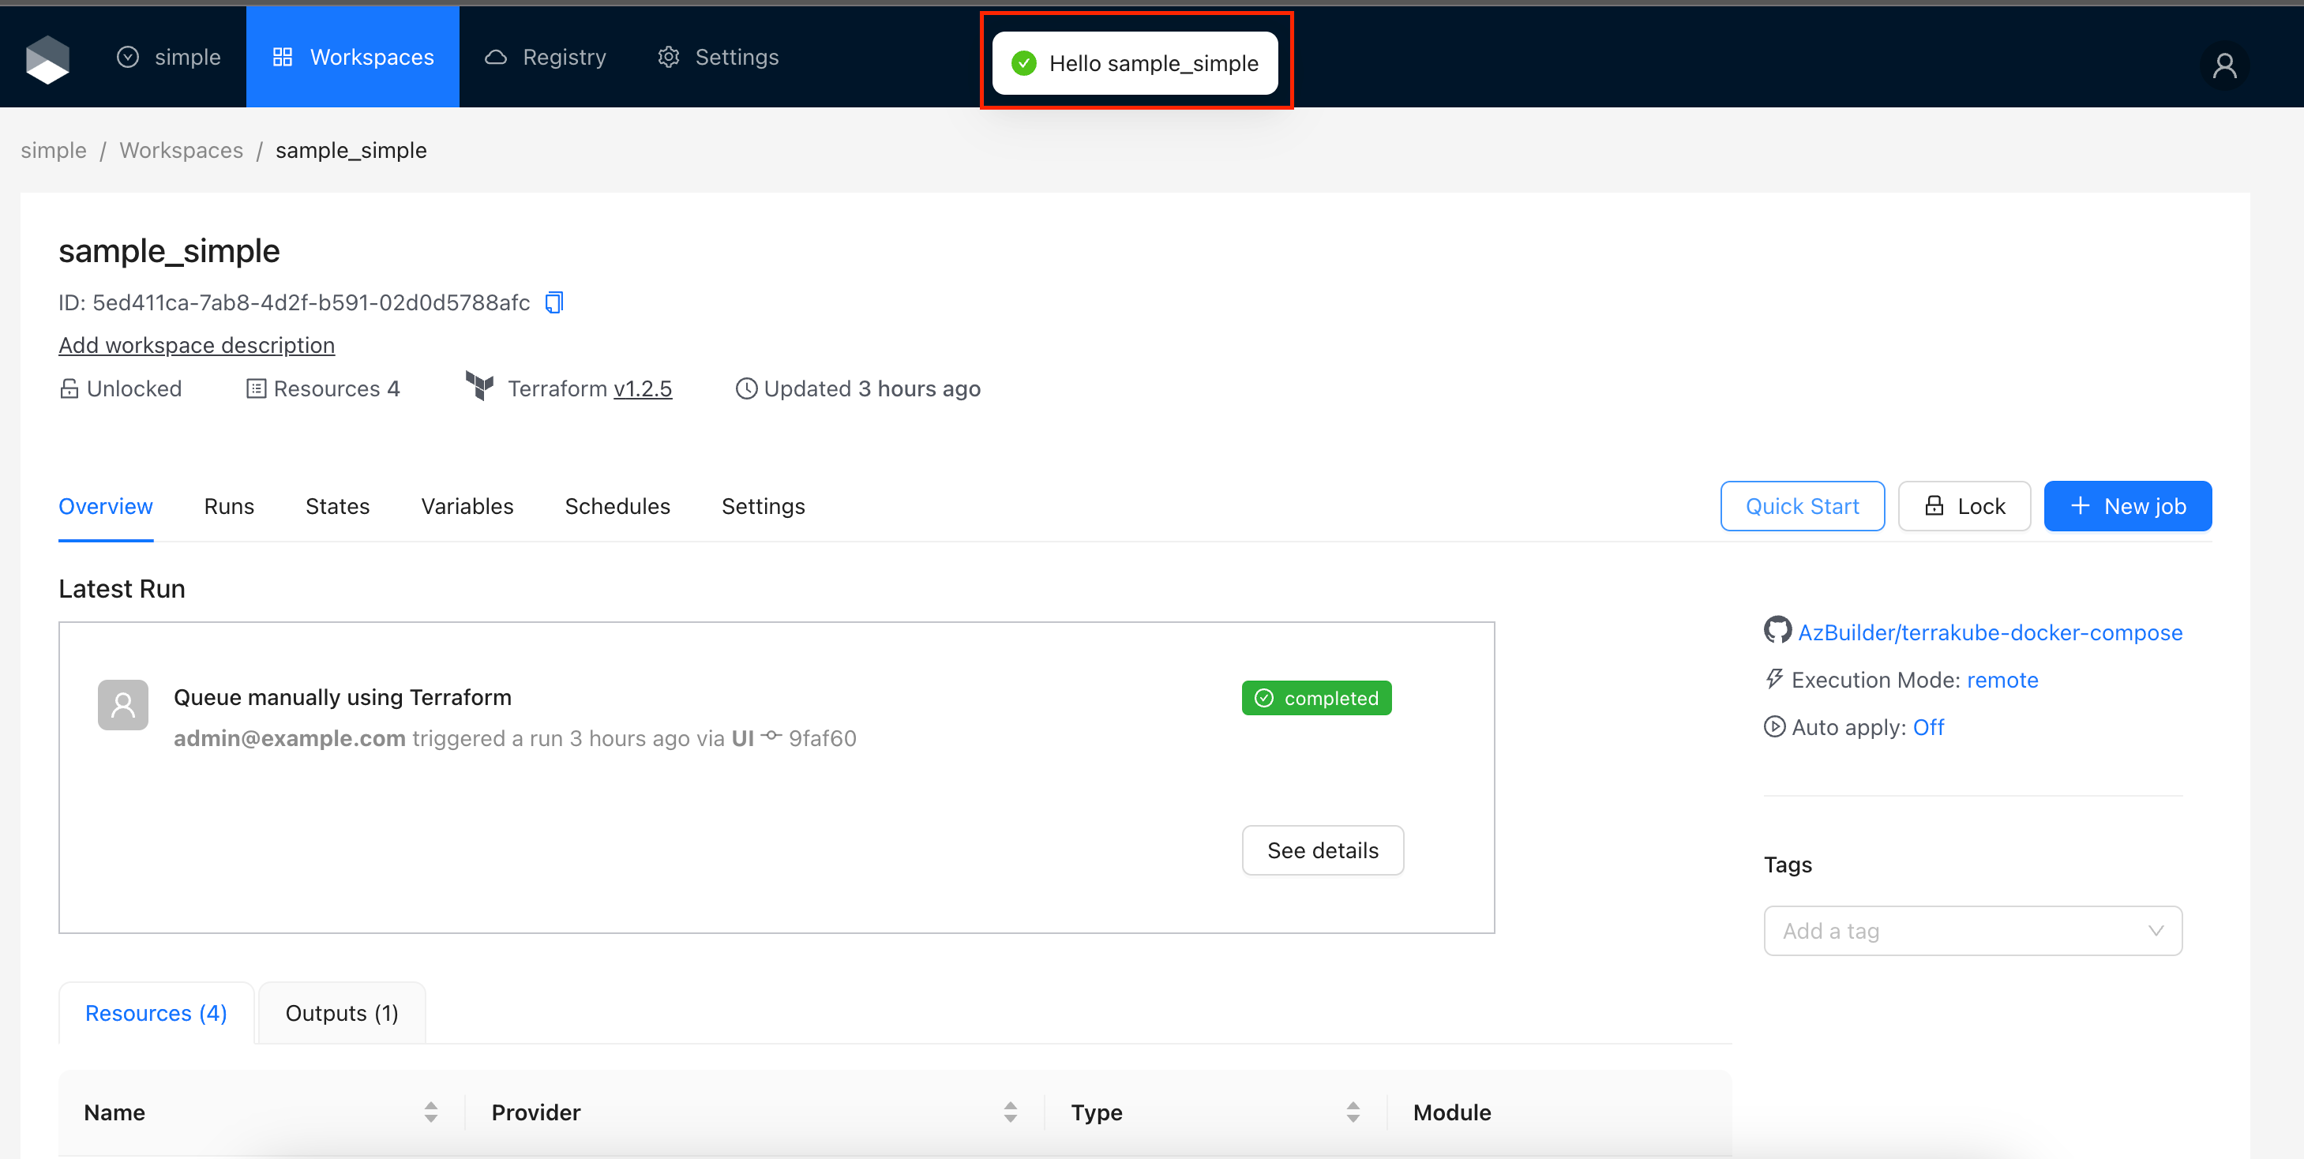
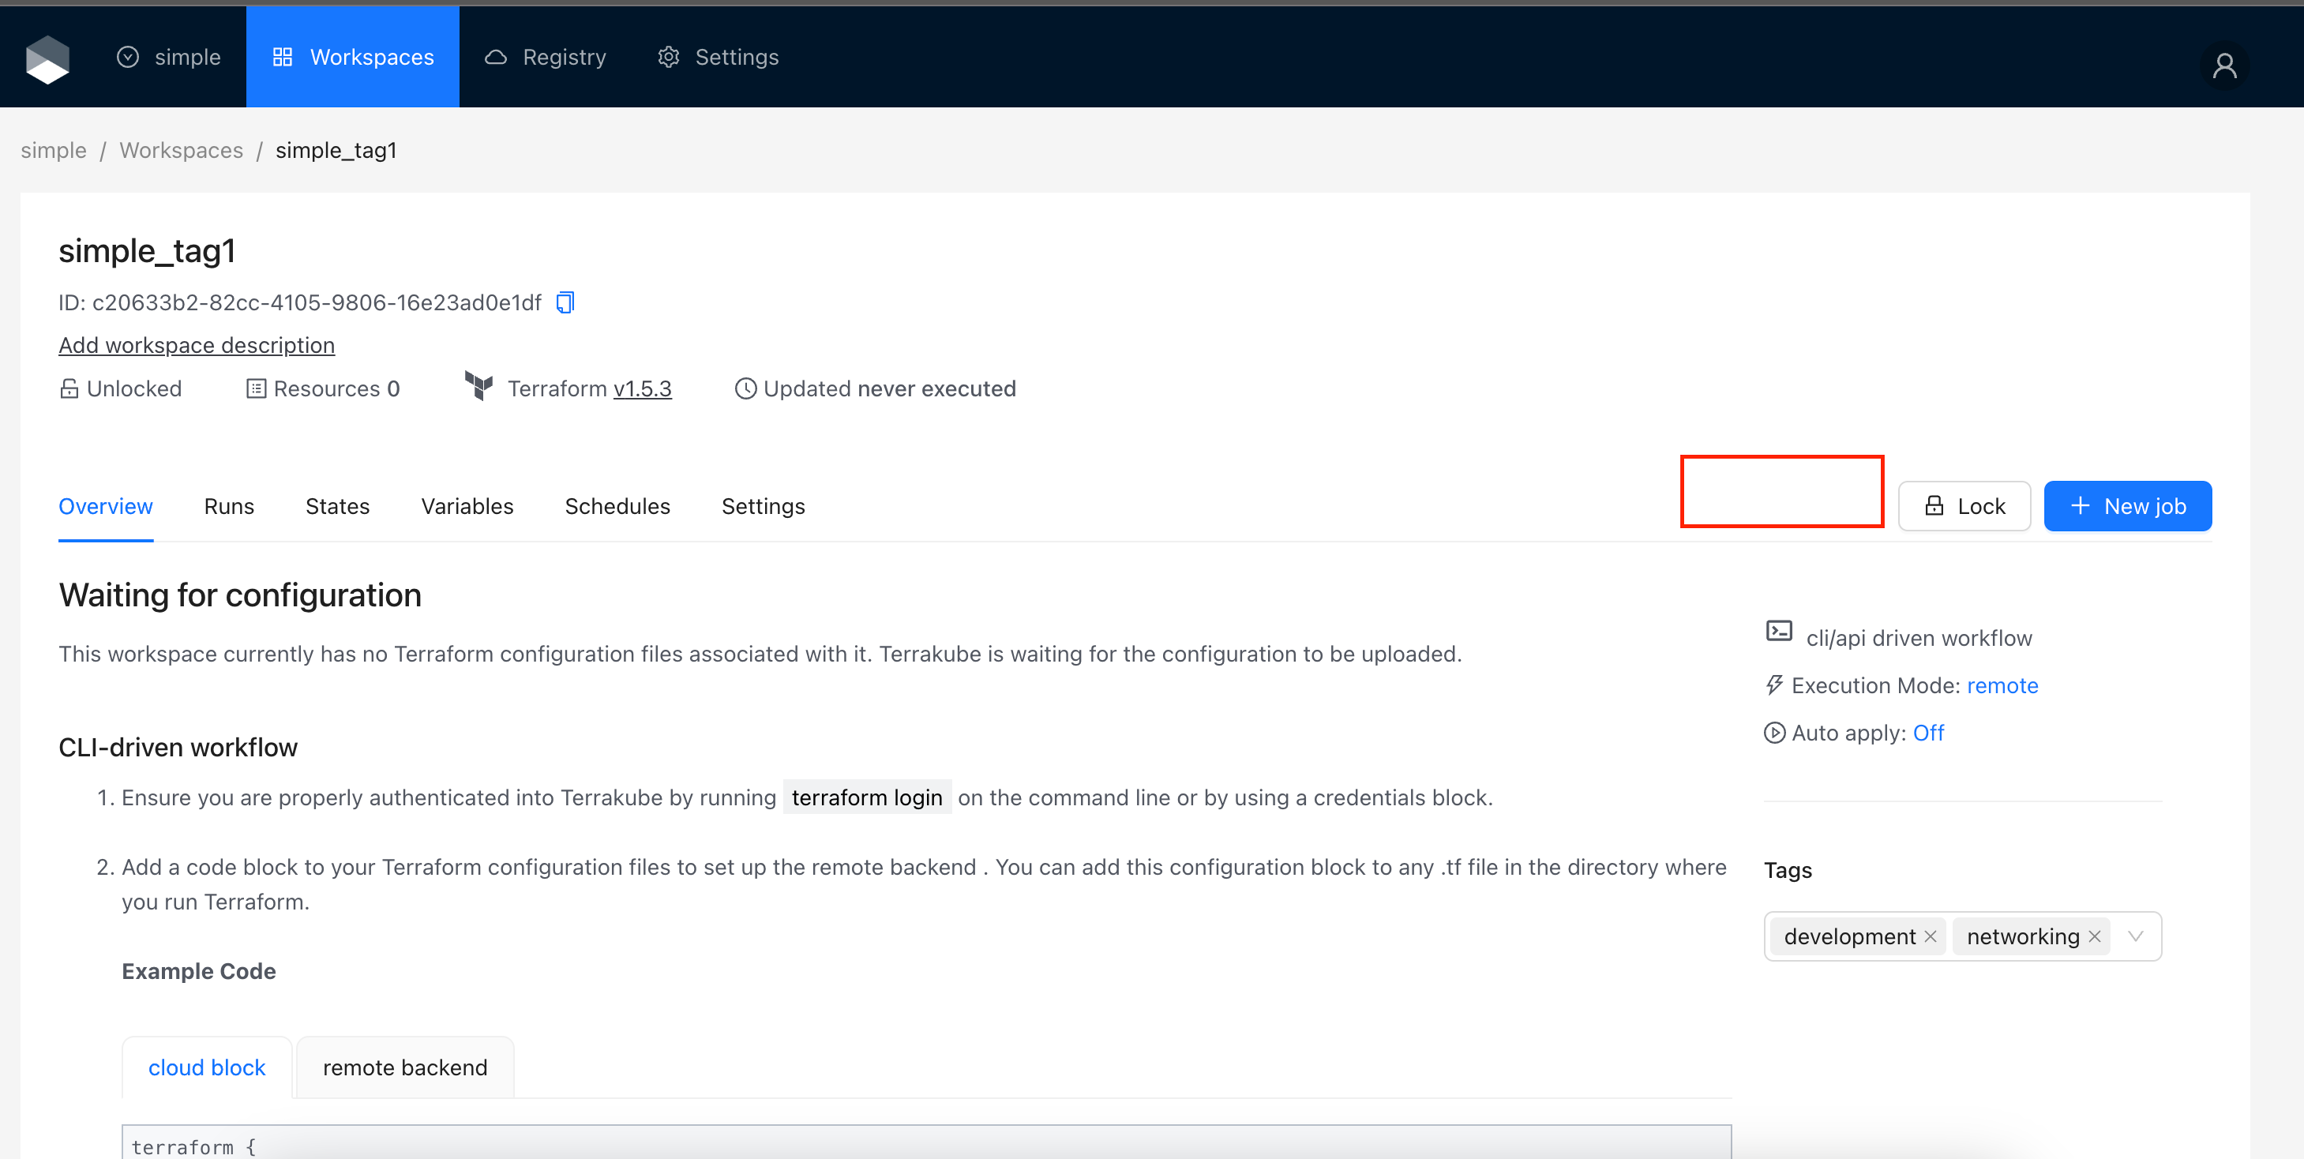
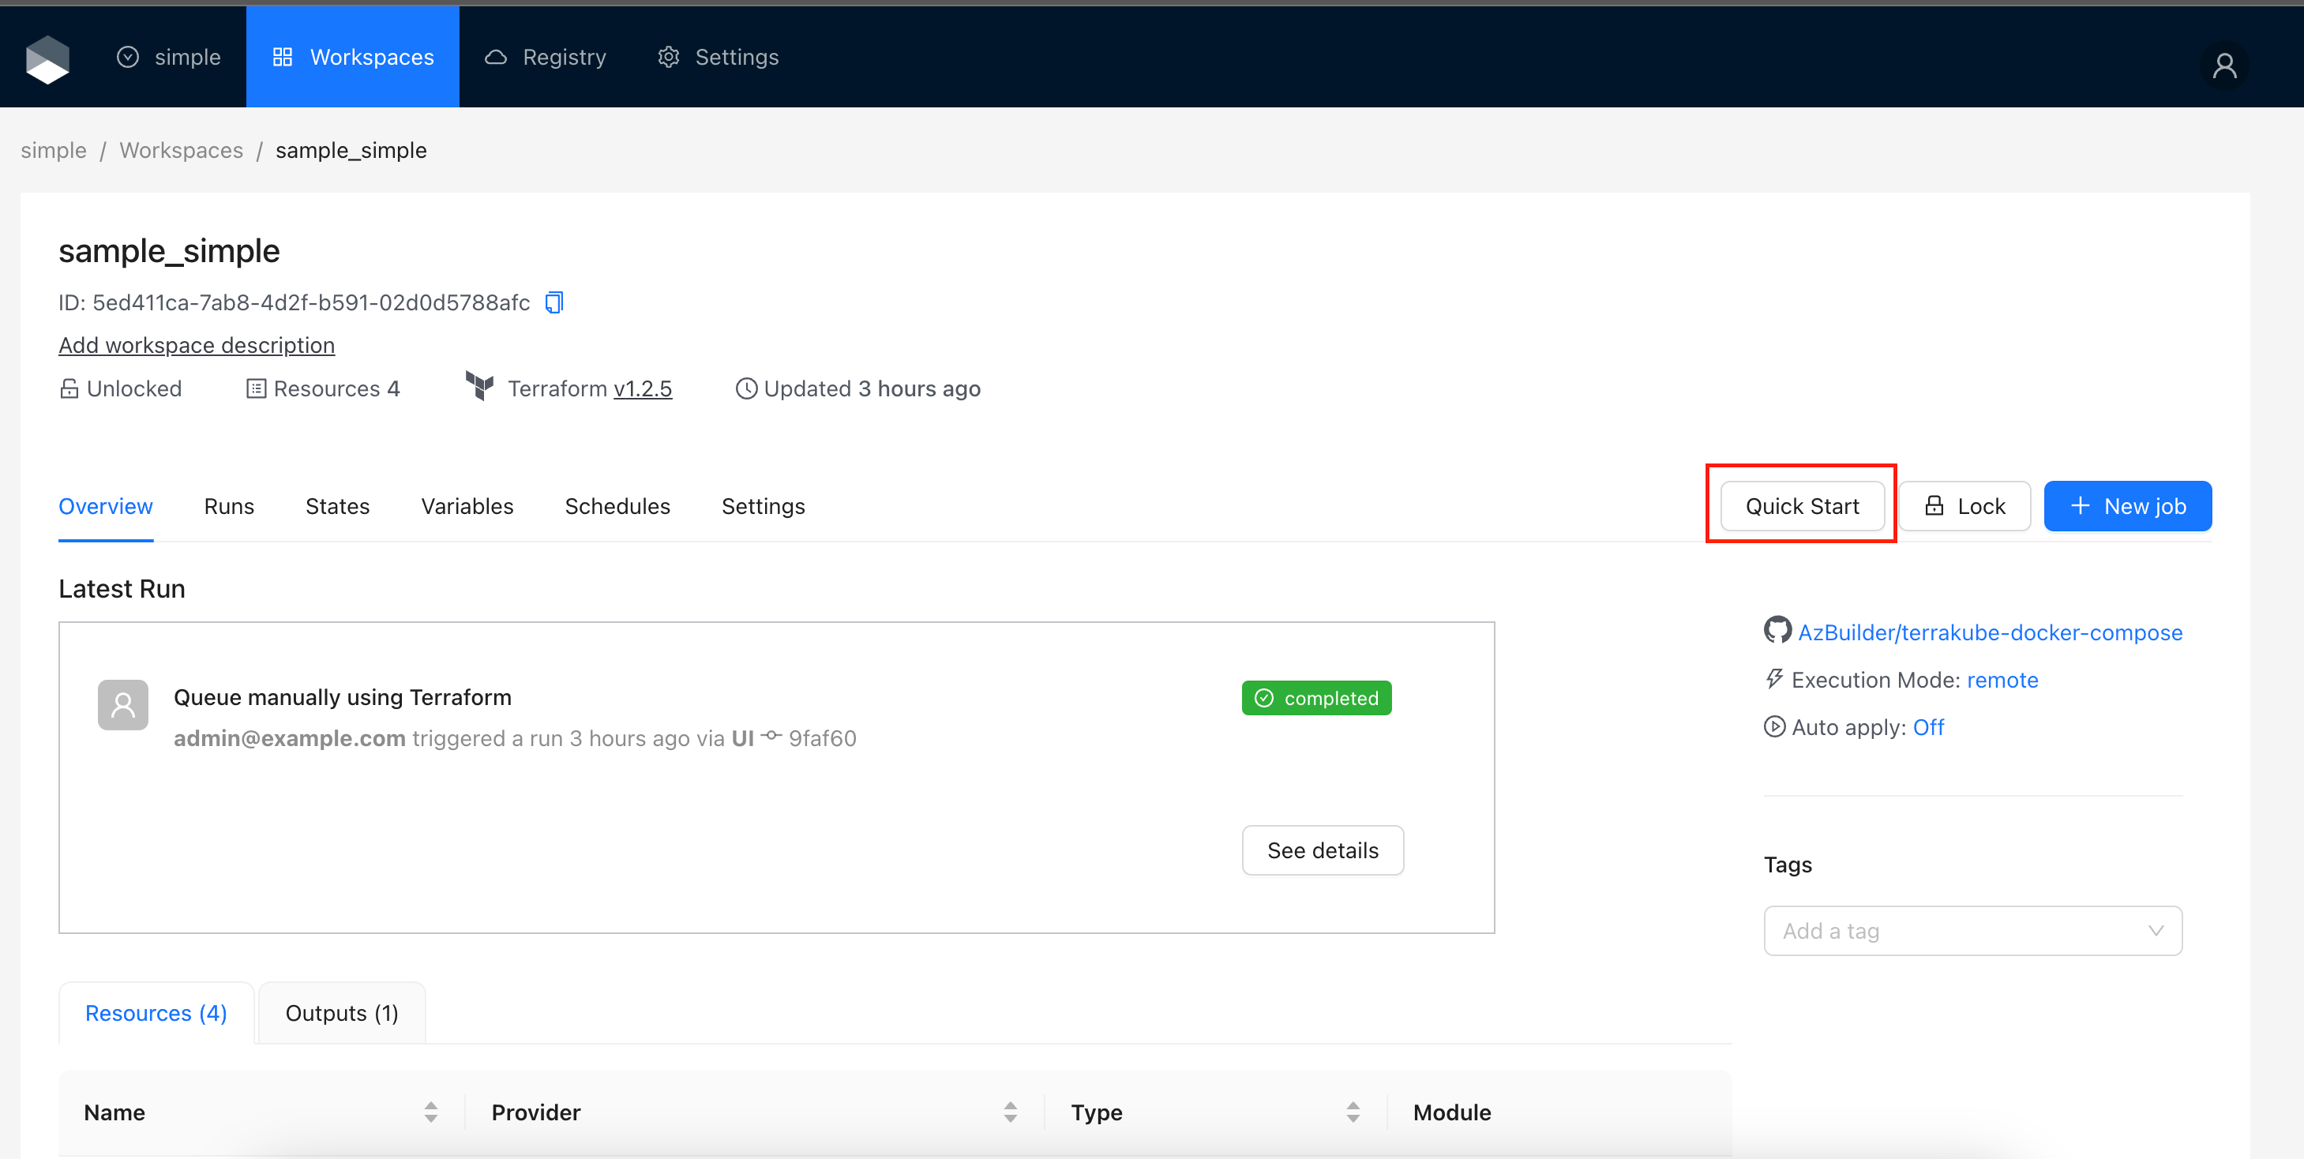
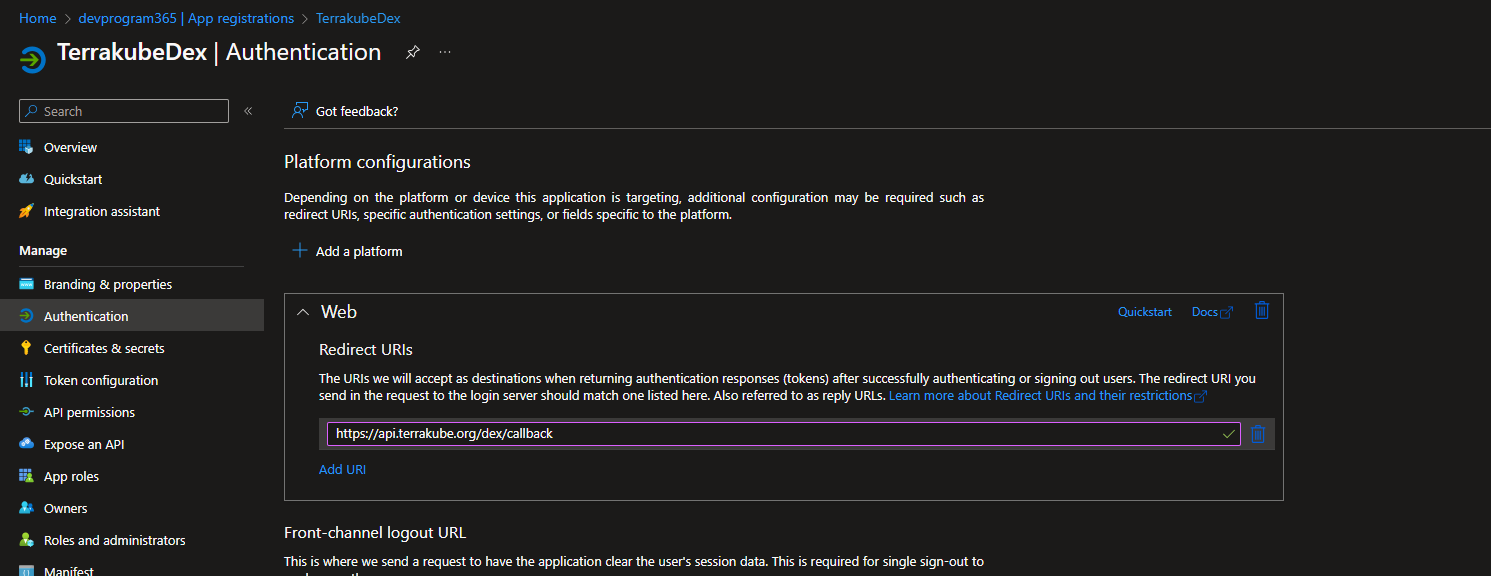
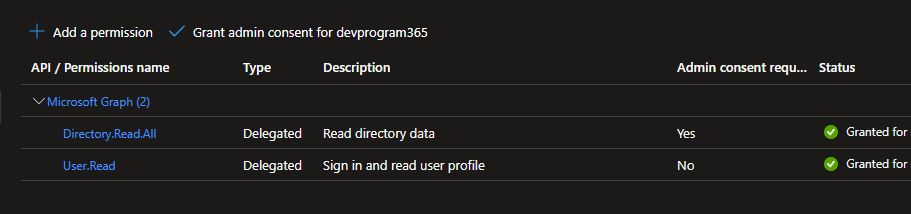
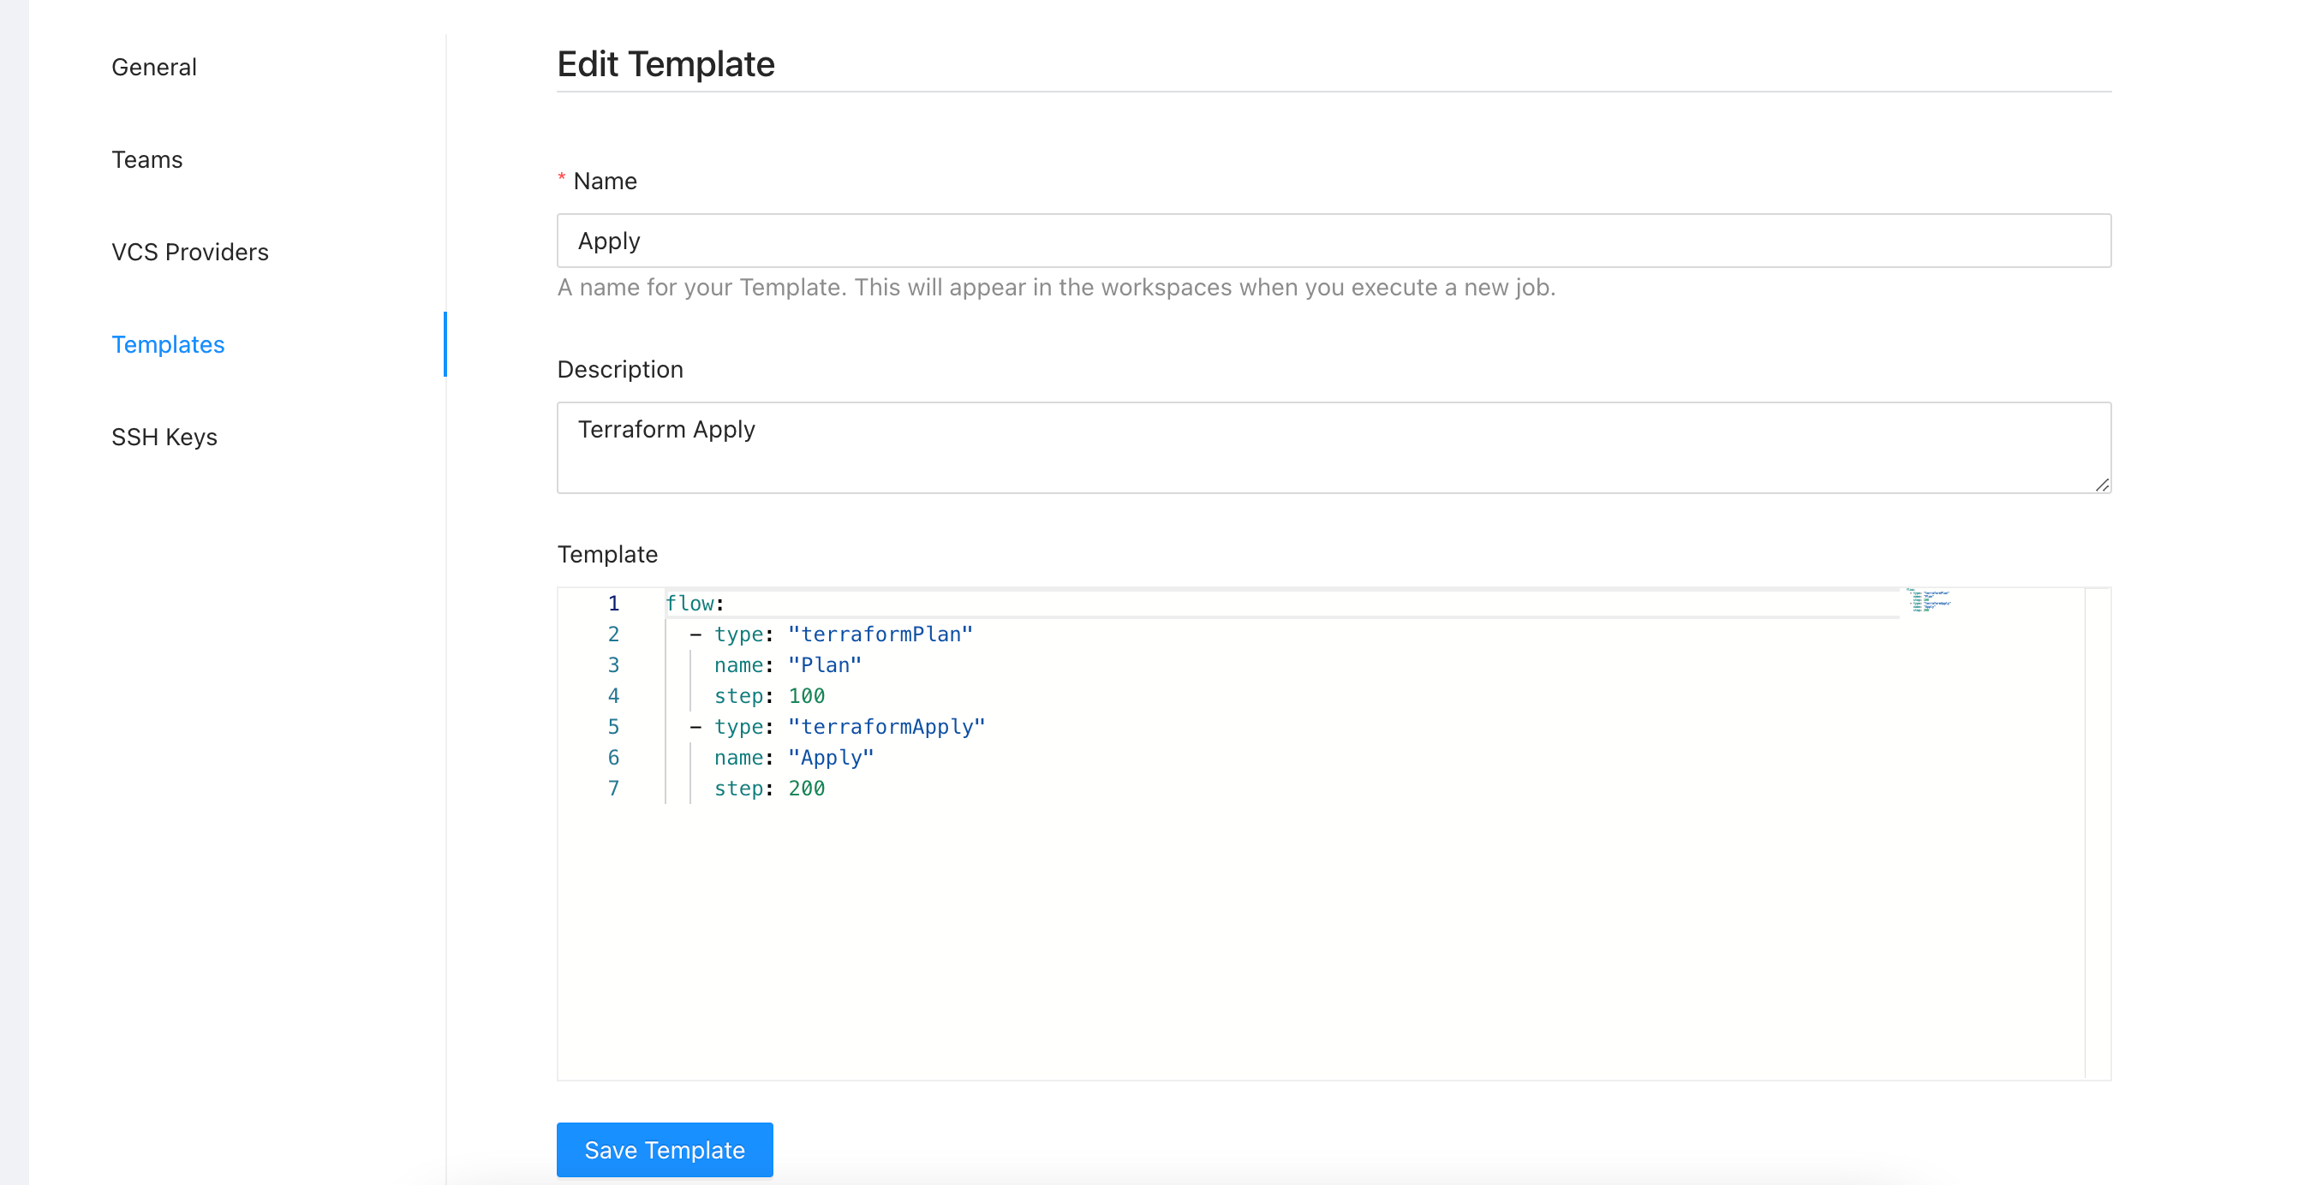
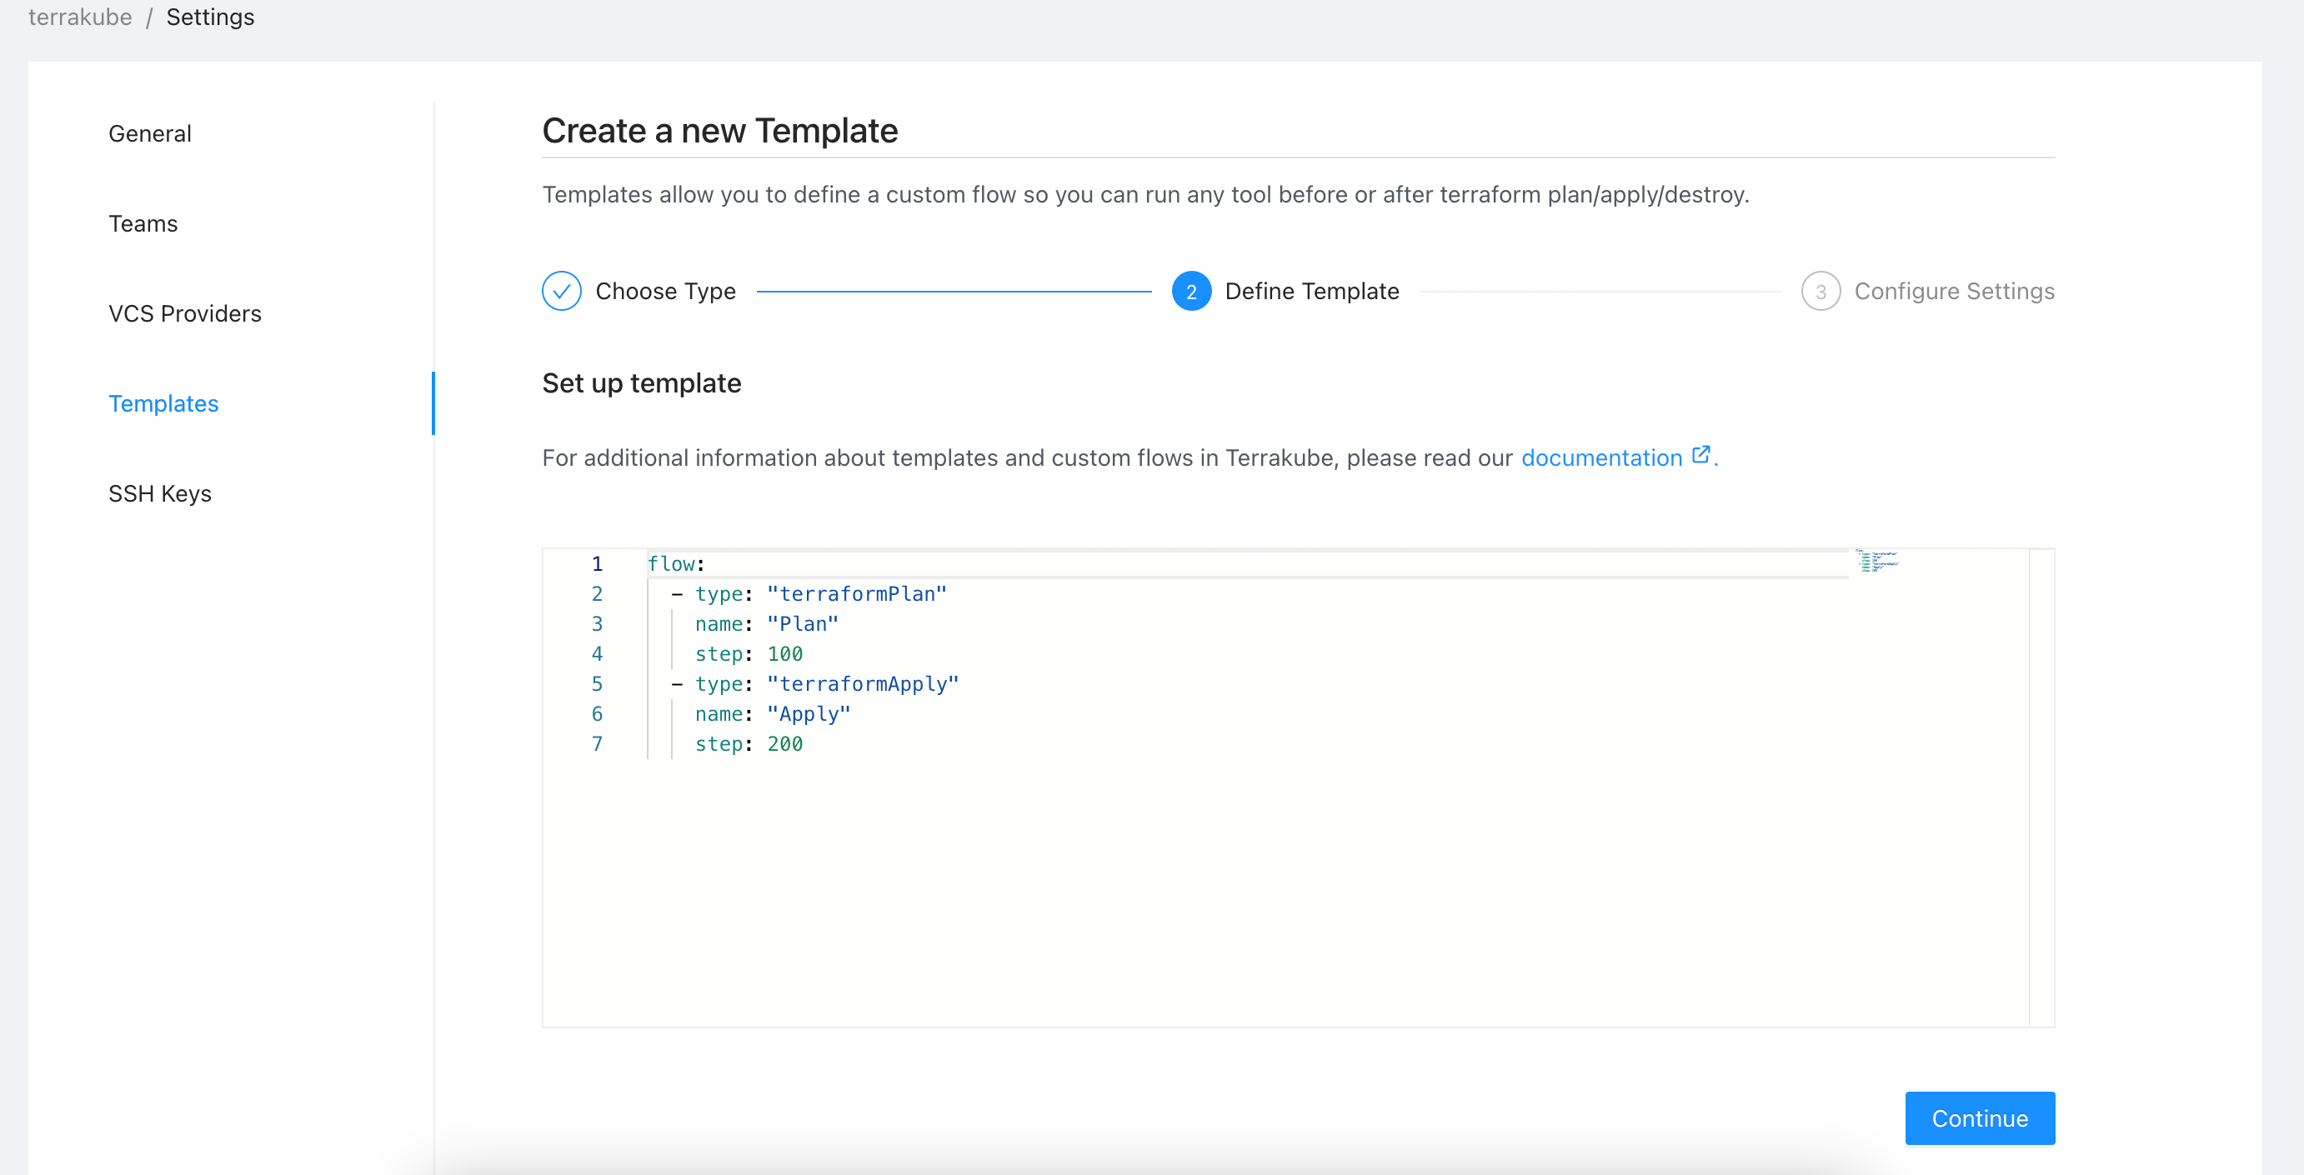
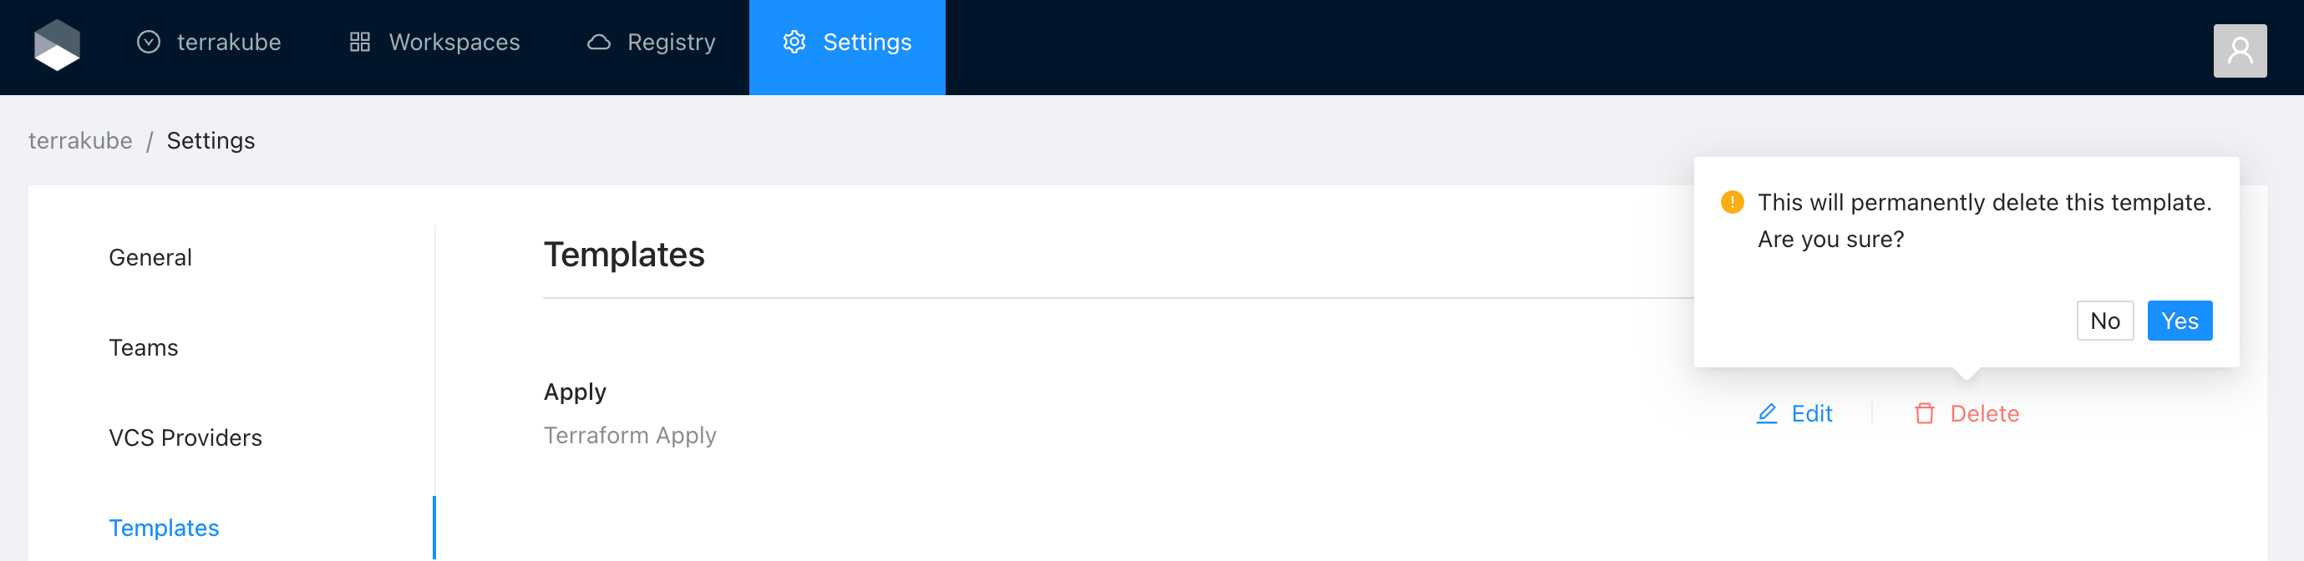
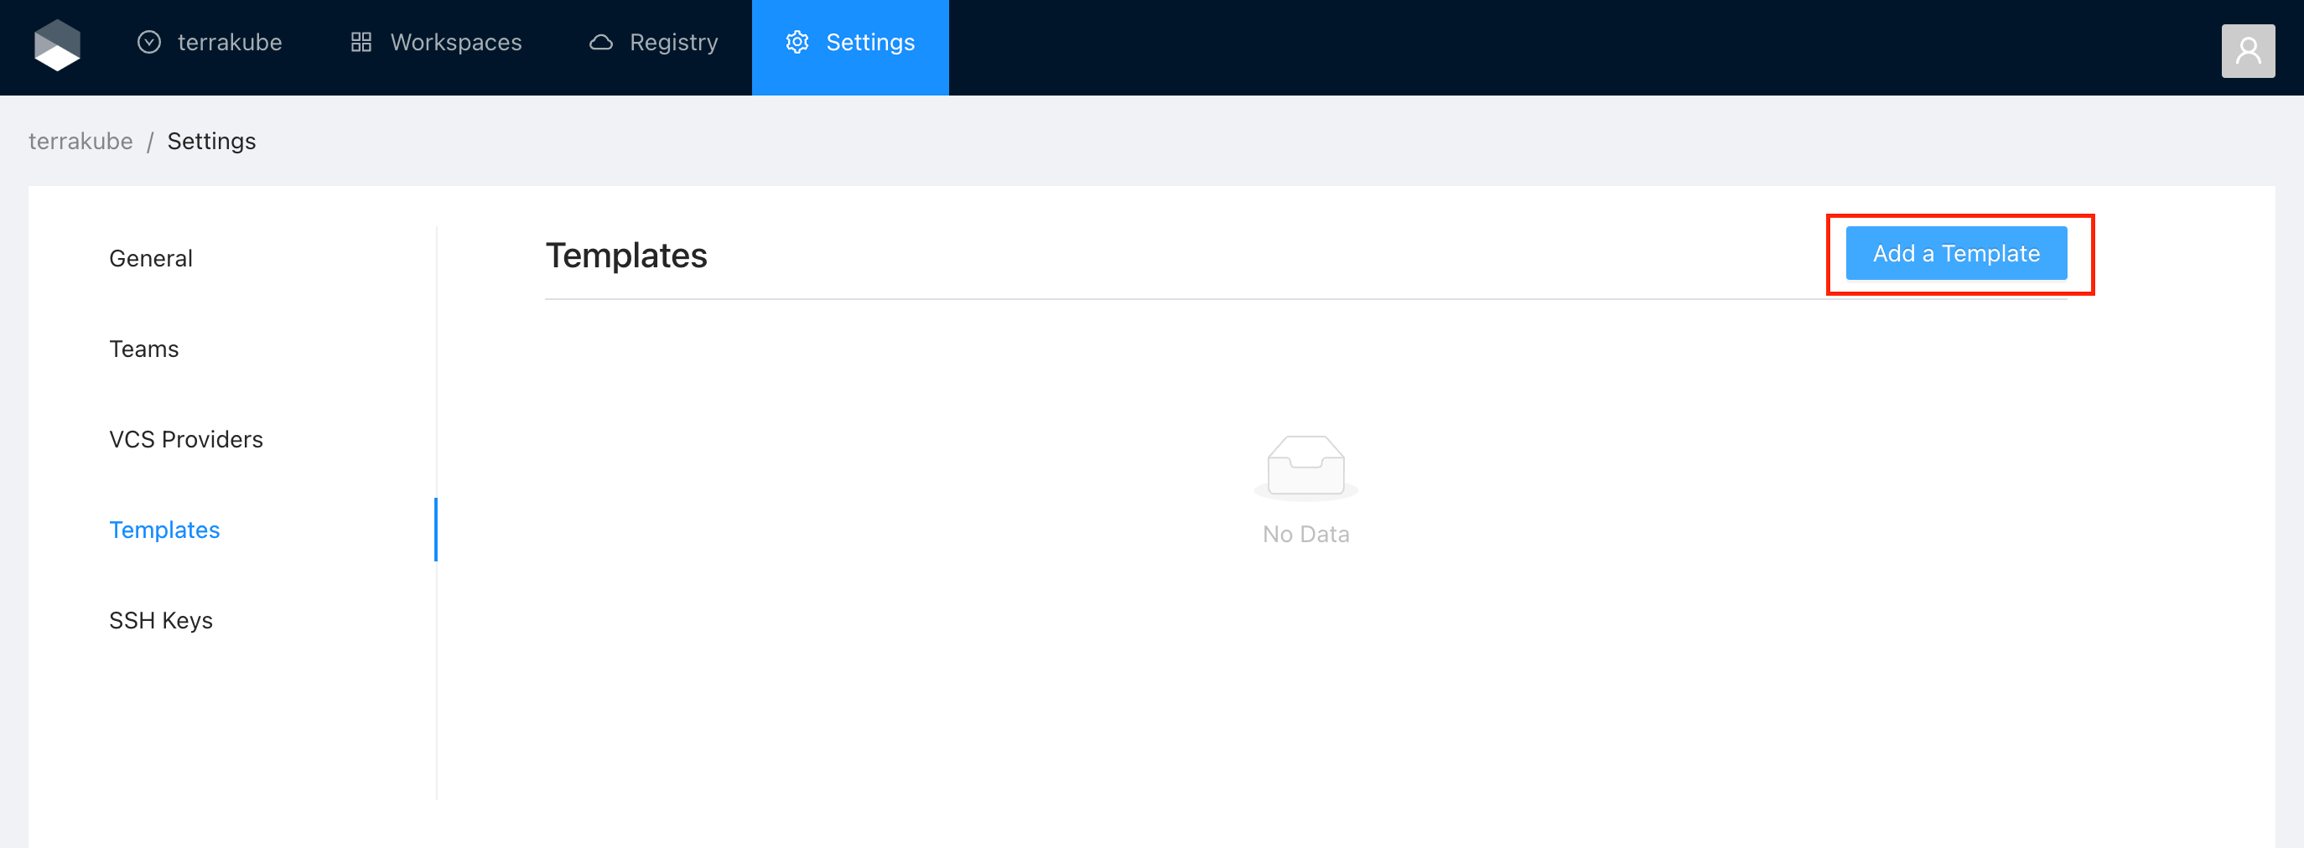
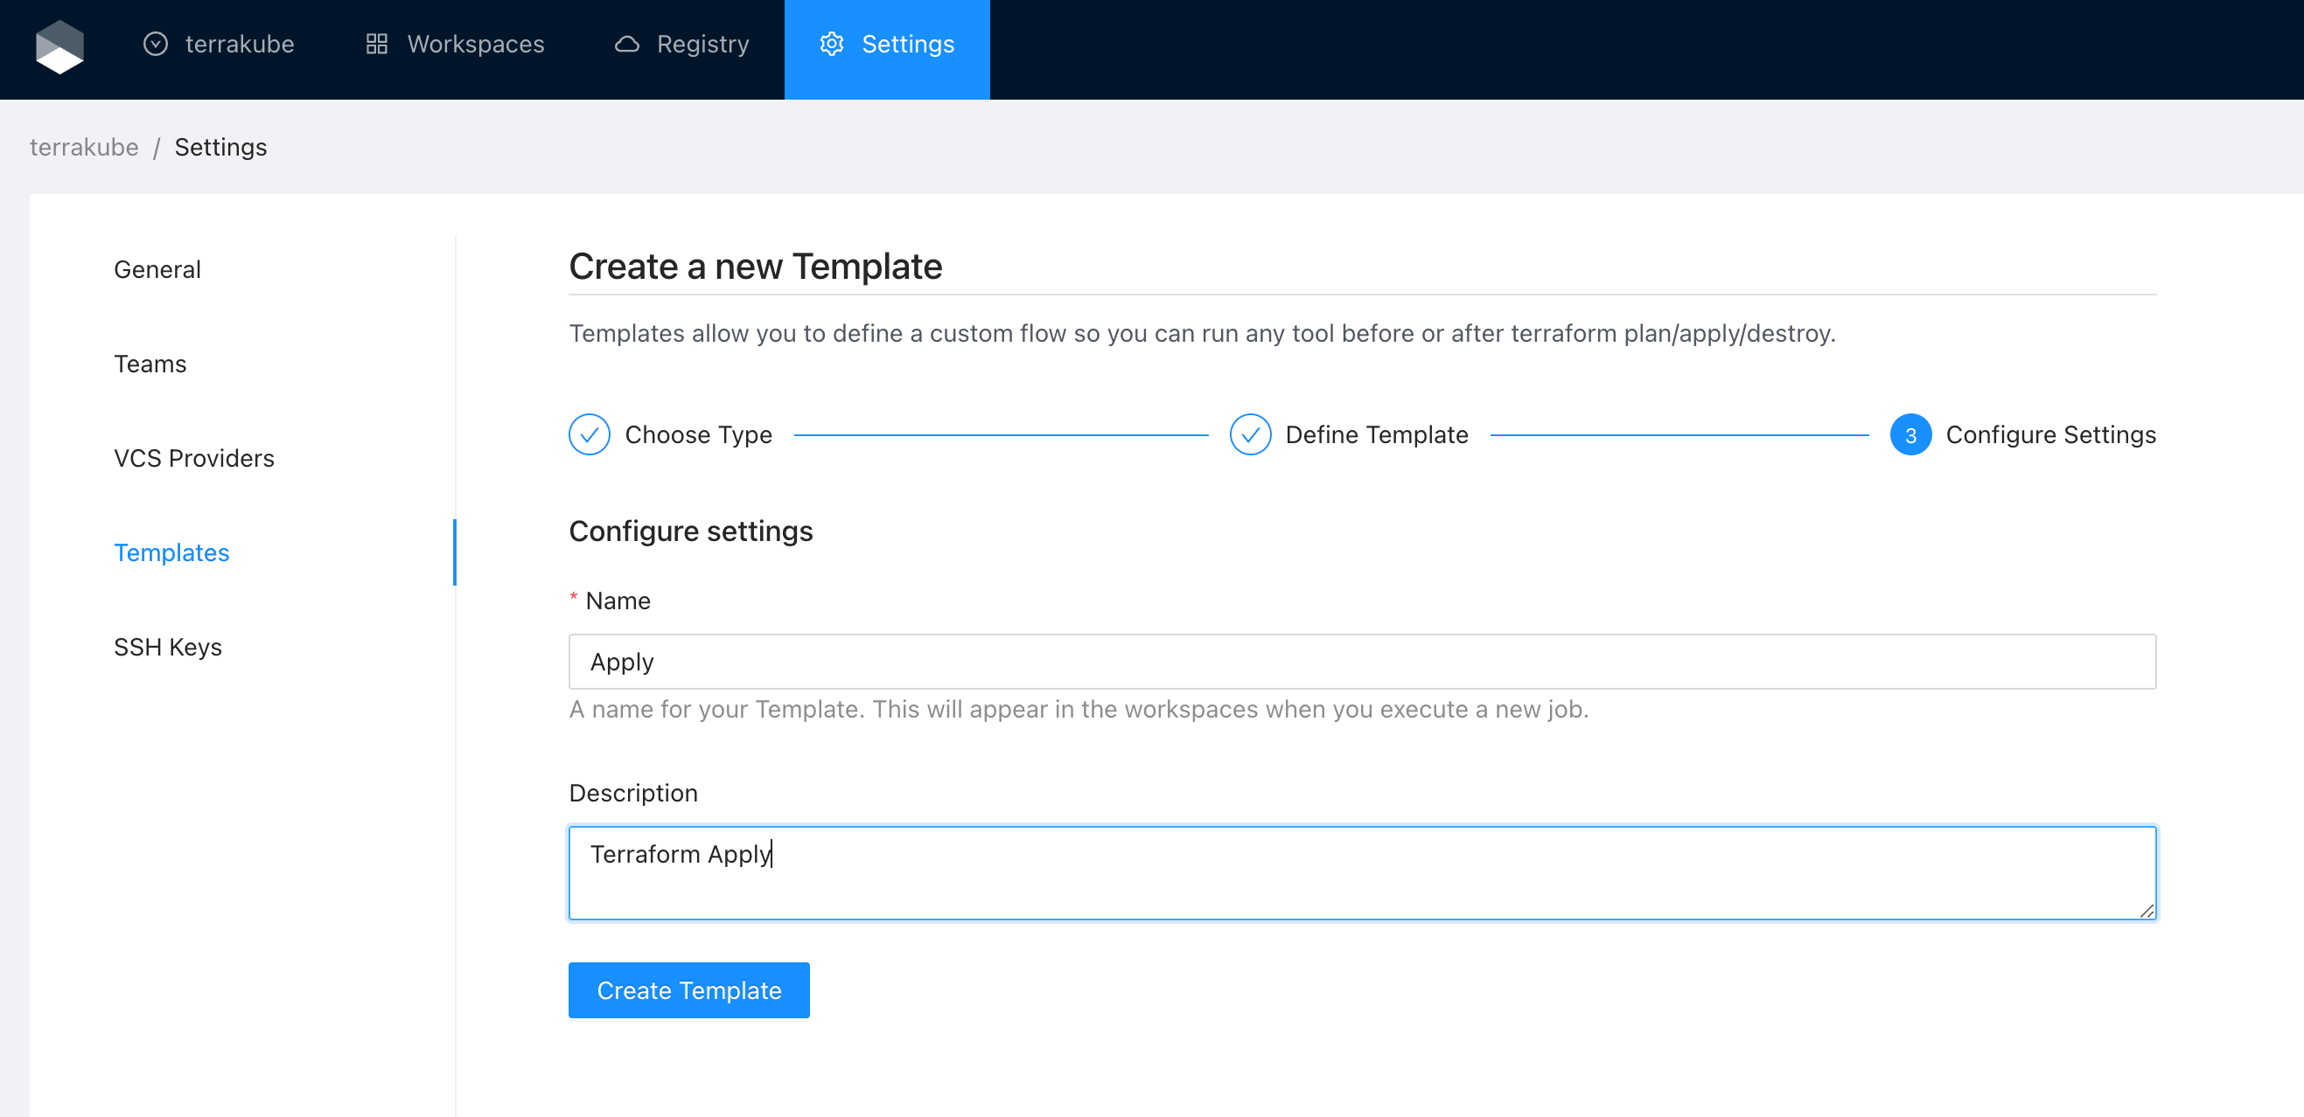
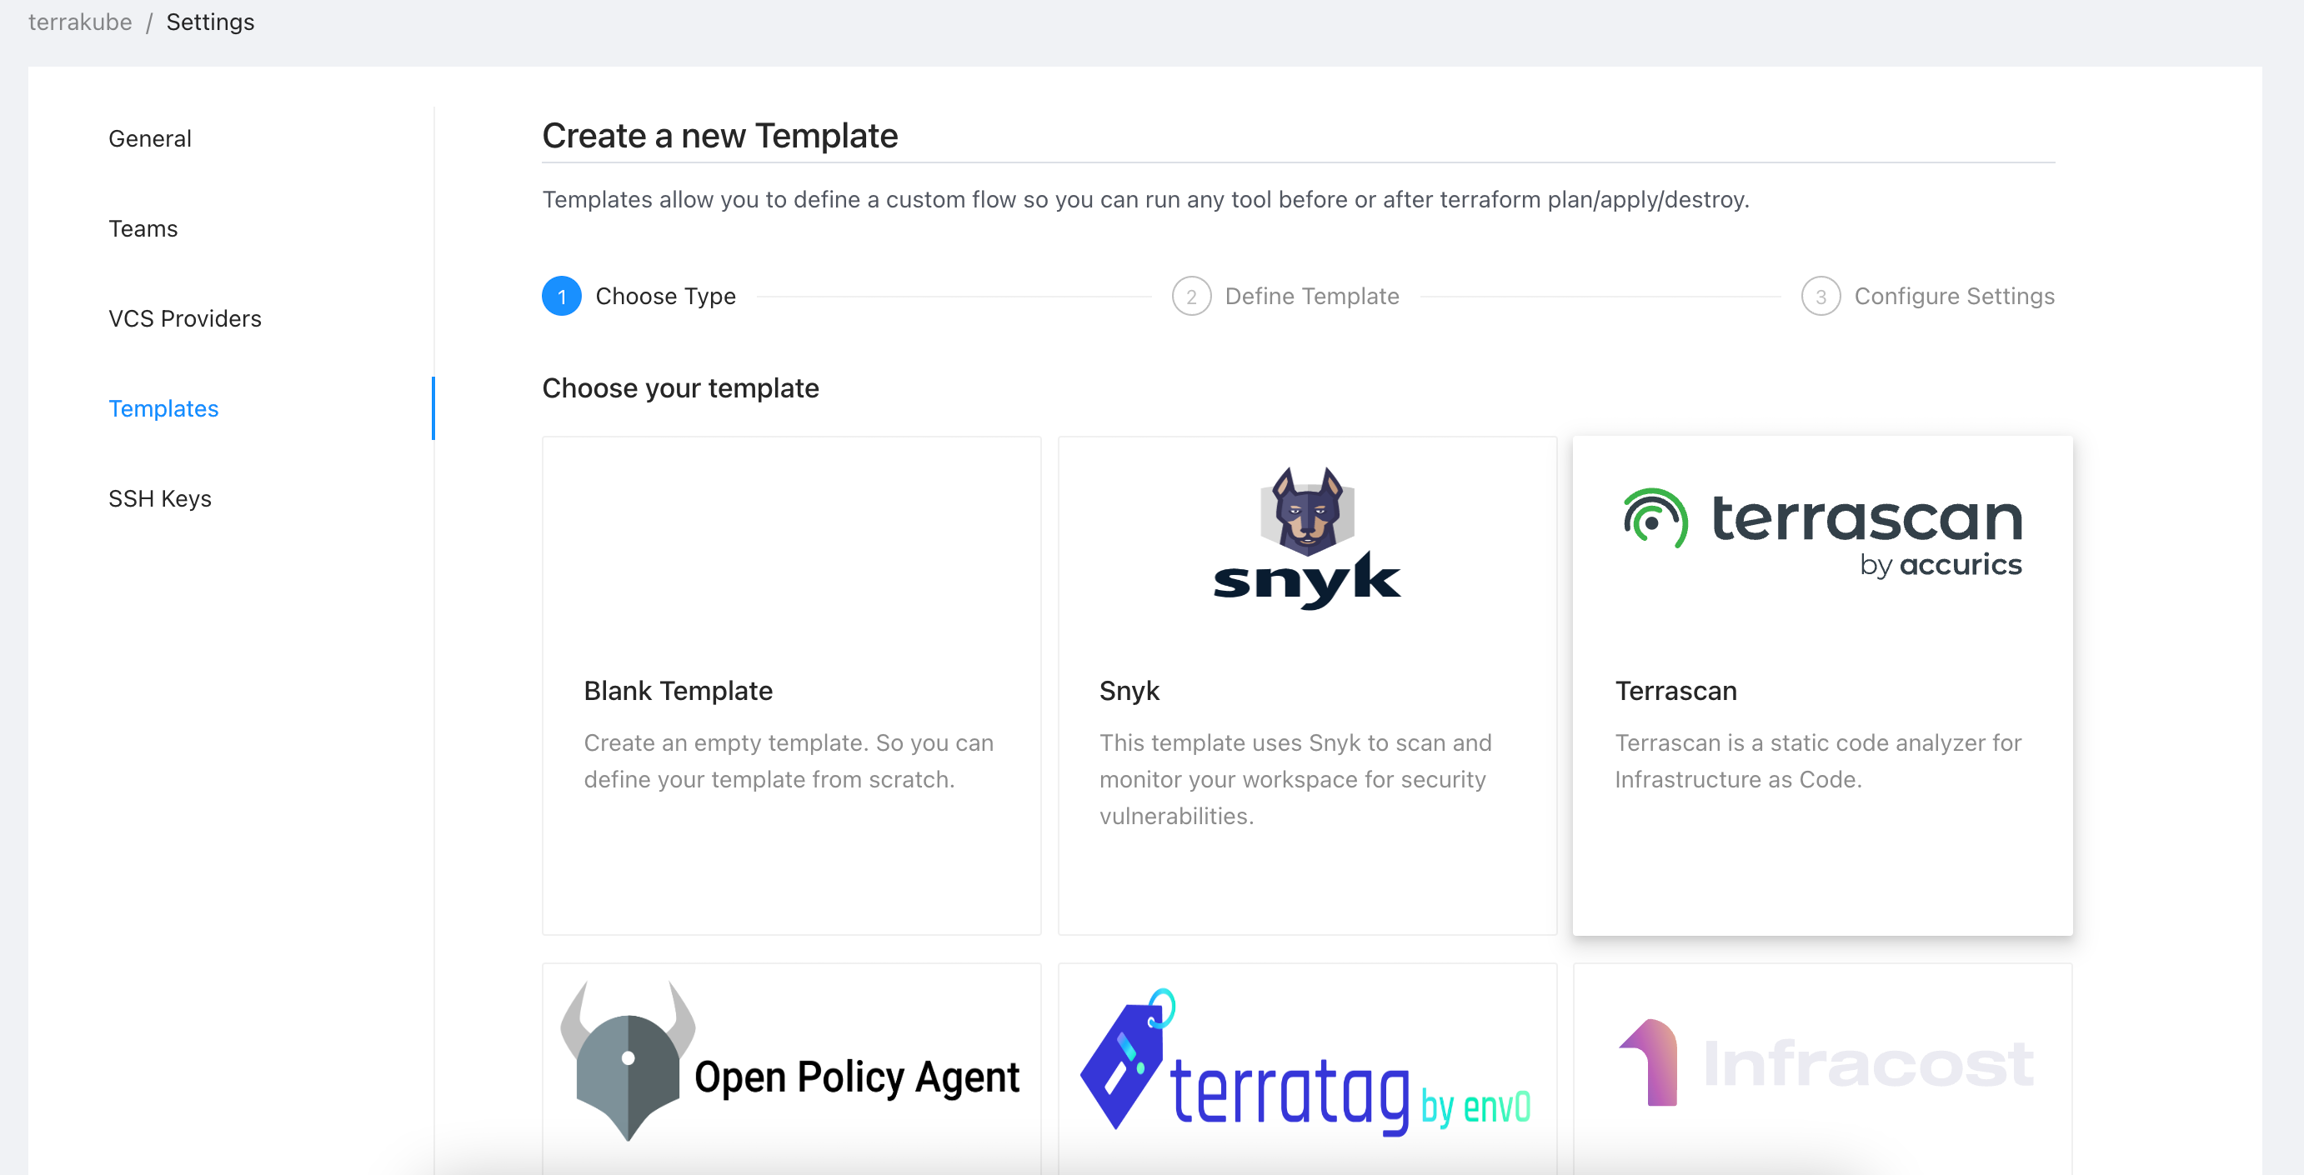
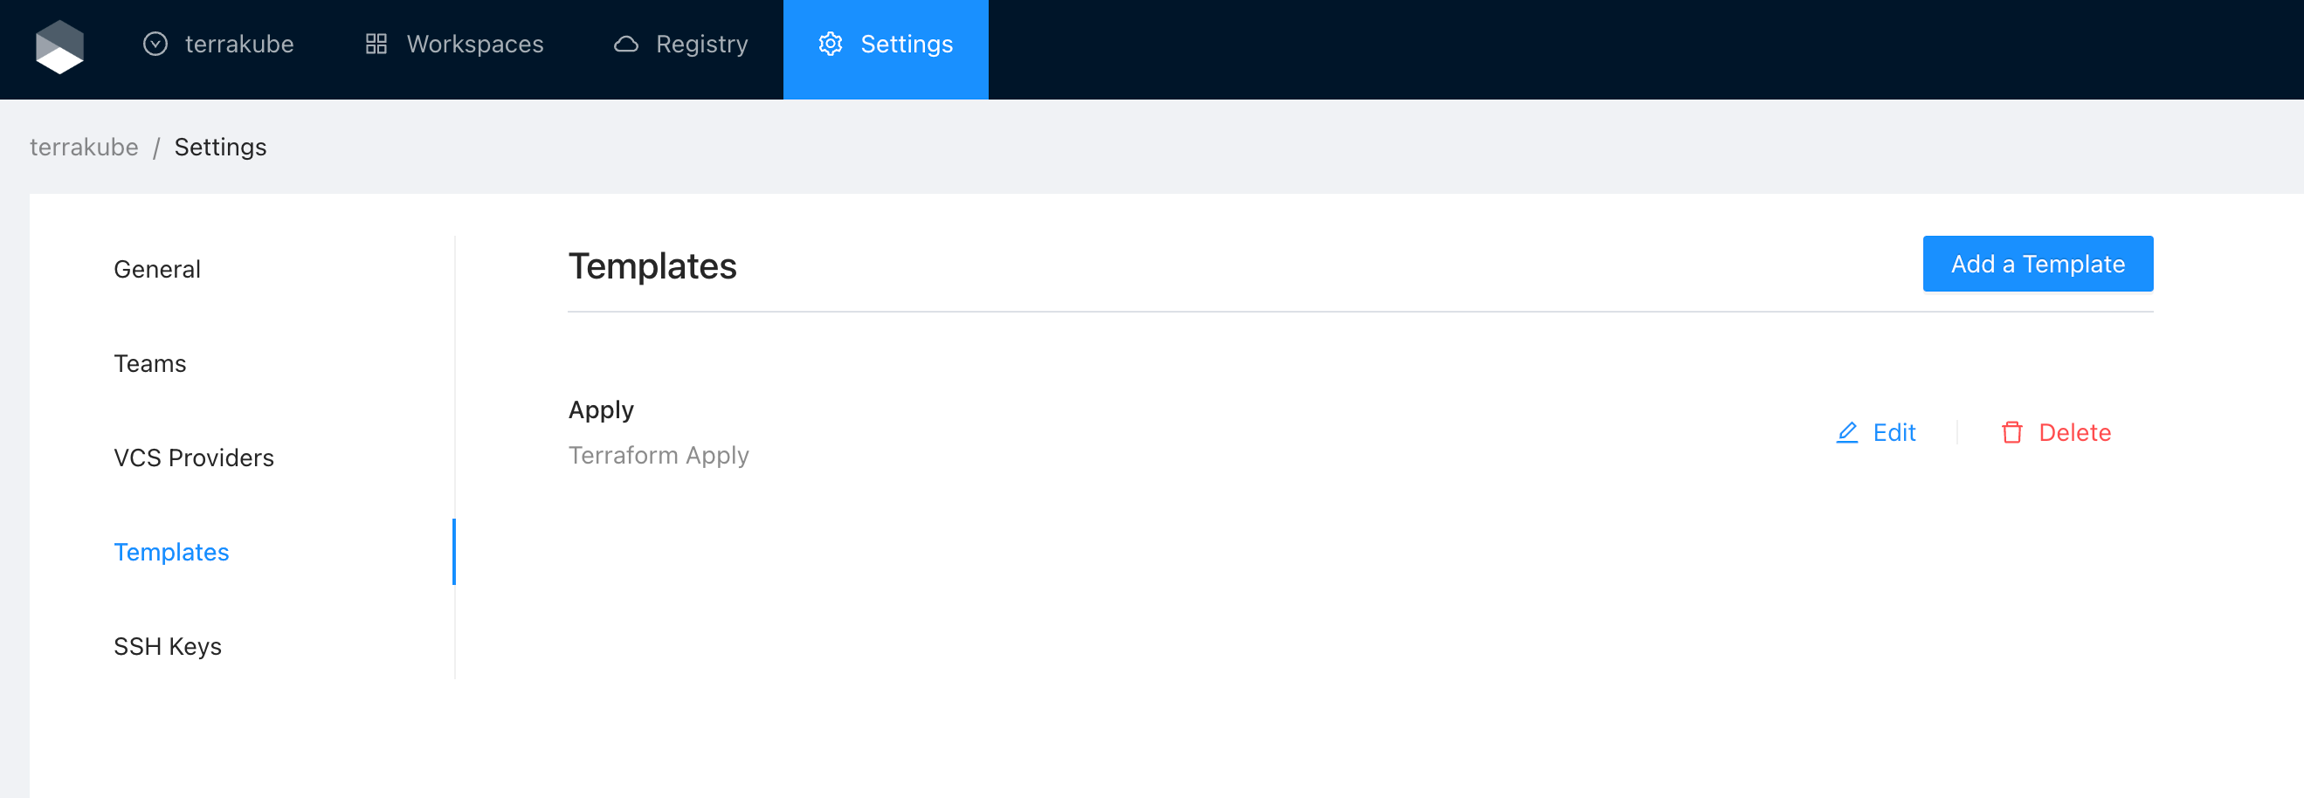
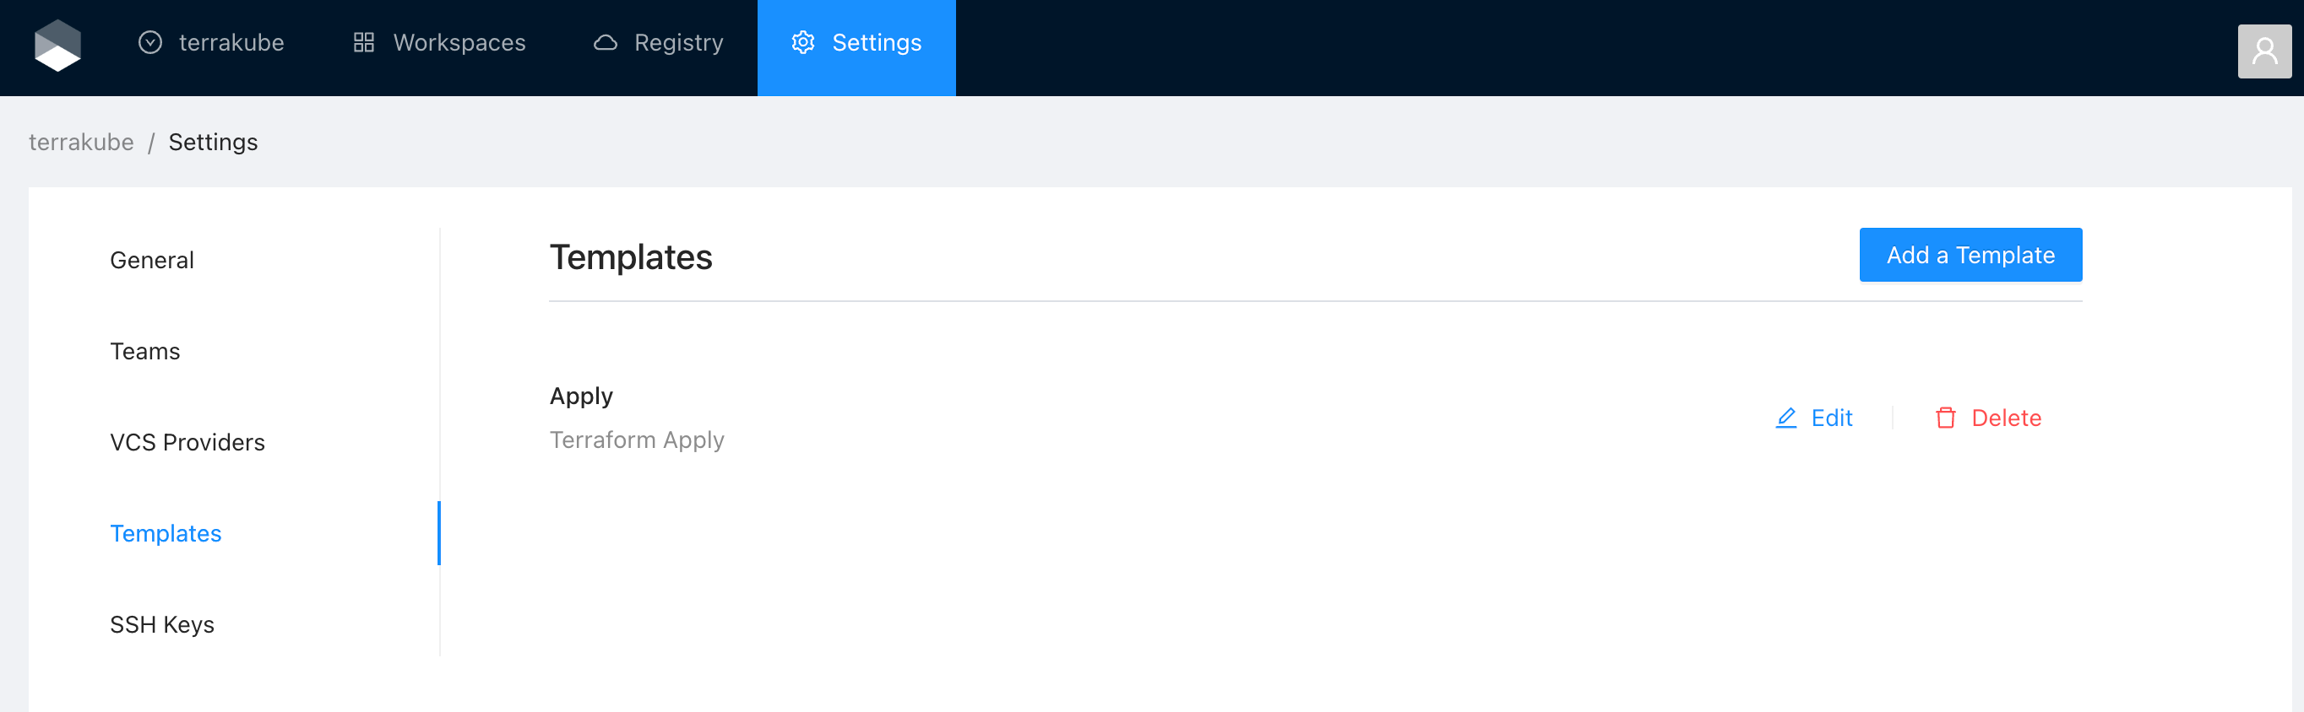
terraform login 8080-azbuilder-terrakube-3xqsq270uq1.ws-us82.gitpod.ioterraform login 8080-azbuilder-terrakube-po7evw1u15x.ws-us86.gitpod.io
Terraform will request an API token for 8080-azbuilder-terrakube-po7evw1u15x.ws-us86.gitpod.io using OAuth.
This will work only if you are able to use a web browser on this computer to
complete a login process. If not, you must obtain an API token by another
means and configure it in the CLI configuration manually.
If login is successful, Terraform will store the token in plain text in
the following file for use by subsequent commands:
C:\Users\XXXXXX\AppData\Roaming\terraform.d\credentials.tfrc.json
Do you want to proceed?
Only 'yes' will be accepted to confirm.
Enter a value: yes
Terraform must now open a web browser to the login page for 8080-azbuilder-terrakube-po7evw1u15x.ws-us86.gitpod.io.
If a browser does not open this automatically, open the following URL to proceed:
https://5556-azbuilder-terrakube-po7evw1u15x.ws-us86.gitpod.io/dex/auth?scope=openid+profile+email+offline_access+groups&client_id=example-app&code_challenge=YYe059U9HyeMy1-RmuEzSajPJYGdcY4IkNr0pZz4LZ8&code_challenge_method=S256&redirect_uri=http%3A%2F%2Flocalhost%3A10000%2Flogin&response_type=code&state=f8b6da79-35f3-2b92-d8d8-179cda386f91
Terraform will now wait for the host to signal that login was successful.
---------------------------------------------------------------------------------
Success! Terraform has obtained and saved an API token.
The new API token will be used for any future Terraform command that must make
authenticated requests to 8080-azbuilder-terrakube-po7evw1u15x.ws-us86.gitpod.io.terraform initterraform init
Initializing the backend...
Initializing provider plugins...
- Reusing previous version of hashicorp/random from the dependency lock file
- Using previously-installed hashicorp/random v3.4.3
Terraform has been successfully initialized!
You may now begin working with Terraform. Try running "terraform plan" to see
any changes that are required for your infrastructure. All Terraform commands
should now work.
If you ever set or change modules or backend configuration for Terraform,
rerun this command to reinitialize your working directory. If you forget, other
commands will detect it and remind you to do so if necessary.terraform planRunning plan in the remote backend. Output will stream here. Pressing Ctrl-C
will stop streaming the logs, but will not stop the plan running remotely.
Preparing the remote plan...
To view this run in a browser, visit:
https://8080-azbuilder-terrakube-po7evw1u15x.ws-us86.gitpod.io/app/simple/workspace1/runs/1
Waiting for the plan to start...
Terrakube Remote Plan Execution
Terraform used the selected providers to generate the following execution
plan. Resource actions are indicated with the following symbols:
+ create
Terraform will perform the following actions:
# random_string.random will be created
+ resource "random_string" "random" {
+ id = (known after apply)
+ length = 16
+ lower = true
+ min_lower = 0
+ min_numeric = 0
+ min_special = 0
+ min_upper = 0
+ number = true
+ numeric = true
+ override_special = "/@£$"
+ result = (known after apply)
+ special = true
+ upper = true
}
Plan: 1 to add, 0 to change, 0 to destroy.terraform apply
Running apply in the remote backend. Output will stream here. Pressing Ctrl-C
will cancel the remote apply if it's still pending. If the apply started it
will stop streaming the logs, but will not stop the apply running remotely.
Preparing the remote apply...
To view this run in a browser, visit:
https://8080-azbuilder-terrakube-po7evw1u15x.ws-us86.gitpod.io/app/simple/workspace1/runs/2
Waiting for the plan to start...
Terrakube Remote Plan Execution
Terraform used the selected providers to generate the following execution
plan. Resource actions are indicated with the following symbols:
+ create
Terraform will perform the following actions:
# random_string.random will be created
+ resource "random_string" "random" {
+ id = (known after apply)
+ length = 16
+ lower = true
+ min_lower = 0
+ min_numeric = 0
+ min_special = 0
+ min_upper = 0
+ number = true
+ numeric = true
+ override_special = "/@£$"
+ result = (known after apply)
+ special = true
+ upper = true
}
Plan: 1 to add, 0 to change, 0 to destroy.
Do you want to perform these actions in workspace "workspace1"?
Terraform will perform the actions described above.
Only 'yes' will be accepted to approve.
Enter a value: yes
random_string.random: Creating...
random_string.random: Creation complete after 0s [id=QvsEmtO7WoeJJcAJ]
Apply complete! Resources: 1 added, 0 changed, 0 destroyed.terraform destroy
Running apply in the remote backend. Output will stream here. Pressing Ctrl-C
will cancel the remote apply if it's still pending. If the apply started it
will stop streaming the logs, but will not stop the apply running remotely.
Preparing the remote apply...
To view this run in a browser, visit:
https://8080-azbuilder-terrakube-po7evw1u15x.ws-us86.gitpod.io/app/simple/workspace1/runs/3
Waiting for the plan to start...
Terrakube Remote Plan Execution
random_string.random: Refreshing state... [id=QvsEmtO7WoeJJcAJ]
Terraform used the selected providers to generate the following execution
plan. Resource actions are indicated with the following symbols:
- destroy
Terraform will perform the following actions:
# random_string.random will be destroyed
- resource "random_string" "random" {
- id = "QvsEmtO7WoeJJcAJ" -> null
- length = 16 -> null
- lower = true -> null
- min_lower = 0 -> null
- min_numeric = 0 -> null
- min_special = 0 -> null
- min_upper = 0 -> null
- number = true -> null
- numeric = true -> null
- override_special = "/@£$" -> null
- result = "QvsEmtO7WoeJJcAJ" -> null
- special = true -> null
- upper = true -> null
}
Plan: 0 to add, 0 to change, 1 to destroy.
Do you really want to destroy all resources in workspace "workspace1"?
Terraform will destroy all your managed infrastructure, as shown above.
There is no undo. Only 'yes' will be accepted to confirm.
Enter a value: yes
random_string.random: Destroying... [id=QvsEmtO7WoeJJcAJ]
random_string.random: Destruction complete after 0s
Apply complete! Resources: 0 added, 0 changed, 1 destroyed.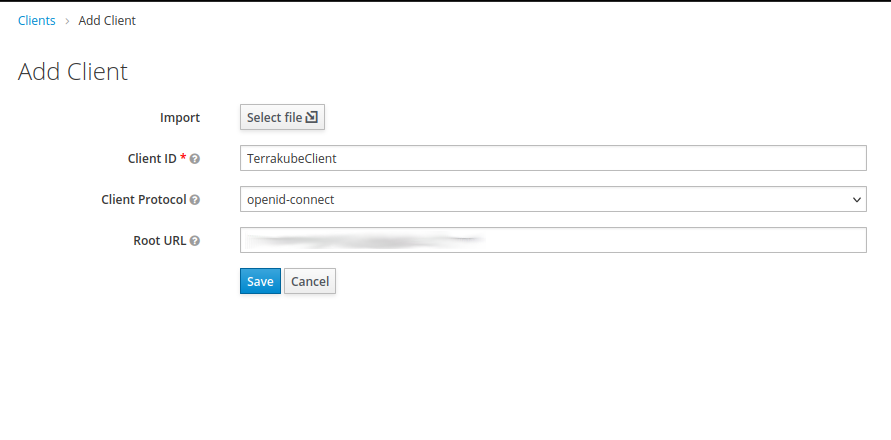
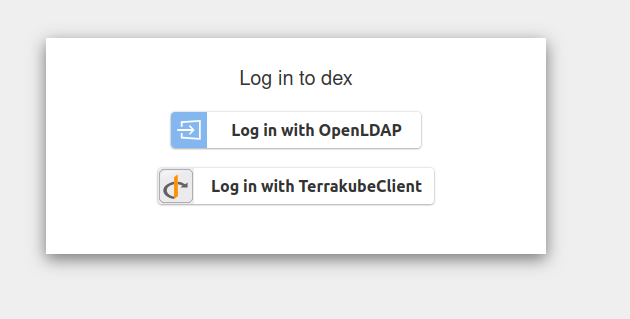
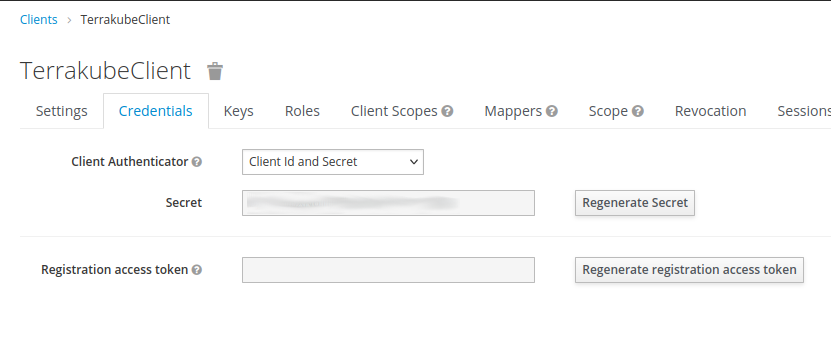
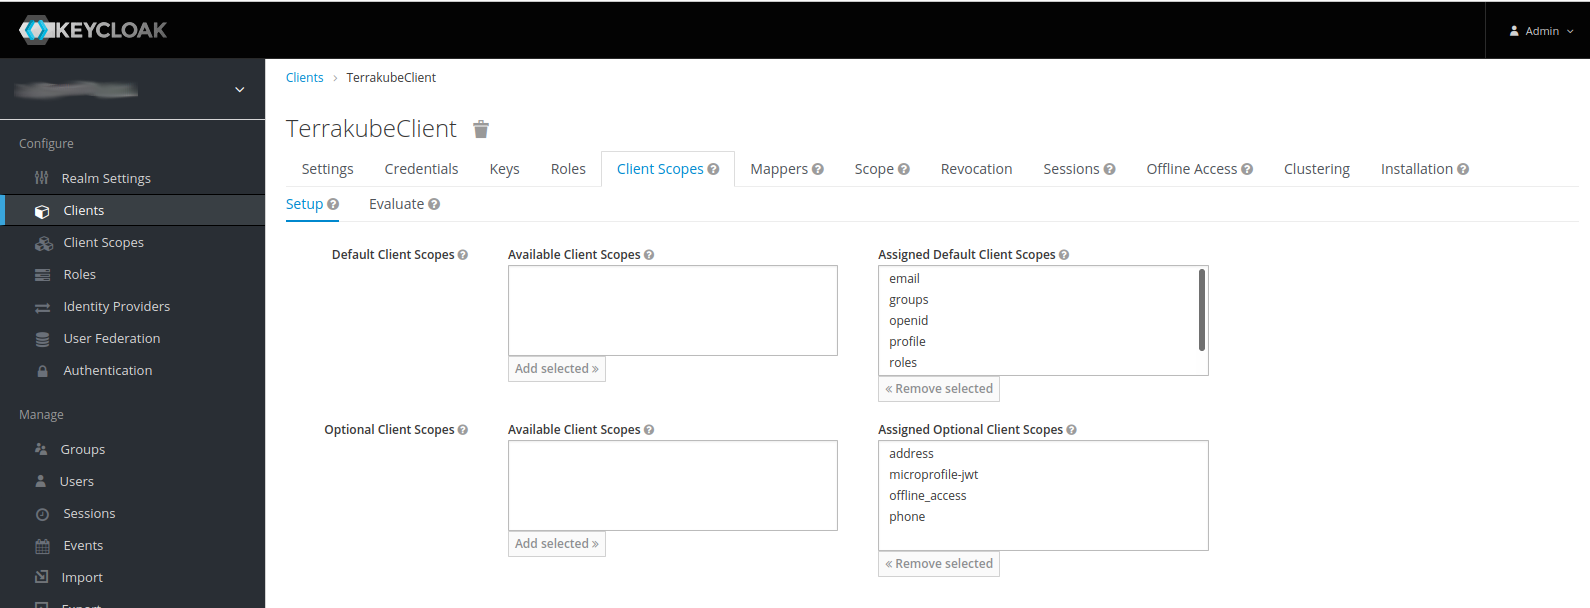
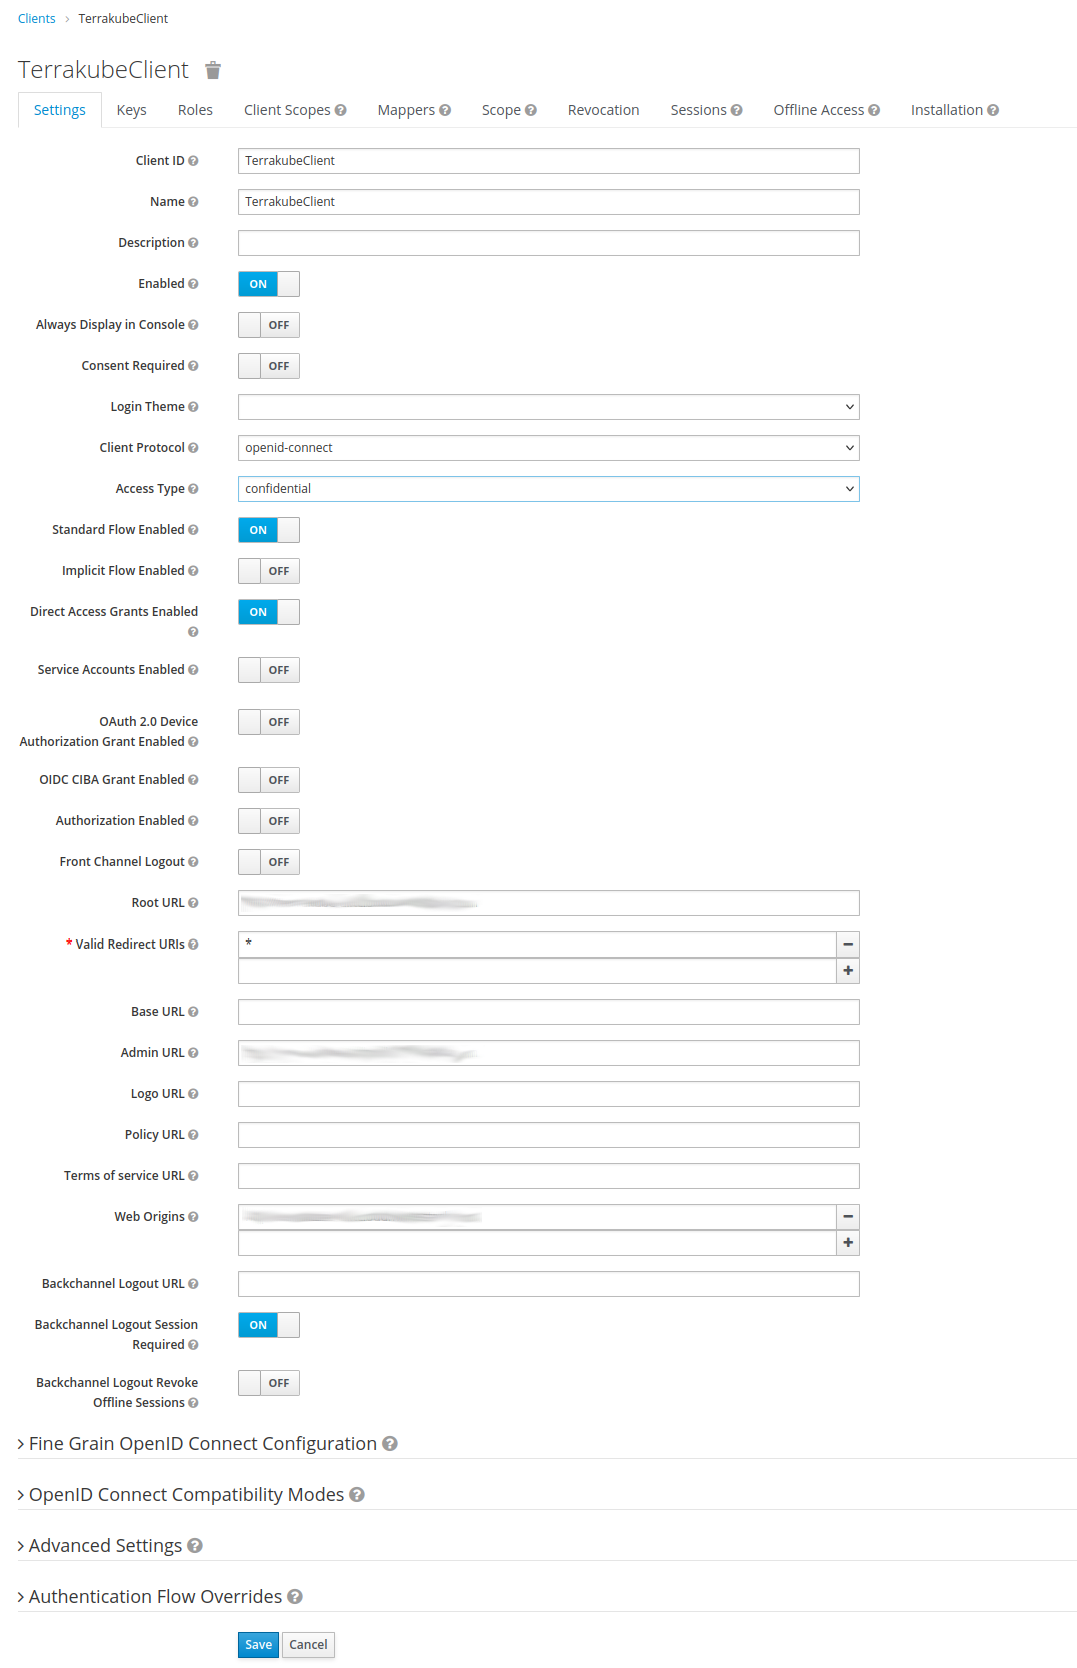
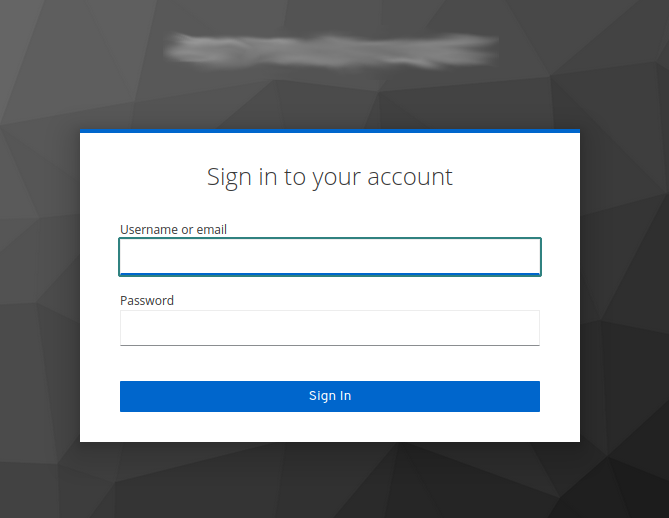
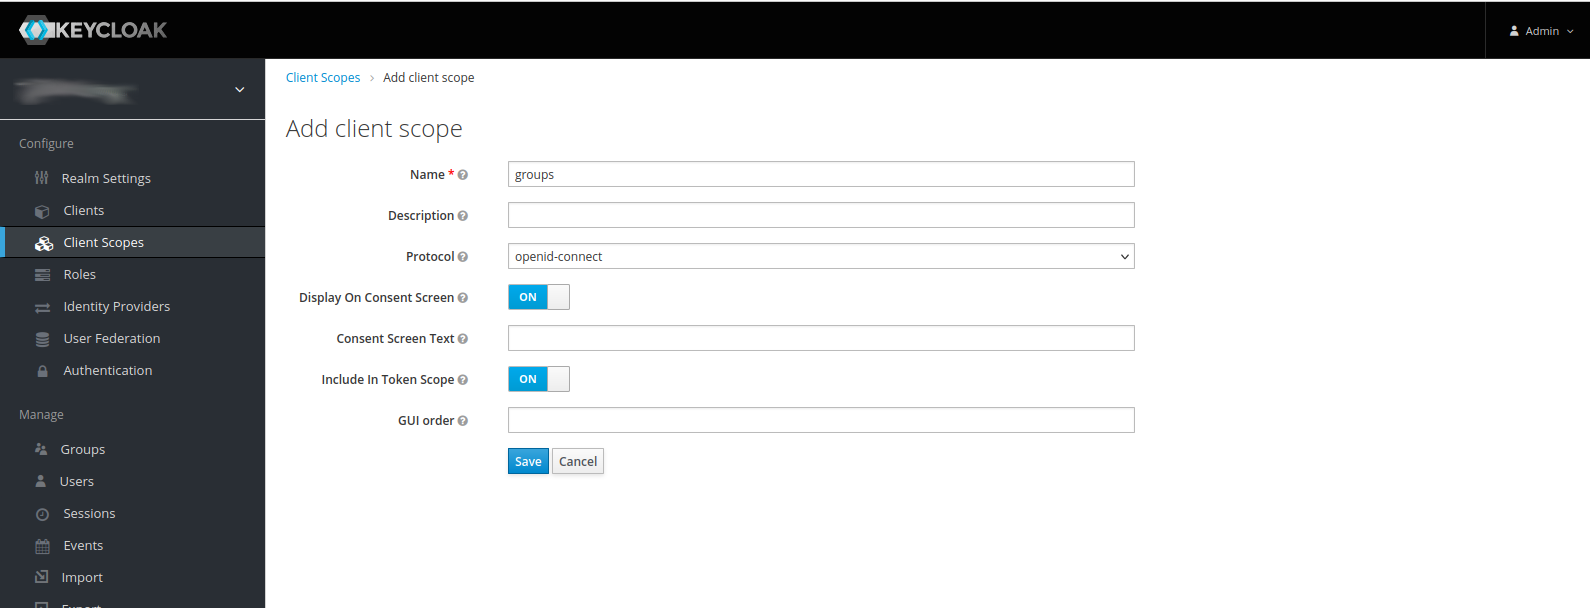
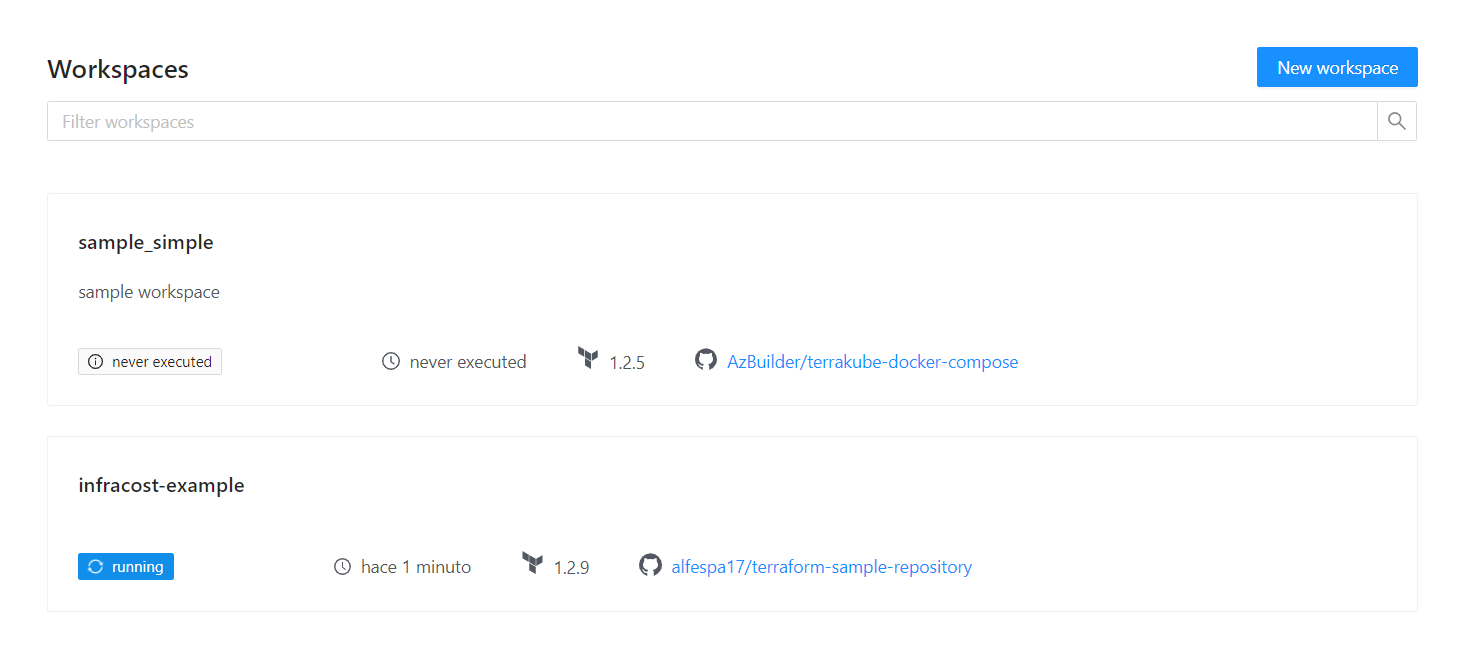
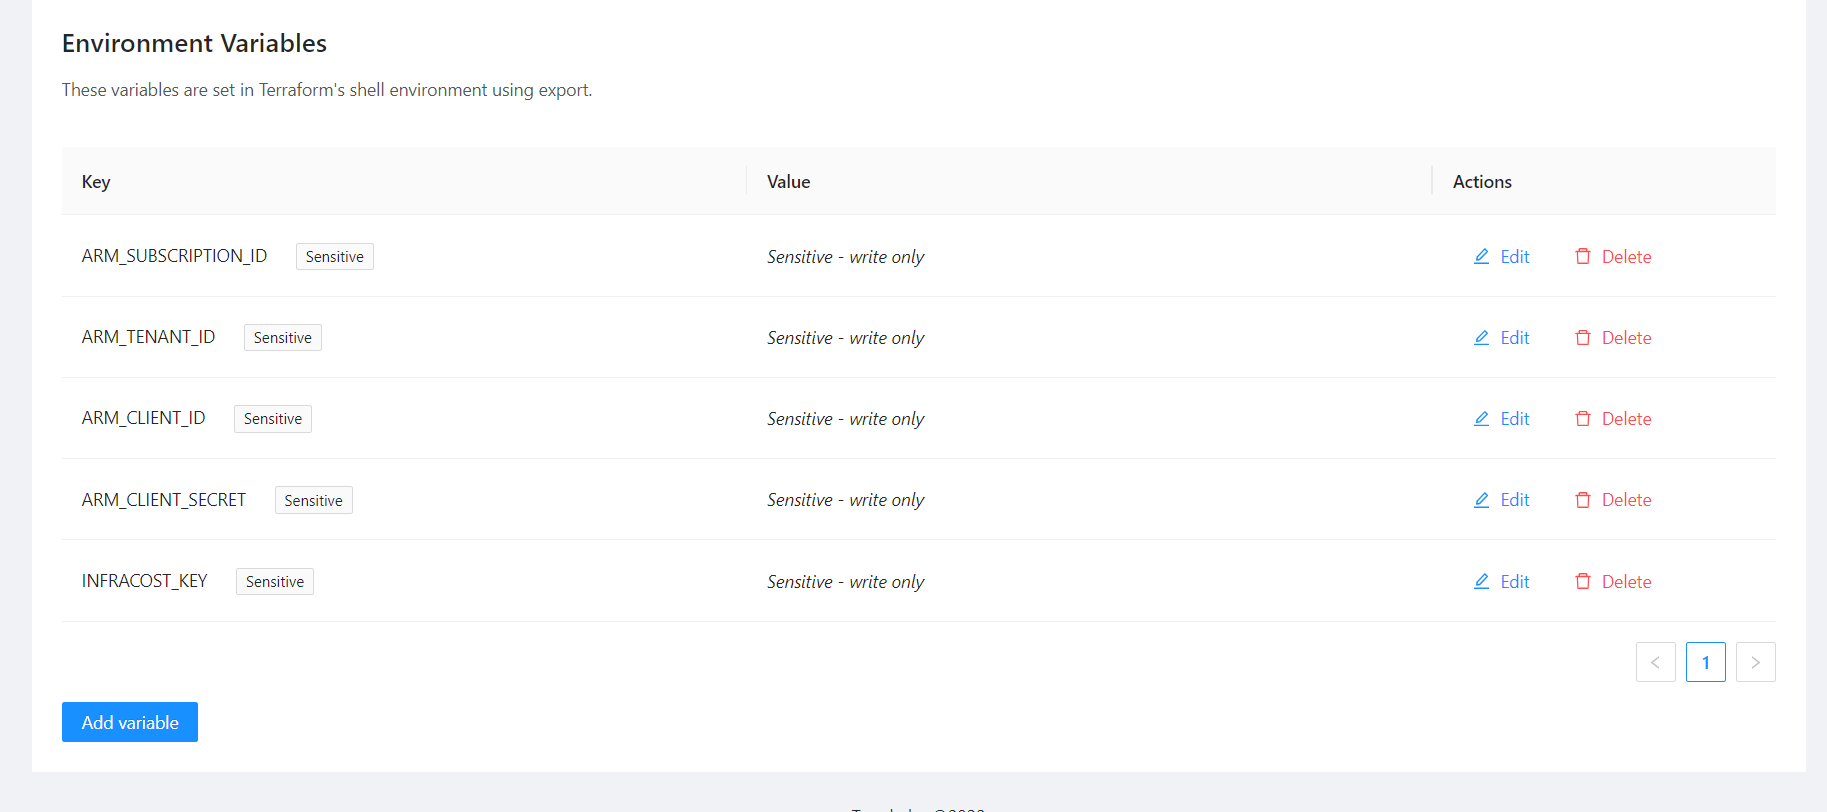
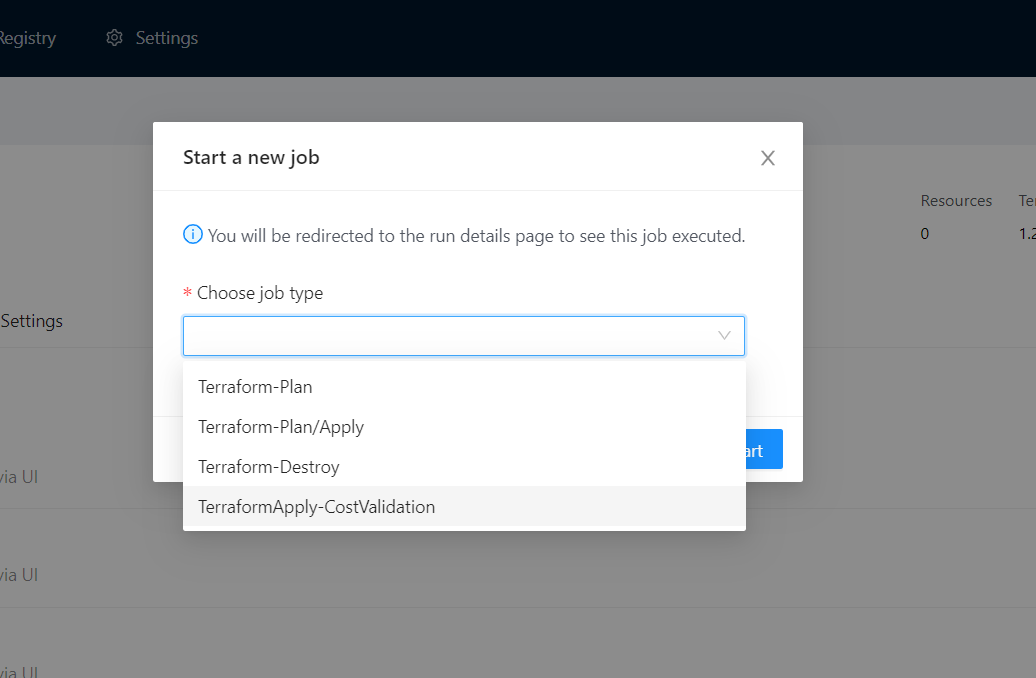
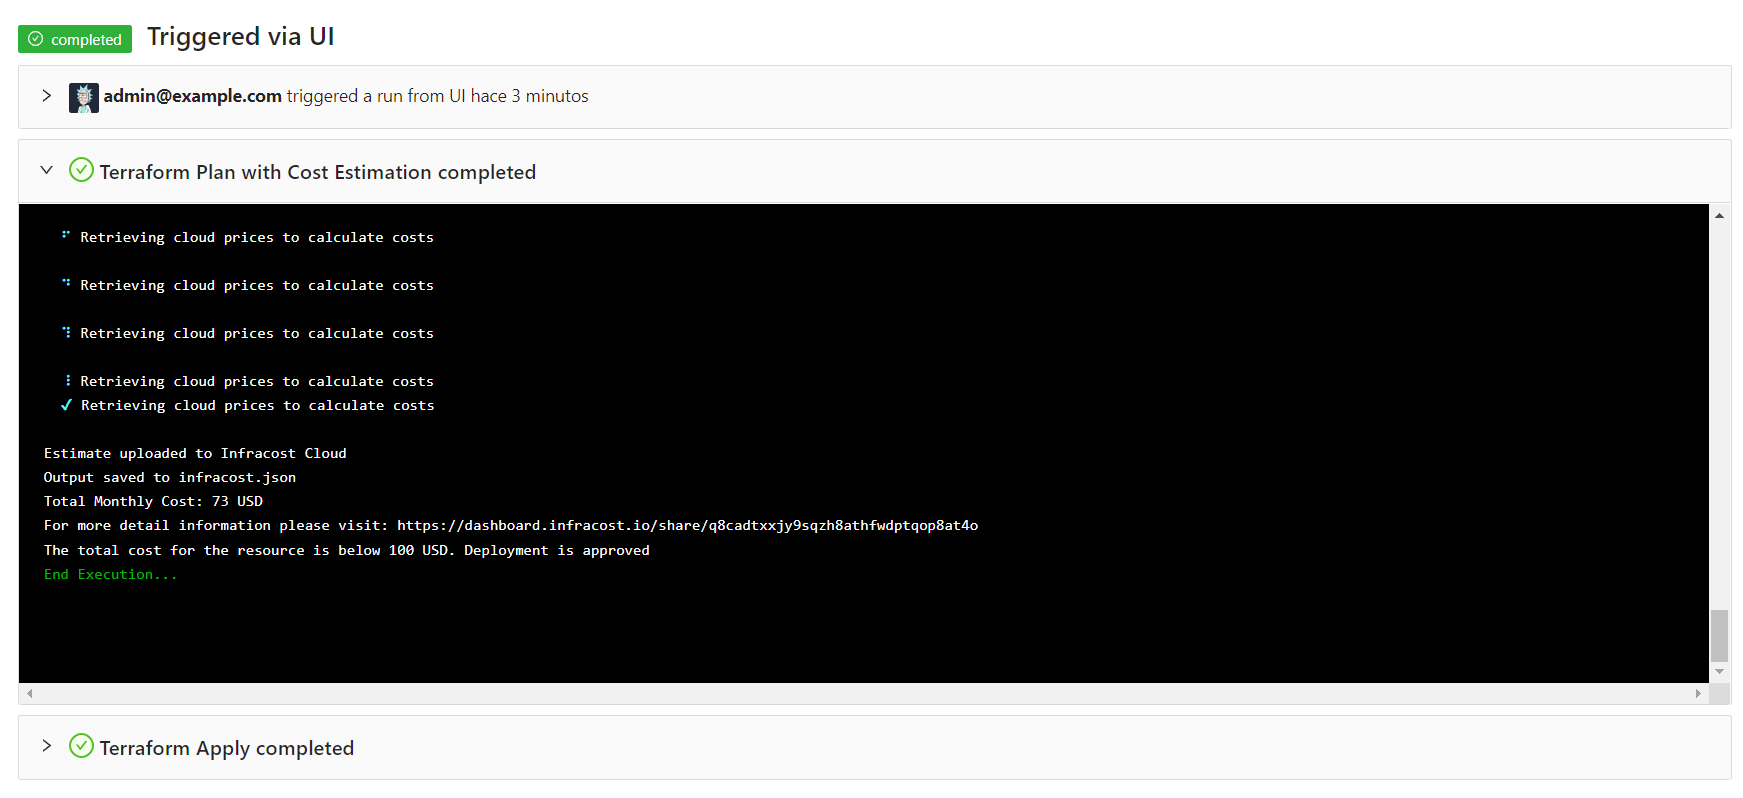
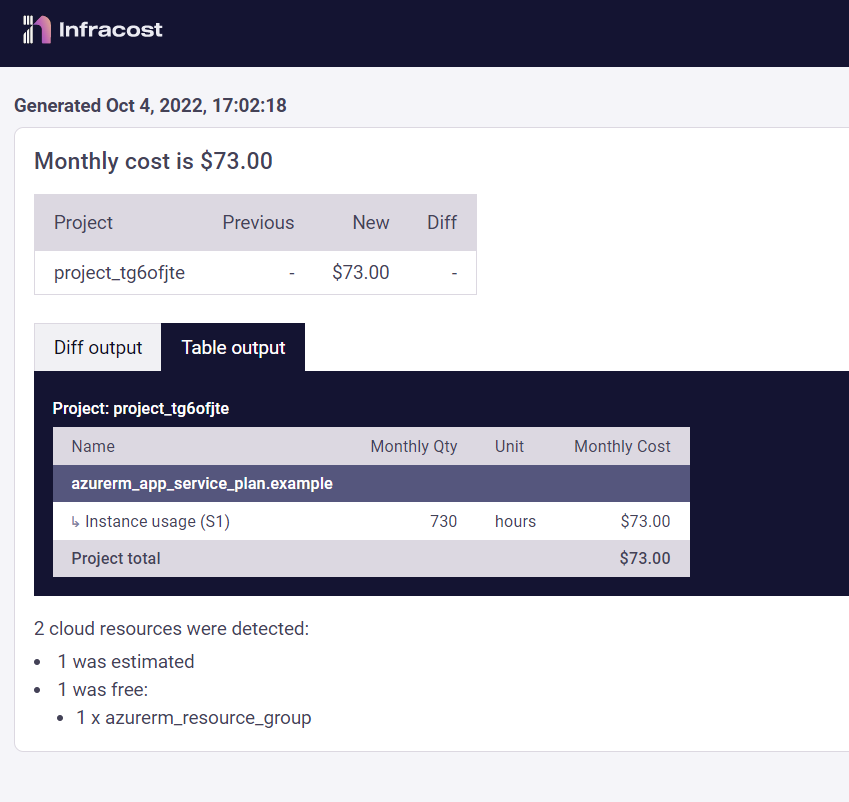
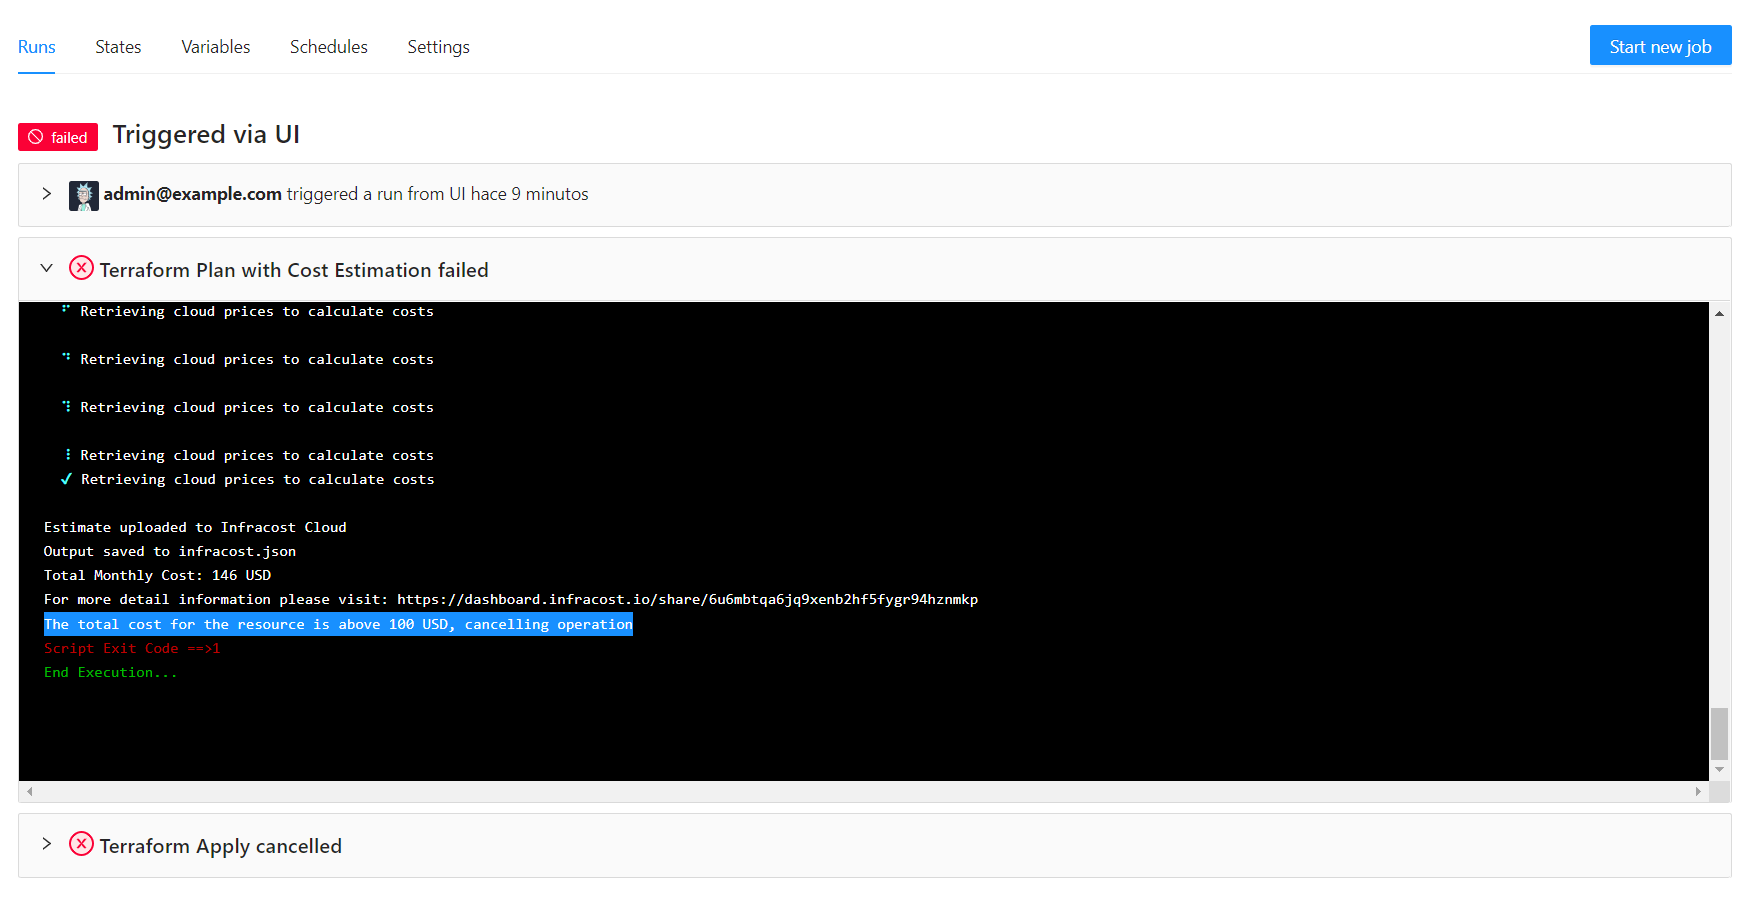
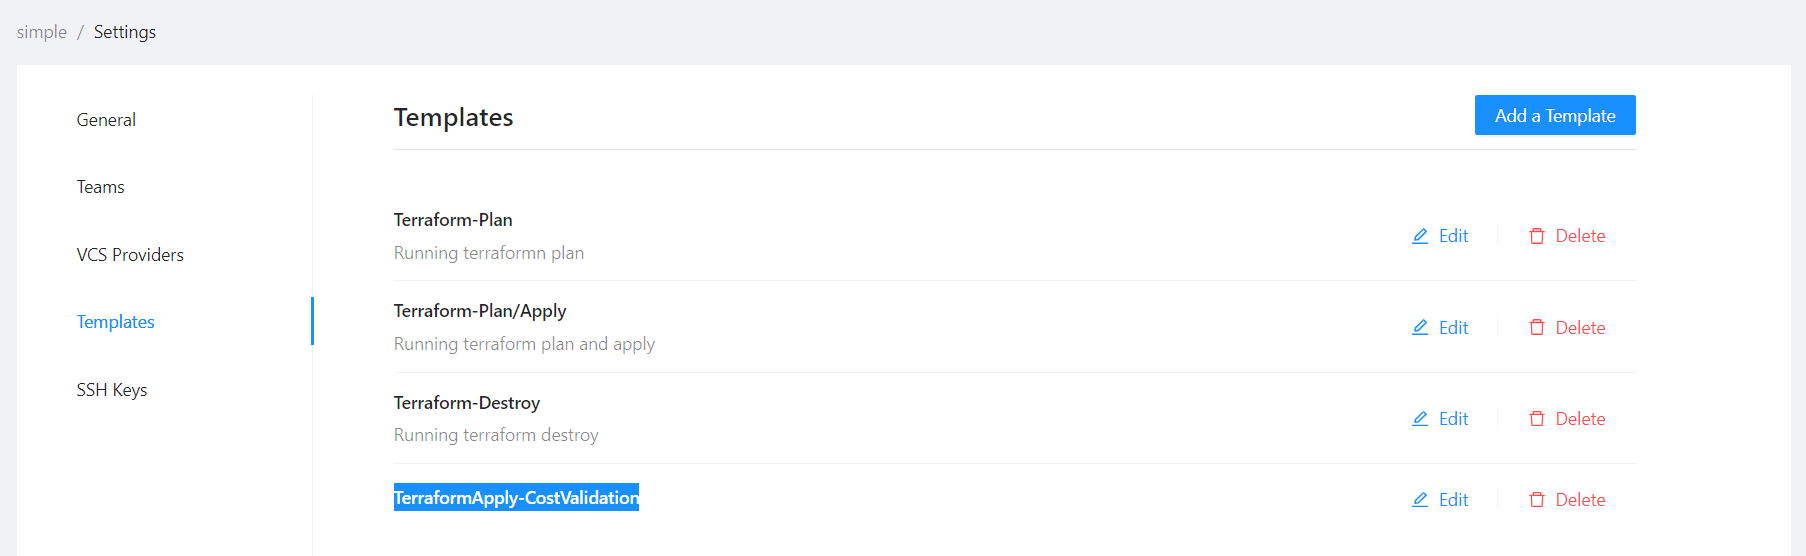
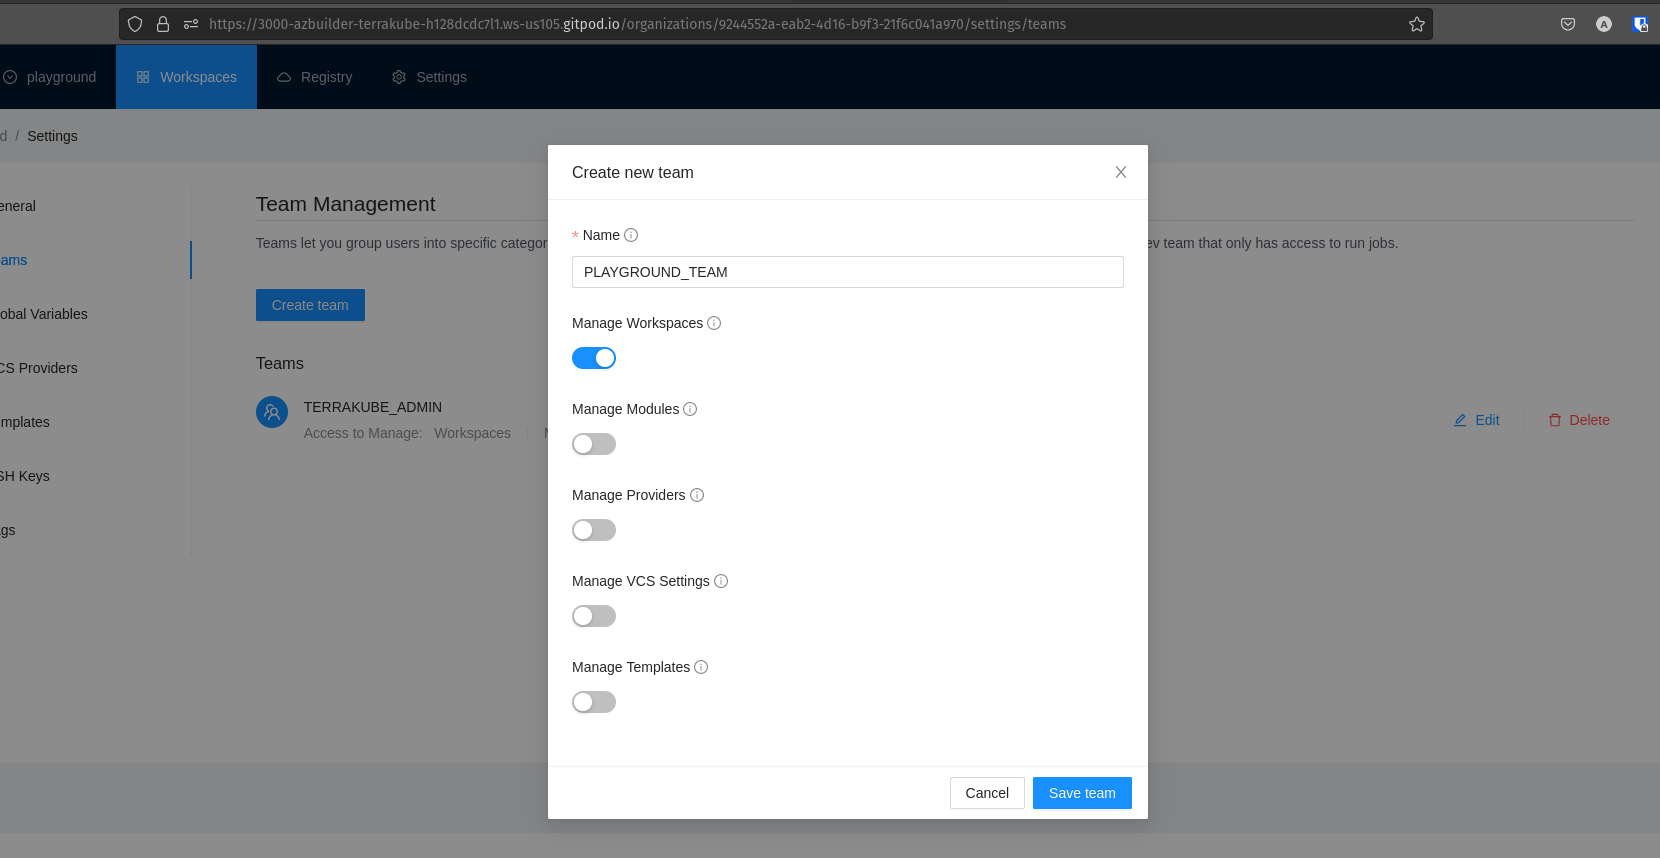
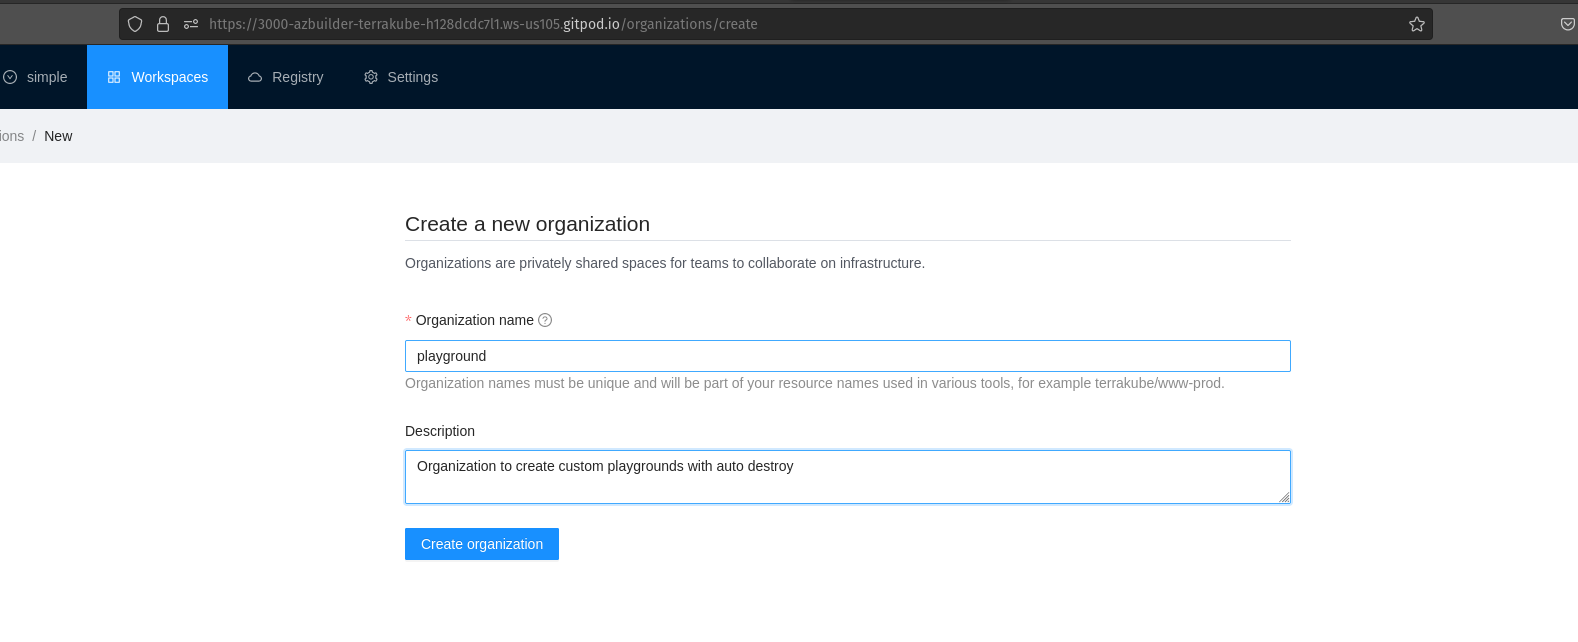
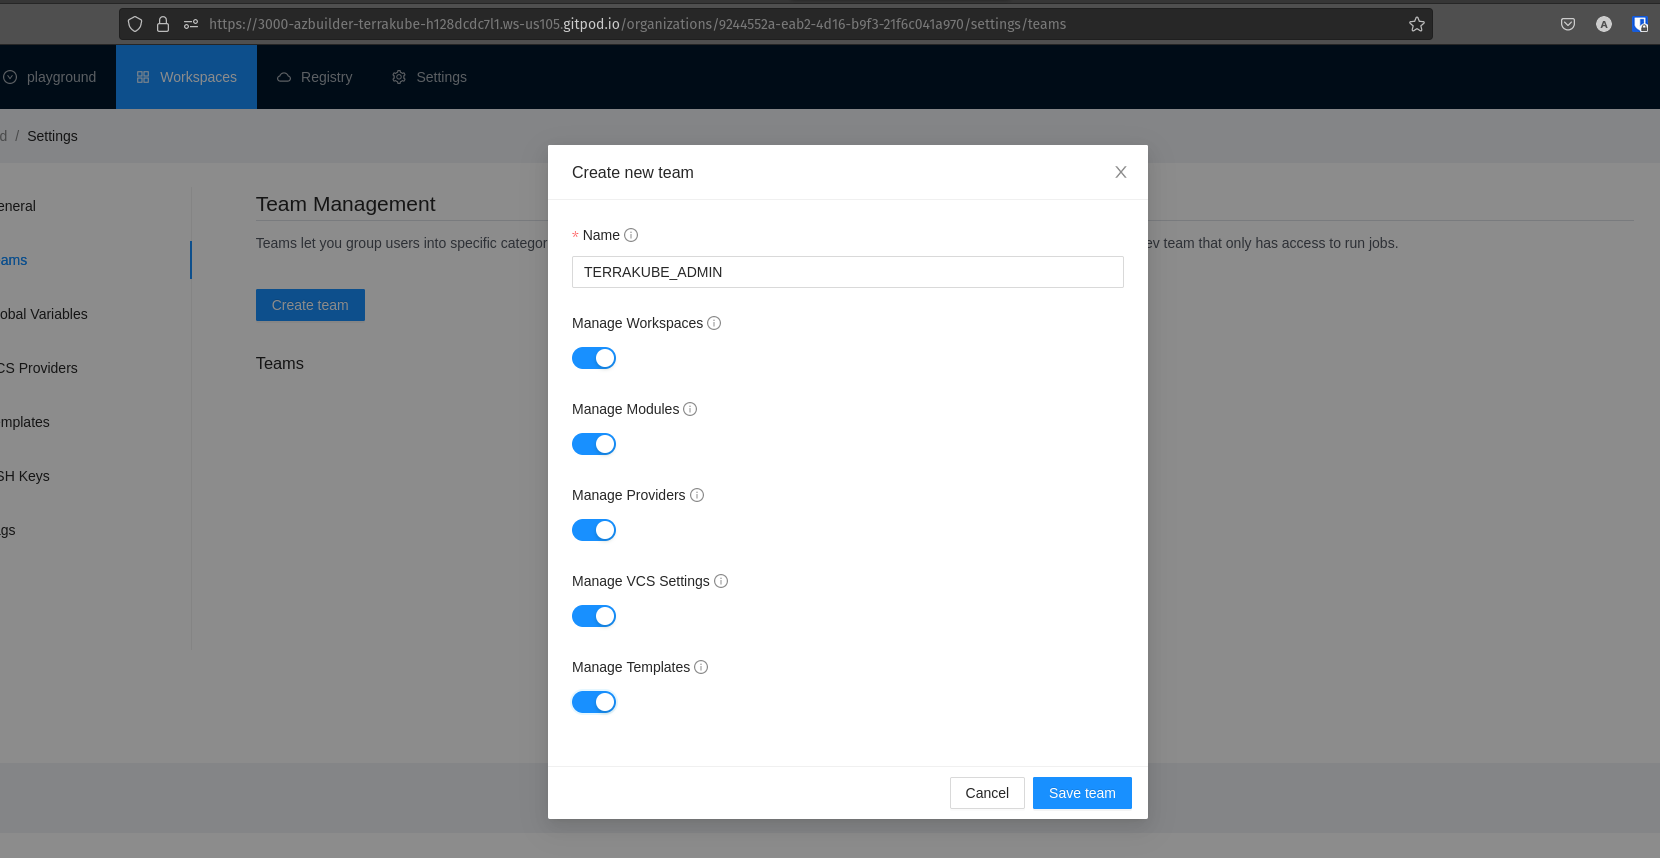
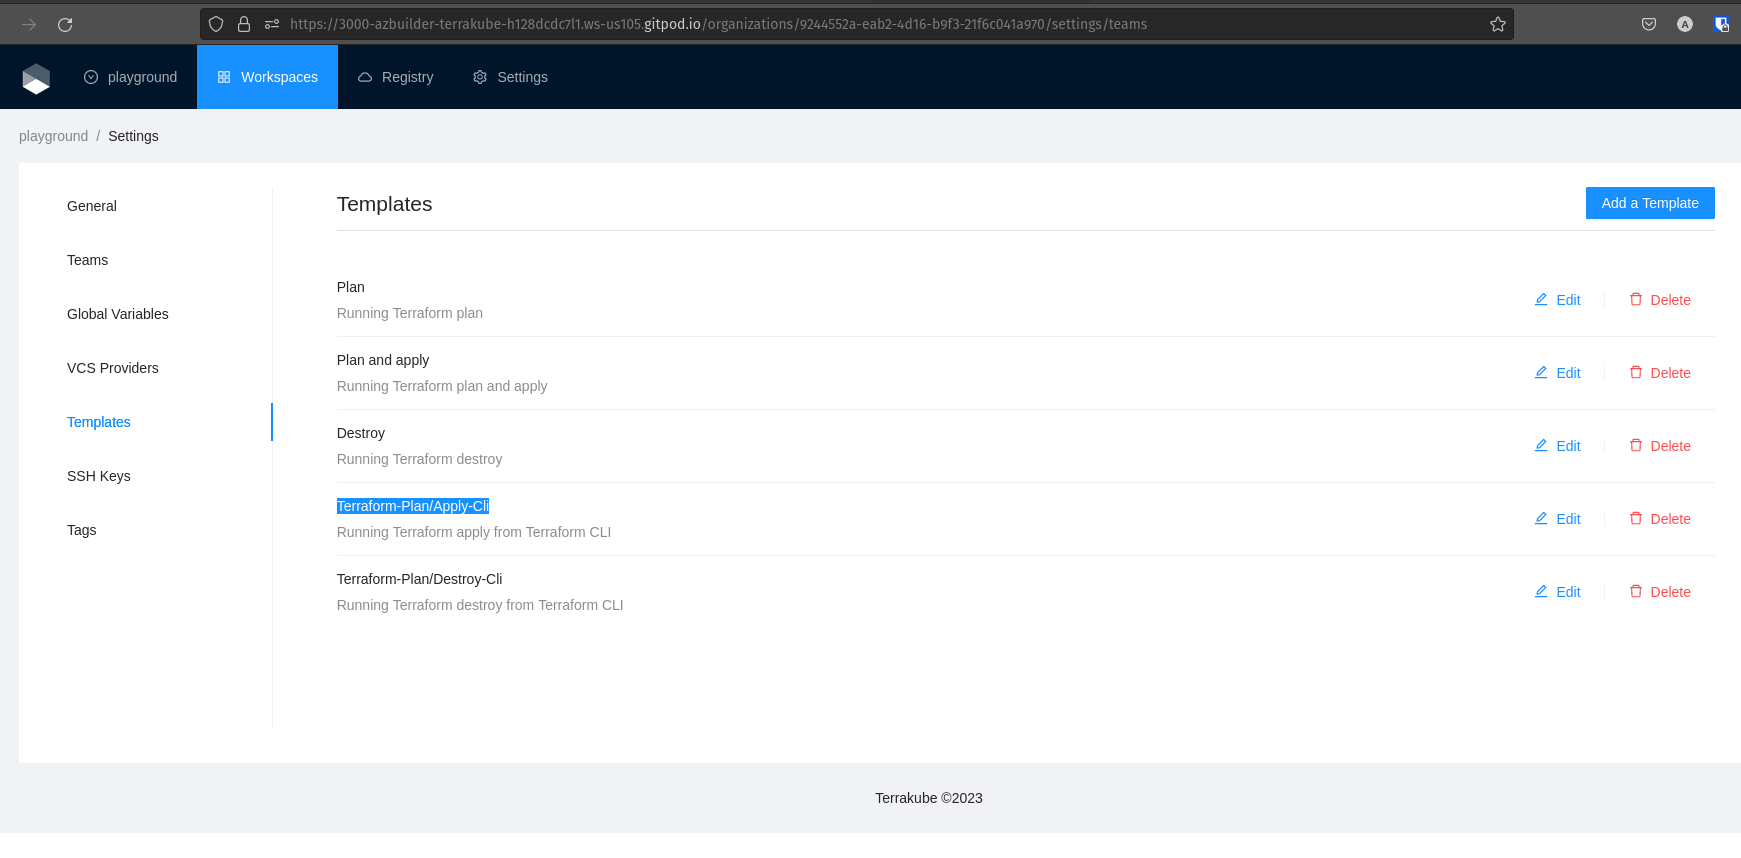
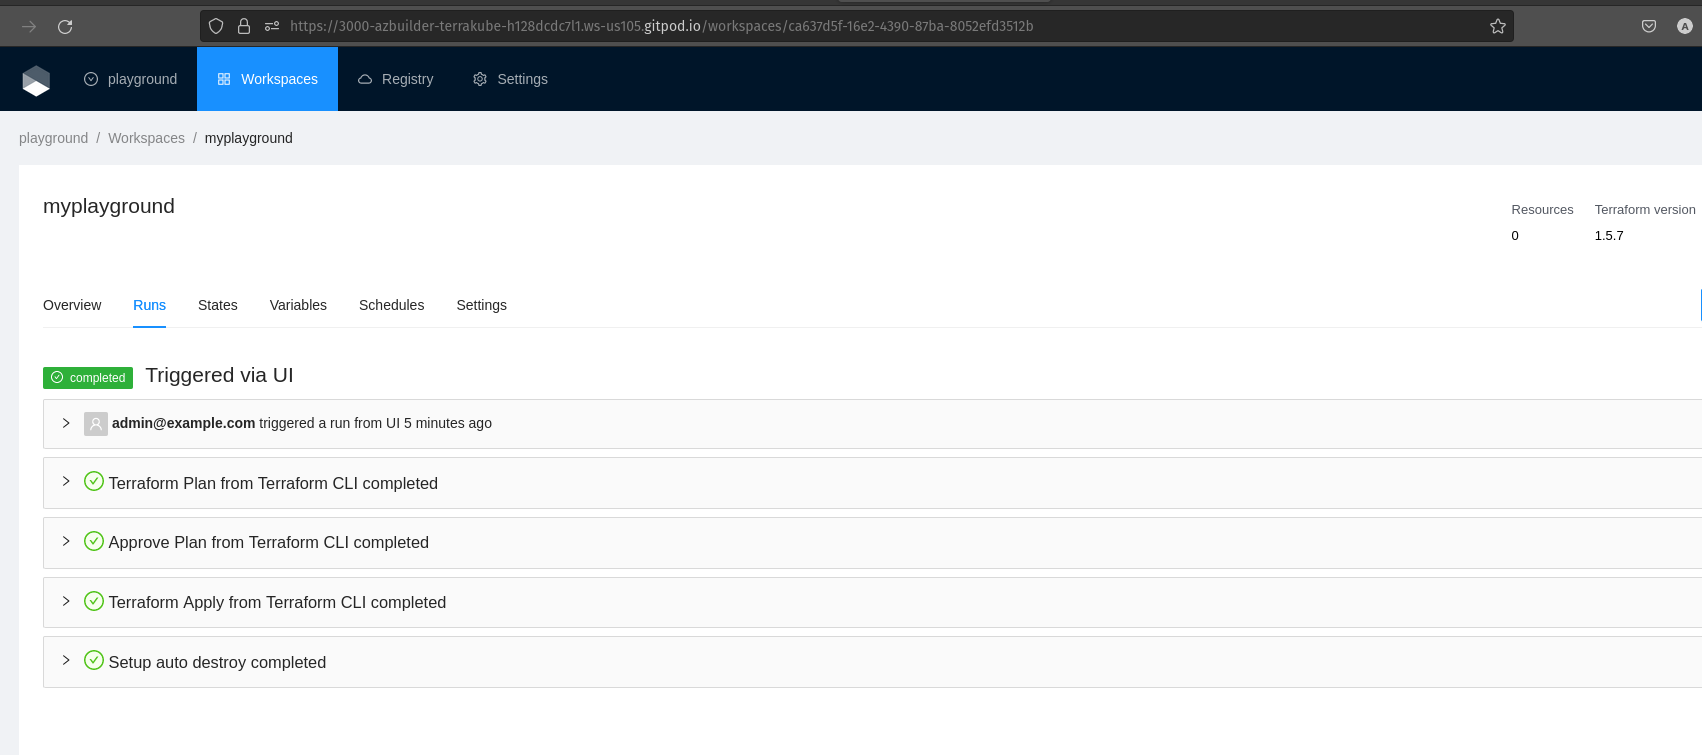
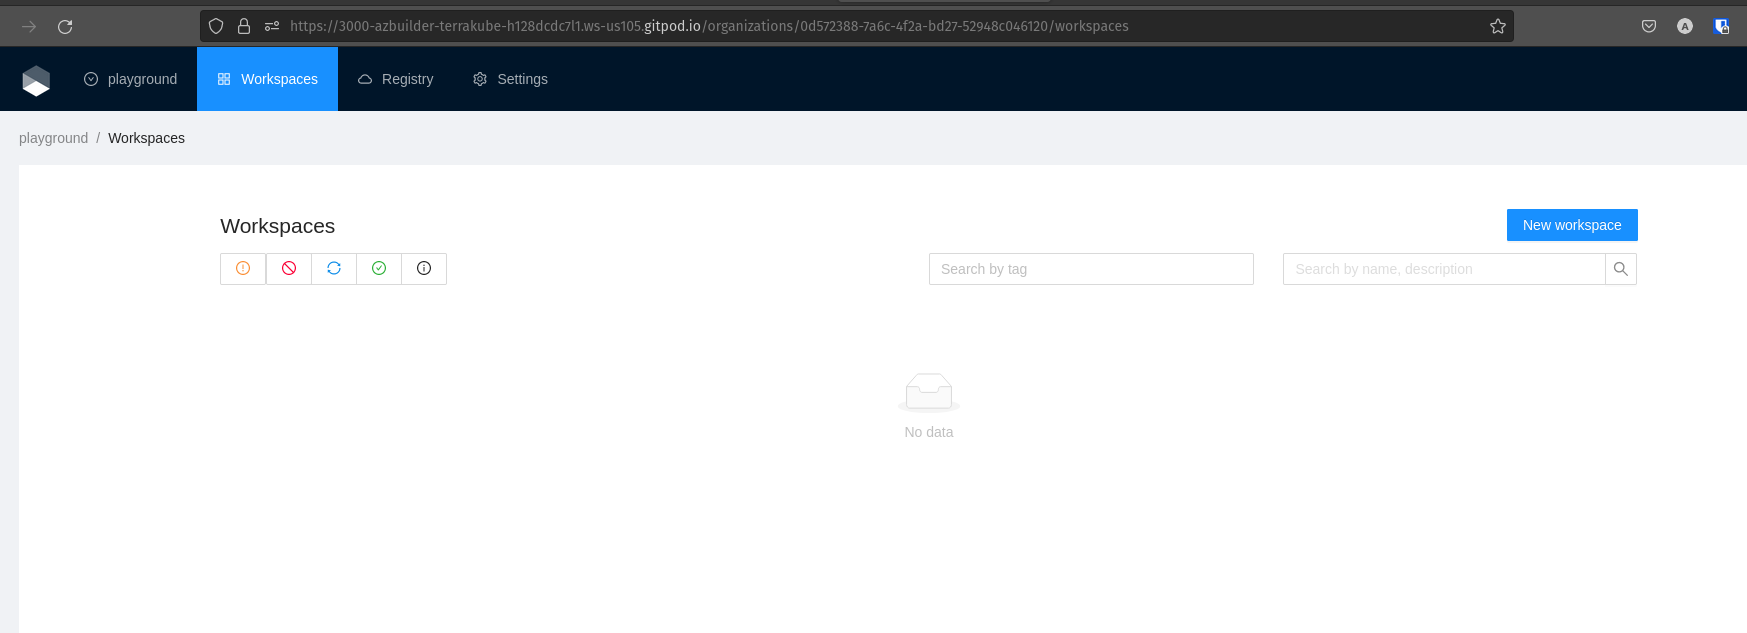
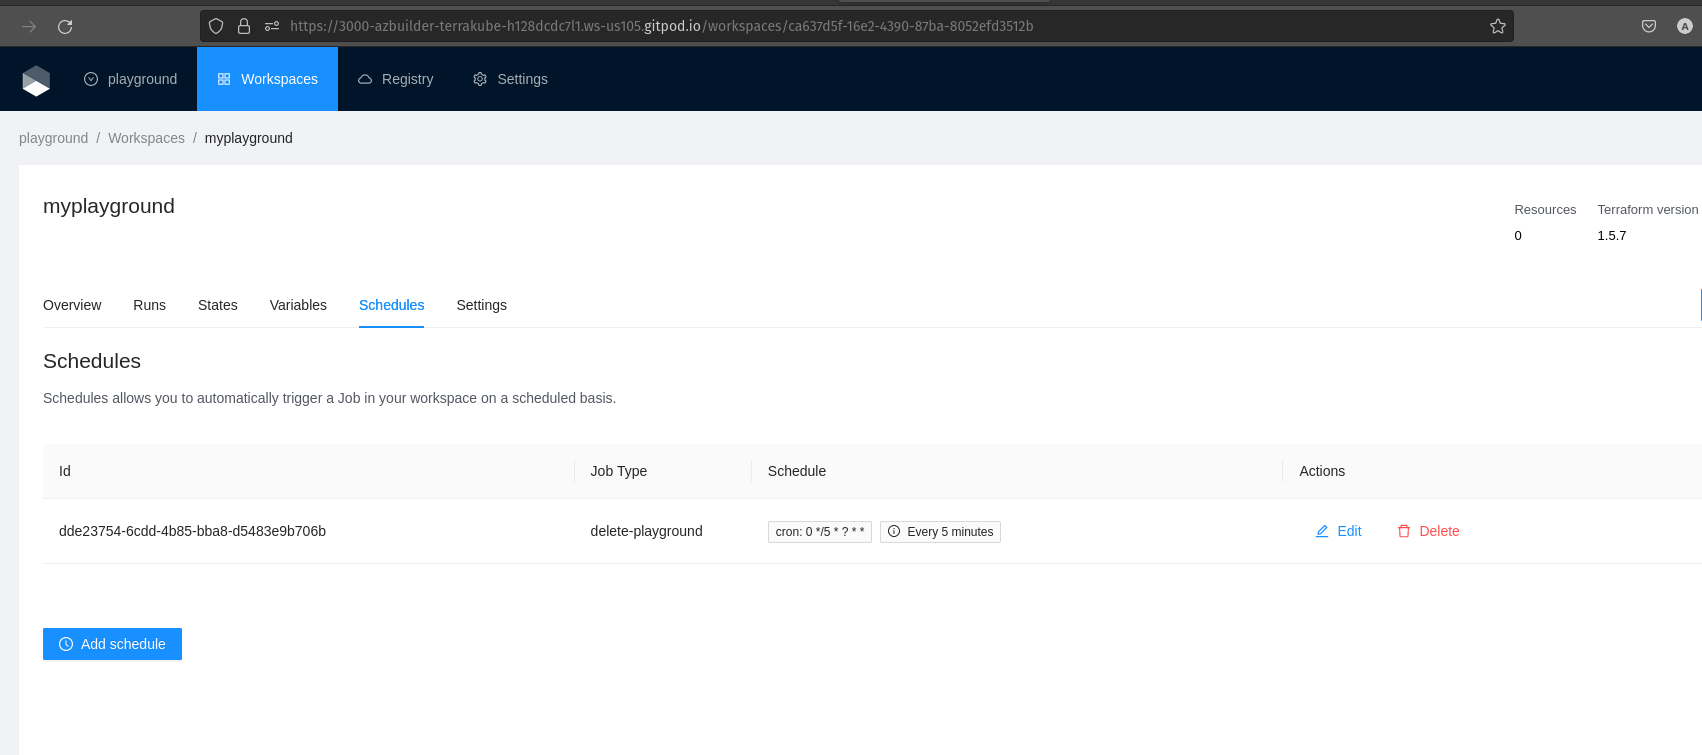
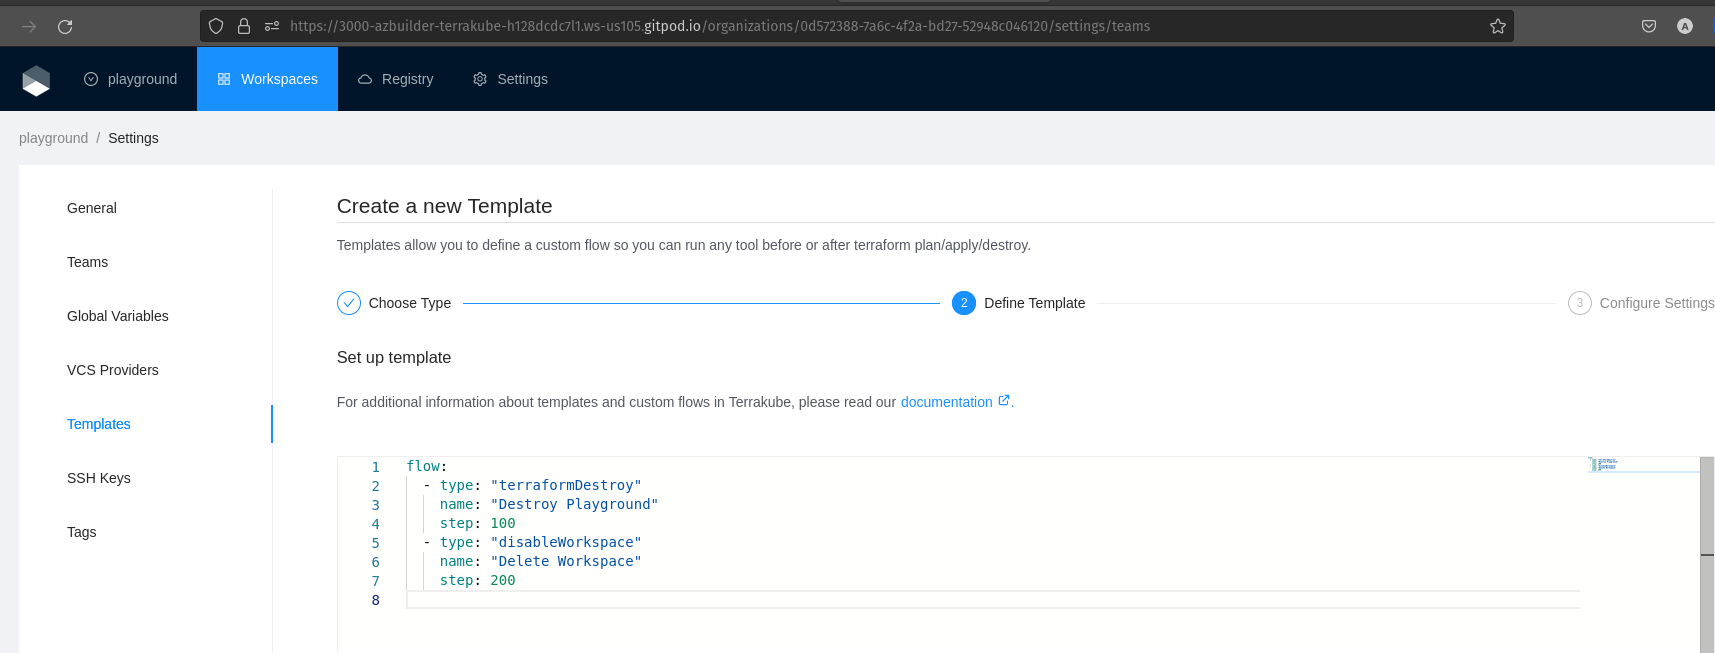

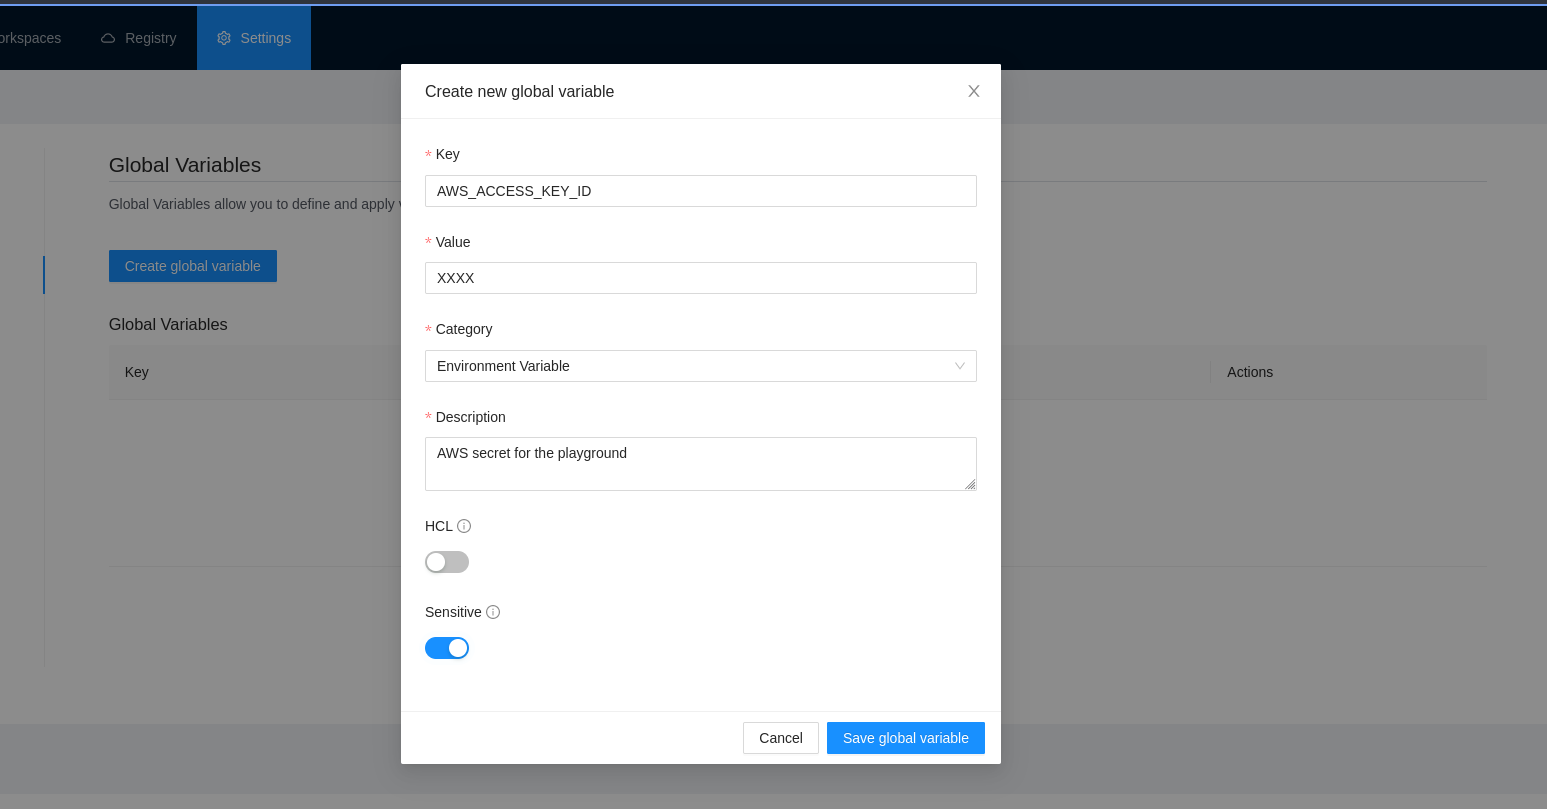
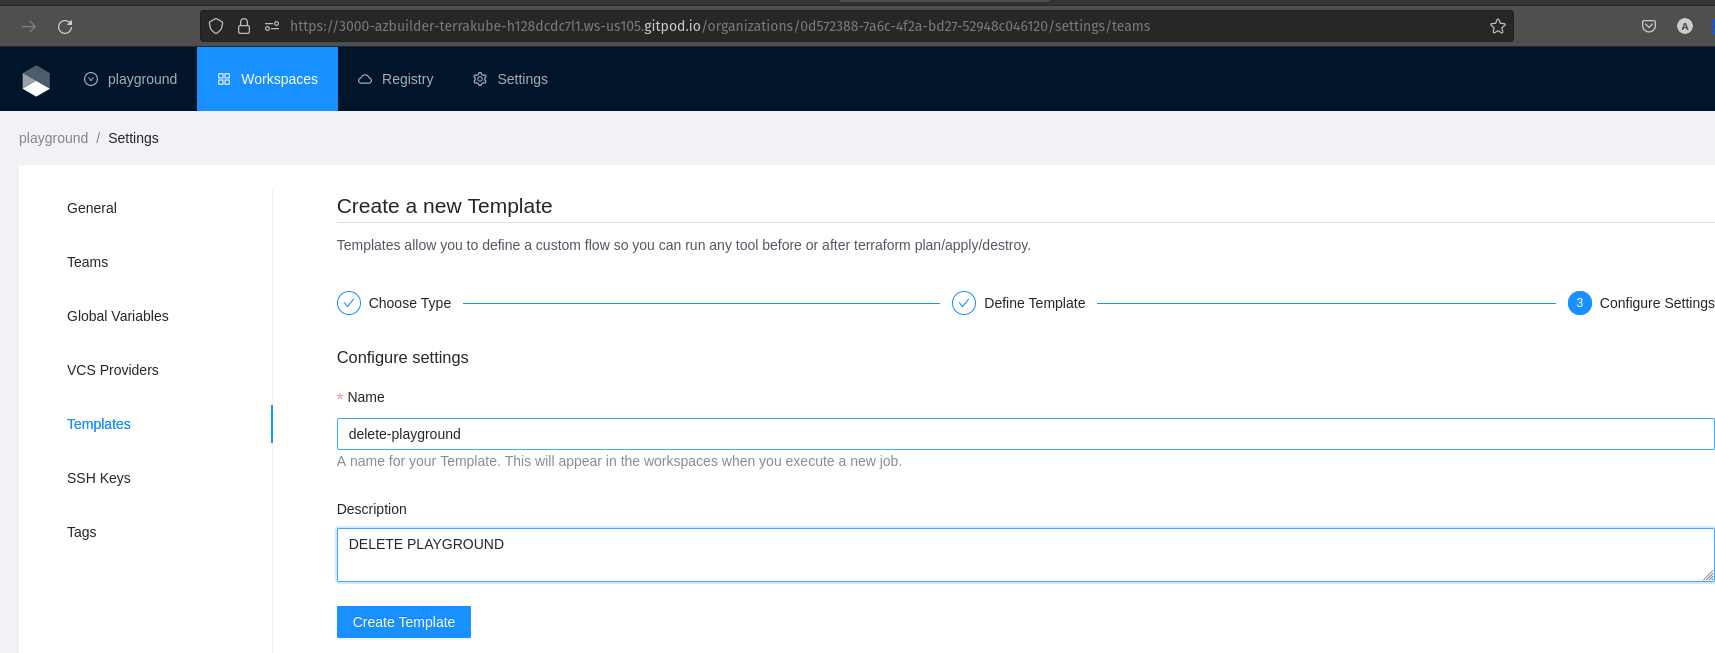
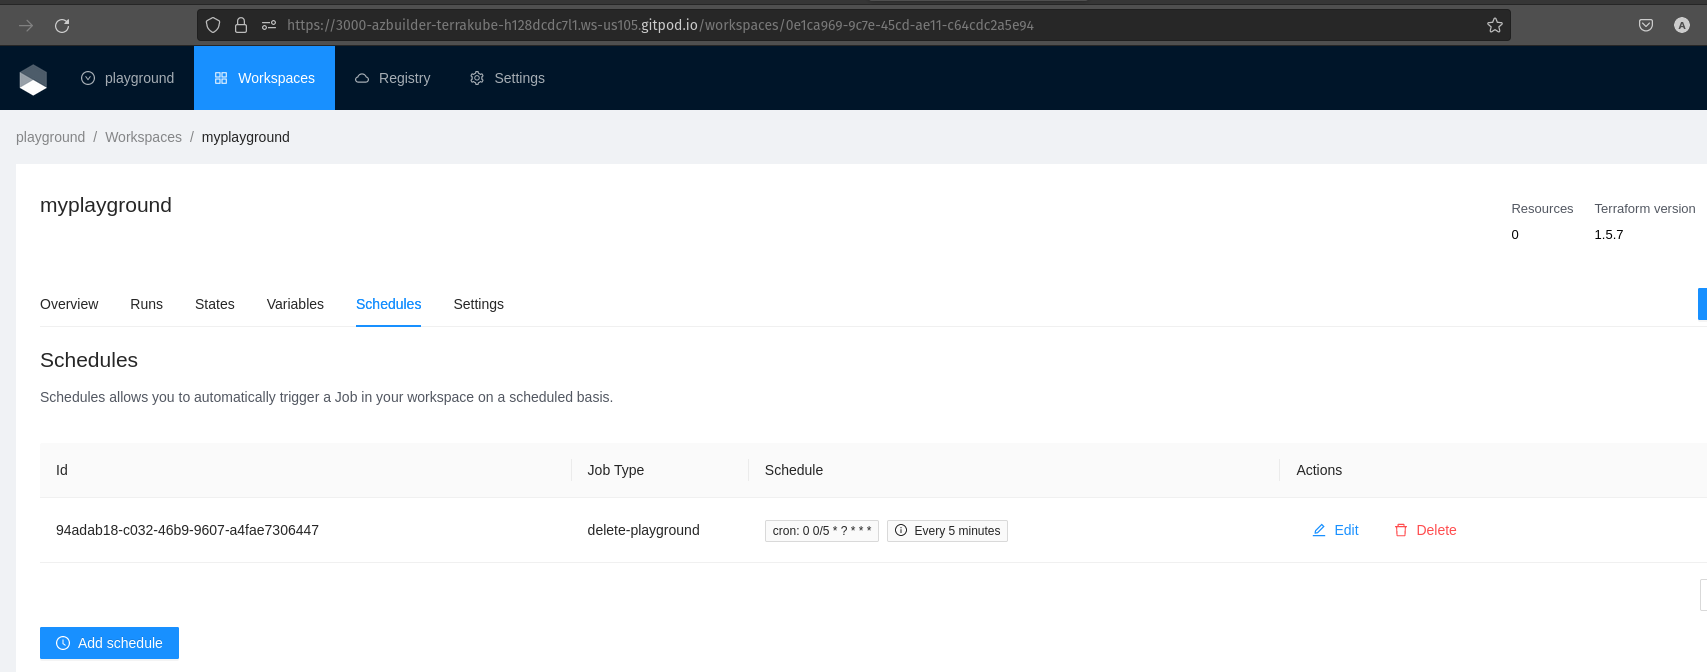
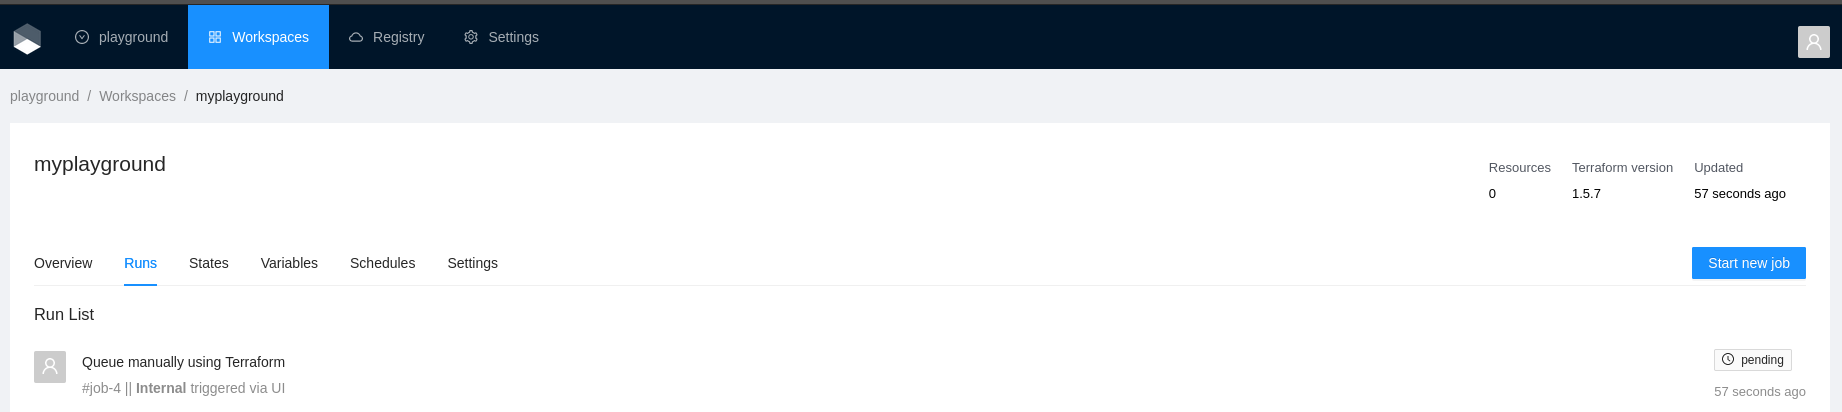

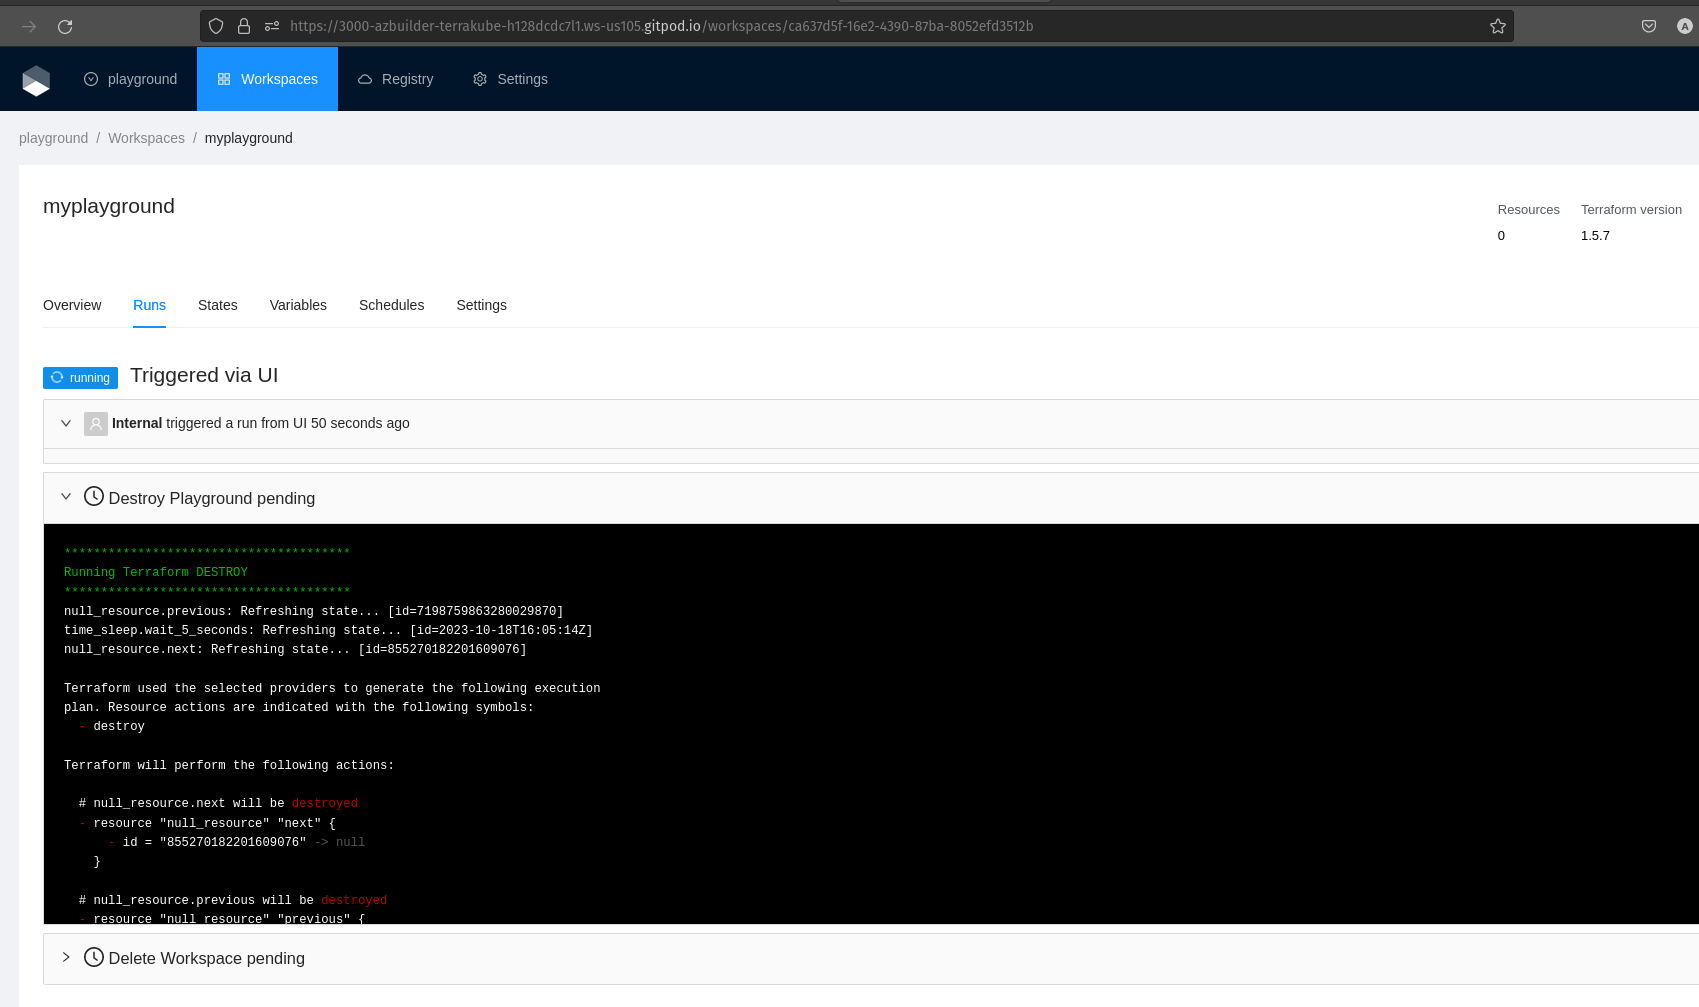
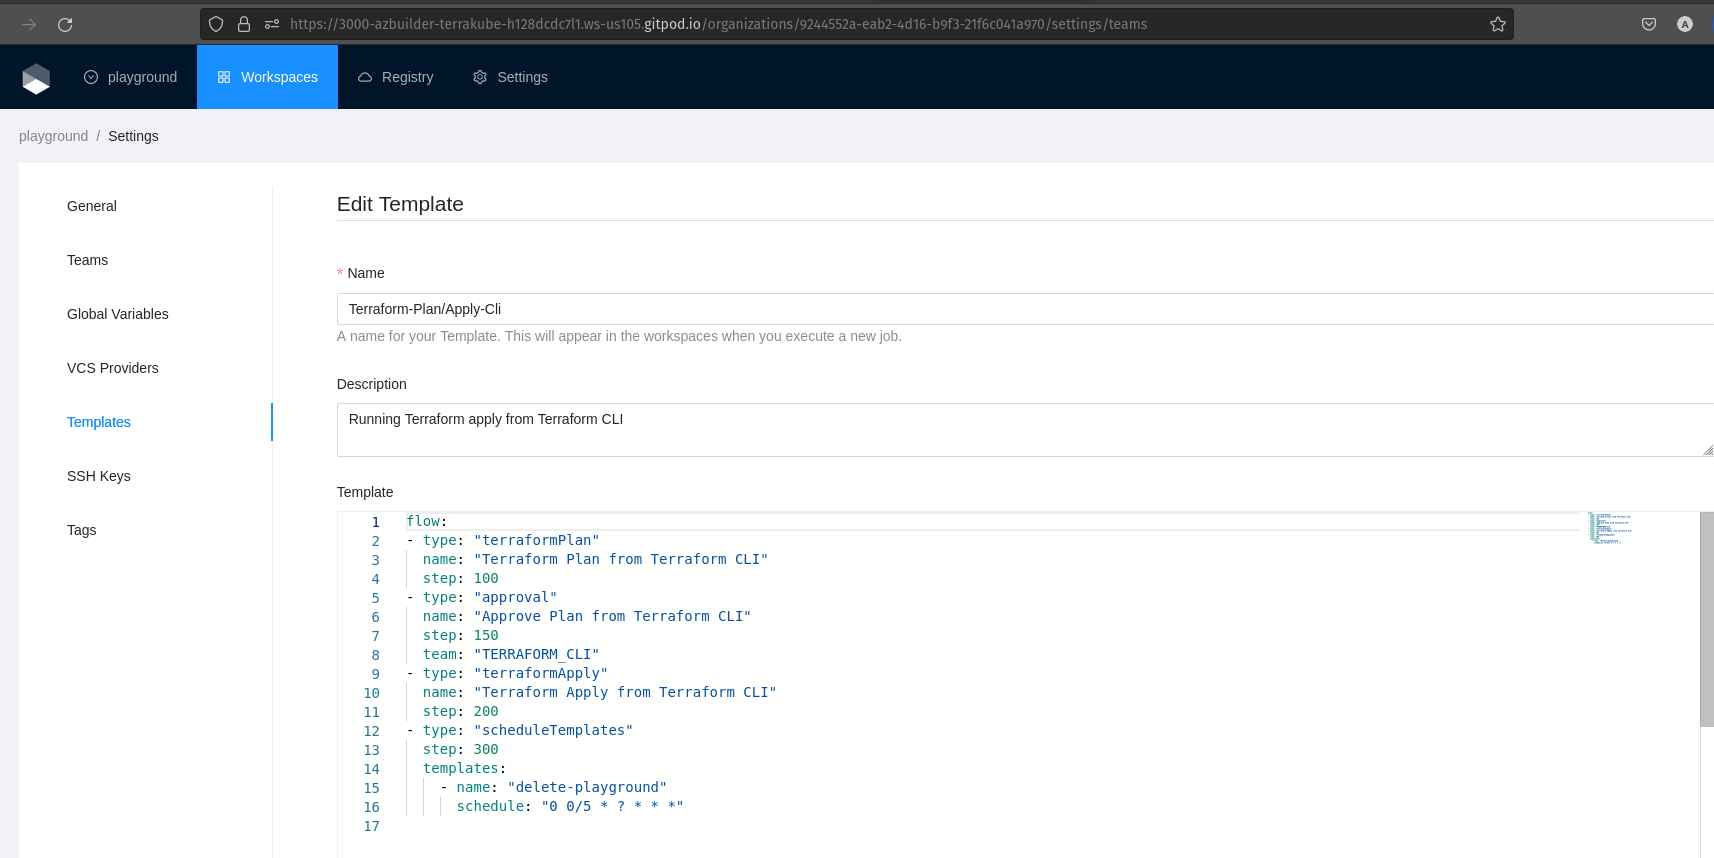
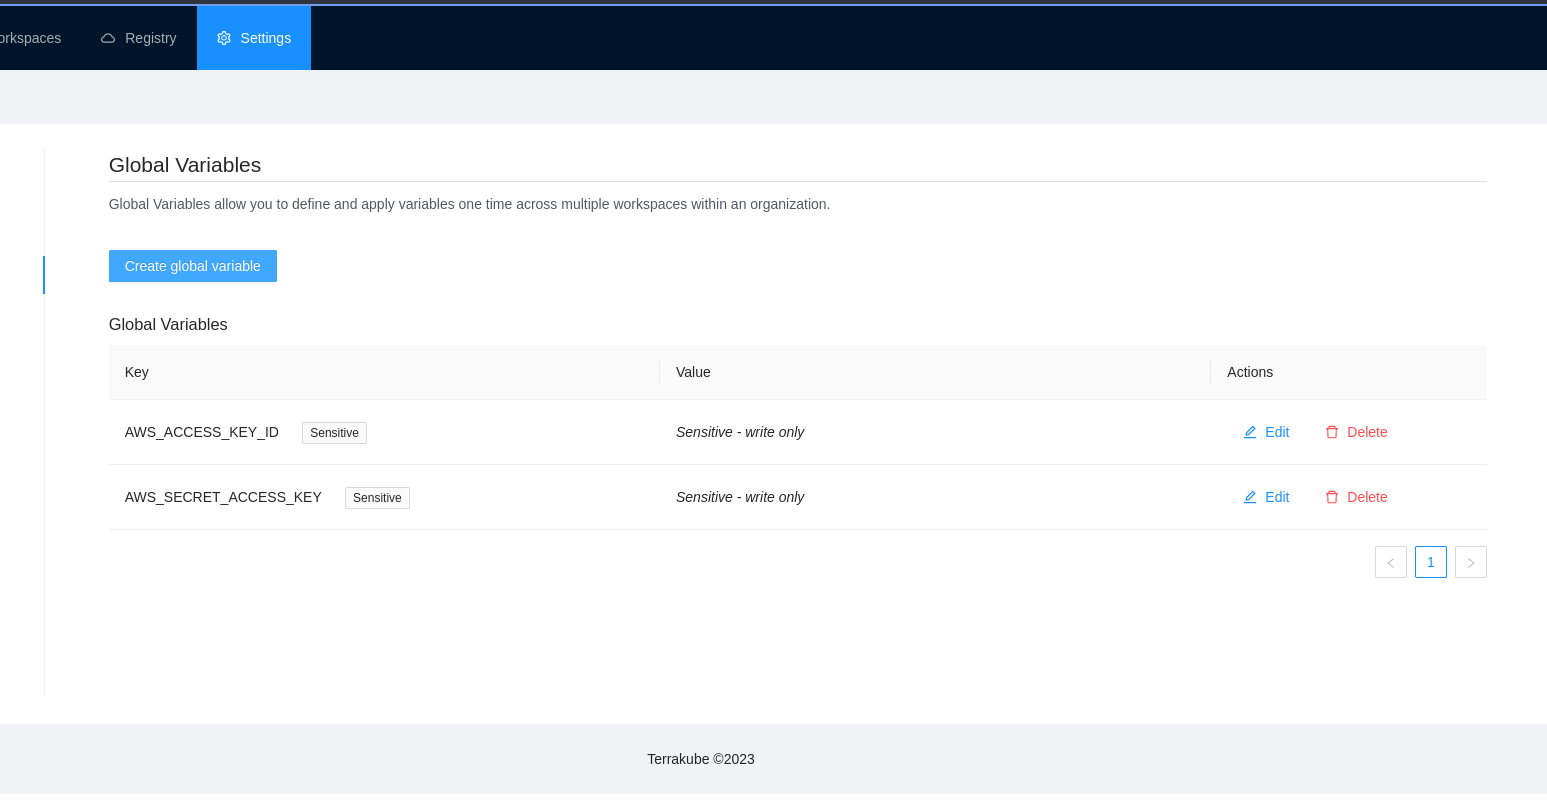
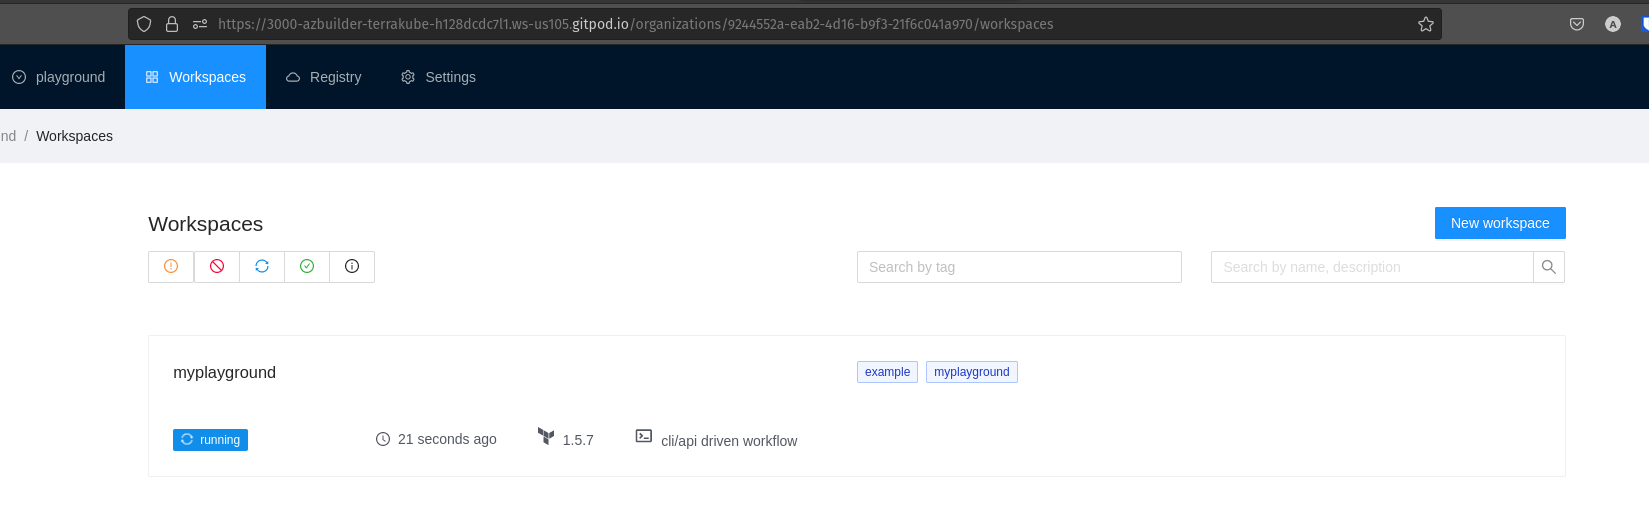
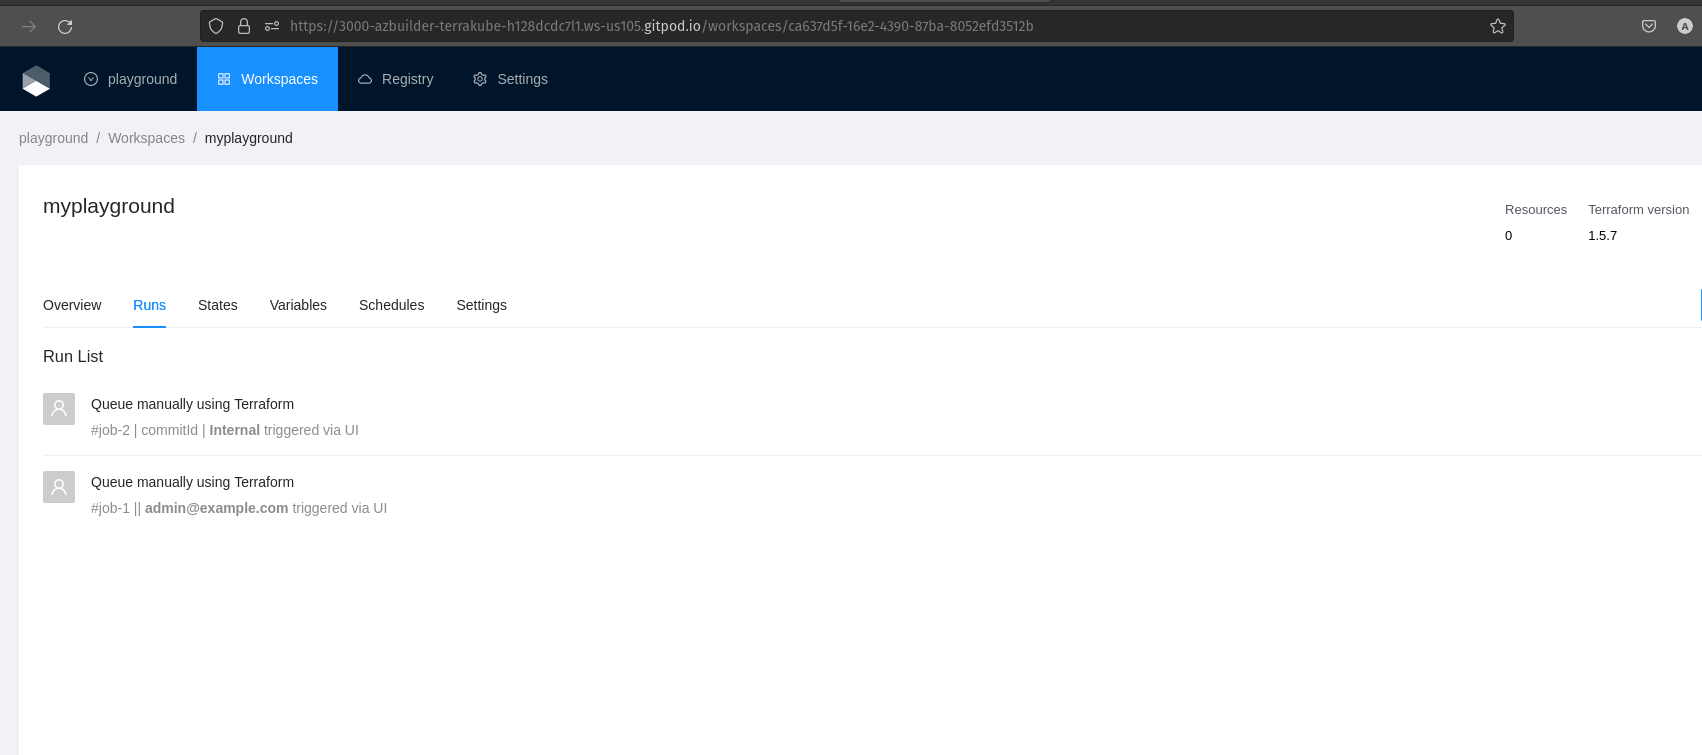
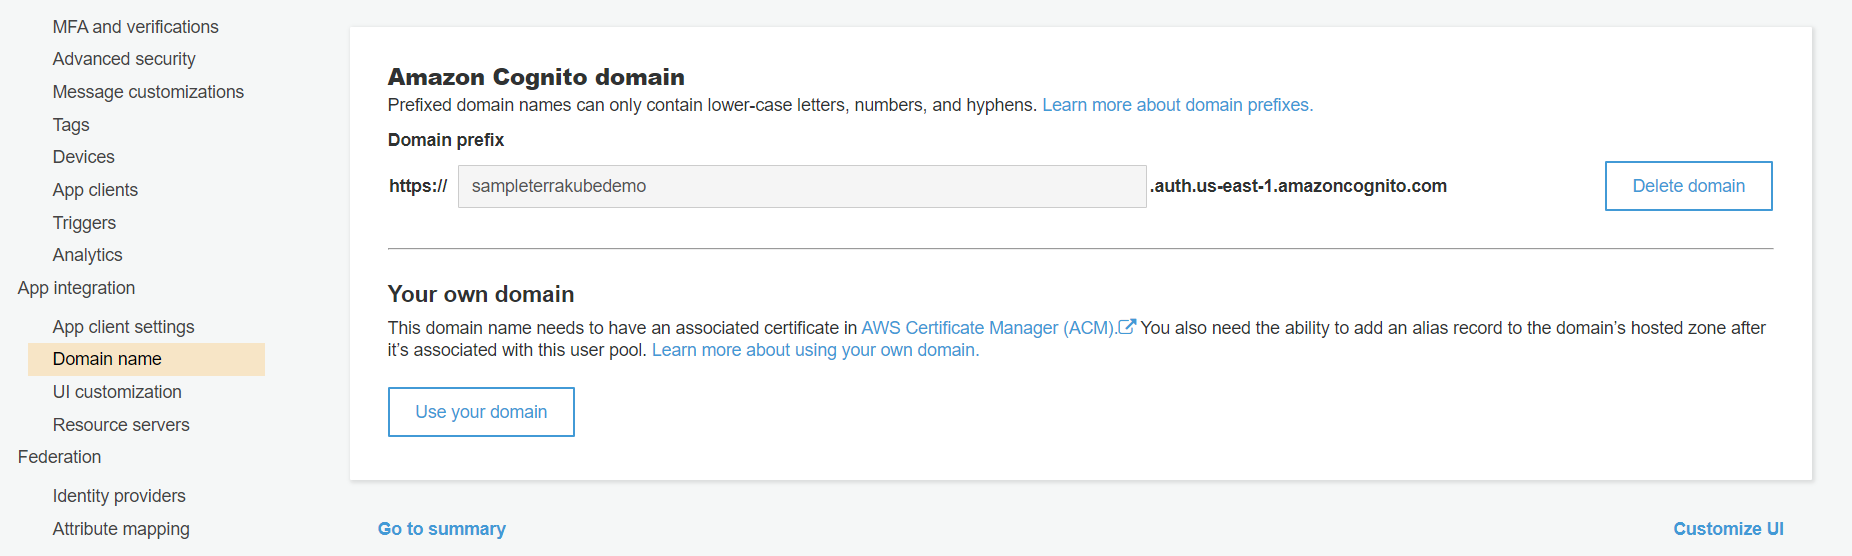
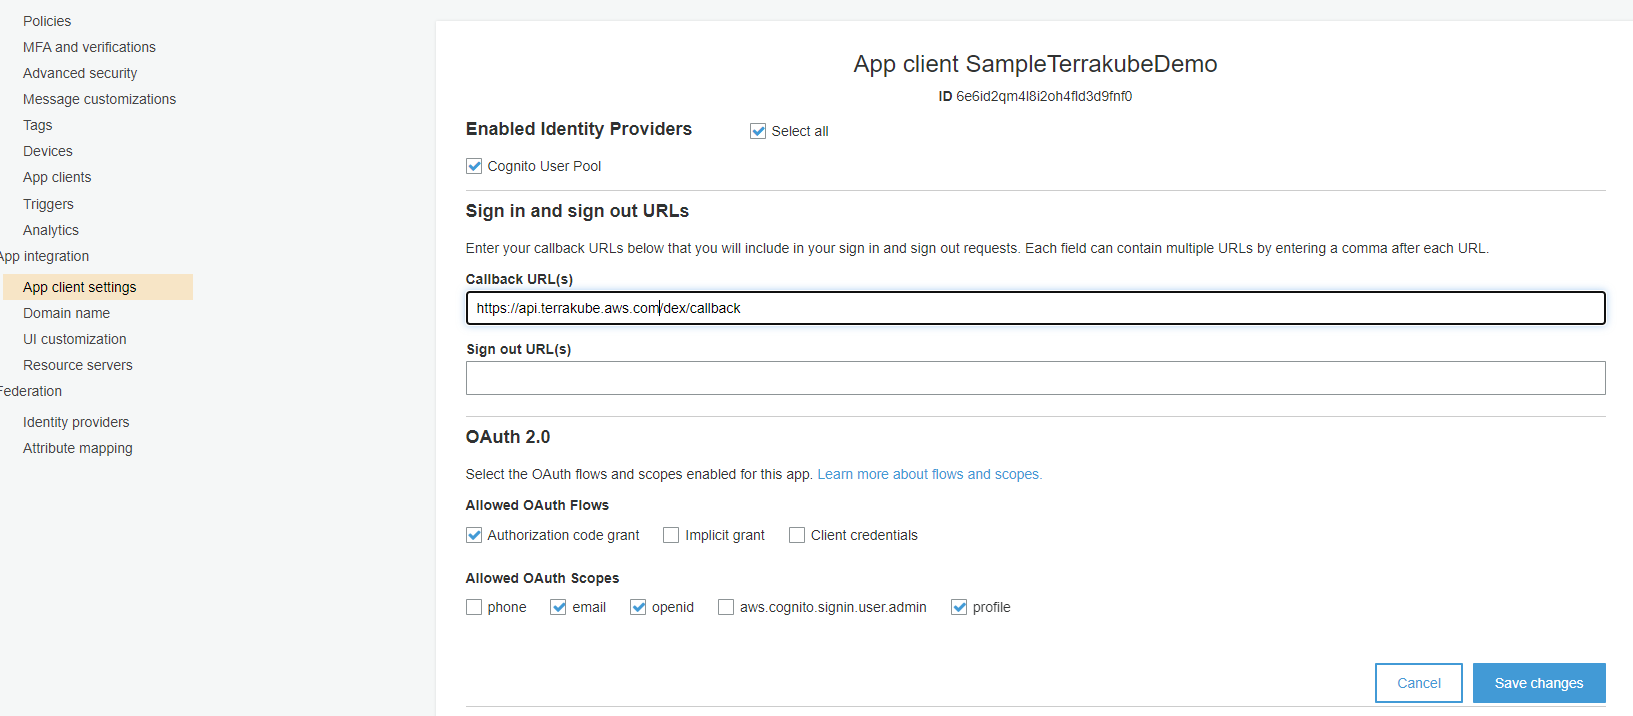
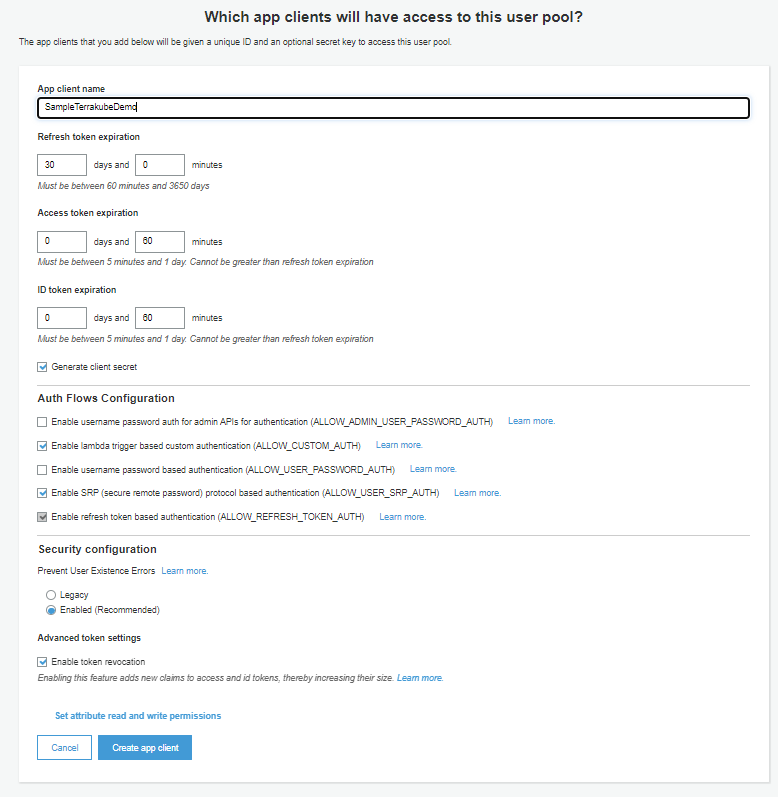
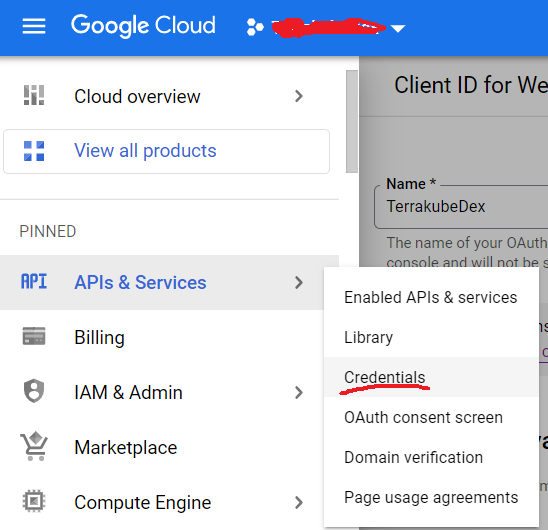

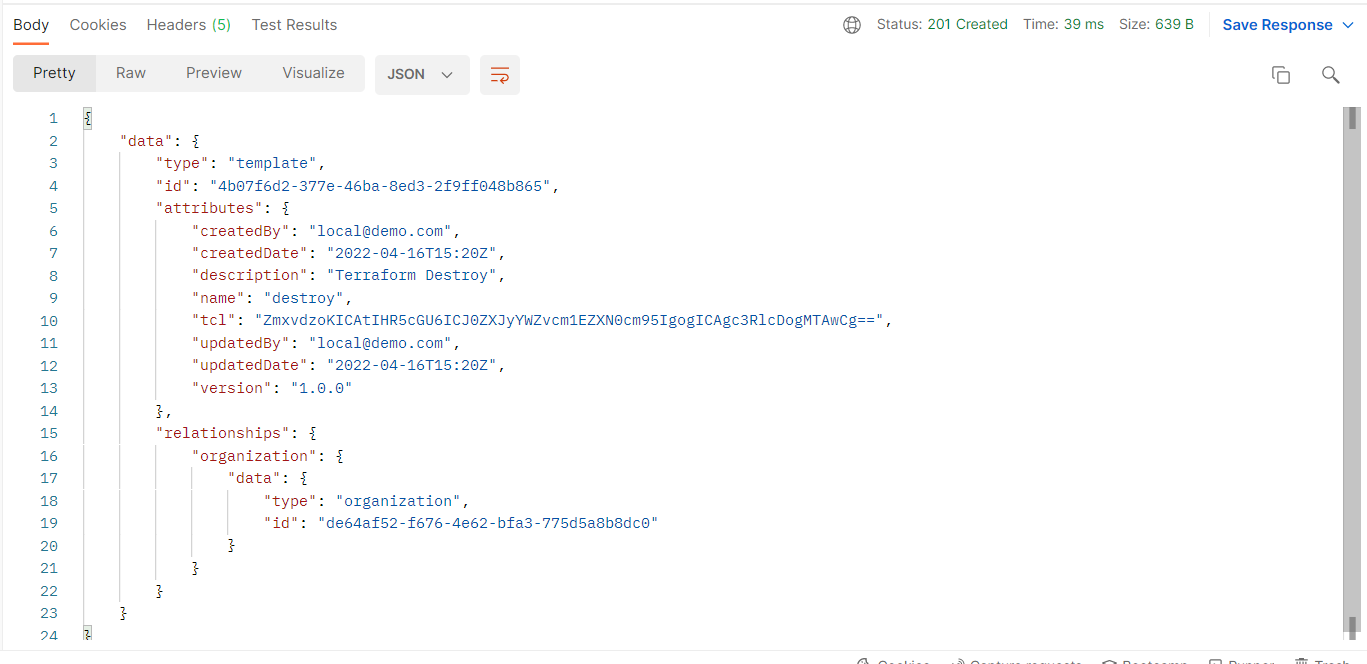
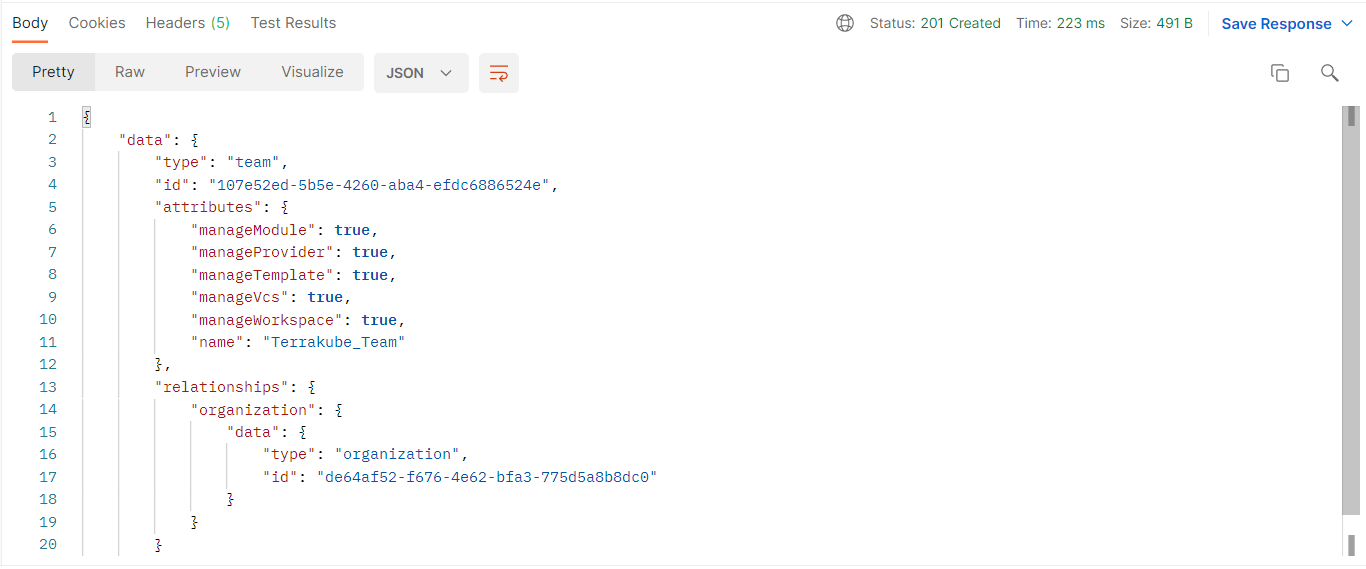
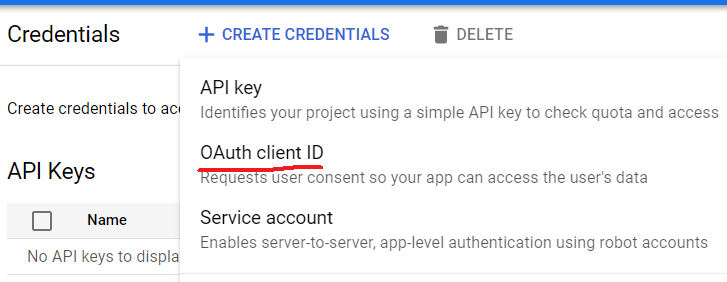
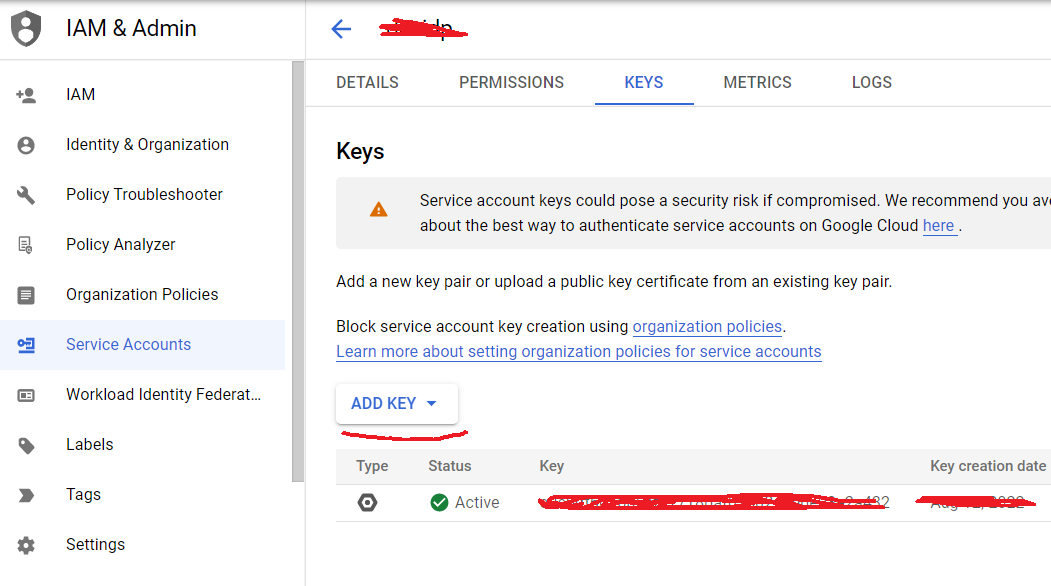
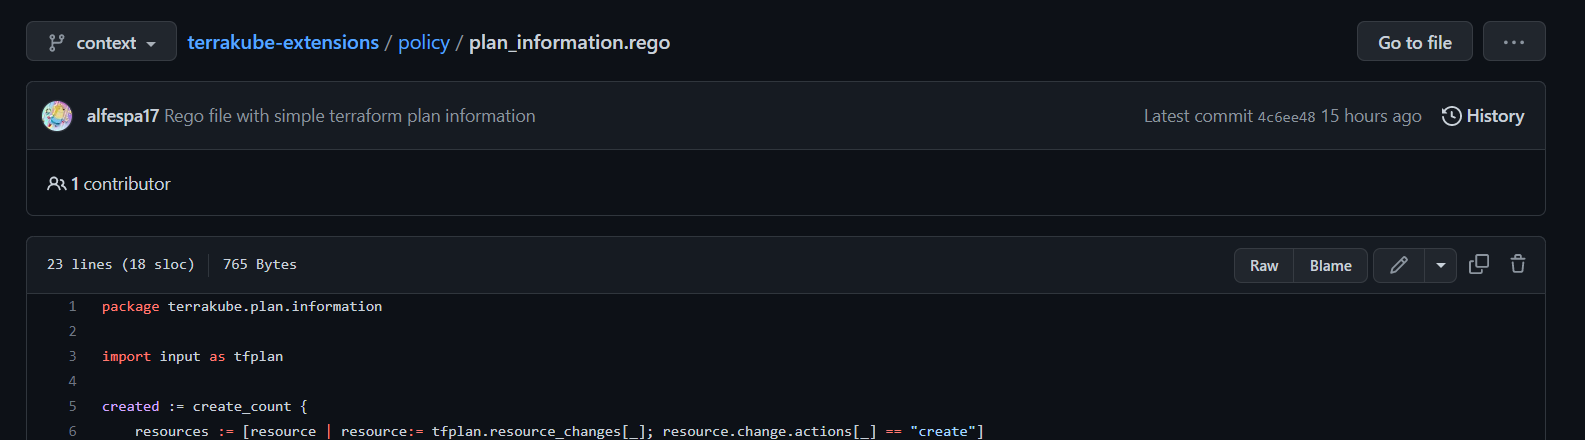
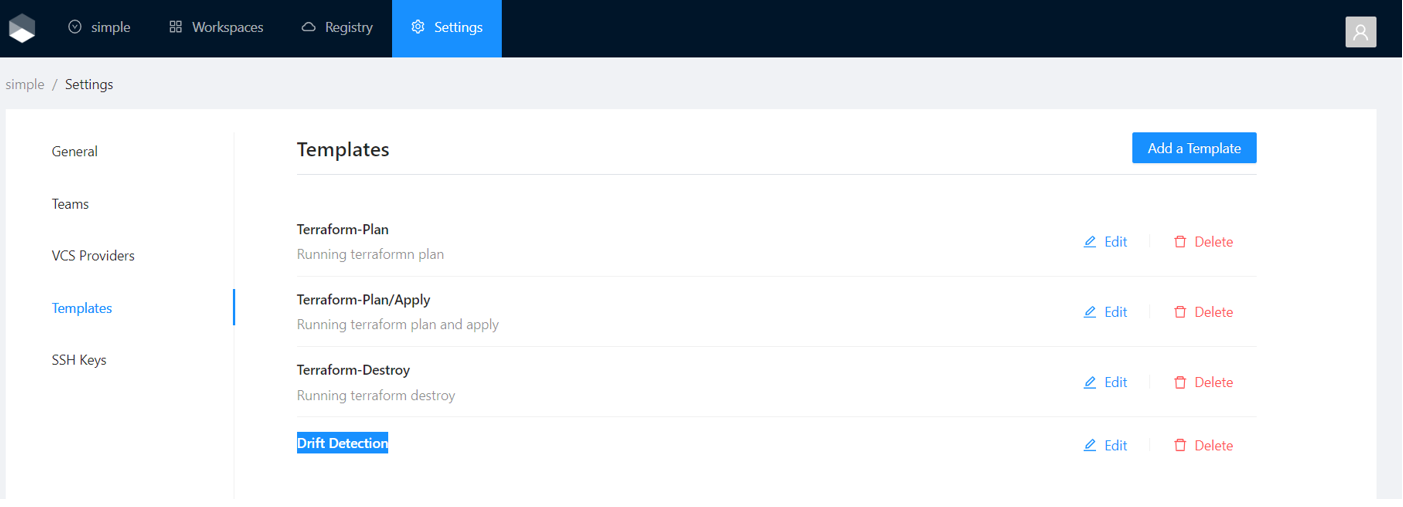

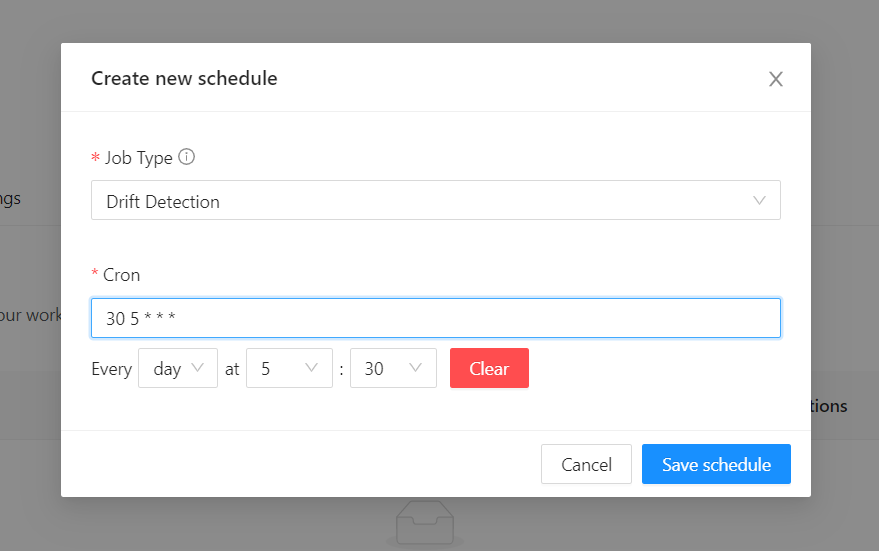
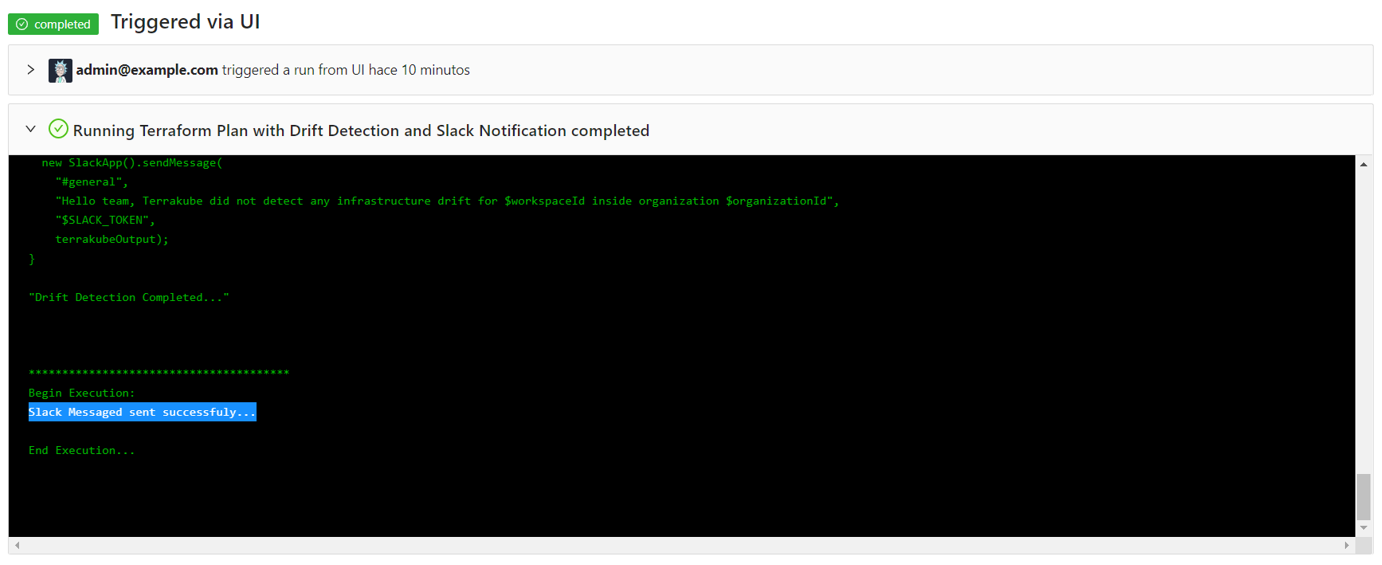

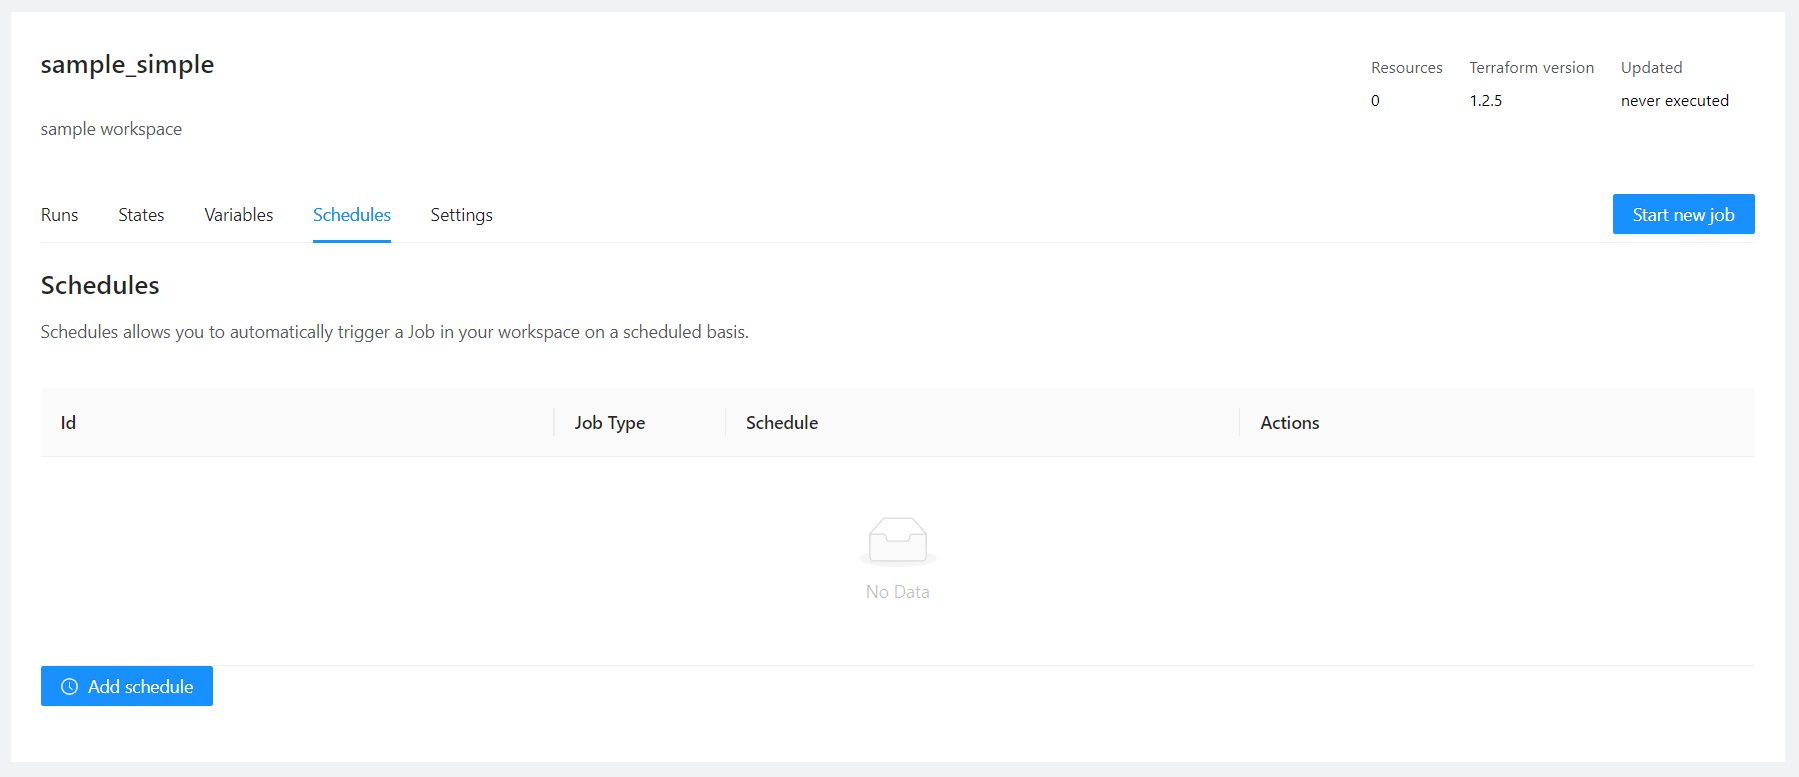
package terraform.analysis
import input as tfplan
########################
# Parameters for Policy
########################
# acceptable score for automated authorization
blast_radius := 30
# weights assigned for each operation on each resource-type
weights := {
"aws_autoscaling_group": {"delete": 100, "create": 10, "modify": 1},
"aws_instance": {"delete": 10, "create": 1, "modify": 1}
}
# Consider exactly these resource types in calculations
resource_types := {"aws_autoscaling_group", "aws_instance", "aws_iam", "aws_launch_configuration"}
#########
# Policy
#########
# Authorization holds if score for the plan is acceptable and no changes are made to IAM
default authz := false
authz {
score < blast_radius
not touches_iam
}
# Compute the score for a Terraform plan as the weighted sum of deletions, creations, modifications
score := s {
all := [ x |
some resource_type
crud := weights[resource_type];
del := crud["delete"] * num_deletes[resource_type];
new := crud["create"] * num_creates[resource_type];
mod := crud["modify"] * num_modifies[resource_type];
x := del + new + mod
]
s := sum(all)
}
# Whether there is any change to IAM
touches_iam {
all := resources["aws_iam"]
count(all) > 0
}
####################
# Terraform Library
####################
# list of all resources of a given type
resources[resource_type] := all {
some resource_type
resource_types[resource_type]
all := [name |
name:= tfplan.resource_changes[_]
name.type == resource_type
]
}
# number of creations of resources of a given type
num_creates[resource_type] := num {
some resource_type
resource_types[resource_type]
all := resources[resource_type]
creates := [res | res:= all[_]; res.change.actions[_] == "create"]
num := count(creates)
}
# number of deletions of resources of a given type
num_deletes[resource_type] := num {
some resource_type
resource_types[resource_type]
all := resources[resource_type]
deletions := [res | res:= all[_]; res.change.actions[_] == "delete"]
num := count(deletions)
}
# number of modifications to resources of a given type
num_modifies[resource_type] := num {
some resource_type
resource_types[resource_type]
all := resources[resource_type]
modifies := [res | res:= all[_]; res.change.actions[_] == "update"]
num := count(modifies)
}flow:
- type: "terraformPlan"
step: 100
name: "Terraform Plan with OPA Check"
commands:
- runtime: "GROOVY"
priority: 100
after: true
script: |
import Opa
new Opa().loadTool(
"$workingDirectory",
"$bashToolsDirectory",
"0.44.0")
"Opa Download Completed..."
- runtime: "BASH"
priority: 200
after: true
script: |
cd $workingDirectory;
terraform show -json terraformLibrary.tfPlan > tfplan.json;
echo "Checkint Open Policy Agent Policy";
opaCheck=$(opa exec --decision terraform/analysis/authz --bundle .terrakube/toolsRepository/policy/ tfplan.json | jq '.result[0].result');
if [ "$opaCheck" == "true" ]; then
echo "Policy is valid"
exit 0
else
echo "Policy is invalid"
exit 1
fi...
- type: "terraformPlan"
step: 100
name: "Terraform Plan with OPA Check"
......
commands:
- runtime: "GROOVY"
priority: 100
after: true
script: |
import Opa
new Opa().loadTool(
"$workingDirectory",
"$bashToolsDirectory",
"0.44.0")
"Opa Download Completed..."
......
- runtime: "BASH"
priority: 200
after: true
script: |
cd $workingDirectory;
terraform show -json terraformLibrary.tfPlan > tfplan.json;
echo "Checkint Open Policy Agent Policy";
opaCheck=$(opa exec --decision terraform/analysis/authz --bundle .terrakube/toolsRepository/policy/ tfplan.json | jq '.result[0].result');
if [ "$opaCheck" == "true" ]; then
echo "Policy is valid"
exit 0
else
echo "Policy is invalid"
exit 1
fi
..provider "aws" {
region = "us-west-1"
}
resource "aws_instance" "web" {
instance_type = "t2.micro"
ami = "ami-09b4b74c"
}
resource "aws_autoscaling_group" "my_asg" {
availability_zones = ["us-west-1a"]
name = "my_asg"
max_size = 5
min_size = 1
health_check_grace_period = 300
health_check_type = "ELB"
desired_capacity = 4
force_delete = true
launch_configuration = "my_web_config"
}
resource "aws_launch_configuration" "my_web_config" {
name = "my_web_config"
image_id = "ami-09b4b74c"
instance_type = "t2.micro"
}provider "aws" {
region = "us-west-1"
}
resource "aws_instance" "web" {
instance_type = "t2.micro"
ami = "ami-09b4b74c"
}
resource "aws_autoscaling_group" "my_asg" {
availability_zones = ["us-west-1a"]
name = "my_asg"
max_size = 5
min_size = 1
health_check_grace_period = 300
health_check_type = "ELB"
desired_capacity = 4
force_delete = true
launch_configuration = "my_web_config"
}
resource "aws_launch_configuration" "my_web_config" {
name = "my_web_config"
image_id = "ami-09b4b74c"
instance_type = "t2.micro"
}
resource "aws_autoscaling_group" "my_asg2" {
availability_zones = ["us-west-2a"]
name = "my_asg2"
max_size = 6
min_size = 1
health_check_grace_period = 300
health_check_type = "ELB"
desired_capacity = 4
force_delete = true
launch_configuration = "my_web_config"
}
resource "aws_autoscaling_group" "my_asg3" {
availability_zones = ["us-west-2b"]
name = "my_asg3"
max_size = 7
min_size = 1
health_check_grace_period = 300
health_check_type = "ELB"
desired_capacity = 4
force_delete = true
launch_configuration = "my_web_config"
}flow:
- type: "terraformPlan"
step: 100
name: "Terraform Plan with OPA Check"
commands:
- runtime: "GROOVY"
priority: 100
after: true
script: |
import Opa
new Opa().loadTool(
"$workingDirectory",
"$bashToolsDirectory",
"0.44.0")
"Opa Download Completed..."
- runtime: "BASH"
priority: 200
after: true
script: |
cd $workingDirectory;
terraform show -json terraformLibrary.tfPlan > tfplan.json;
echo "Checkint Open Policy Agent Policy";
opaCheck=$(opa exec --decision terraform/analysis/authz --bundle .terrakube/toolsRepository/policy/ tfplan.json | jq '.result[0].result');
if [ "$opaCheck" == "true" ]; then
echo "Policy is valid"
exit 0
else
echo "Policy is invalid"
exit 1
fi
- type: "terraformApply"
step: 300


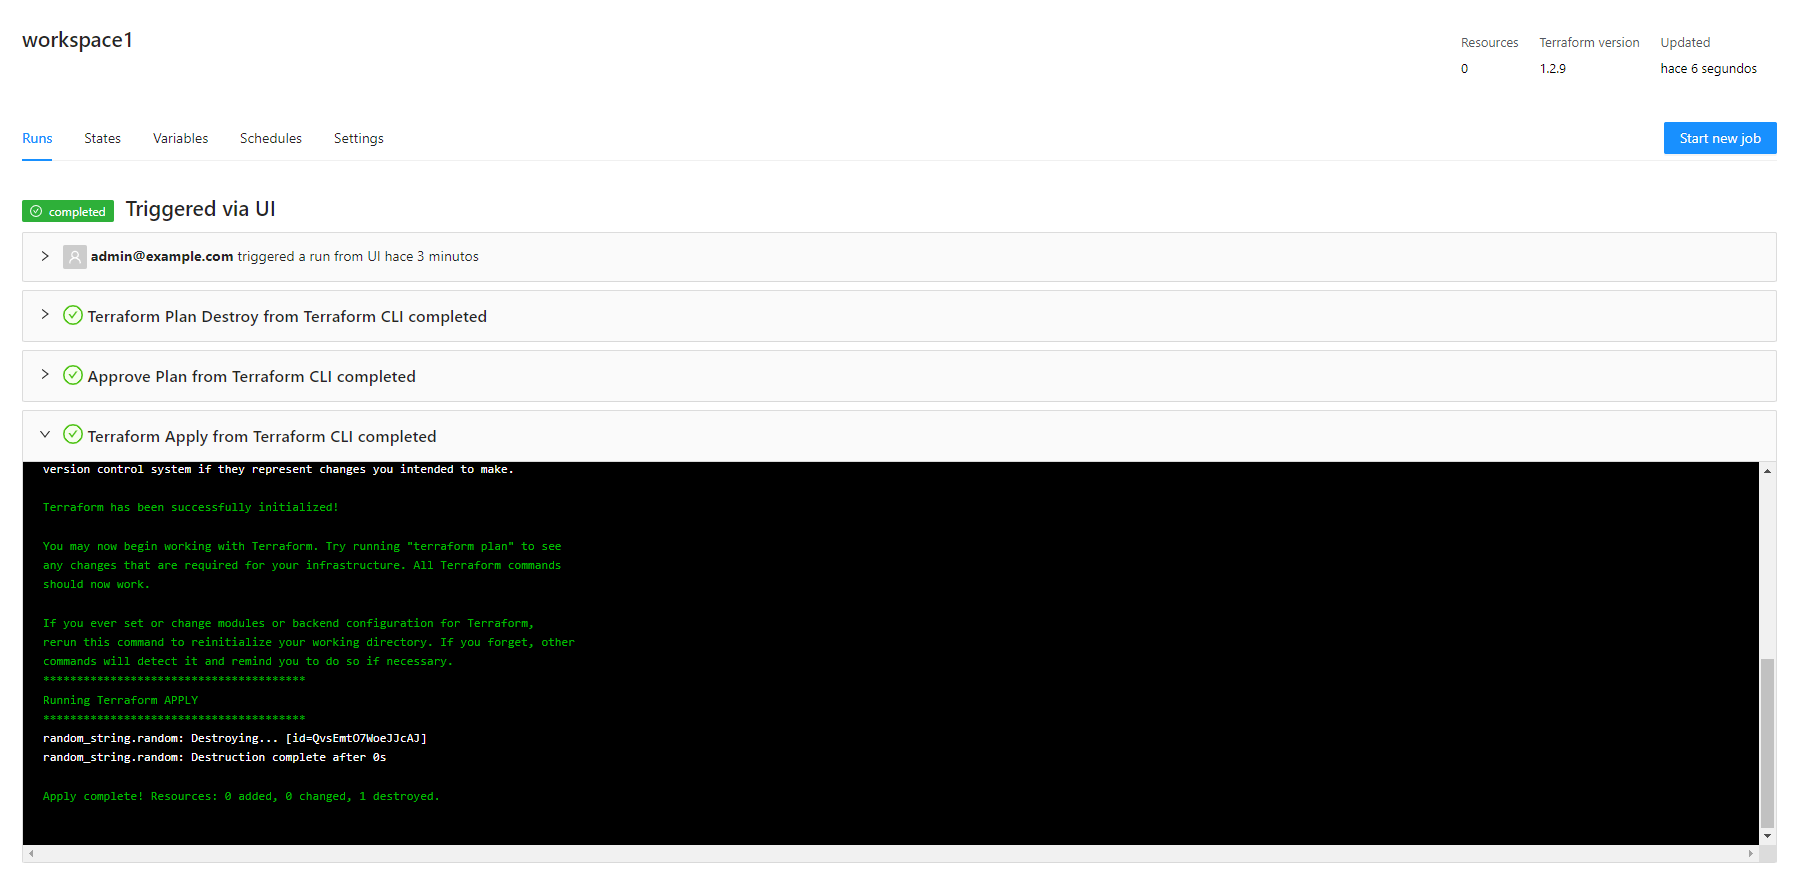
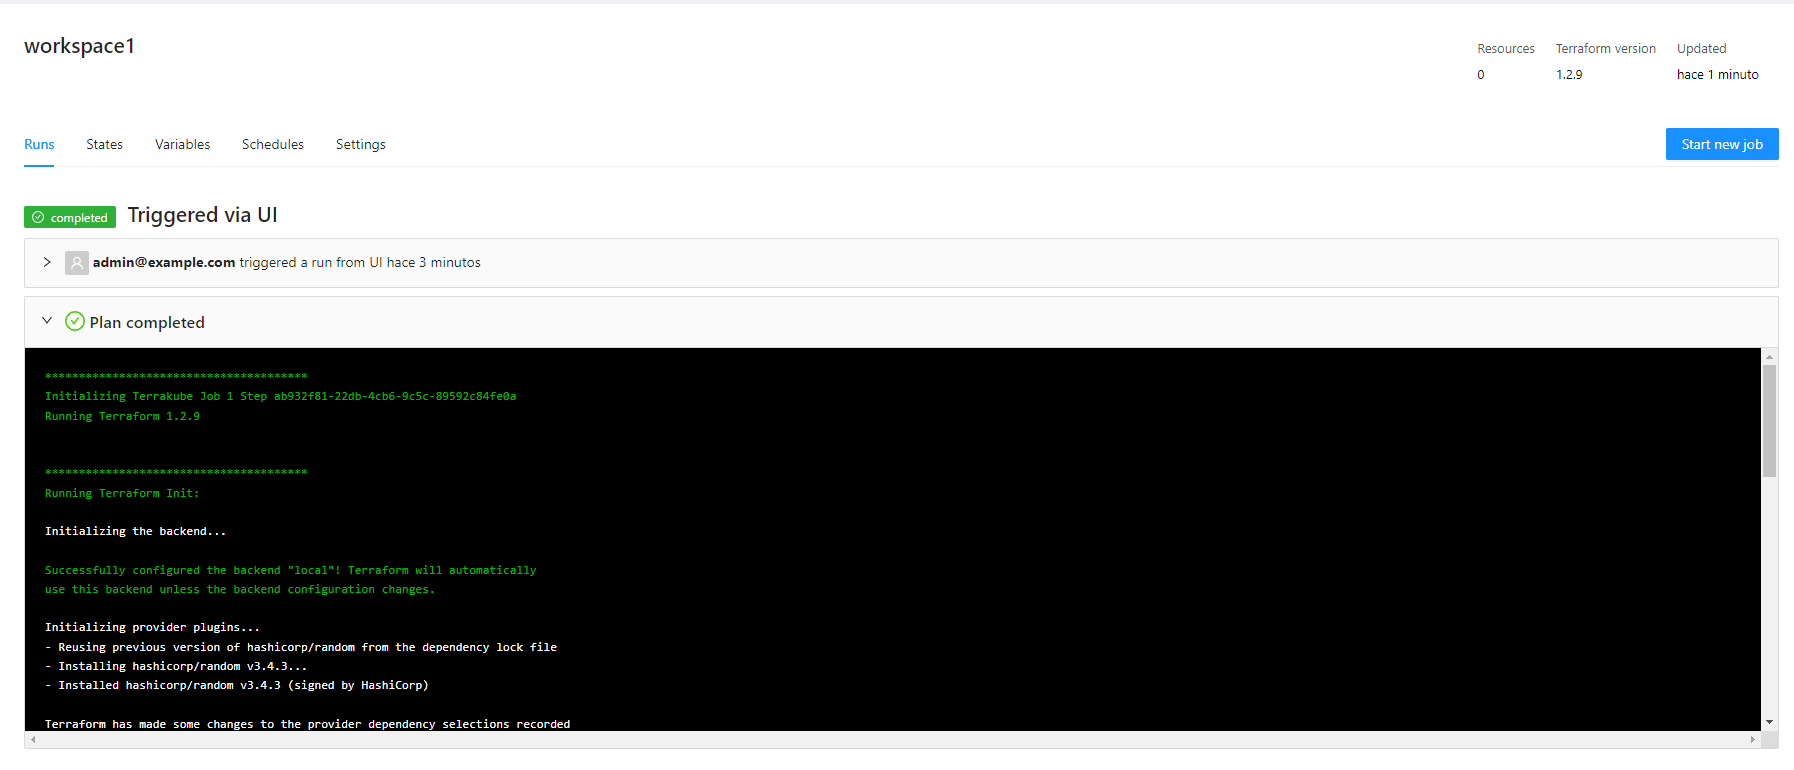
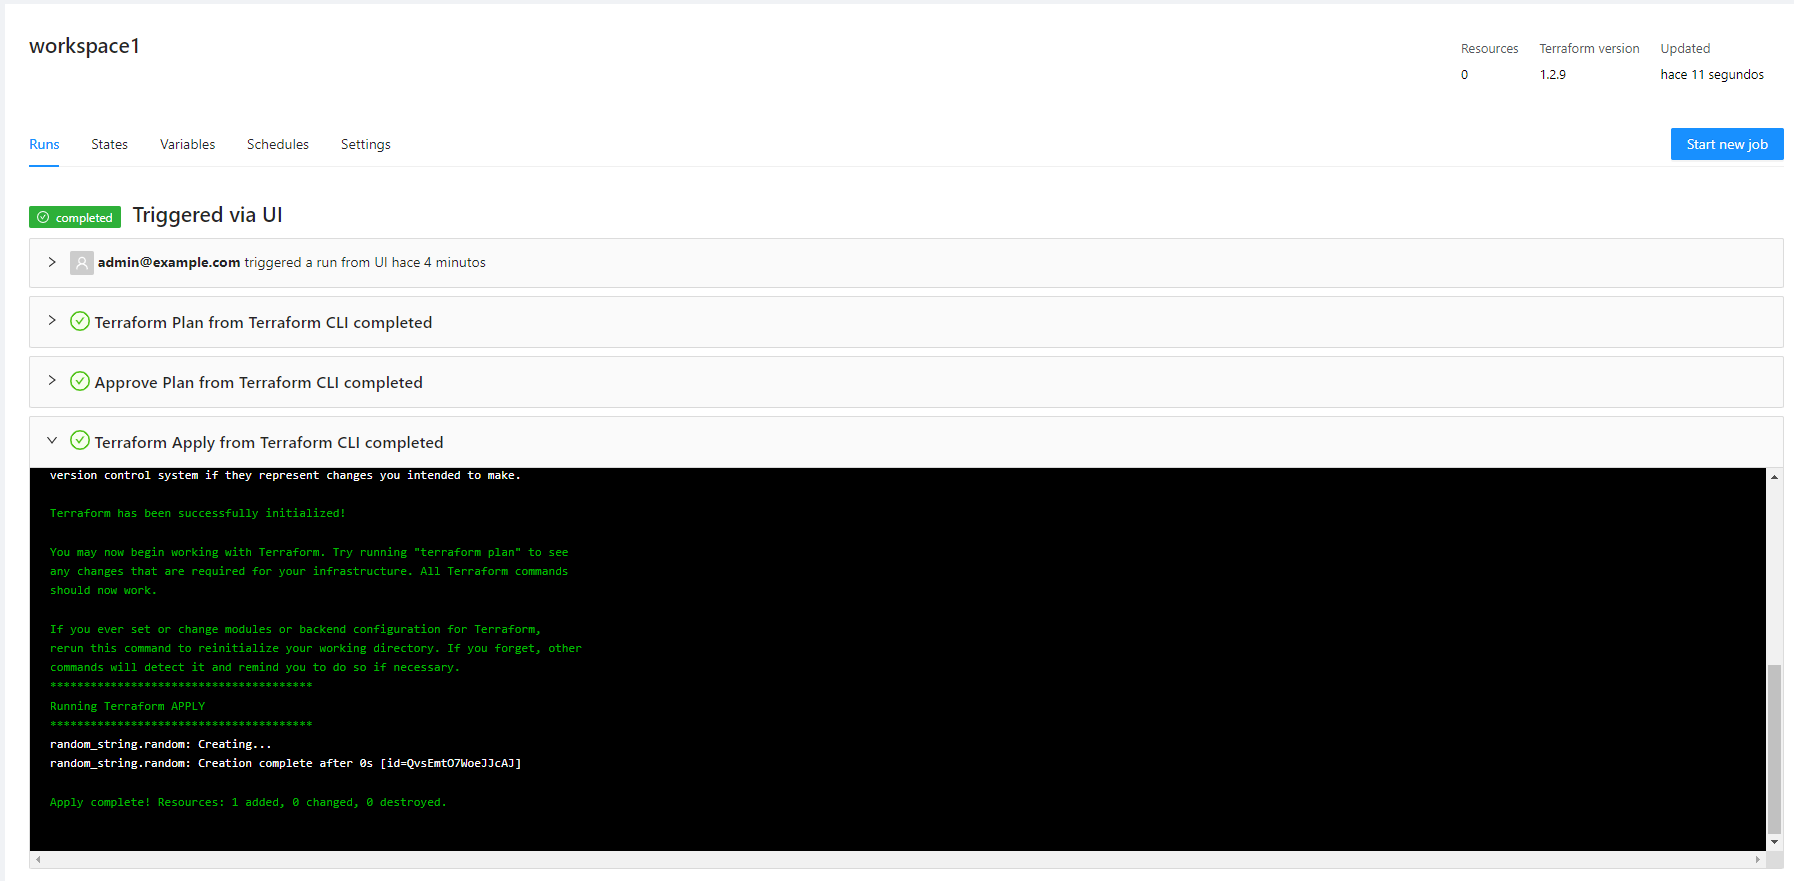
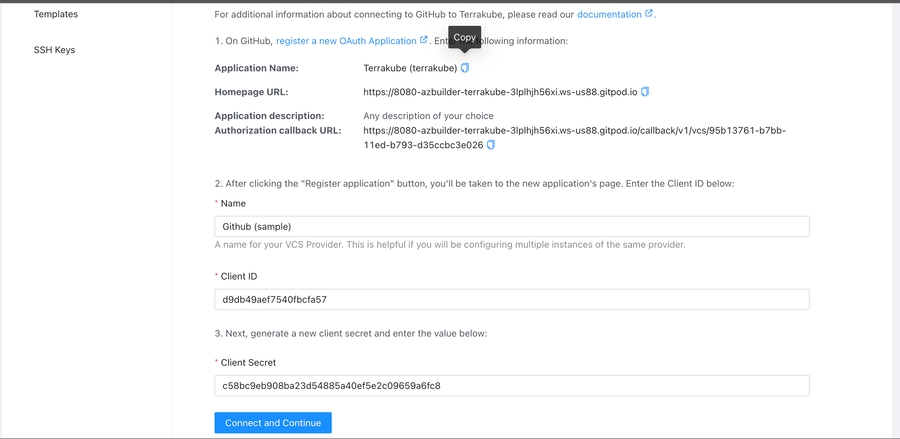
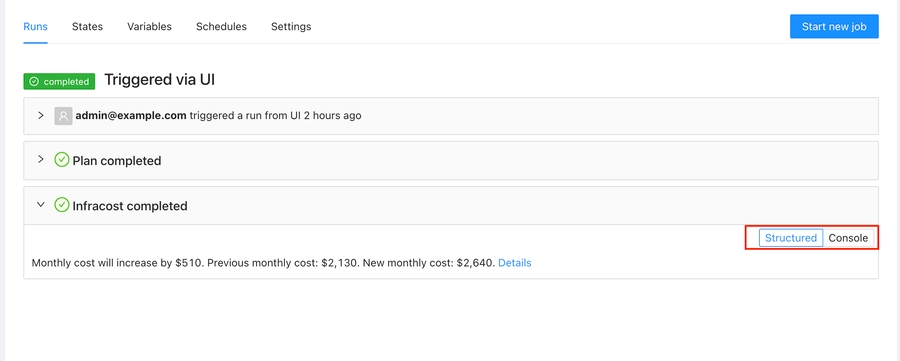


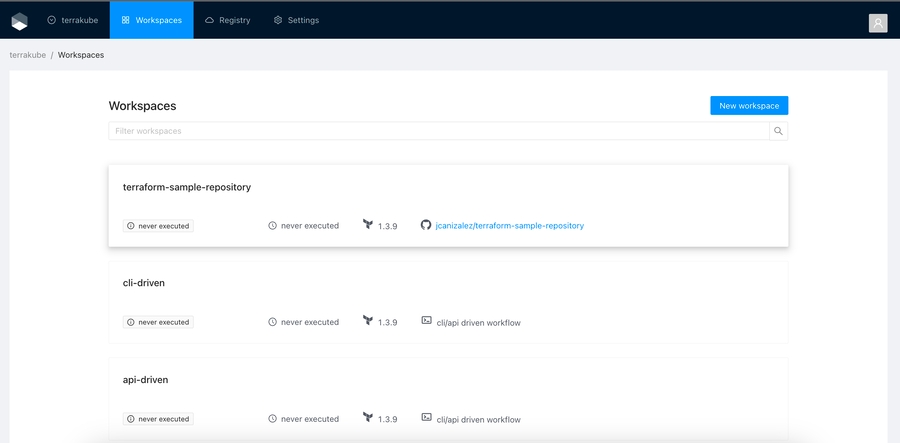
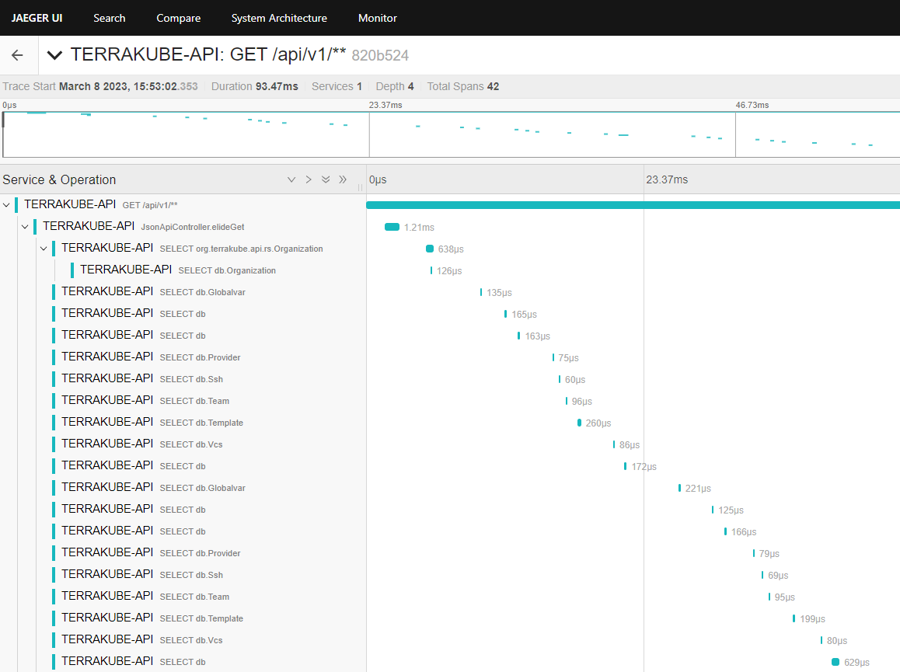
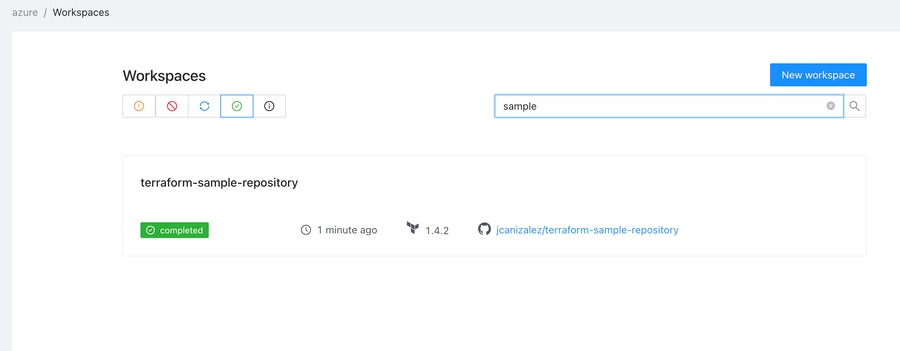
terrakube-api.minikube.net
terrakube-ui.minikube.net
terrakube-reg.minikube.netmkcert -install
Created a new local CA 💥
The local CA is now installed in the system trust store! ⚡️
The local CA is now installed in the Firefox trust store (requires browser restart)! 🦊mkcert -CAROOT
/home/myuser/.local/share/mkcertcat /home/myuser/.local/share/mkcert/rootCA.pemmkcert -key-file key.pem -cert-file cert.pem minikube.net *.minikube.net
Created a new certificate valid for the following names 📜
- "minikube.net"
- "*.minikube.net"
Reminder: X.509 wildcards only go one level deep, so this won't match a.b.minikube.net ℹ️
The certificate is at "cert.pem" and the key at "key.pem" ✅
It will expire on 19 January 2026 🗓helm repo add terrakube-repo https://AzBuilder.github.io/terrakube-helm-chart
helm repo updateminikube start
minikube addons enable ingress
minikube addons enable storage-provisioner
minikube ip kubectl -n kube-system create secret tls mkcert --key key.pem --cert cert.pemkubectl create namespace terrakubesudo nano /etc/hosts
192.168.59.100 terrakube-ui.minikube.net
192.168.59.100 terrakube-api.minikube.net
192.168.59.100 terrakube-reg.minikube.netminikube addons configure ingress
-- Enter custom cert(format is "namespace/secret"): kube-system/mkcert
✅ ingress was successfully configured
minikube addons disable ingress
🌑 "The 'ingress' addon is disabled
minikube addons enable ingress
🔎 Verifying ingress addon...
🌟 The 'ingress' addon is enabledsecurity:
caCerts:
rootCA.pem: |
-----BEGIN CERTIFICATE-----
XXXXXXXXXXXXXXXXXXXXXXXXXXXXXXXXXXXXXXXXXXXXXXXXXXXXXXXXXXXXXXXX
XXXXXXXXXXXXXXXXXXXXXXXXXXXXXXXXXXXXXXXXXXXXXXXXXXXXXXXXXXXXXXXX
XXXXXXXXXXXXXXXXXXXXXXXXXXXXXXXXXXXXXXXXXXXXXXXXXXXXXXXXXXXXXXXX
XXXXXXXXXXXXXXXXXXXXXXXXXXXXXXXXXXXXXXXXXXXXXXXXXXXXXXXXXXXXXXXX
XXXXXXXXXXXXXXXXXXXXXXXXXXXXXXXXXXXXXXXXXXXXXXXXXXXXXXXXXXXXXXXX
XXXXXXXXXXXXXXXXXXXXXXXXXXXXXXXXXXXXXXXXXXXXXXXXXXXXXXXXXXXXXXXX
XXXXXXXXXXXXXXXXXXXXXXXXXXXXXXXXXXXXXXXXXXXXXXXXXXXXXXXXXXXXXXXX
XXXXXXXXXXXXXXXXXXXXXXXXXXXXXXXXXXXXXXXXXXXXXXXXXXXXXXXXXXXXXXXX
XXXXXXXXXXXXXXXXXXXXXXXXXXXXXXXXXXXXXXXXXXXXXXXXXXXXXXXXXXXXXXXX
XXXXXXXXXXXXXXXXXXXXXXXXXXXXXXXXXXXXXXXXXXXXXXXXXXXXXXXXXXXXXXXX
XXXXXXXXXXXXXXXXXXXXXXXXXXXXXXXXXXXXXXXXXXXXXXXXXXXXXXXXXXXXXXXX
-----END CERTIFICATE-----
## API properties
api:
env:
- name: SERVICE_BINDING_ROOT
value: /mnt/platform/bindings
volumes:
- name: ca-certs
secret:
secretName: terrakube-ca-secrets
items:
- key: "rootCA.pem"
path: "rootCA.pem"
- key: "type"
path: "type"
volumeMounts:
- name: ca-certs
mountPath: /mnt/platform/bindings/ca-certificates
readOnly: true
properties:
databaseType: "H2"
executor:
env:
- name: SERVICE_BINDING_ROOT
value: /mnt/platform/bindings
volumes:
- name: ca-certs
secret:
secretName: terrakube-ca-secrets
items:
- key: "rootCA.pem"
path: "rootCA.pem"
- key: "type"
path: "type"
volumeMounts:
- name: ca-certs
mountPath: /mnt/platform/bindings/ca-certificates
readOnly: true
## Registry properties
registry:
enabled: true
replicaCount: "1"
serviceType: "ClusterIP"
env:
- name: SERVICE_BINDING_ROOT
value: /mnt/platform/bindings
volumes:
- name: ca-certs
secret:
secretName: terrakube-ca-secrets
items:
- key: "rootCA.pem"
path: "rootCA.pem"
- key: "type"
path: "type"
volumeMounts:
- name: ca-certs
mountPath: /mnt/platform/bindings/ca-certificates
readOnly: true
dex:
config:
issuer: https://terrakube-api.minikube.net/dex
storage:
type: memory
web:
http: 0.0.0.0:5556
allowedOrigins: ['*']
skipApprovalScreen: true
oauth2:
responseTypes: ["code", "token", "id_token"]
connectors:
- type: ldap
name: OpenLDAP
id: ldap
config:
# The following configurations seem to work with OpenLDAP:
#
# 1) Plain LDAP, without TLS:
host: terrakube-openldap-service:1389
insecureNoSSL: true
#
# 2) LDAPS without certificate validation:
#host: localhost:636
#insecureNoSSL: false
#insecureSkipVerify: true
#
# 3) LDAPS with certificate validation:
#host: YOUR-HOSTNAME:636
#insecureNoSSL: false
#insecureSkipVerify: false
#rootCAData: 'CERT'
# ...where CERT="$( base64 -w 0 your-cert.crt )"
# This would normally be a read-only user.
bindDN: cn=admin,dc=example,dc=org
bindPW: admin
usernamePrompt: Email Address
userSearch:
baseDN: ou=users,dc=example,dc=org
filter: "(objectClass=person)"
username: mail
# "DN" (case sensitive) is a special attribute name. It indicates that
# this value should be taken from the entity's DN not an attribute on
# the entity.
idAttr: DN
emailAttr: mail
nameAttr: cn
groupSearch:
baseDN: ou=Groups,dc=example,dc=org
filter: "(objectClass=groupOfNames)"
userMatchers:
# A user is a member of a group when their DN matches
# the value of a "member" attribute on the group entity.
- userAttr: DN
groupAttr: member
# The group name should be the "cn" value.
nameAttr: cn
staticClients:
- id: example-app
redirectURIs:
- 'https://terrakube-ui.minikube.net'
- '/device/callback'
- 'http://localhost:10000/login'
- 'http://localhost:10001/login'
name: 'example-app'
public: true
## Ingress properties
ingress:
useTls: true
includeTlsHosts: true
ui:
enabled: true
domain: "terrakube-ui.minikube.net"
path: "/"
pathType: "Prefix"
tlsSecretName: tls-secret-ui-terrakube
annotations:
nginx.ingress.kubernetes.io/use-regex: "true"
api:
enabled: true
domain: "terrakube-api.minikube.net"
path: "/"
pathType: "Prefix"
tlsSecretName: tls-secret-api-terrakube
annotations:
nginx.ingress.kubernetes.io/use-regex: "true"
nginx.ingress.kubernetes.io/configuration-snippet: "proxy_set_header Authorization $http_authorization;"
registry:
enabled: true
domain: "terrakube-reg.minikube.net"
path: "/"
pathType: "Prefix"
tlsSecretName: tls-secret-reg-terrakube
annotations:
nginx.ingress.kubernetes.io/use-regex: "true"
nginx.ingress.kubernetes.io/configuration-snippet: "proxy_set_header Authorization $http_authorization;"
dex:
enabled: true
path: "/dex/"
pathType: "Prefix"
annotations:
nginx.ingress.kubernetes.io/use-regex: "true"
nginx.ingress.kubernetes.io/configuration-snippet: "proxy_set_header Authorization $http_authorization;"
helm install terrakube terrakube-repo/terrakube -n terrakube --values values.yaml terraform login terrakube-api.minikube.net
terraform login terrakube-reg.minikube.netterraform {
cloud {
organization = "simple"
hostname = "terrakube-api.minikube.net"
workspaces {
tags = ["myplayground", "example"]
}
}
}
# This resource will destroy (potentially immediately) after null_resource.next
resource "null_resource" "previous" {}
resource "time_sleep" "wait_5_seconds" {
depends_on = [null_resource.previous]
create_duration = "5s"
}
# This resource will create (at least) 30 seconds after null_resource.previous
resource "null_resource" "next" {
depends_on = [time_sleep.wait_5_seconds]
}$ terraform init
Initializing Terraform Cloud...
No workspaces found.
There are no workspaces with the configured tags (example, myplayground)
in your Terraform Cloud organization. To finish initializing, Terraform needs at
least one workspace available.
Terraform can create a properly tagged workspace for you now. Please enter a
name to create a new Terraform Cloud workspace.
Enter a value: simple
Initializing provider plugins...
- Finding latest version of hashicorp/null...
- Finding latest version of hashicorp/time...
- Installing hashicorp/null v3.2.1...
- Installed hashicorp/null v3.2.1 (signed by HashiCorp)
- Installing hashicorp/time v0.9.1...
- Installed hashicorp/time v0.9.1 (signed by HashiCorp)
Terraform has created a lock file .terraform.lock.hcl to record the provider
selections it made above. Include this file in your version control repository
so that Terraform can guarantee to make the same selections by default when
you run "terraform init" in the future.$ terraform apply
Running apply in Terraform Cloud. Output will stream here. Pressing Ctrl-C
will cancel the remote apply if it's still pending. If the apply started it
will stop streaming the logs, but will not stop the apply running remotely.
Preparing the remote apply...
To view this run in a browser, visit:
https://terrakube-api.minikube.net/app/simple/simple/runs/40
Waiting for the plan to start...
***************************************
Running Terraform PLAN
***************************************
Terraform used the selected providers to generate the following execution
plan. Resource actions are indicated with the following symbols:
+ create
Terraform will perform the following actions:
# null_resource.next will be created
+ resource "null_resource" "next" {
+ id = (known after apply)
}
# null_resource.previous will be created
+ resource "null_resource" "previous" {
+ id = (known after apply)
}
# time_sleep.wait_5_seconds will be created
+ resource "time_sleep" "wait_5_seconds" {
+ create_duration = "5s"
+ id = (known after apply)
}
Plan: 3 to add, 0 to change, 0 to destroy.
Changes to Outputs:
+ creation_time = "5s"
Do you want to perform these actions in workspace "simple"?
Terraform will perform the actions described above.
Only 'yes' will be accepted to approve.
Enter a value: yes
null_resource.previous: Creating...
null_resource.previous: Creation complete after 0s [id=6182221597368620892]
time_sleep.wait_5_seconds: Creating...
time_sleep.wait_5_seconds: Creation complete after 5s [id=2023-10-19T20:25:22Z]
null_resource.next: Creating...
null_resource.next: Creation complete after 0s [id=9093191930998774410]
Apply complete! Resources: 3 added, 0 changed, 0 destroyed.allow-snippet-annotations: "true"
Reference: https://github.com/AzBuilder/terrakube/issues/618#issuecomment-1838980